Hi,
Replacing a power brake booster takes a little time, but really isn't too hard to do. I recommend getting a lifetime replacement part so you never have to pay for a new one in the future.
Here are the directions specific to your vehicle. The pics attached below correlate with the directions.
____________________________
2005 Dodge Neon L4-2.0L VIN C
Removal and Installation (Left Hand Drive)
Vehicle Brakes and Traction Control Power Brake Assist Vacuum Brake Booster Service and Repair Procedures Removal and Installation (Left Hand Drive)
REMOVAL AND INSTALLATION (LEFT HAND DRIVE)
REMOVAL - LHD
NOTE: Before proceeding, Refer to WARNING.
1. Disconnect negative (ground) cable from the battery and isolate the cable.
2. Disconnect the positive cable from the battery, then remove the battery from the battery tray. There is one nut securing the clamp on the backside of the battery holding it in place.
3. Remove the one nut and one bolt securing the air cleaner box in place, then disconnect the wiring harness connector at the air inlet sensor.
pic 1
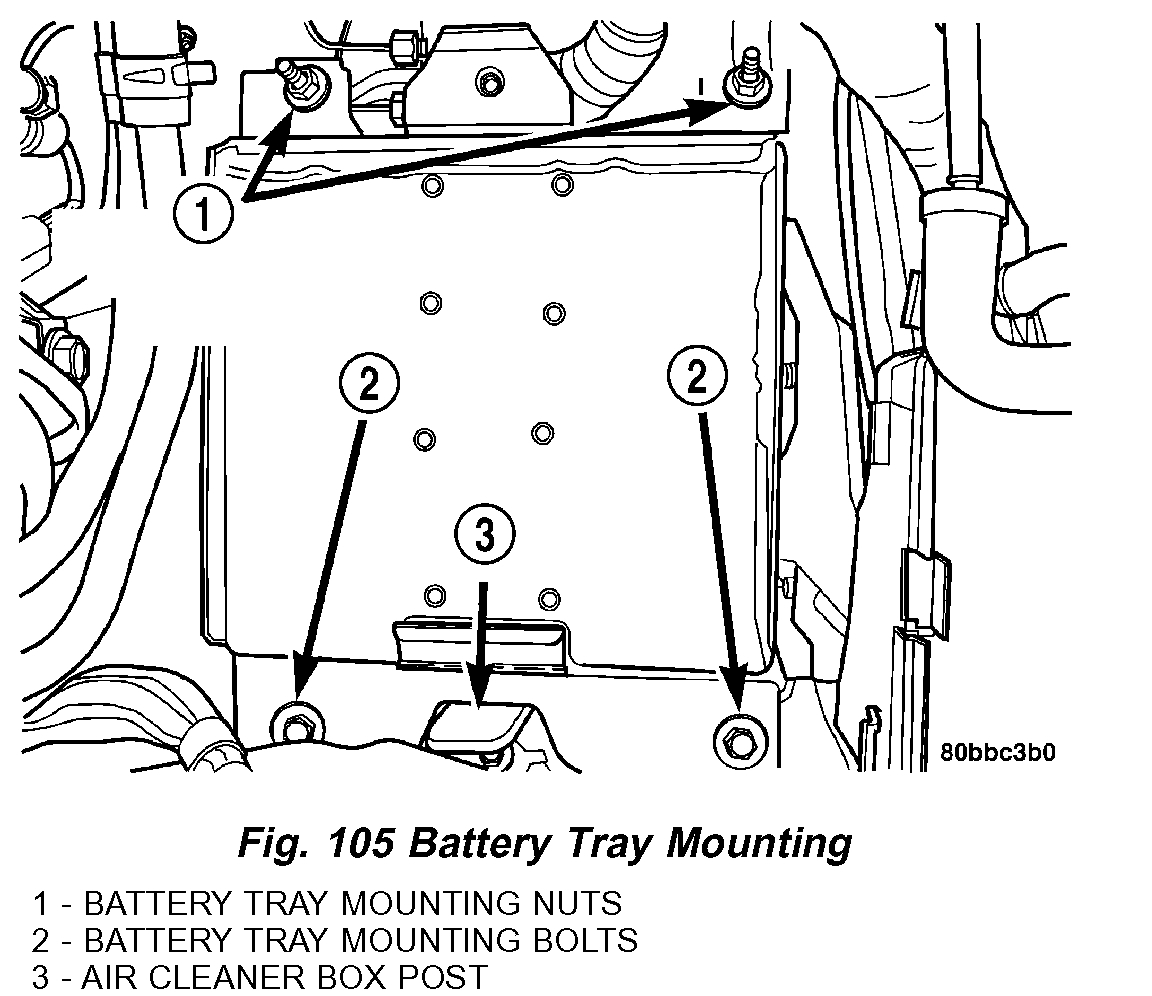
4. Lift the air cleaner box upward enough to clear its grommeted alignment post (Fig. 105), then move the air cleaner box forward just enough to access the battery tray mounting bolts.
5. Remove the 2 bolts, then the 2 nuts mounting the battery tray to its bracket (Fig. 105). Remove the battery tray.
CAUTION: The vacuum in the power brake booster must be pumped down before removing the master cylinder to prevent the booster from sucking in any contamination. This can be done by pumping the brake pedal 4 - 5 times while the engine is not running until a firm brake pedal is achieved.
6. Remove the master cylinder.
7. If the vehicle is equipped with ABS, remove the Integrated Control Unit (ICU).
8. If the vehicle is equipped with ABS, remove the three bolts securing the ICU mounting bracket to the frame rail.
pic 2
9. Disconnect the vacuum hoses from the check valve on the power brake booster (Fig. 106), but do not remove the check valve from power brake booster.
pic 3
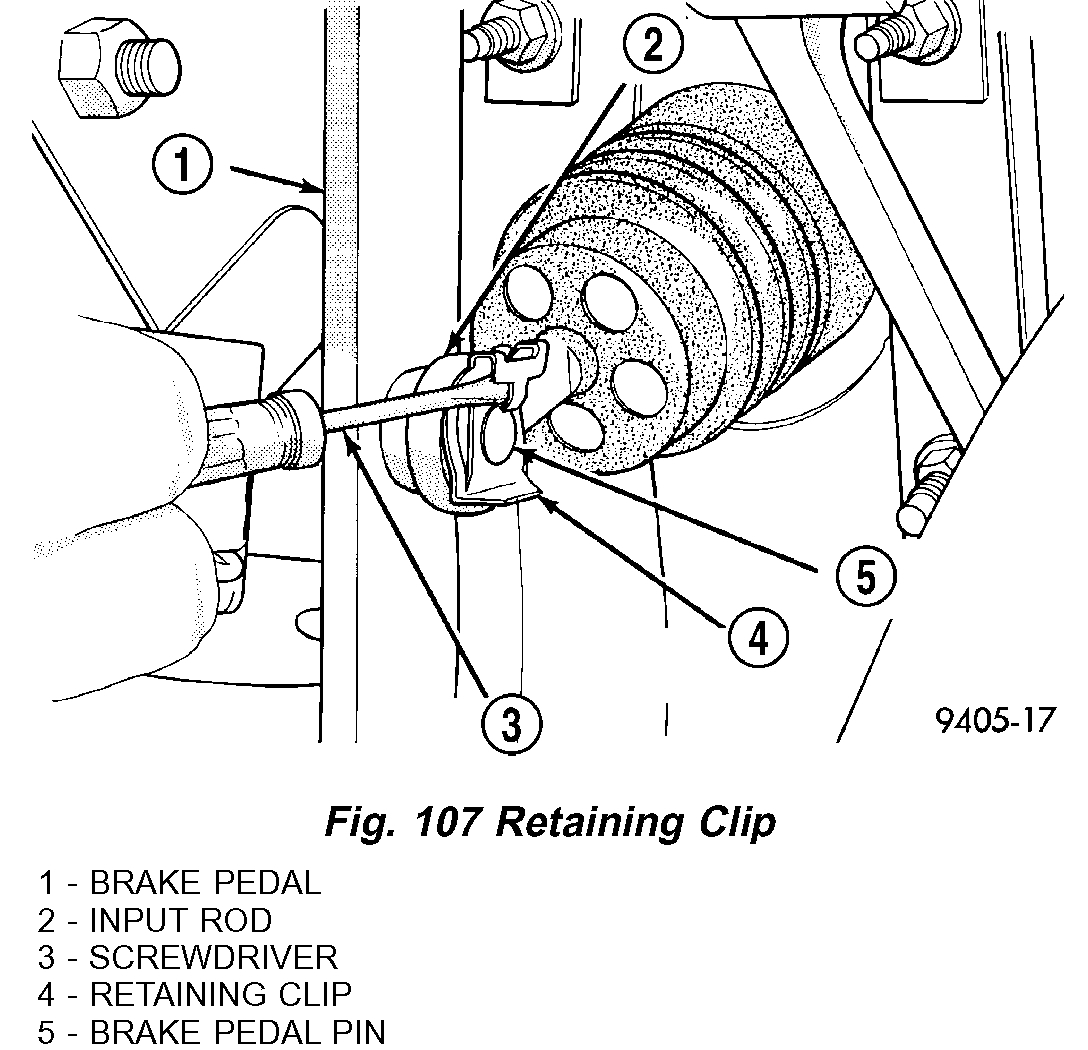
10. Locate the brake pedal-to-power brake booster input rod attachment under the instrument panel. Position a small screwdriver (Fig. 107) under the center tang of the retaining clip. Rotate the screwdriver enough to allow the retaining clip tang to pass over the end of the brake pedal pin. Remove the clip.
CAUTION: Discard the used retaining clip, it is not to be reused. Replace the clip with a new one on reassembly.
pic 4
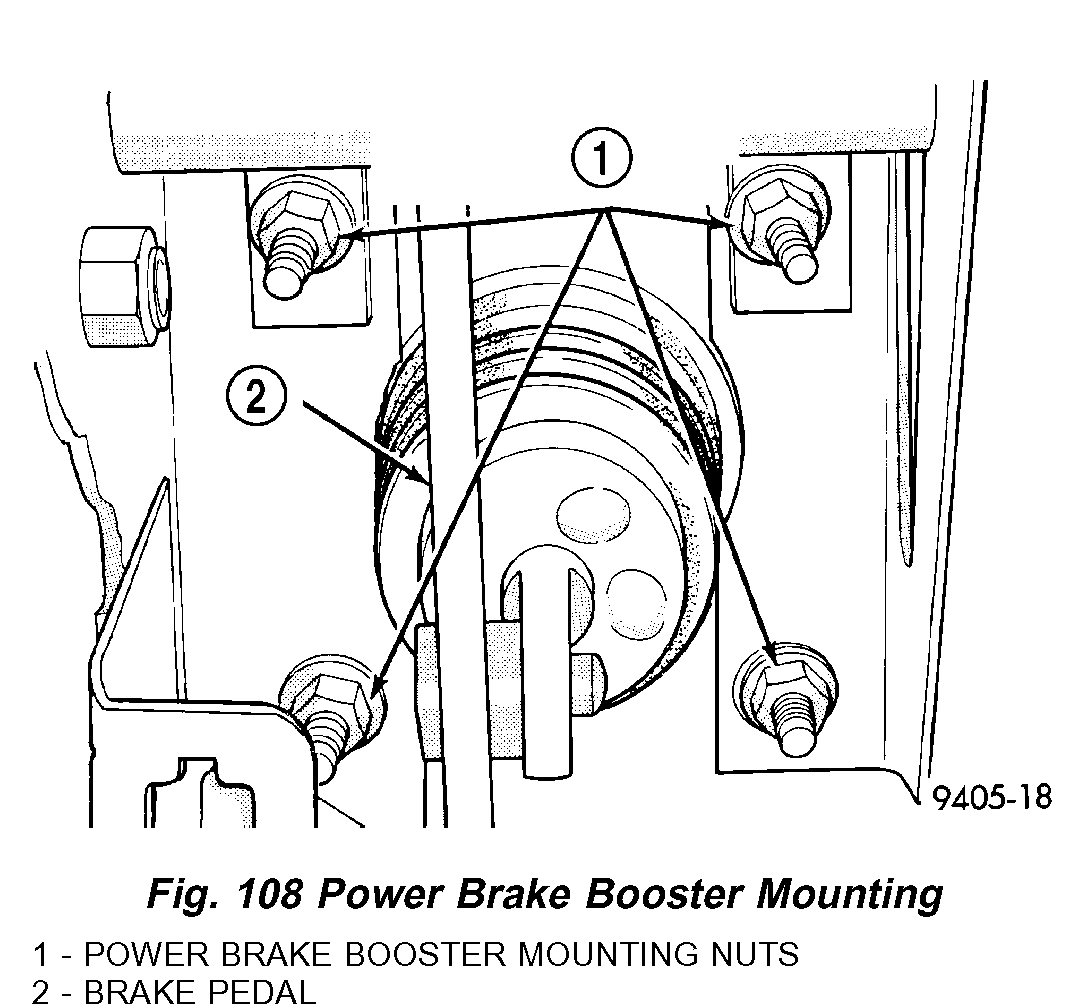
11. Remove the four nuts attaching the power brake booster to the instrument panel (Fig. 108). The nuts are accessible from under the instrument panel in the area of the brake pedal bracket.
pic 5
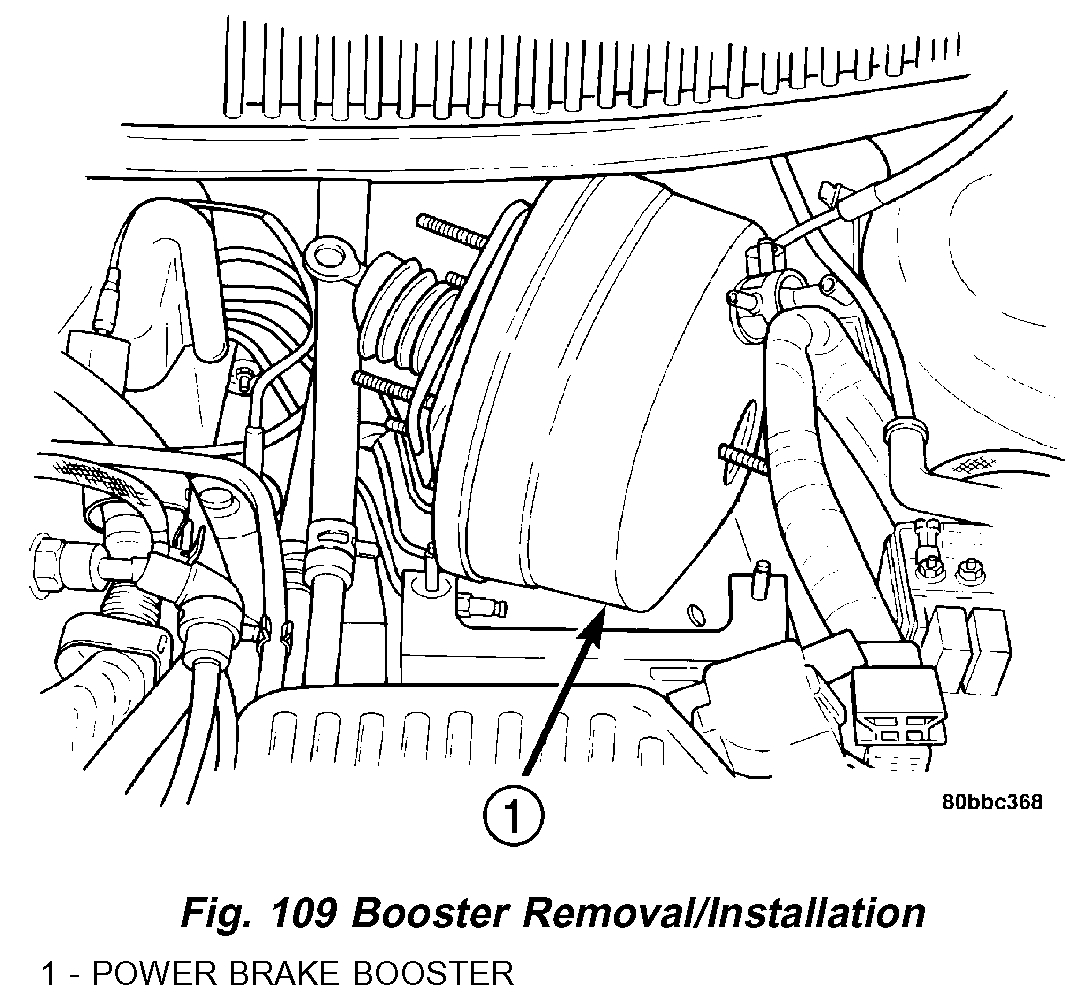
12. Slide the power brake booster forward until mounting studs clear the instrument panel. Turn the booster sideways (Fig. 109), then remove it from the vehicle.
INSTALLATION - LHD
1. Turn the power brake booster sideways (Fig. 109), then install it into the engine compartment down past the heater hoses and the strut tower. Rotate the booster so its four mounting studs and input rod are pointed straight toward the instrument panel. Slide the input rod and studs through the instrument panel and into mounting position.
2. Under the instrument panel, install the four power brake booster mounting nuts (Fig. 108). Tighten the nuts to a torque of 34 Nm (25 ft. lbs.).
3. Using lubricate, or an equivalent, coat the surface of the brake pedal pin where it contacts the brake booster input rod.
CAUTION: Use only a new brake booster input rod-to-brake pedal retaining clip to ensure proper retainment. Install a new brake lamp switch anytime the old switch is removed, the brake booster or pedals have been changed or removed.
4. Connect the power brake booster input rod-to-brake pedal pin. Install a new retaining clip. Do not use the old clip.
5. Install and adjust a new brake lamp switch.
6. Connect all previously removed vacuum hoses to the vacuum check valve (Fig. 106).
7. If the vehicle is equipped with ABS, install the ICU mounting bracket on the frame rail using its three bolts. Tighten the nuts to a torque of 23 Nm (200 inch lbs.).
8. If the vehicle is equipped with ABS, reinstall the ICU.
9. Install the master cylinder.
10. Position the battery tray back in place. Install the two bolts, then the two nuts mounting the battery tray to its bracket (Fig. 105). Tighten the two bolts and nuts to a torque of 34 Nm (25 ft. lbs.).
11. Reinstall the air cleaner box onto its grommeted alignment post (Fig. 105).
12. Install the one nut and one bolt securing the air cleaner box in place, then connect the wiring harness connector at the air inlet sensor.
13. Install the battery and clamp it in place.
14. Connect the positive, then the negative (ground) cable on the battery.
15. Bleed the base brake system.
16. Road test the vehicle to ensure proper operation of the brakes.
________________________________
I hope this helps. Let me know if you have other questions.
Take care and God Bless,
Joe
Images (Click to enlarge)
Mar 5, 2021 at 10:55 PM