Hi and thanks for using 2CarPros. Com.
The order is the same just starting at a different point. However, like you, I am not 100% sure why they would have done that. Make sure you have the plug wires in connected to the distributor the way it was originally and that when you are at TDC on the crankshaft, the rotor is pointing to the number one plug wire. Also, make sure the order on the cap correlates with the rotor rotation direction.
Here are the removal and reinstall directions from Alldata. Check through them and see if there is anything you missed or is different and let me know. All attached pictures correlate with these directions.
_______________________________________________________
REMOVAL AND INSTALLATION
DISTRIBUTOR REMOVAL
1. Disconnect Negative Terminal Cable From Battery
CAUTION (w/ SRS): Work must be started after 90 seconds from the time the ignition switch is turned to the - LOCK position and the negative (-) terminal cable is disconnected from the battery.
2. DIsconnect Distributor Connectors
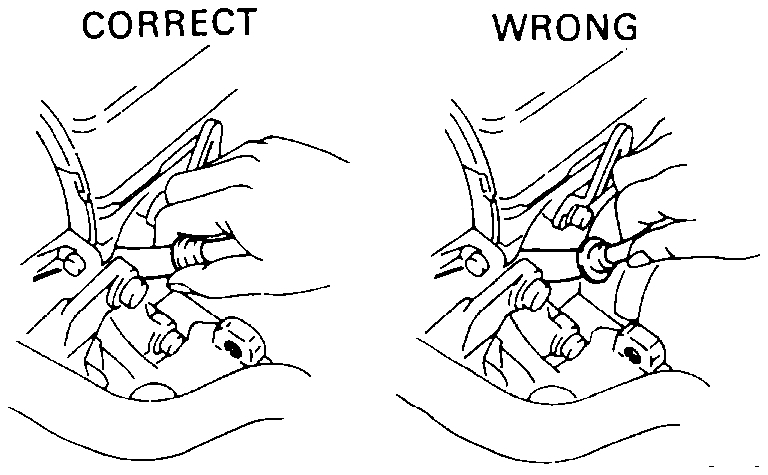
3. Disconnect High-tension Cords From Spark Plugs
a. Disconnect the cord clamp from the cylinder head cover.
B. Disconnect the 4 high-tension cords from the spark plugs at the rubber boot. Do not pull on the high-tension cords.
NOTE: Pulling on or bending the cords may damage the conductor inside.
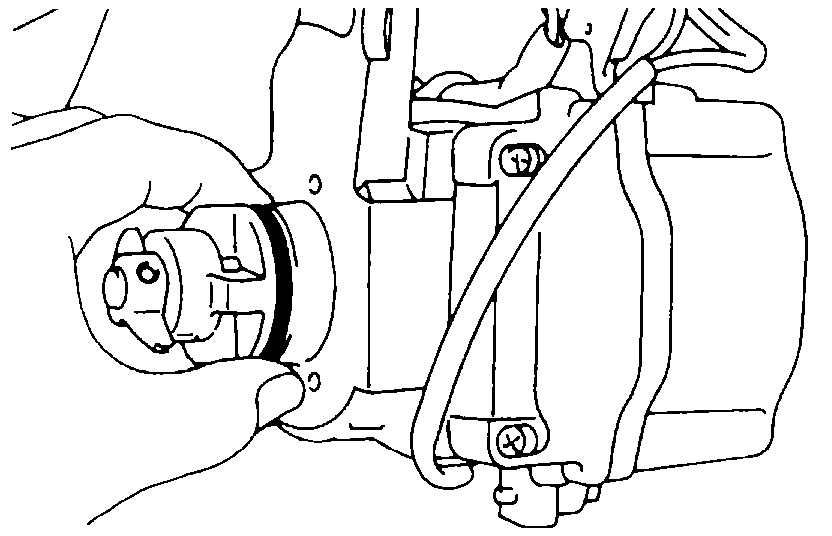
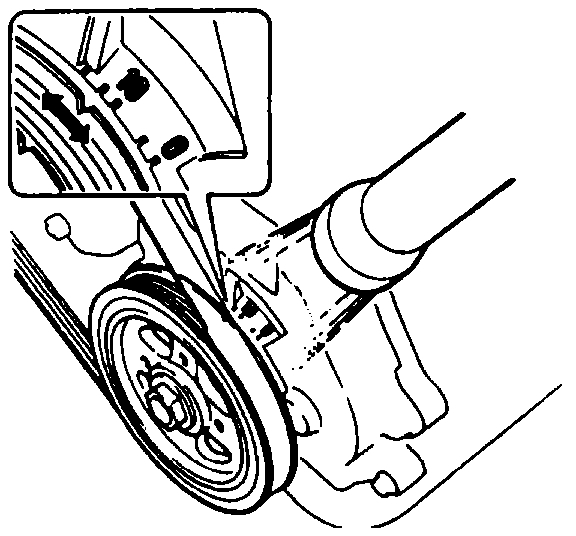
4. Remove Distributor
a. Remove the 2 bolts, and pull out the distributor.
B. Remove the 0-ring from the distributor housing.
DISTRIBUTOR INSTALLATION
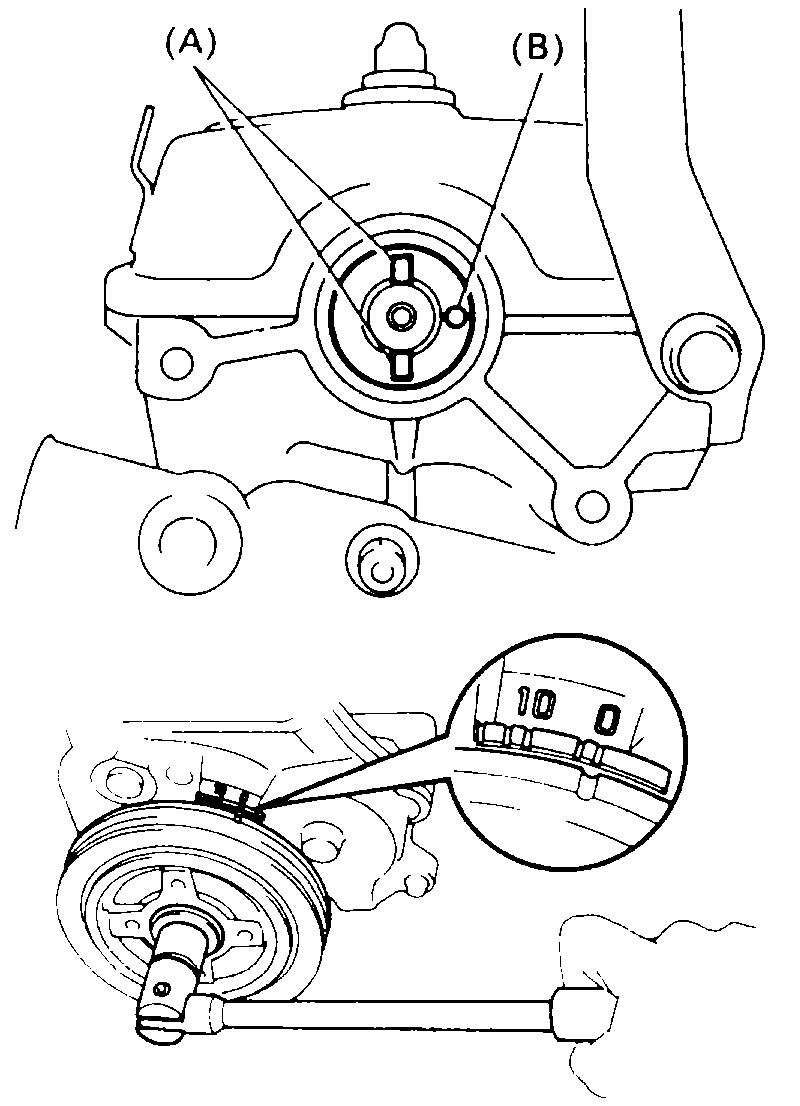
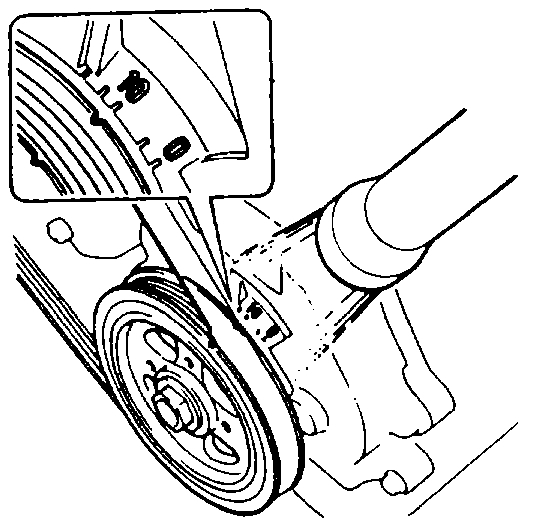
1. Set No.1 Cylinder To TDC/Compression
Turn the crankshaft clockwise, and position the slits (A) and indentation (B) of the camshaft as shown in the illustration.
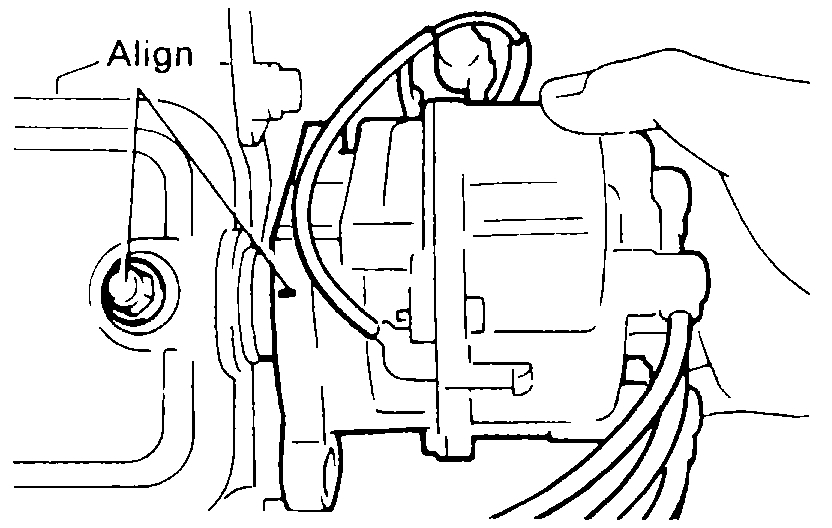
2. Install Distributor
a. Install a new 0-ring to the distributor housing.
B. Apply a light coat of engine oil on the 0-ring.
C. Align the protrusion on the housing with groove of the coupling.
D. Insert the distributor, aligning the protrusion of the flange with that of the nut on the cylinder head cover.
E. Lightly tighten the 2 bolts.
3. Connect High-tension Cords To Spark Plugs
Firing order 1-3-4-2
4. Connect Distributor Connectors
5. Connect Negative Terminal Cable To Battery
6. Warm Up Engine
Allow the engine to warm up to normal operating temperature.
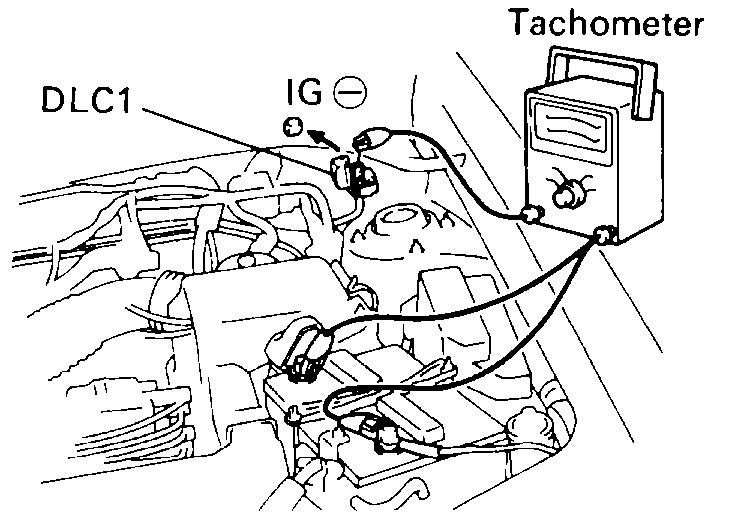
7. Connect Tachometer
Connecting A Tachometer To DLC 1
Connect the tester probe of a tachometer to terminal IGG of the data link connector 1.
NOTE:
Never allow the tachometer terminal to touch ground as it could result in damage to the igniter and/or ignition coil.
As some tachometers are not compatible with this ignition system, we recommend that you confirm the compatibility of your unit before use.
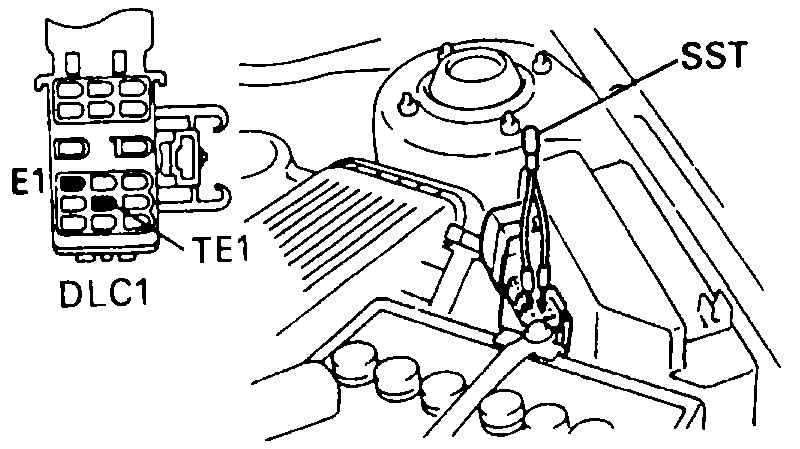
8. Adjust Ignition Timing
a. Using SST, connect terminals TE1 and E1 of the data link connector 1. (SST 09843-18020)
b. Check the idle speed.
Idle speed:
M/T - 750 (+/-) 50 rpm
A/T - 800 (+/-) 50 rpm
(w/ Cooling fan OFF and transmission in neutral position)
c. Using a timing light, check the ignition timing.
Ignition timing 10° BTDC @ idle
(w/ Cooling fan OFF and transmission in neutral position)
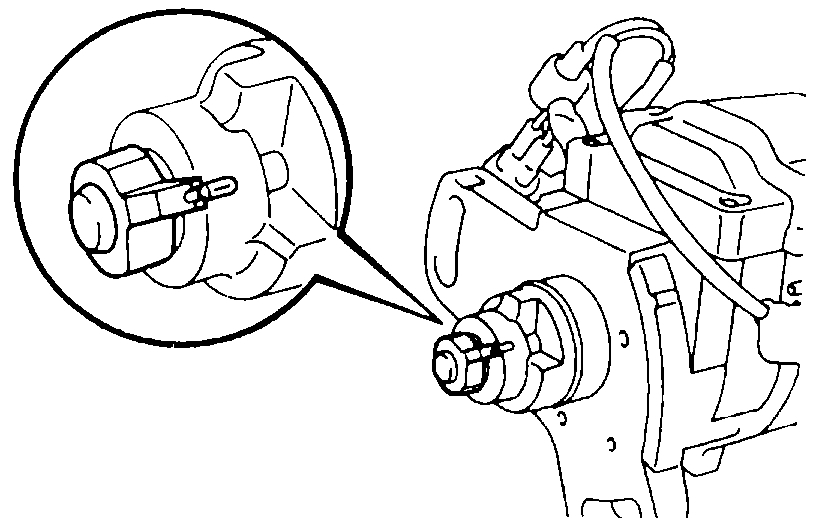
d. Loosen the 2 bolts, and adjust by turning the distributor.
E. Tighten the 2 bolts, and recheck the ignition timing.
Torque 17 N.M (175 kgf. Cm, 13 ft. Lbf)
f. Remove the SST from the data link connector 1.
9. Further Check Ignition Timing. Check the ignition timing advance.
Ignition timing 7 - 17° BTDC @ idle
(w/ Cooling fan OFF and transmission in neutral position)
HINT: The timing mark moves in a range between 7° and 17°.
10. Disconnect Tachometer And Timing Light From Engine
_________________________________________________________________
I hope this helps. Again, make sure you follow the original firing order when connecting the plug wires to the cap.
Let me know what you find. I am very interested in knowing.
Take care,
Joe
Images (Click to make bigger)
Monday, August 13th, 2018 AT 6:44 PM