Hi,
Does the vehicle shift into drive even though the light doesn't turn on? I'm asking because there is a transmission range sensor that sends the signal identifying the selected gear.
What really should be done with this is to have the can-bus system scanned. CAN stands for controller area network, Basically, the computer systems and modules are tied together via a couple of wires. If there is a problem, it should show up (trouble code) by doing this.
Here is a video that shows how it's done:
https://youtu.be/InIlnsjOVFA
That is where I would start. If you find there is an indication via the scan a problem exists at the range sensor, here are the directions for replacement. The attached pics correlate with the directions.
____________________
2006 Honda Truck CR-V 4WD L4-2.4L
Procedures
Vehicle Powertrain Management Sensors and Switches - Powertrain Management Sensors and Switches - Computers and Control Systems Transmission Position Sensor/Switch Service and Repair Procedures
PROCEDURES
Transmission Range Switch Replacement
1. Raise the vehicle, and make sure it is securely supported.
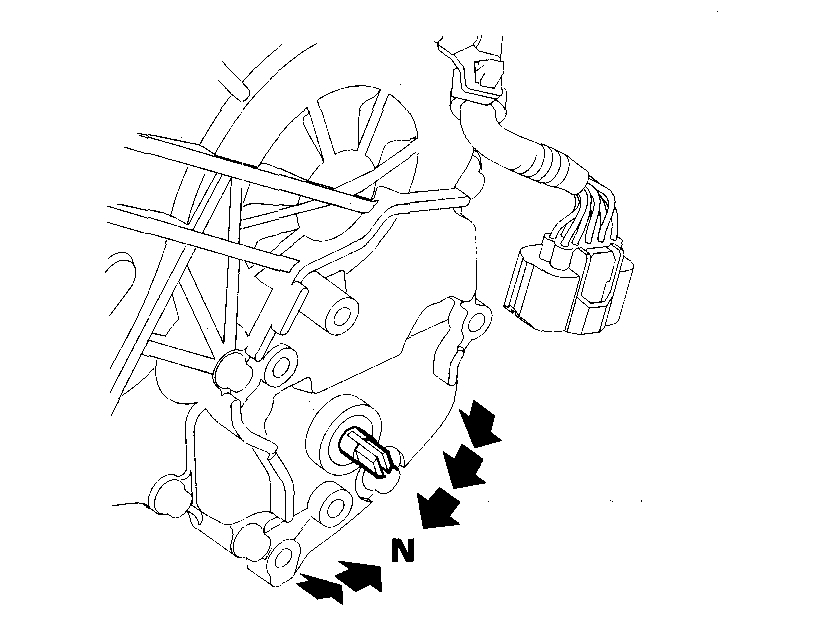
2. Shift to the N position.
pic 1
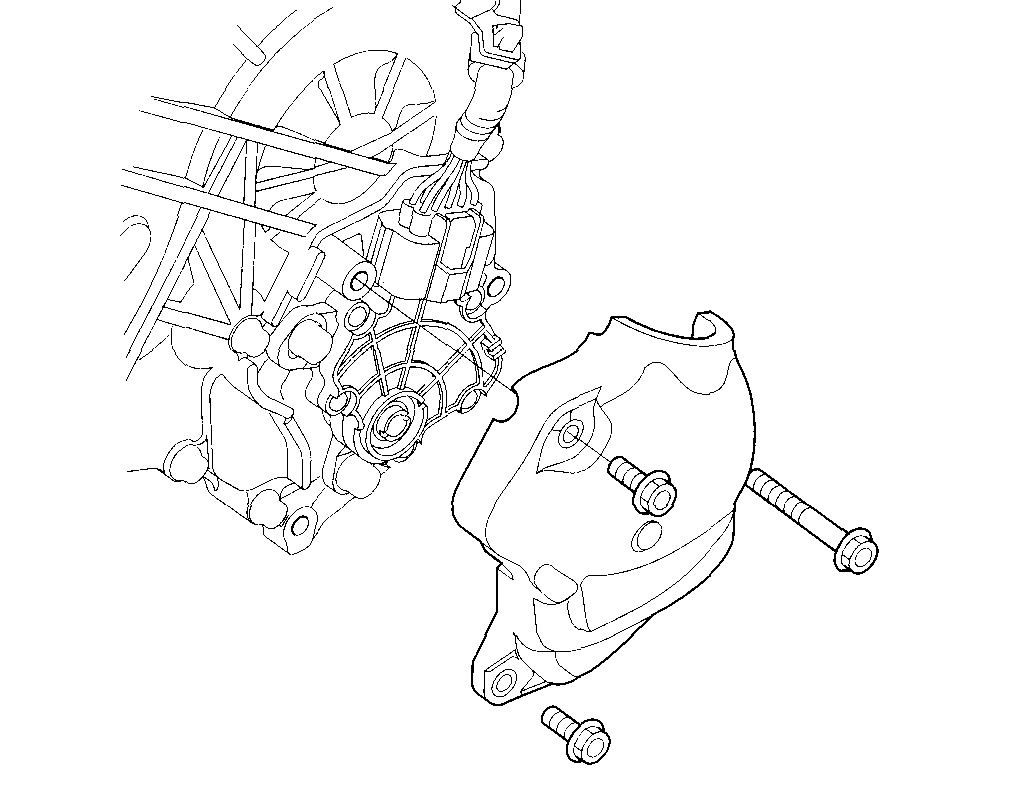
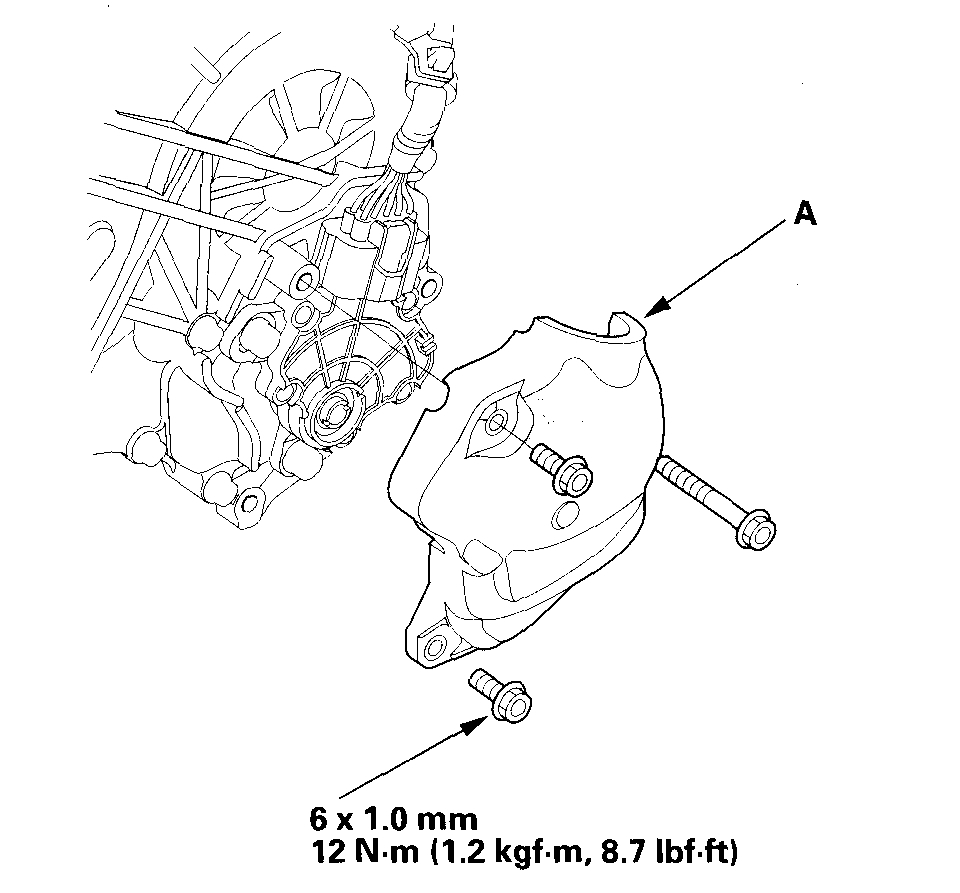
3. Remove the transmission range switch cover.
pic 2
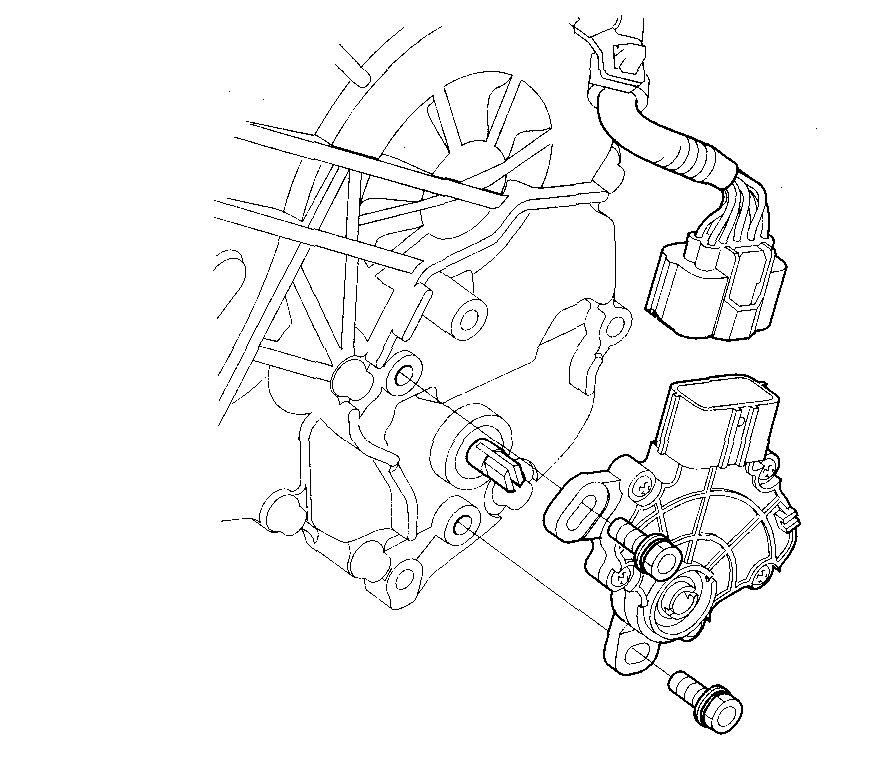
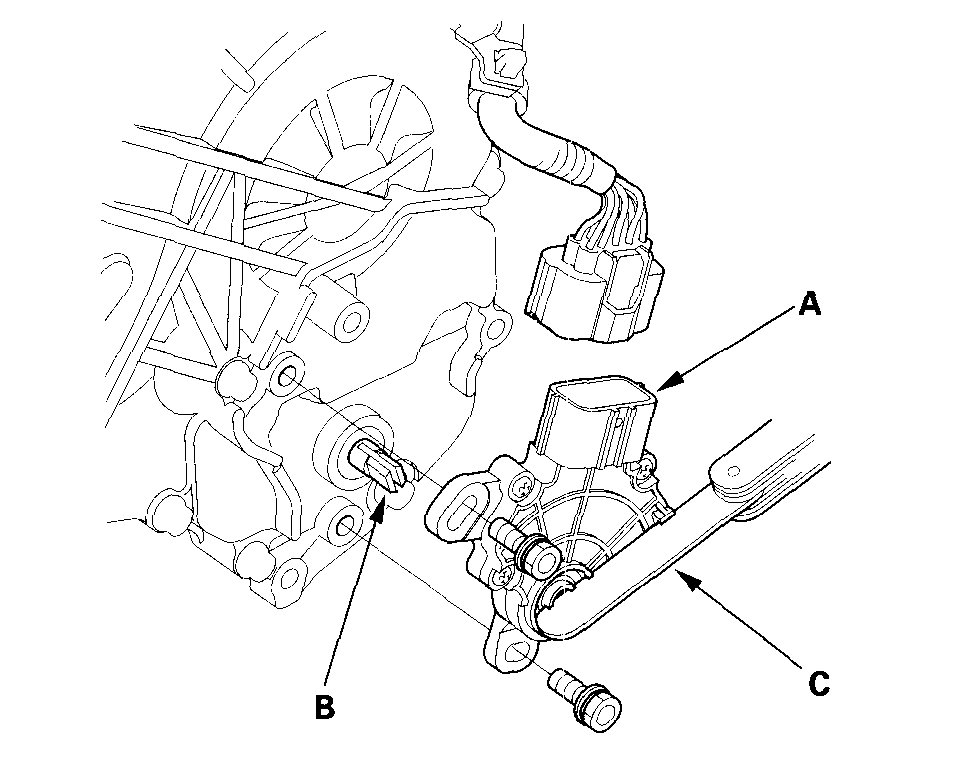
4. Disconnect the transmission range switch connector.
5. Remove the transmission range switch, and replace the new switch.
pic 3
6. Make sure the selector control shaft is in the N position. If necessary, move the shift lever to the N position.
NOTE: Do not use the selector control shaft to adjust the shift position. If the selector control shaft tips are squeezed together it will cause a faulty signal or position due to play between the selector control shaft and the switch.
pic 4
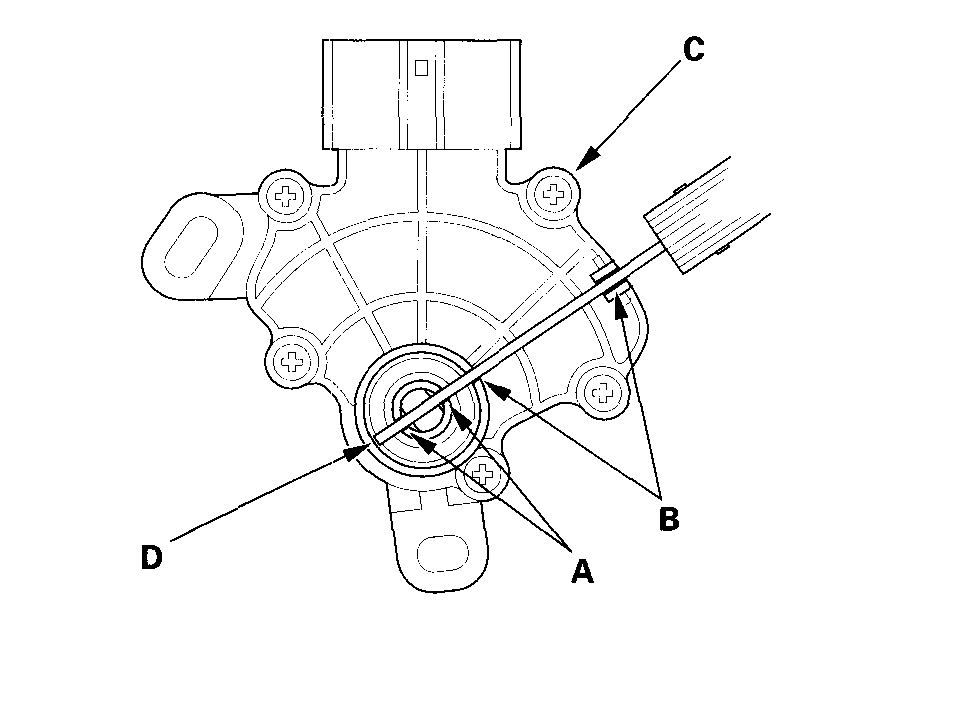
7. Align the cutouts; (A) on the rotary-frame with the neutral positioning cutouts (B) on the transmission range switch (C), then put a 2.0 mm (0.08 inch) feeler gauge blade (D) in the cutouts to hold the switch in the N position.
NOTE: Be sure to use a 2.0 mm (0.08 inch) blade or equivalent to hold the switch in the N position.
pic 5
8. Install the transmission range switch (A) gently on the selector control shaft (B) with holding it in the N position with the 2.0 mm (0.08 inch) blade (C).
pic 6
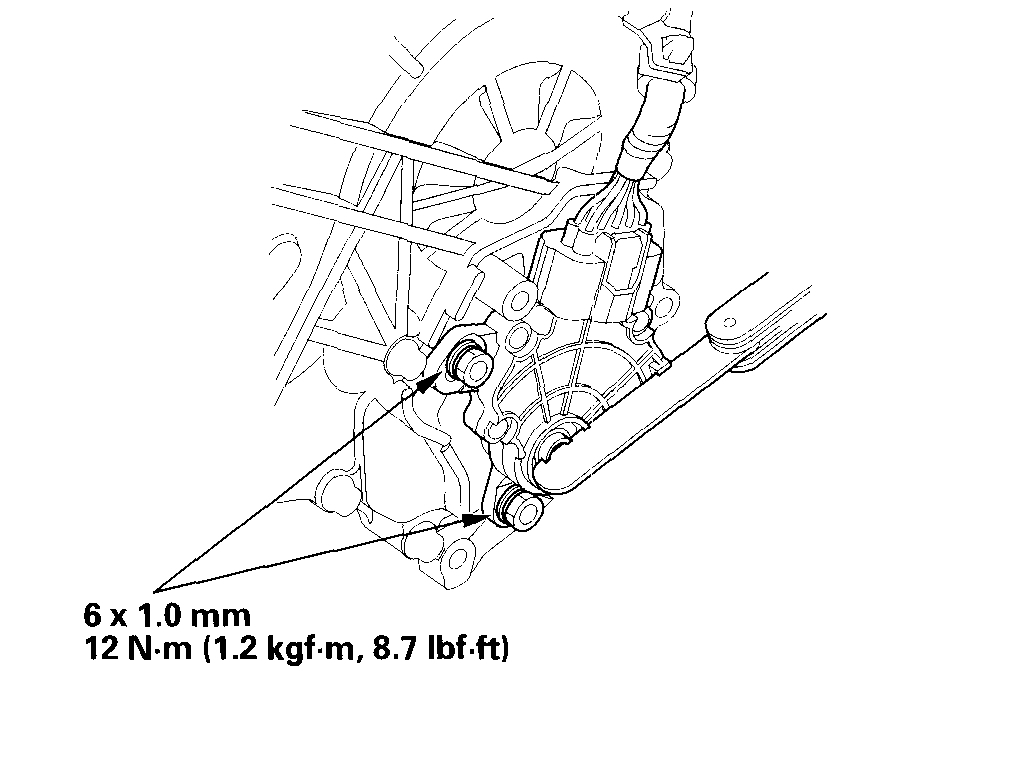
9. Tighten the bolts on the transmission range switch while you continue to hold the N position. Do not move the transmission range switch when tightening the bolts. Remove the feeler gauge.
pic 7
10. Connect the connector securely, then install the transmission range switch cover (A).
11. Turn the ignition switch ON (II). Move the shift lever through all positions, and check the transmission range switch synchronization with the A/T gear position indicator.
12. Check that the engine will start in the P and N positions, and will not start in any other shift lever position.
13. Check that the back-up lights come on when the shift lever is in the R position.
14. Allow the front wheels to rotate freely, then start the engine, and check the shift lever operation.
________________________
Let me know if this helps or if you have other questions.
Take care,
Joe
Images (Click to enlarge)
Oct 26, 2020 at 5:29 PM