Hi and thanks for using 2CarPros.
Everything you described points to a bad head gasket, regardless if you are getting oil into the coolant or white smoke. With that being said, the head gasket needs to be tested. Here is a link that shows how that is done:
https://www.2carpros.com/articles/head-gasket-blown-test
If you determine the head gasket is an issue, here are the directions. The attached pictures correlate with these directions.
________________________________________________________________________
Cylinder head, removing and installing
Special tools
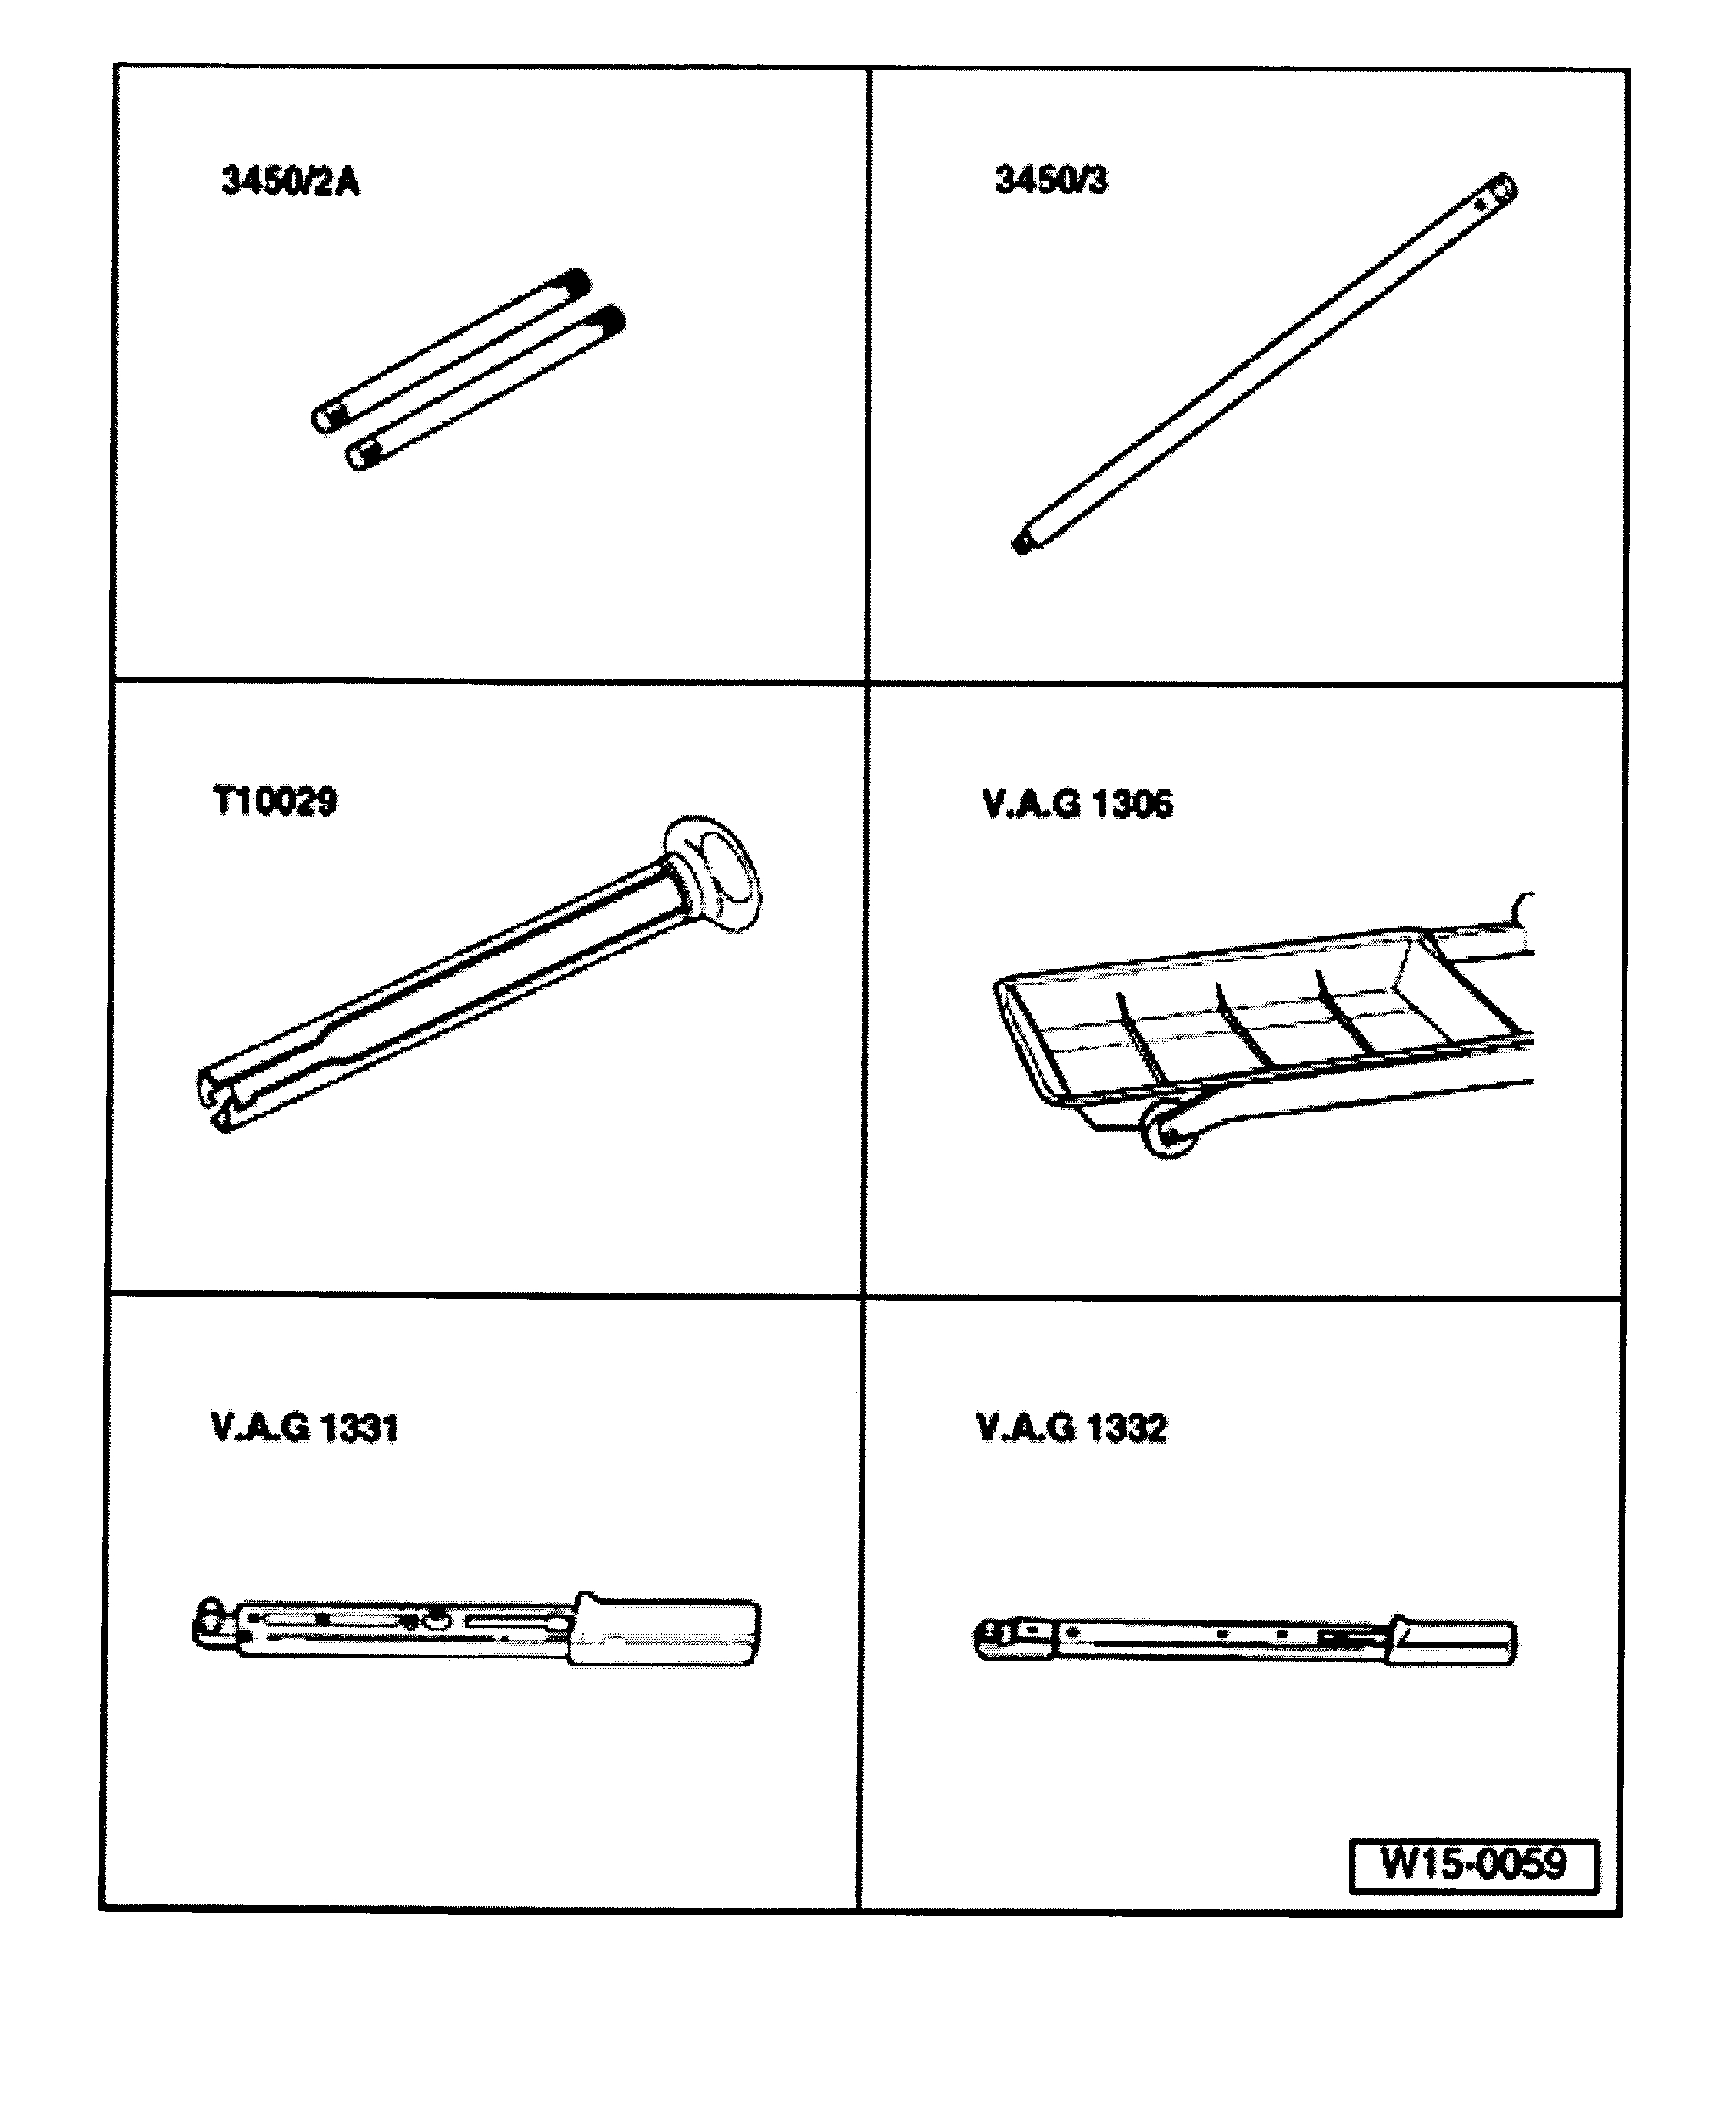
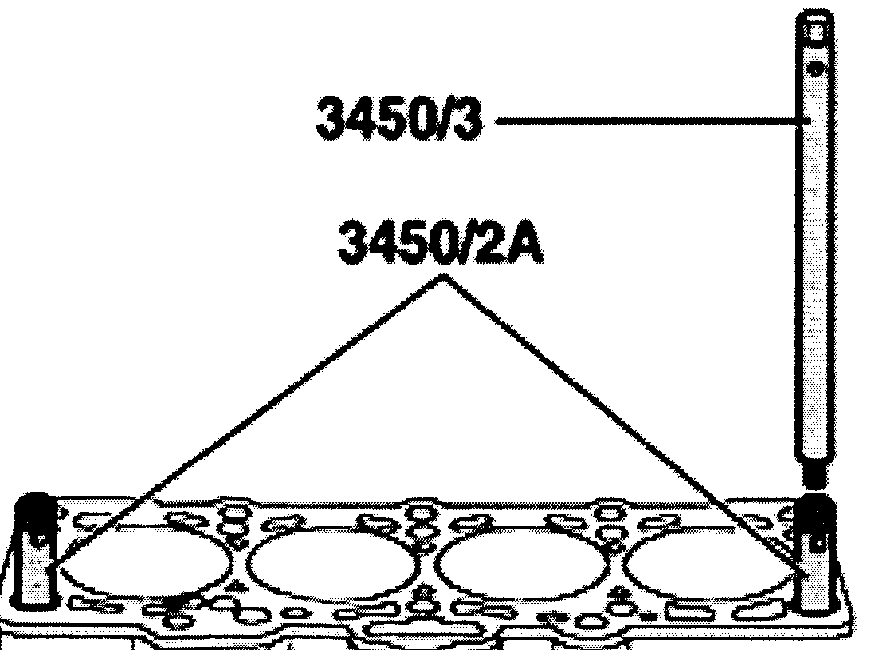
Picture 1
^ 3450/2A Guide bolt
^ 3450/3 Extractor
^ T10029 Installation tool
^ V.A.G 1306 Drip tray
^ V.A.G 1331 Torque wrench 5 to 50 Nm (3.7 to 37 ft. lbs.)
^ V.A.G 1332 Torque wrench 40 to 200 Nm (30 to 148 ft. lbs.)
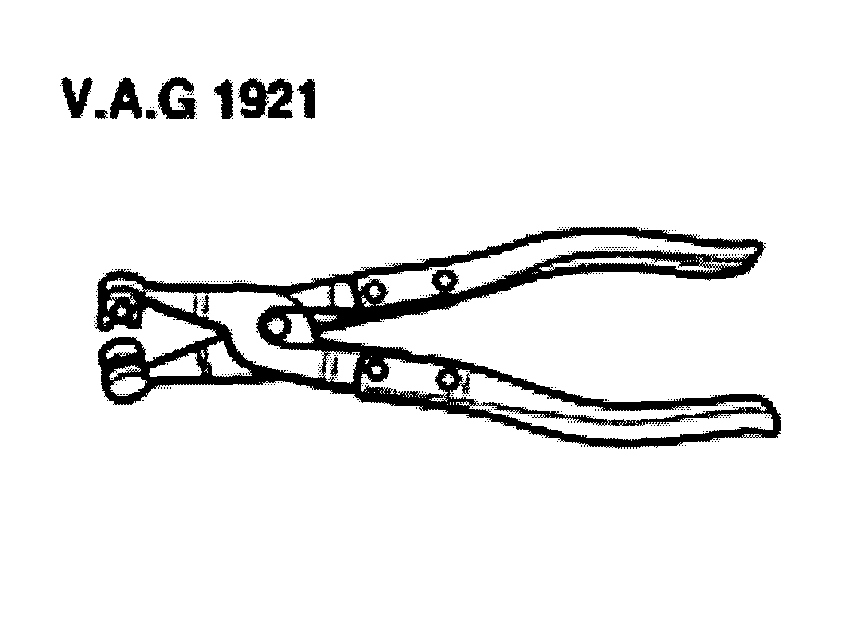
Picture 2
^ V.A.G 1921 or VAS 5024 Spring clip pliers or VAS 5024
Requirements
^ Engine must not be hotter than warm to the touch.
^ Pistons must NOT be positioned at TDC.
Work procedure
CAUTION:
-Obtain radio anti-theft code from customer BEFORE disconnecting battery Ground strap!
-With ignition switched OFF, disconnect battery Ground strap
Note:
-All cable ties, which are opened or cut open to remove the engine, must be replaced in the same position when reinstalling the engine.
- Remove intake manifold upper section:
Note:
- Seal off open portions of lower intake manifold against dirt etc. with clean shop rags.
- Drain coolant.
- Remove hoses from cylinder head using pliers V.A.G 1921 or VAS 5024.
WARNING:
- Fuel system is under pressure! Cover over the connections with a cloth BEFORE disconnecting the hoses.
- Separate fuel supply line and fuel return line at fuel rail connection.
- Seal off fuel lines so system is not contaminated by dirt etc.
- Separate front exhaust pipe with catalyst from exhaust manifold.
- Remove ribbed belt.
- Remove ribbed belt tensioning element with bracket.
- Remove camshaft drive belt guard upper section.
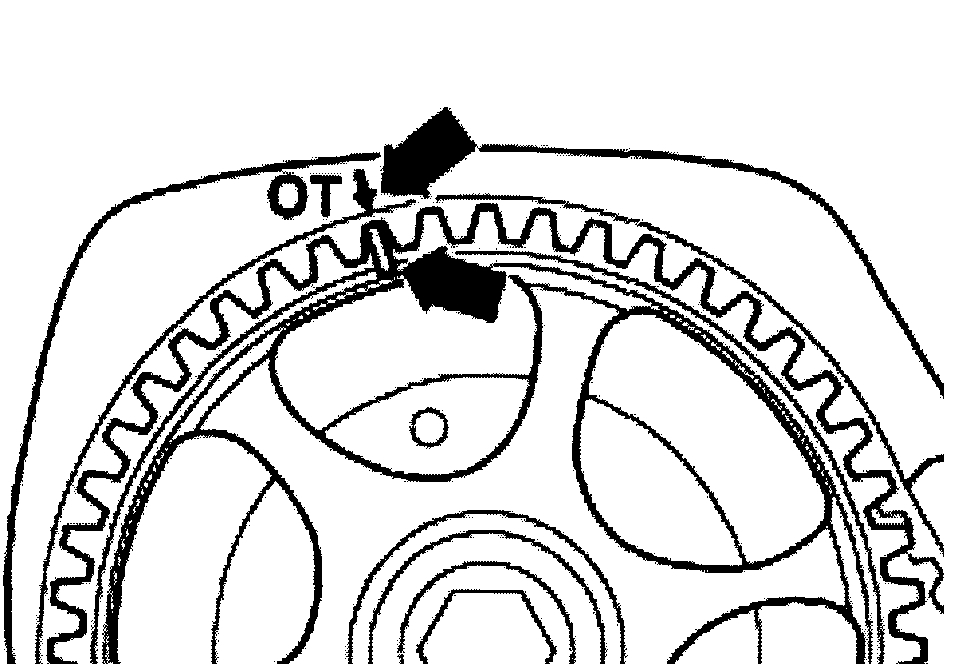
Picture 3
- Turn engine to cyl. 1 TDC (mark on camshaft gear comes into line with mark on toothed belt guard -arrows-).
- Release tensioning roller and take toothed belt off camshaft sprocket.
- Turn camshaft back slightly.
- Remove valve cover.
- Unscrew upper bolt from rear belt guard.
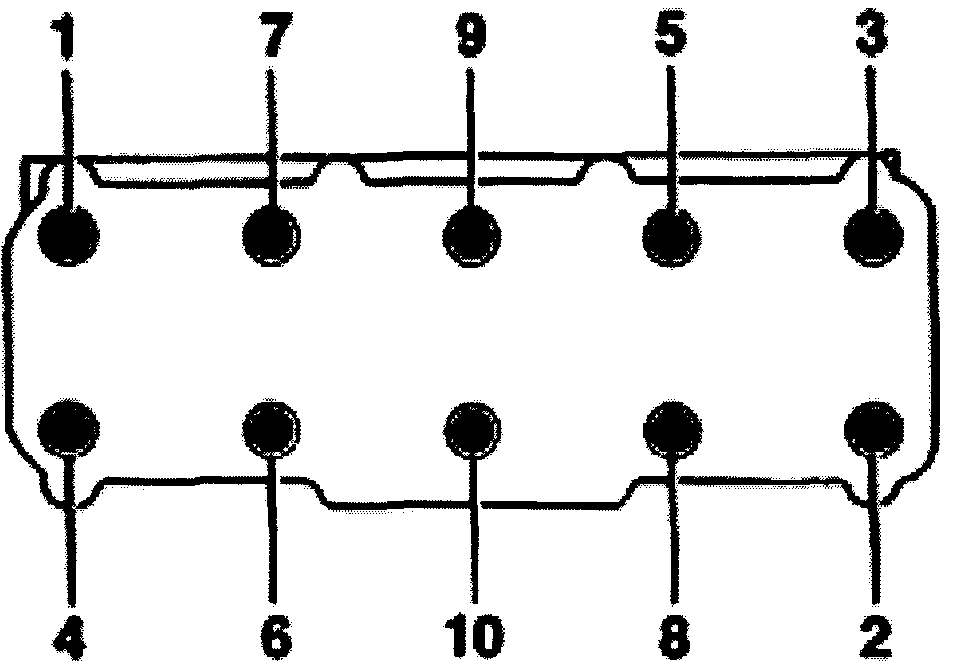
Picture 4
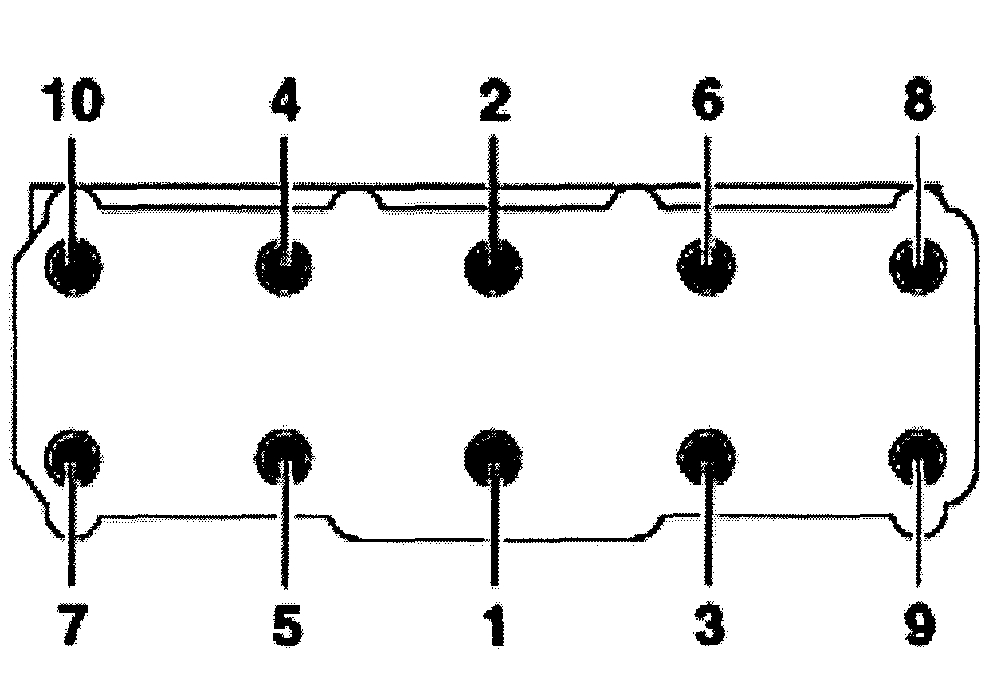
- Loosen socket head bolts in the sequence given and then remove completely.
- Carefully lift off cylinder head.
Installing
Note:
^ Always replace cylinder head bolts.
^ There must NOT be any oil or coolant in the bolt pockets in the cylinder head or there is the danger of creating a hydro-lock while torquing which could lead to structural damage.
^ Only remove the new cylinder head gasket from its packaging immediately before installing.
^ Handle the new gasket with extreme care. Damage will lead to leaks.
^ Place a clean cloth over the cylinders so no dirt or abrasive particles can get between the cylinder wall and piston.
^ Take whatever precautions are necessary to prevent dirt and abrasive particles from gaffing into the coolant system.
^ Carefully clean the cylinder head and cylinder block sealing surfaces, ensuring that no scores or scratches are formed. When using abrasive paper, do NOT use any grades coarser than 100, such as 80.
^ Carefully remove all traces of metal particles, emery remains and cloth.
- Position cyl. 1 piston to top dead center, then turn back crankshaft slightly.
Picture 5
- Center 3450/2A guide pins into head bolt holes as shown.
Note:
- The tolerance of centering bores was restricted in upper section. Check if locating pins can be pulled up before reinstalling cylinder head. Grind knurl of location pins if necessary.
- Install new cylinder head gasket.
^ Lettering (part number) must be readable.
- Install cylinder head, screw in 8 remaining head bolts and tighten by hand.
- Unscrew 3450/2A guide pins through bolt holes using 3450/3 pin driver by turning it counter-clockwise until pins are free.
- Install remaining cylinder head bolts and tighten hand-tight.
Picture 6
- Tighten cylinder head in sequence as follows:
- Pretighten all bolts to 40 Nm (30 ft. lbs.).
- Tighten all bolts 1/4 turn (90°) further using a box wrench.
- Tighten all bolts a 1/4 turn (90°) further.
Note:
- Assembly is basically a reverse of the disassembly procedure.
- Install camshaft drive belt and adjust timing.
- Install ribbed belt tensioner. Torque: 25 Nm (18 ft. lbs.)
- Install ribbed belt.
- Fill with new coolant.
- Check Diagnostic Trouble Code memory:
- Match Engine Control Module (ECM) to Throttle Control Module:
- Check Readiness code:
- Reset Readiness code after DTCs are corrected, Engine Control Module (ECM) is subject to low voltage with ignition on, or ECM is replaced:
___________________________________________________________________
Let me know if this helps or if you have other questions.
Take care,
Joe
Images (Click to enlarge)
Feb 10, 2019 at 8:07 PM