Hi, Noah.
Are there leaks presently? If there are no leaks and the brake fluid is full, I suspect the brake master cylinder has failed. Take a look through this link:
https://www.2carpros.com/articles/brake-pedal-goes-to-the-floor
Please confirm there are no leaks and the MC is full of brake fluid. If it is and there are no leaks, replace the MC.
Here is a link that explains how it is done in general:
https://www.2carpros.com/articles/how-to-replace-a-brake-master-cylinder
____________________________
Here are the directions specific to your vehicle for replacement. The attached pictures correlate with the directions.
____________________________
2007 Toyota Truck RAV4 4WD V6-3.5L (2GR-FE)
Removal and Replacement
Vehicle Brakes and Traction Control Hydraulic System Brake Master Cylinder Service and Repair Removal and Replacement
REMOVAL AND REPLACEMENT
BRAKE MASTER CYLINDER
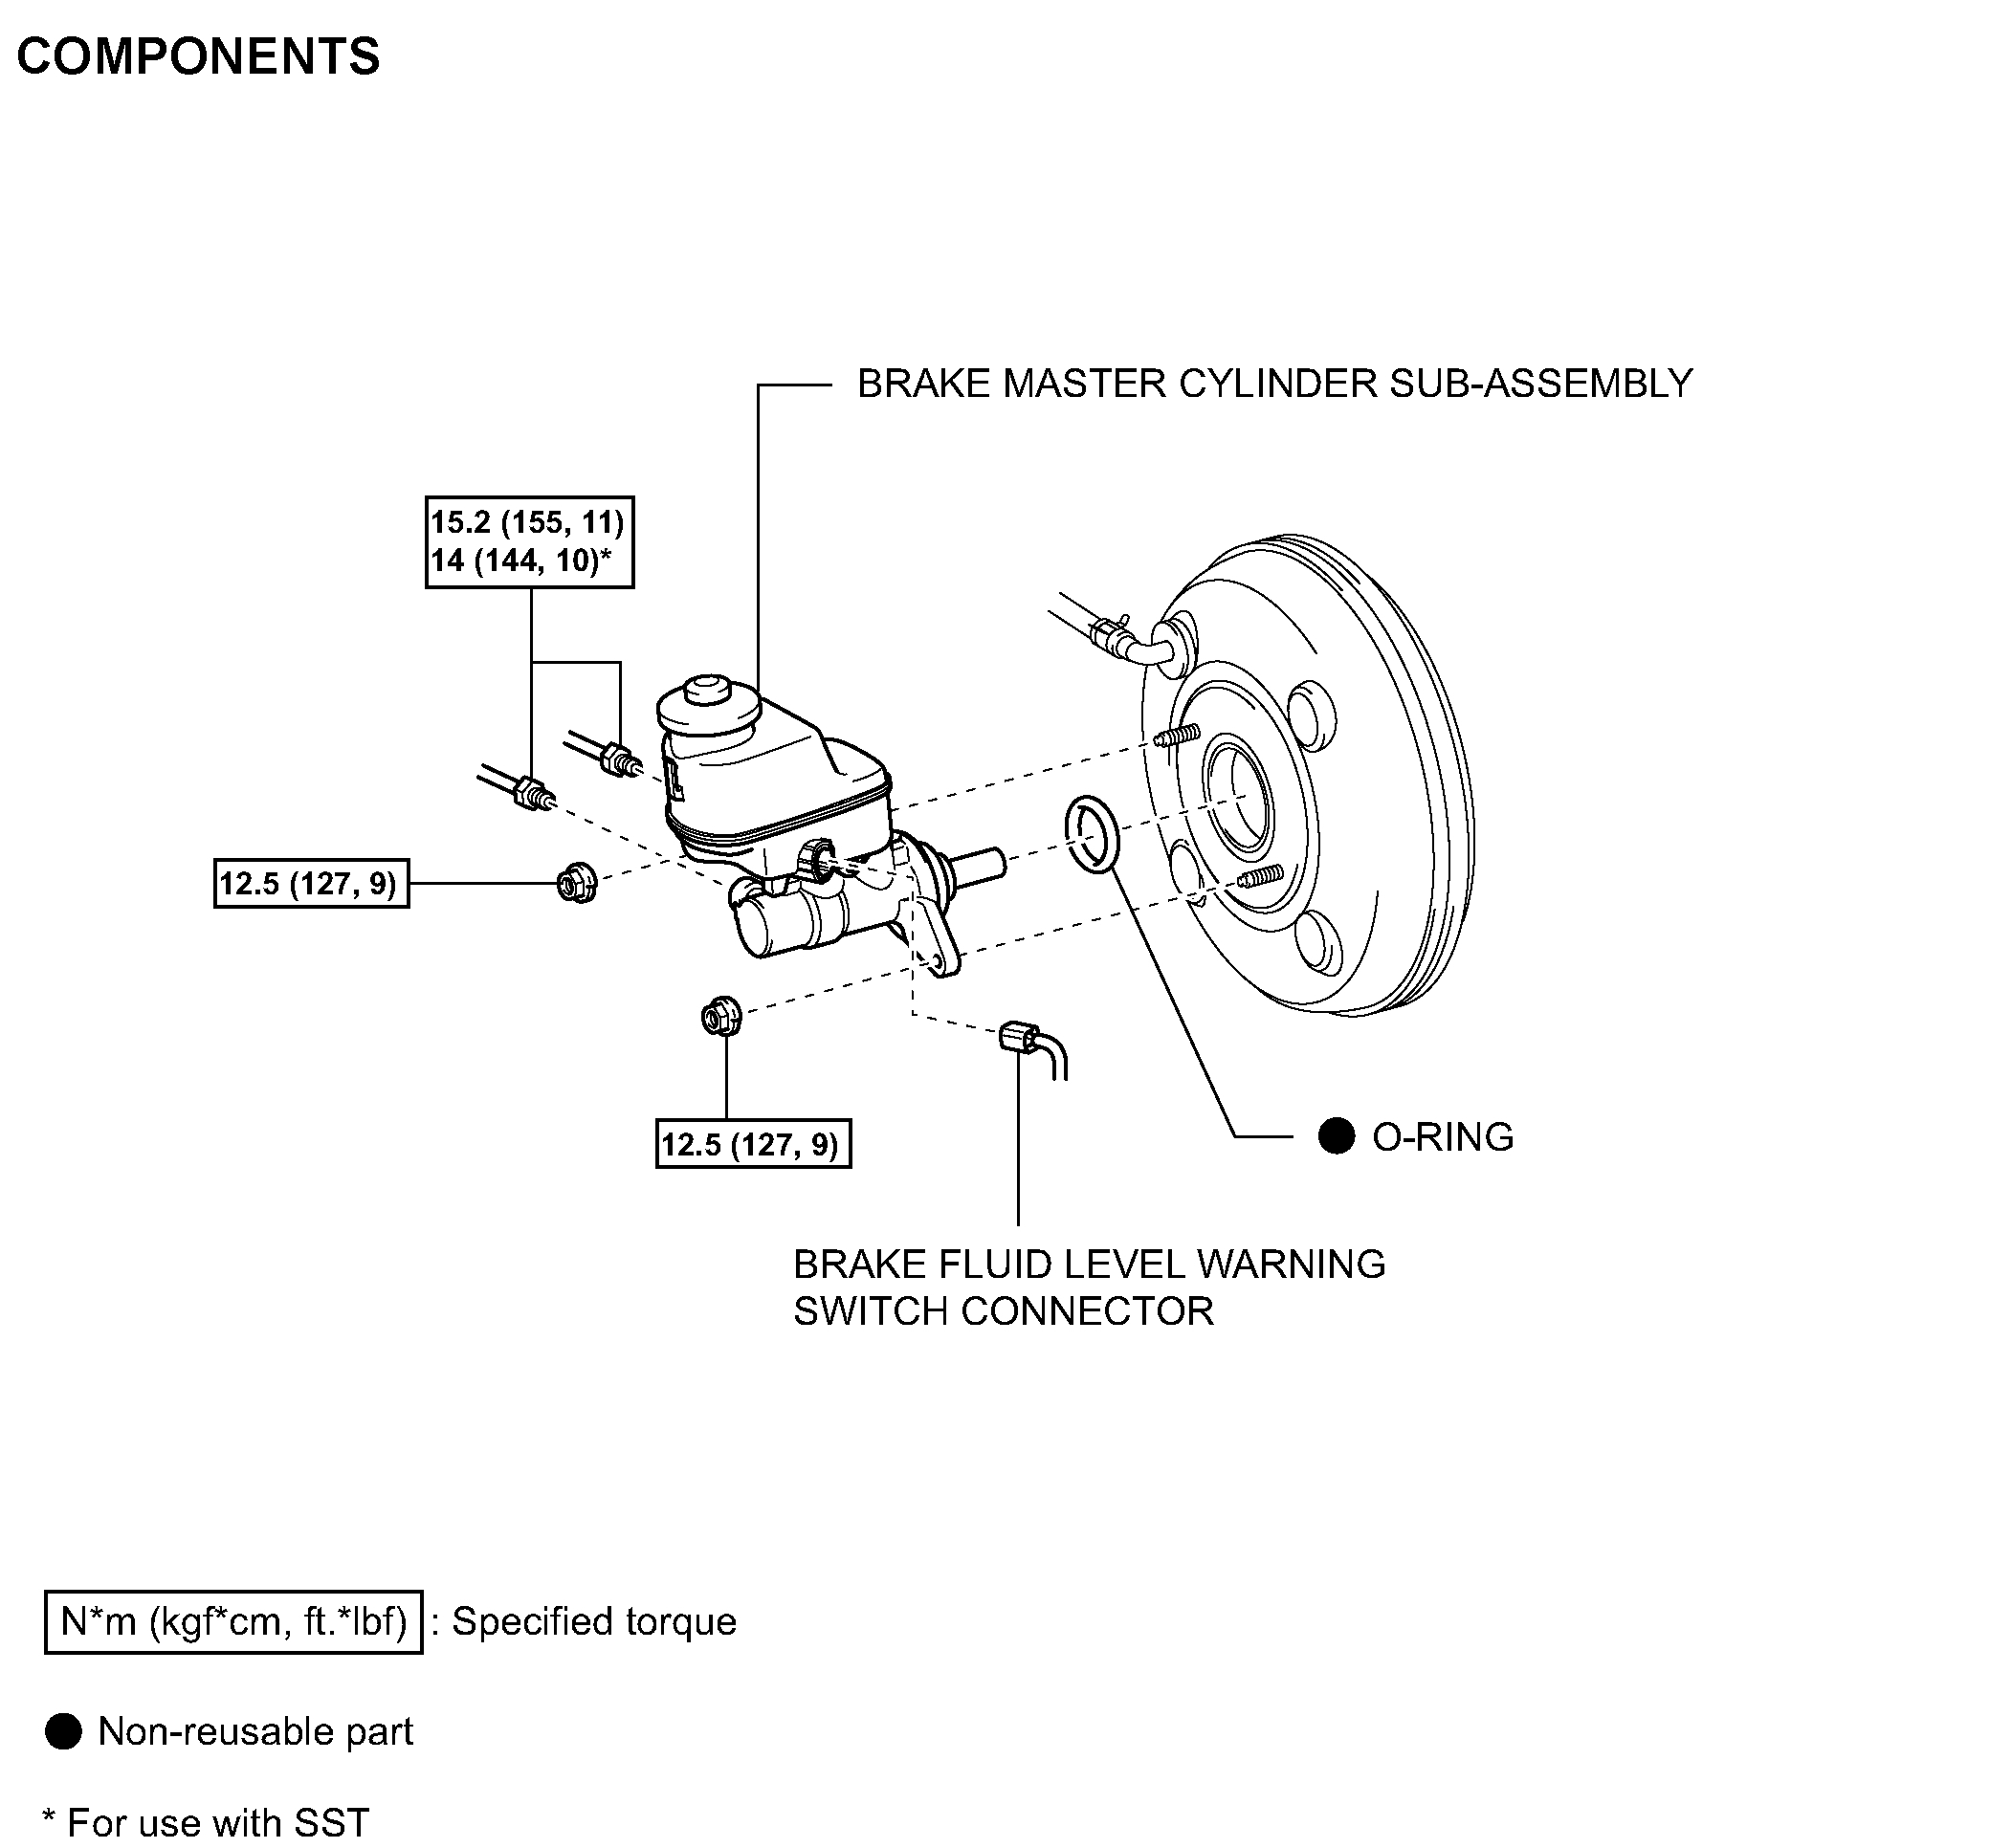
COMPONENTS (Part 1)
pic 1
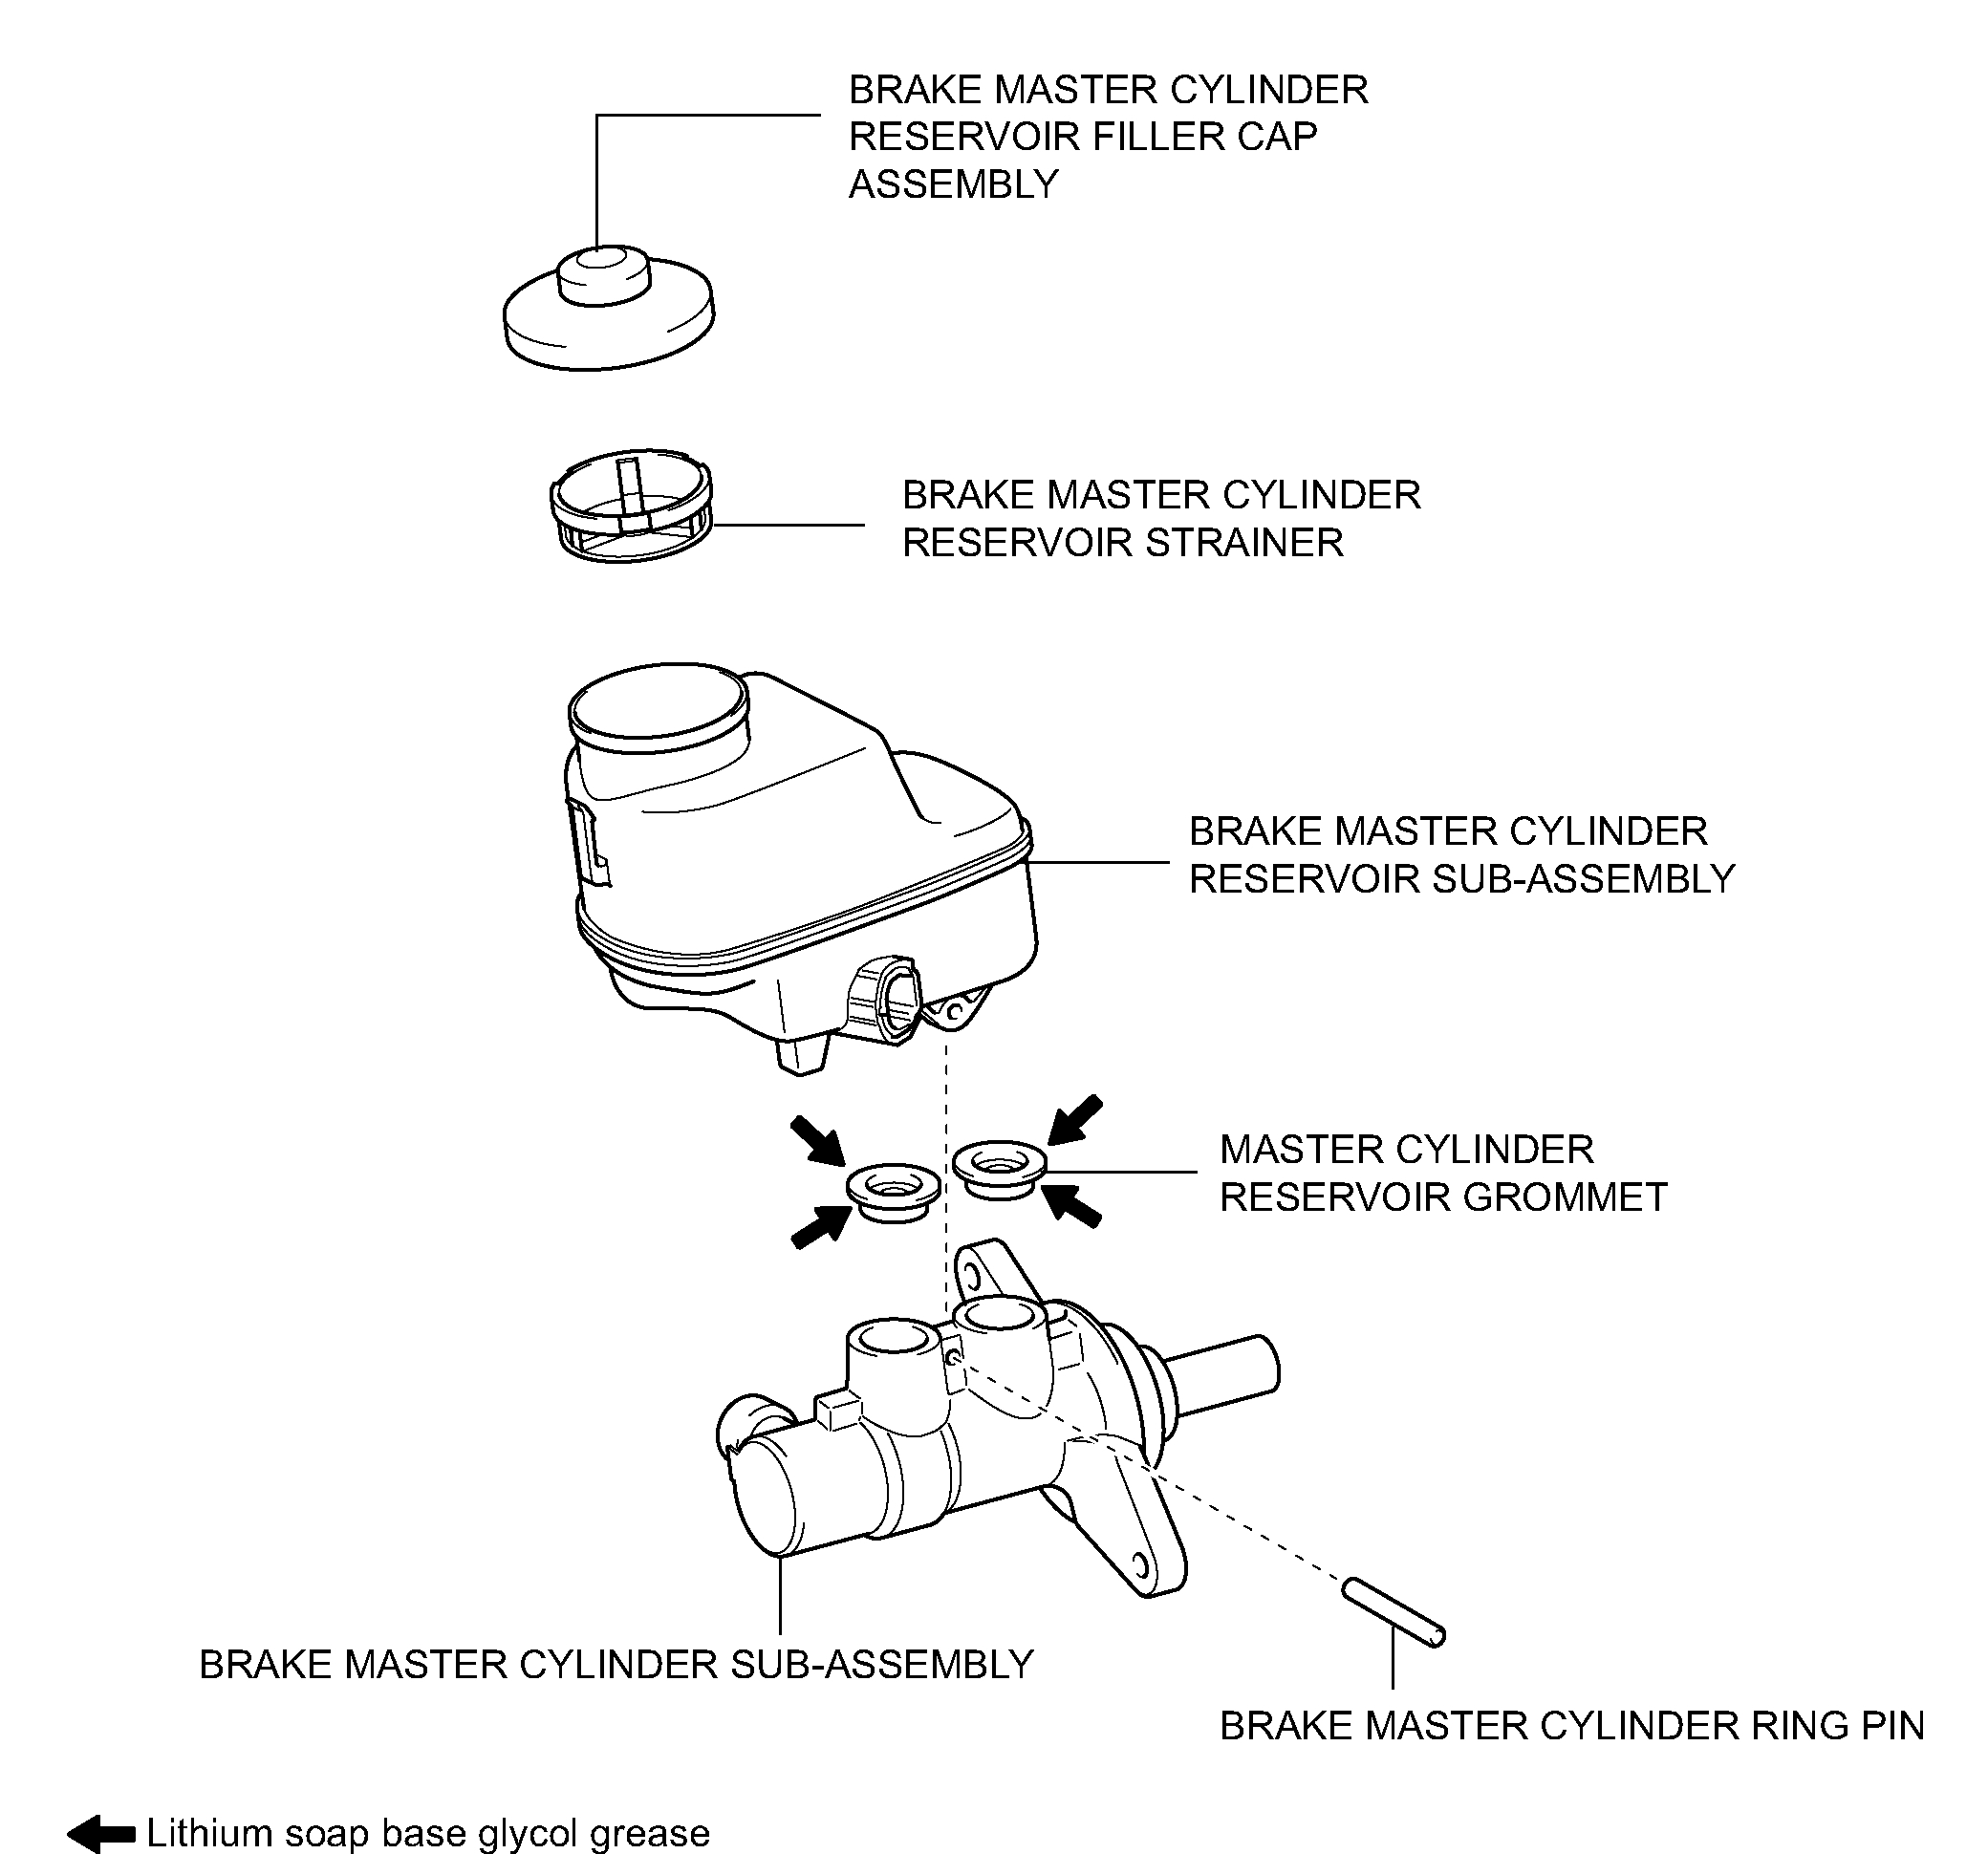
COMPONENTS (Part 2)
pic 2
REMOVAL
NOTICE:
^ The master cylinder and piston are designed so that the piston can easily fall out. Prevent this by making sure that the tip of the master cylinder points downward when handling the master cylinder.
^ Make sure foreign matter does not attach to the master cylinder's piston. If foreign matter attaches, clean it off with a cloth. Then apply lithium soap base glycol grease to the entire outer circumference contact surface area of the piston.
1. REMOVE AIR CLEANER CASE SUB-ASSEMBLY (for 2AZ-FE)
(a) Remove the air cleaner case.
HINT: Refer to the procedures from the removal of the purge VSV up until the removal of the air cleaner case.
2. REMOVE AIR CLEANER CASE
(a) Remove the air cleaner case.
HINT: Refer to the procedures from the removal of the air cleaner cap sub-assembly up until the removal of the air cleaner case.
3. DRAIN BRAKE FLUID
NOTICE: Wash off brake fluid immediately if it comes in contact with any painted surface.
4. REMOVE BRAKE MASTER CYLINDER SUB-ASSEMBLY
(a) Release the vacuum pressure in the brake booster as follows.
(1) Stop the engine.
(2) Depress the brake pedal several times.
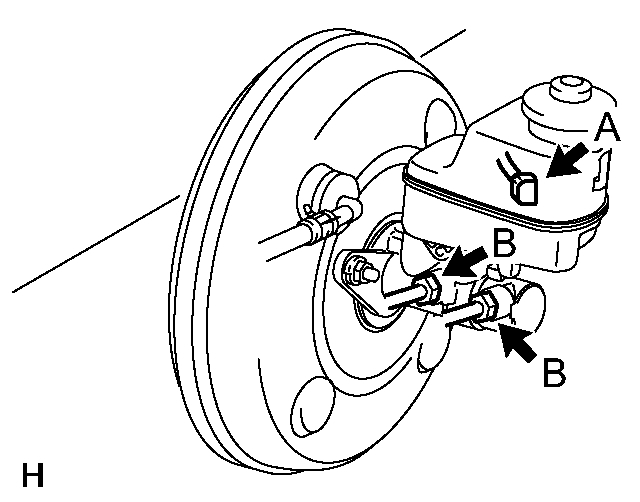
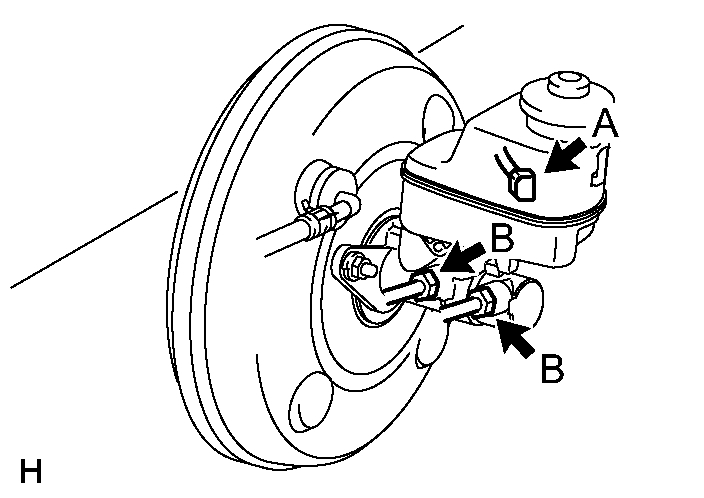
pic 3
(b) Disconnect the brake fluid level warning switch connector labeled A.
(c) Using SST, disconnect the 2 brake lines labeled B from the master cylinder.
SST 09023-00101
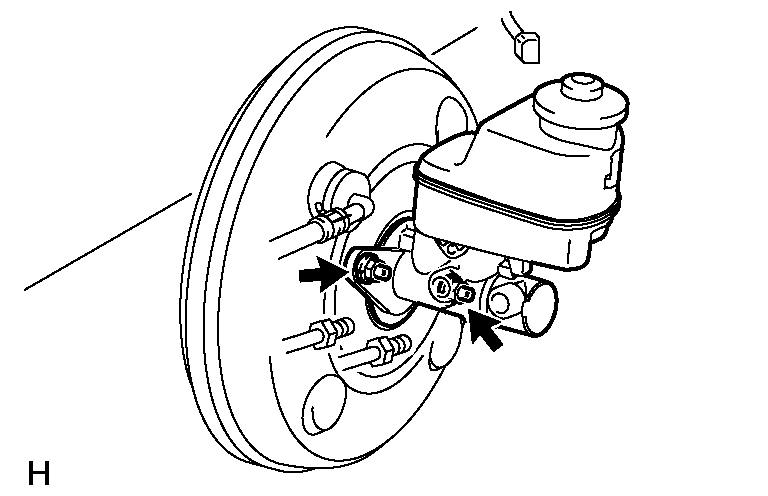
pic 4
(d) Remove the 2 nuts.
(e) Pull out the master cylinder from the brake booster.
NOTICE:
^ The master cylinder and piston are designed so that the piston can easily fall out. Prevent this by making sure that the tip of the master cylinder points downward when handling the master cylinder.
^ Make sure foreign matter does not attach to the master cylinder's piston. If foreign matter attaches, clean it off with a cloth. Then apply lithium soap base glycol grease to the entire outer circumference contact surface area of the piston.
(f) Remove the O-ring from the master cylinder.
INSTALLATION
1. INSTALL BRAKE MASTER CYLINDER SUB-ASSEMBLY
NOTICE:
^ The master cylinder and piston are designed so that the piston can easily fall out. Prevent this by making sure that the tip of the master cylinder points downward when handling the master cylinder.
^ Make sure foreign matter does not attach to the master cylinder's piston. If foreign matter attaches, clean it off with a cloth. Then apply lithium soap base glycol grease to the entire outer circumference contact surface area of the piston.
(a) Install a new O-ring to the master cylinder.
pic 5
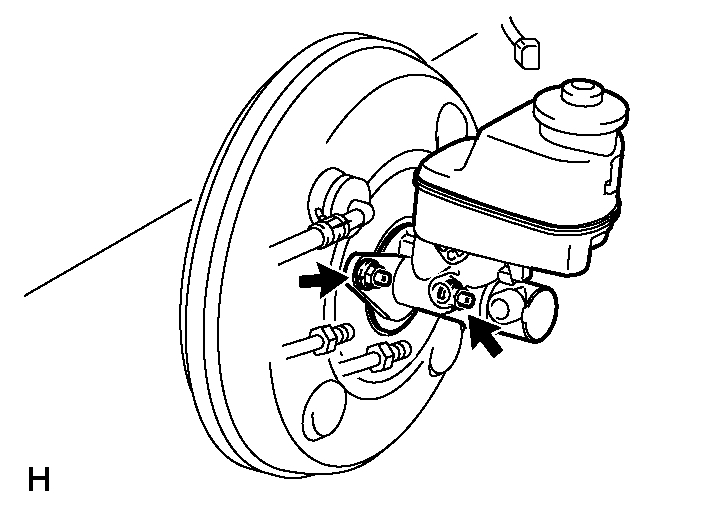
(b) Install the master cylinder to the booster with the 2 nuts.
Torque: 12.5 Nm (127 kgf-cm, 9 ft. lbs.)
pic 6
(c) Using SST, connect the 2 brake lines labeled B to the master cylinder.
SST 09023-00101
Torque:
15.2 Nm (155 kgf-cm, 11 ft. lbs.) without SST
14 Nm (144 kgf-cm, 10 ft. lbs.) with SST
HINT: Use a torque wrench with a fulcrum length of 30 cm (11.81 inch).
(d) Connect the brake fluid level warning switch connector labeled A to the master cylinder.
2. FILL RESERVOIR WITH BRAKE FLUID
3. BLEED AIR FROM BRAKE MASTER CYLINDER
4. BLEED AIR FROM BRAKE LINE
5. BLEED AIR FROM ABS AND TRACTION ACTUATOR ASSEMBLY
6. CHECK BRAKE FLUID LEVEL IN RESERVOIR
7. INSPECT FOR BRAKE FLUID LEAK
8. INSTALL AIR CLEANER CASE SUB-ASSEMBLY
(a) Install the air cleaner case.
HINT: Refer to the procedures from the installation of the air cleaner case up until the installation of the purge VSV.
9. INSTALL AIR CLEANER CASE (for 2GR-FE)
(a) Install the air cleaner case.
HINT: Refer to the procedures from the installation of the air cleaner case up until the installation of the air cleaner cap sub-assembly.
______________________________________
Let me know if this helps or if you have other questions.
Take care,
Joe
Images (Click to enlarge)
Jan 27, 2020 at 6:45 PM