Hi Amy and thanks for using 2CarPros.
It sounds like you have a brake sticking, even though you replaced the caliper.
Now, did you lubricate the slid pins that attach the caliper to the caliper mount so it can move easily? If so, I want you to try something for me. Safely lift the vehicle and have a helper apply the brakes. Confirm that the left wheel locks. Then have the helper release the brakes. Confirm that the wheel is easily turned. If it isn't easy to turn and feels like the brake is still applied, open the bleeder on the caliper and see if that releases the brake. If it releases only when you open the bleeder, my first suspect is that you have a bad rubber brake hose. These hoses can collapse internally. Then, as a result, you can force brake fluid into the caliper to apply the brake, but when you release the brakes, there isn't enough pressure to force the fluid through the brake hose and the brake sticks.
Here is a link that shows how to replace a caliper. Just adding it to confirm it was done correctly.
https://www.2carpros.com/articles/brake-caliper-replacement
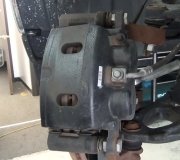
Here are the directions for replacing the front brakes specific to your vehicle. The attached pictures correlate with these directions.
______________________________________
FRONT
Picture 1
BRAKE PAD REPLACEMENT
1. Remove front wheel.
Remove the wheel and temporarily fasten the disc with the hub nuts.
Picture 2
2. Inspect pad lining thickness.
Check the pad thickness through the caliper inspection hole and replace the pads if they are not within the specification.
Minimum thickness: 1.0 mm (0.039 inch)
Picture 3
3. Lift up caliper.
a. Remove the bottom side installation bolt.
b. Lift up the caliper and suspend it securely.
HINT: Do not disconnect the flexible hose from the caliper.
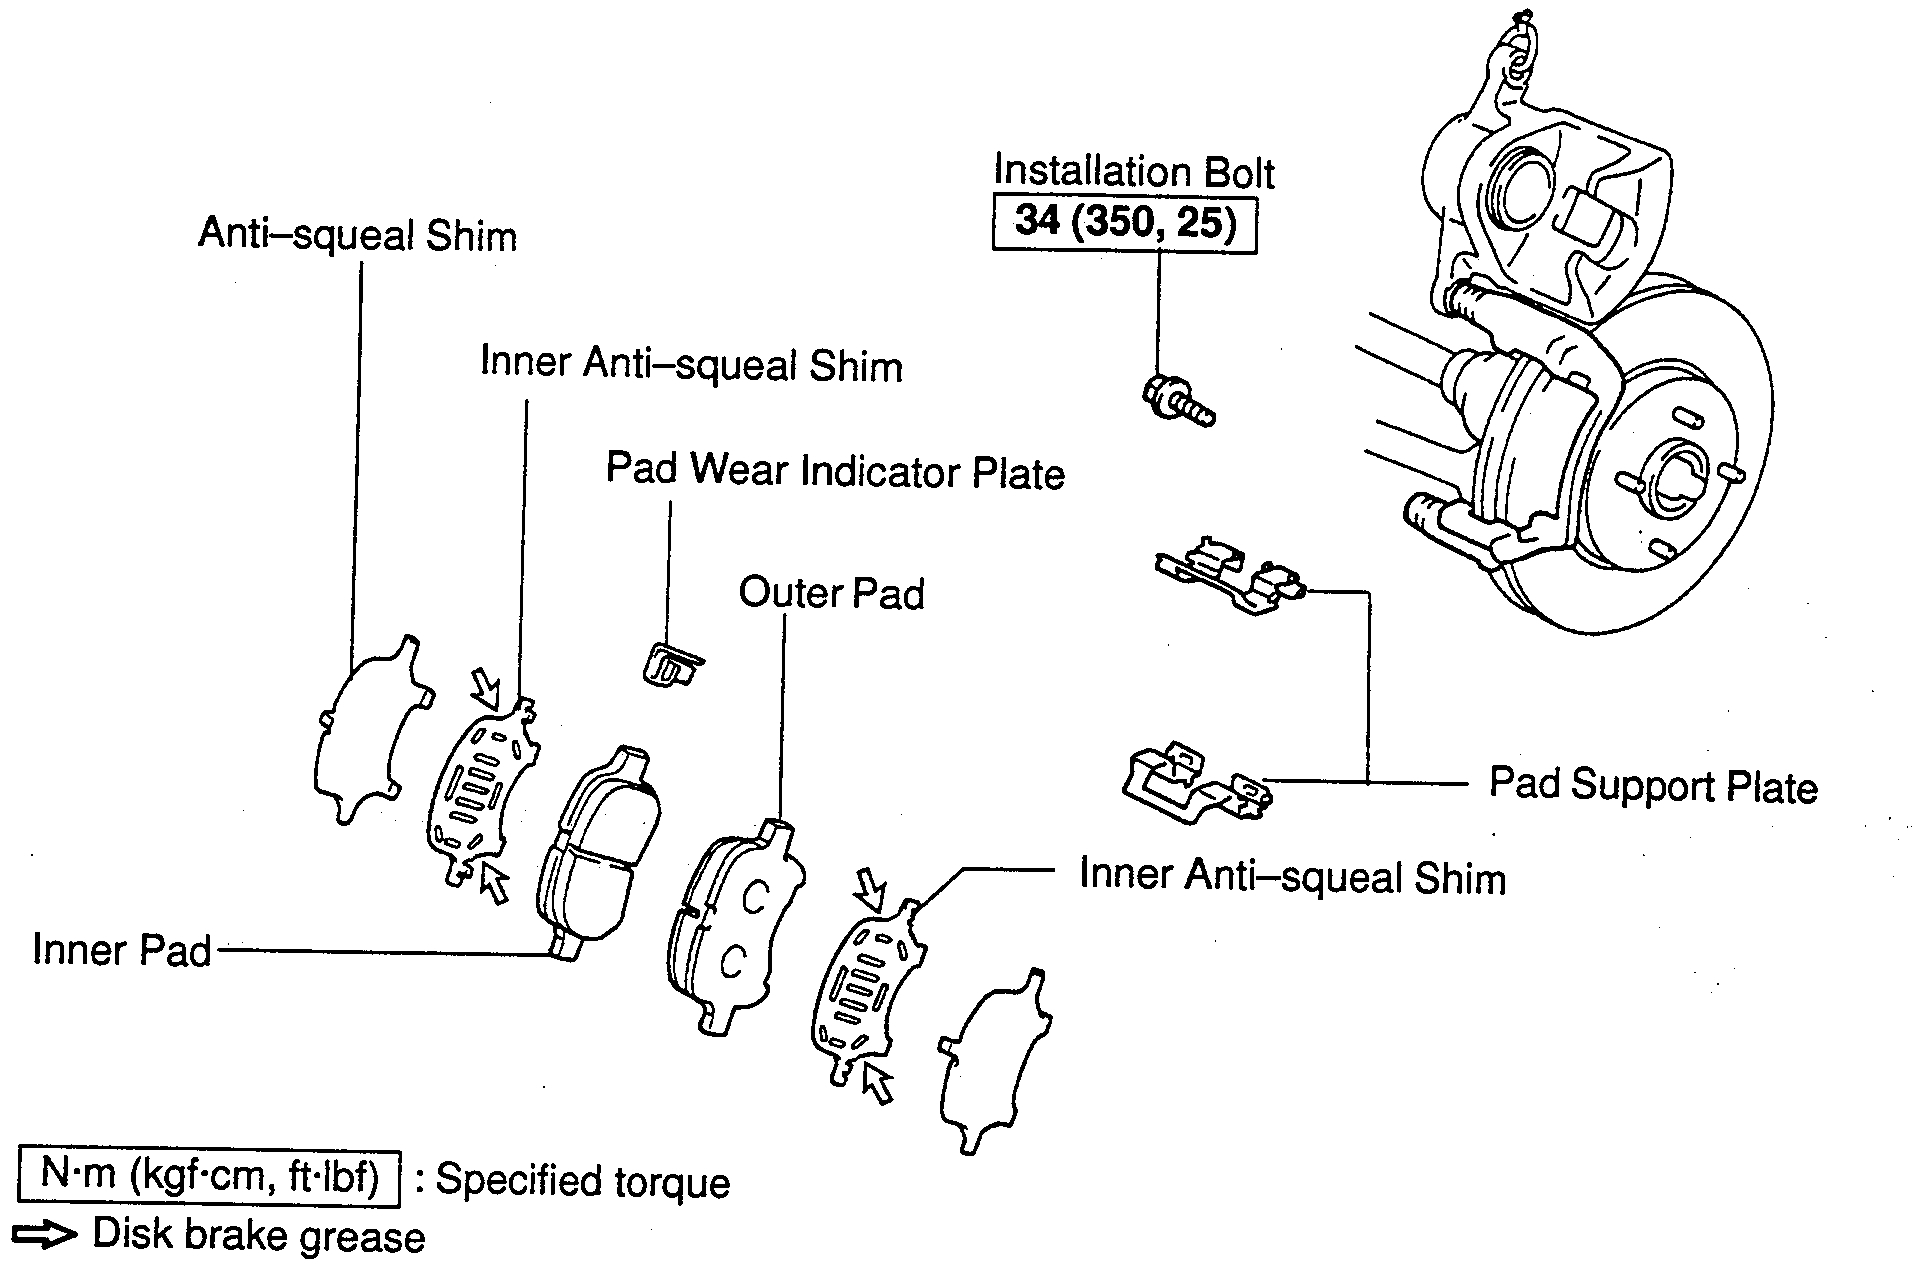
4. Remove these parts:
a. 2 brake pads
b. 4 anti-squeal shims
c. 2 pad support plates
d. Pad wear indicator plate.
NOTICE: The support plates can be used again provided that they have sufficient rebound, no deformation, cracks or wear, and have had all rust, dirt and foreign particles cleaned off.
5. Check disc thickness and runout.
Disc Thickness:
- Standard: 22.0 mm (0.866 inch)
- Minimum: 20.0 mm (0.787 inch)
Disc Runout, Max: 0.05 mm (0.0020 inch)
6. Install pad support plates.
Install the 2 pad support plates.
7. Install new pads.
NOTICE:
- When replacing worn pads, the anti-squeal shims must be replaced together with the pads.
- Do not allow oil or grease to get on the rubbing face of the pad.
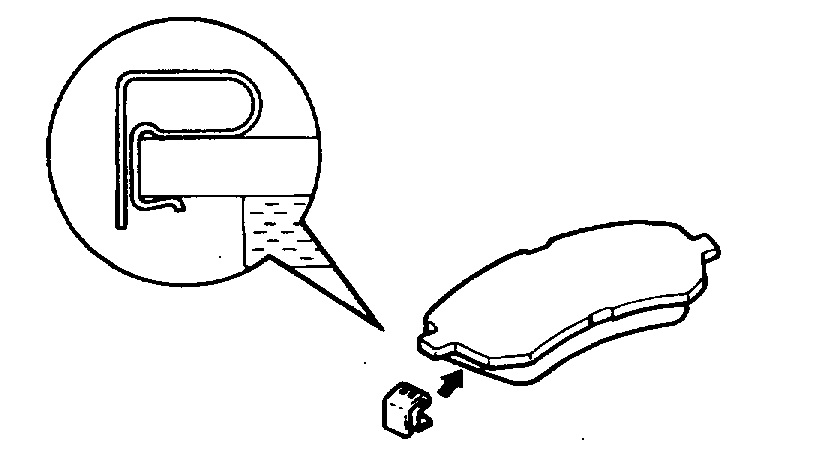
Picture 4
a. Install a pad wear indicator plate on the inner pad.
b. Apply disc brake grease to both sides of the inner anti-squeal shims.
c. Install the anti-squeal shims to each pad.
d. Install inner pad with pad wear indicator plate facing upward.
e. Install outer pad.
Picture 5
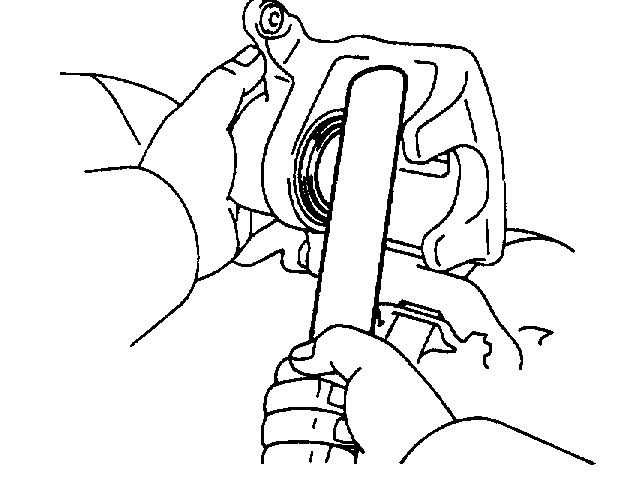
8. Install caliper.
a. Draw out a small amount of brake fluid from the reservoir.
b. Press in the piston with a hammer handle or an equivalent.
HINT: If the piston is difficult to push in, loosen the bleeder plug and push in the piston while letting some brake fluid escape.
c. Install the caliper.
d. Install the installation bolt.
Torque: 34 Nm (25 ft.lb)
9. Install front wheel.
10. Check that fluid level is at Max line.
___________________________________________________-
I added these things in case you wanted to review and confirm your work. However, I have a feeling it is the flex hose that attached to the caliper. Try what I mentioned and let me know you find.
Joe
Images (Click to make bigger)
Monday, March 29th, 2021 AT 11:15 AM