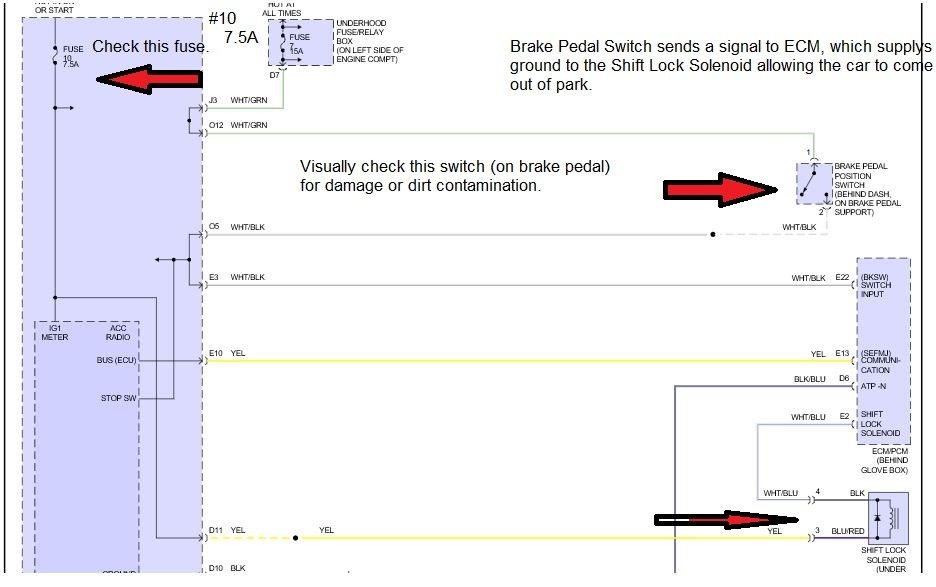
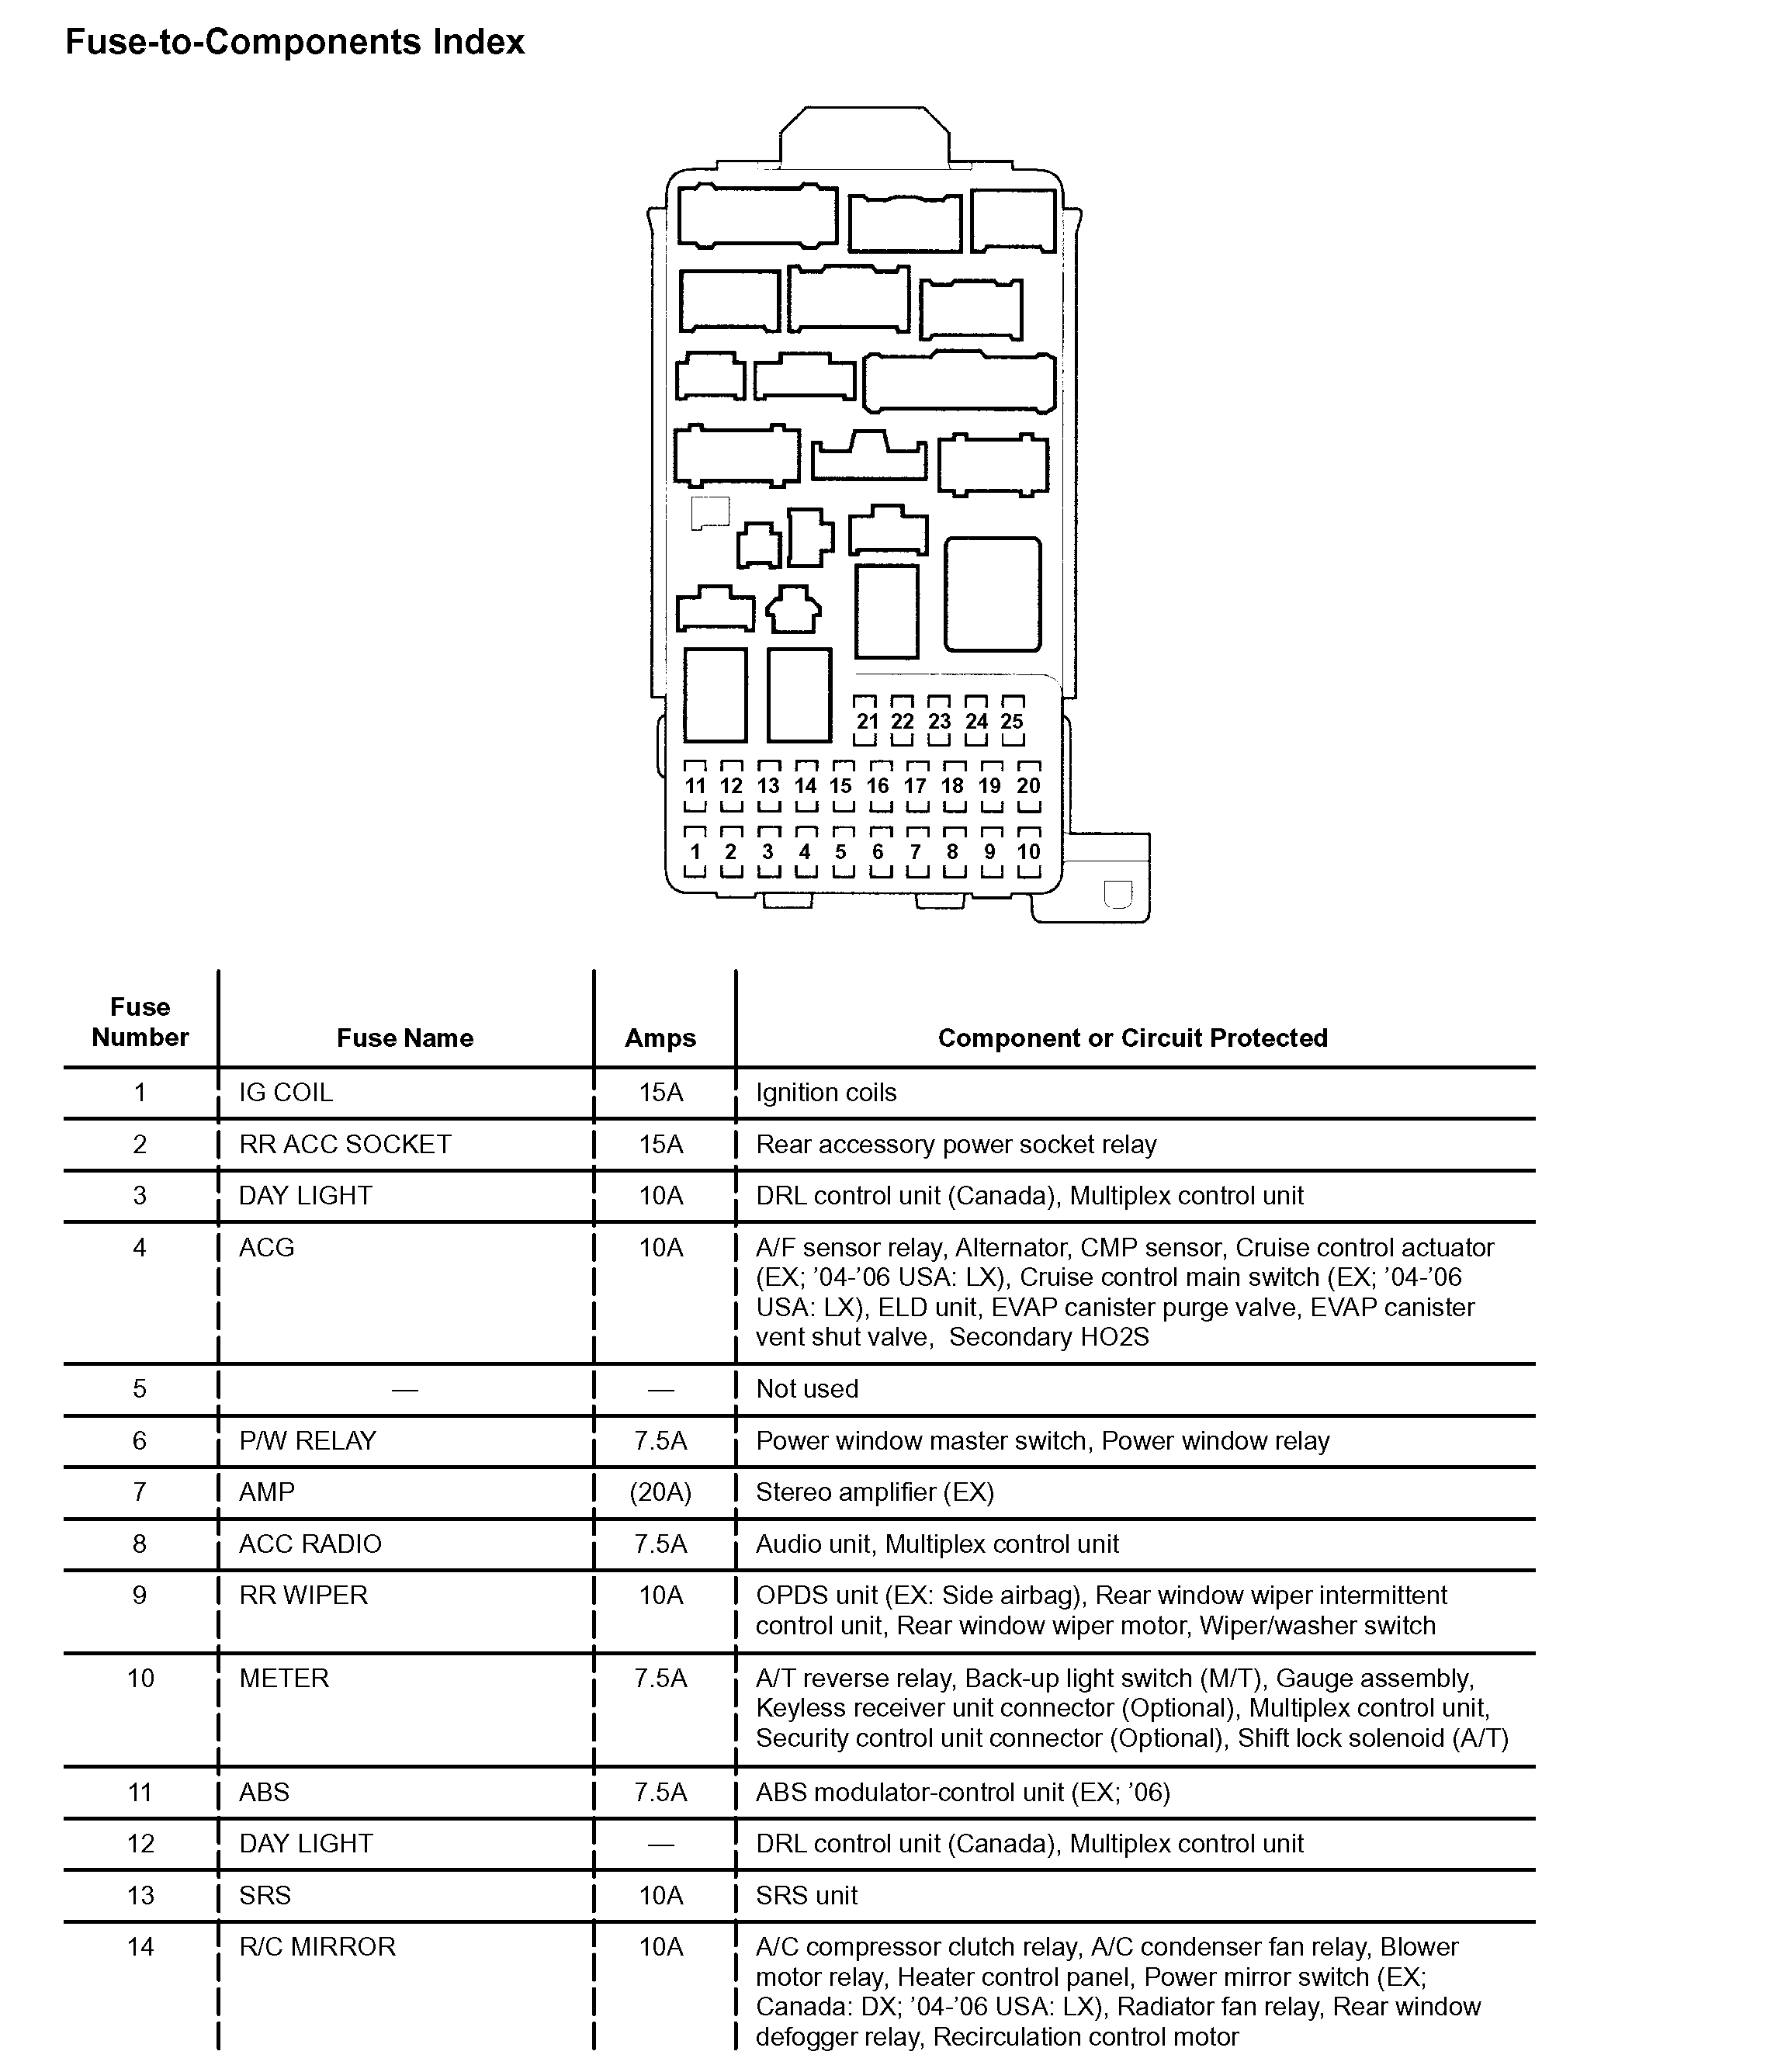
Hi and welcome back. I need you to check fuse 10 in the fuse box (under dash). Power to the brake light switch is always hot via fuse 7. However, power to the solenoid is supplied via fuse 10. The last picture I attached is the under dash fuse box. It indicates what each fuse is used for.
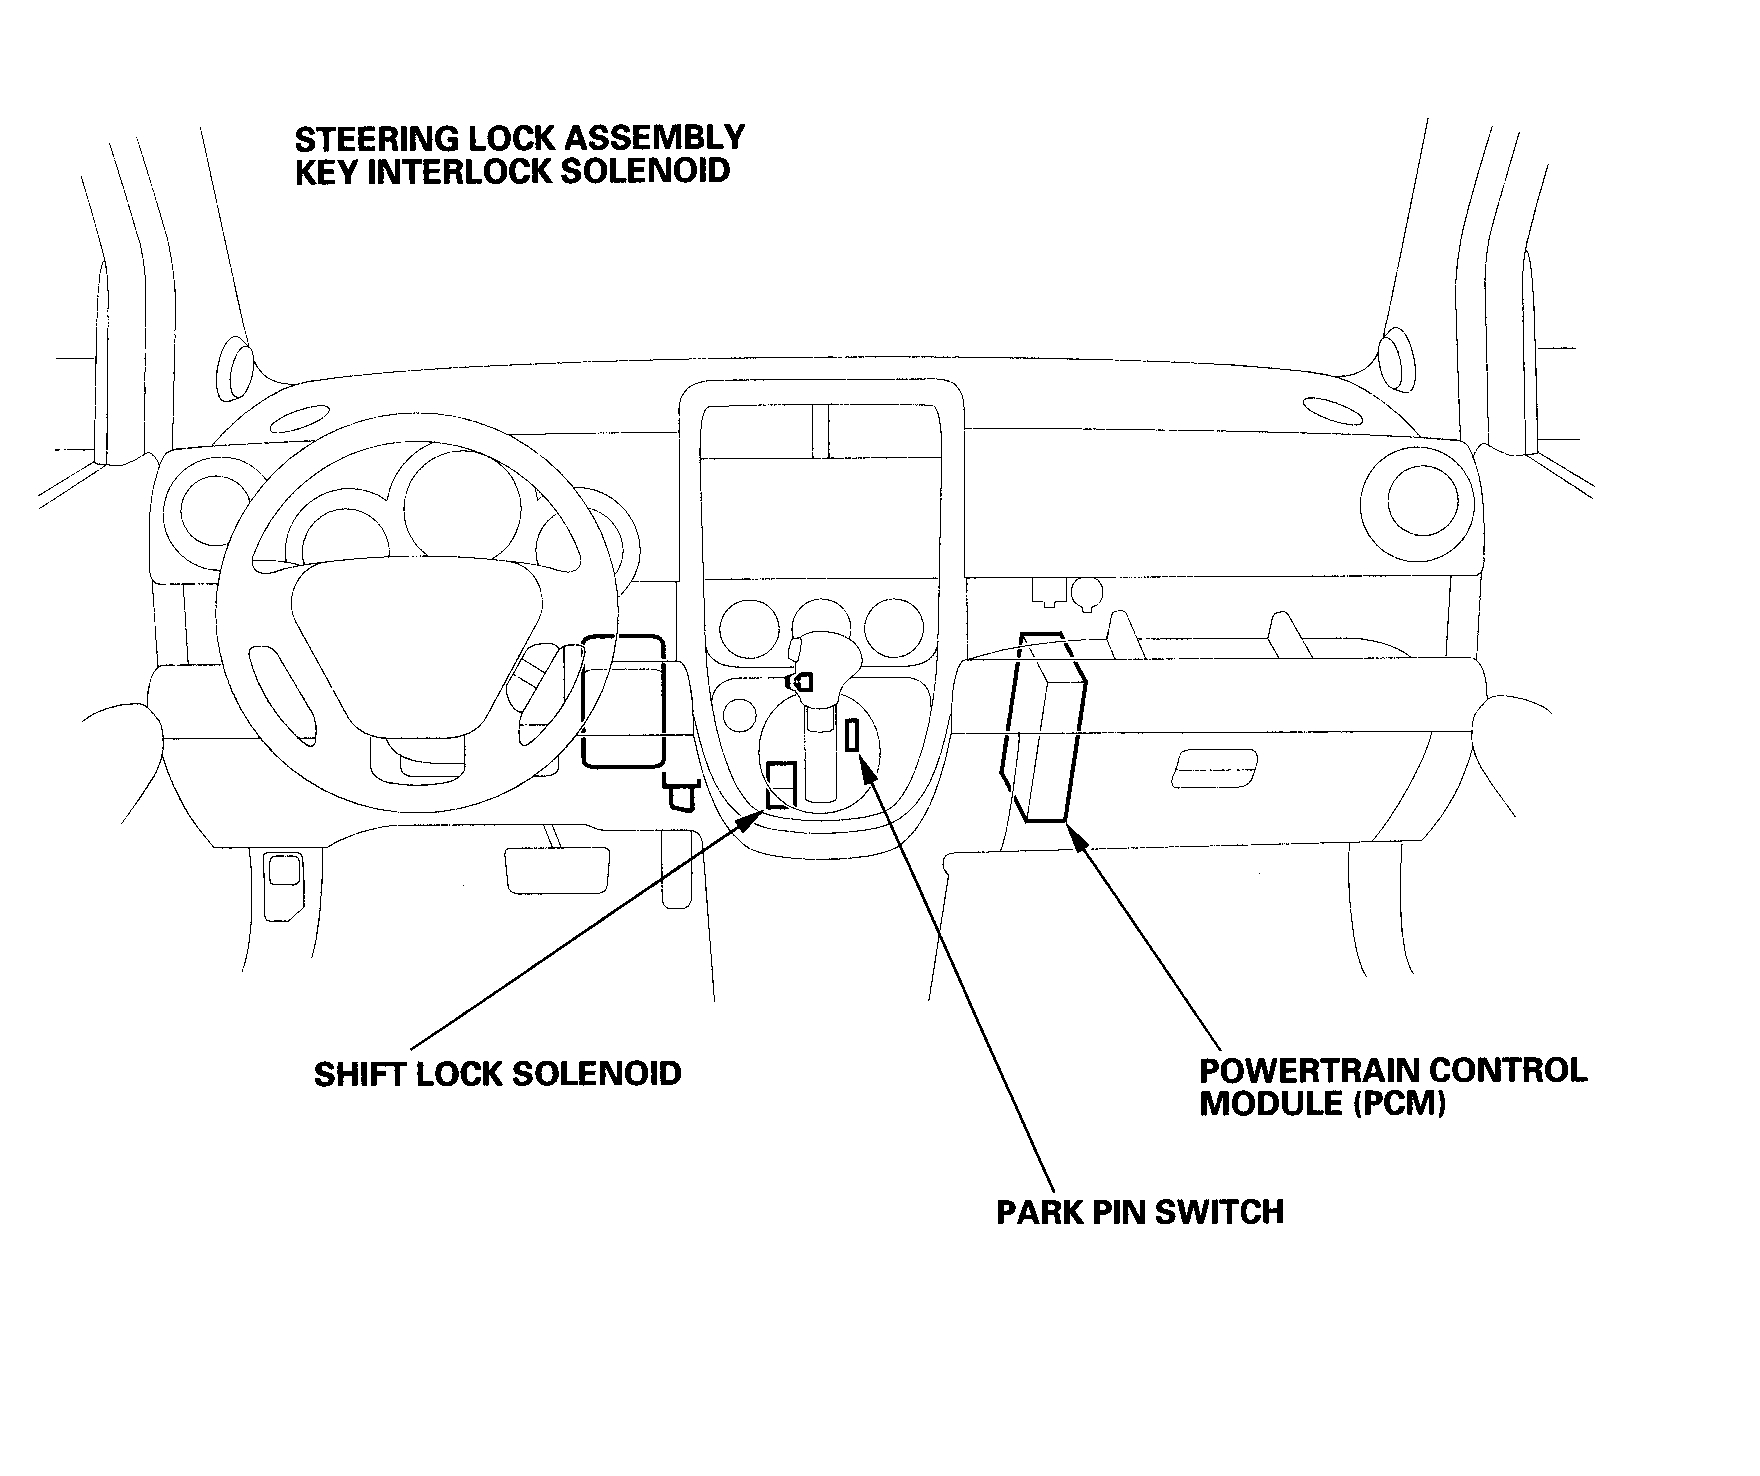
As far as the solenoid, picture 1 shows its location. The remaining pictures correlate with the following (Test and Replacement) directions.
___________________________________________
Shift Lock Solenoid Test/Replacement
1. Remove the center lower cover.
2. Remove the shift lever console trim.
3. Shift the shift lever into the R position.
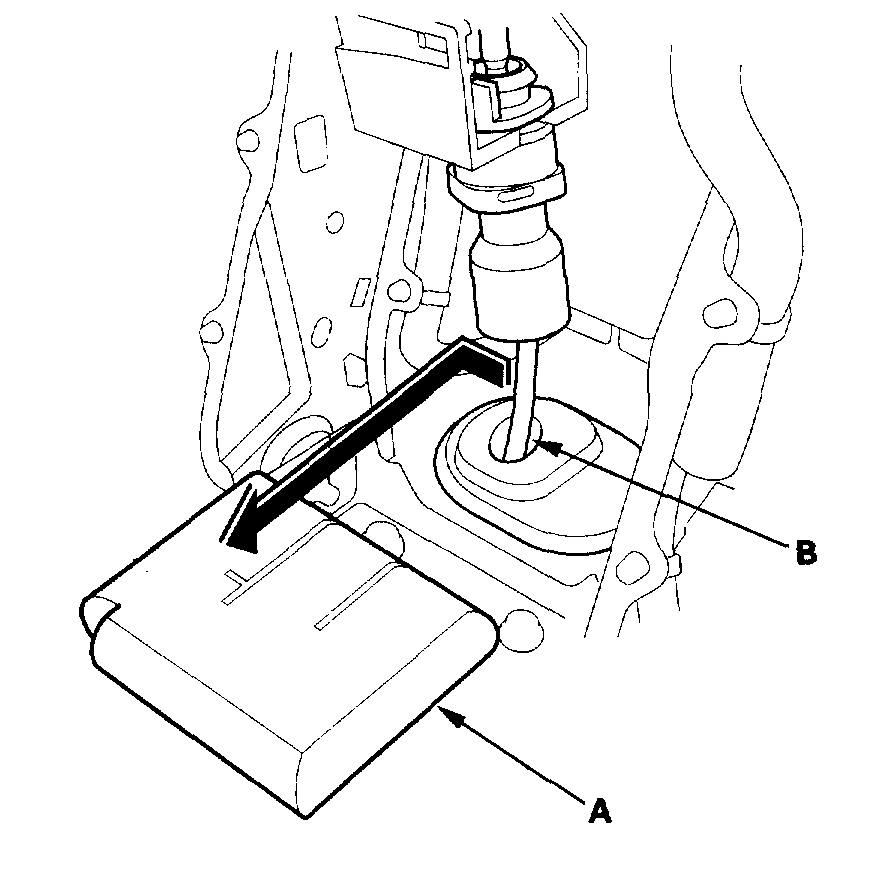
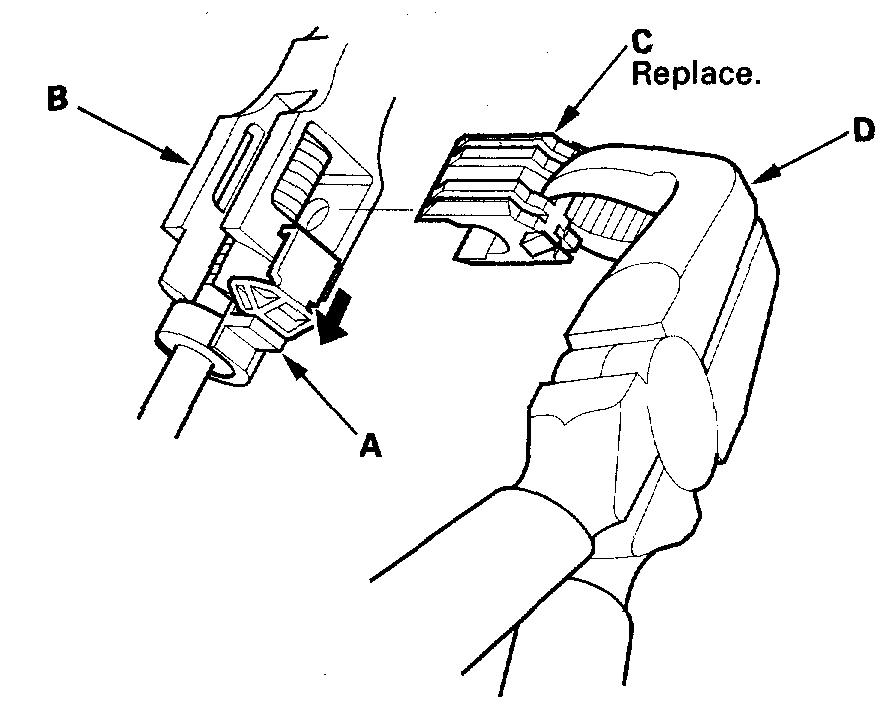
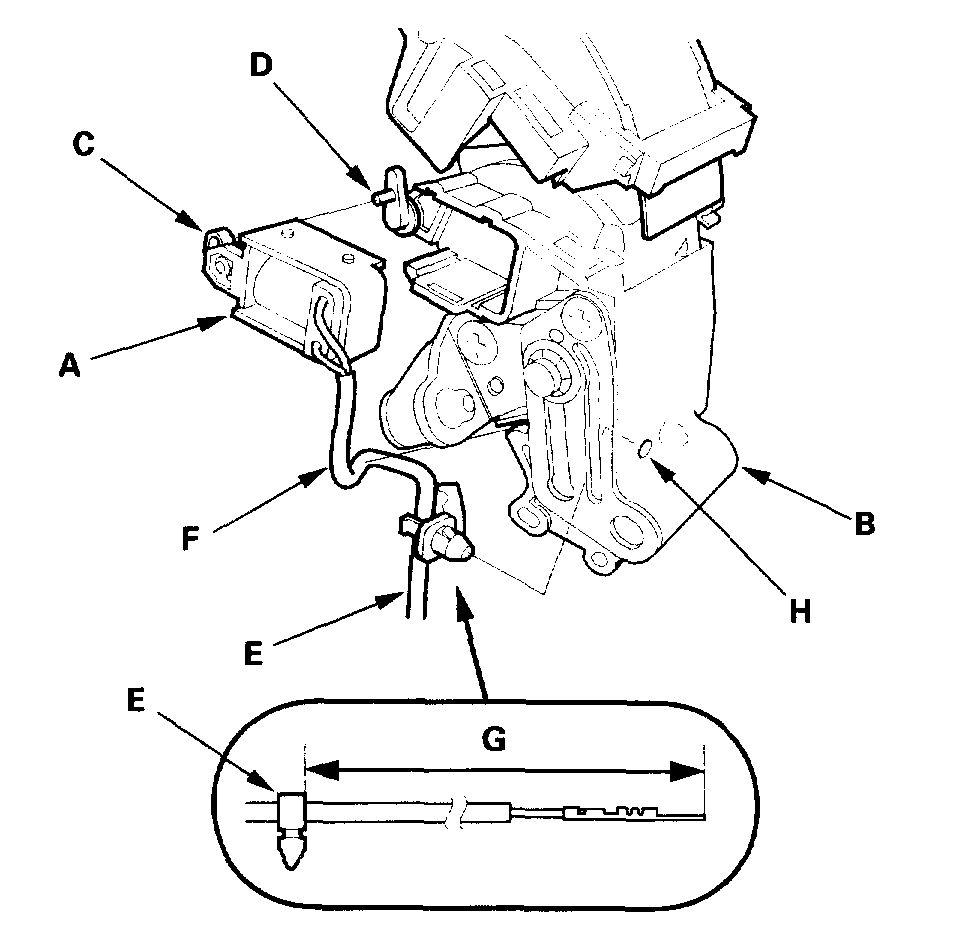
4. Remove the shift cable insulator (A) from the shift cable (B).
5. Slide the lock tab (A) down on the shift cable end holder (B).
6. Grasp the shift cable lock (C) in the middle with angle-jaw needle-nose pliers (D), and remove it from the shift cable end and shift cable end holder. Do not pry the shift cable lock with a screwdriver, it may damage the shift cable end holder.
7. Separate the shift cable end (A) from the shift cable end holder (B).
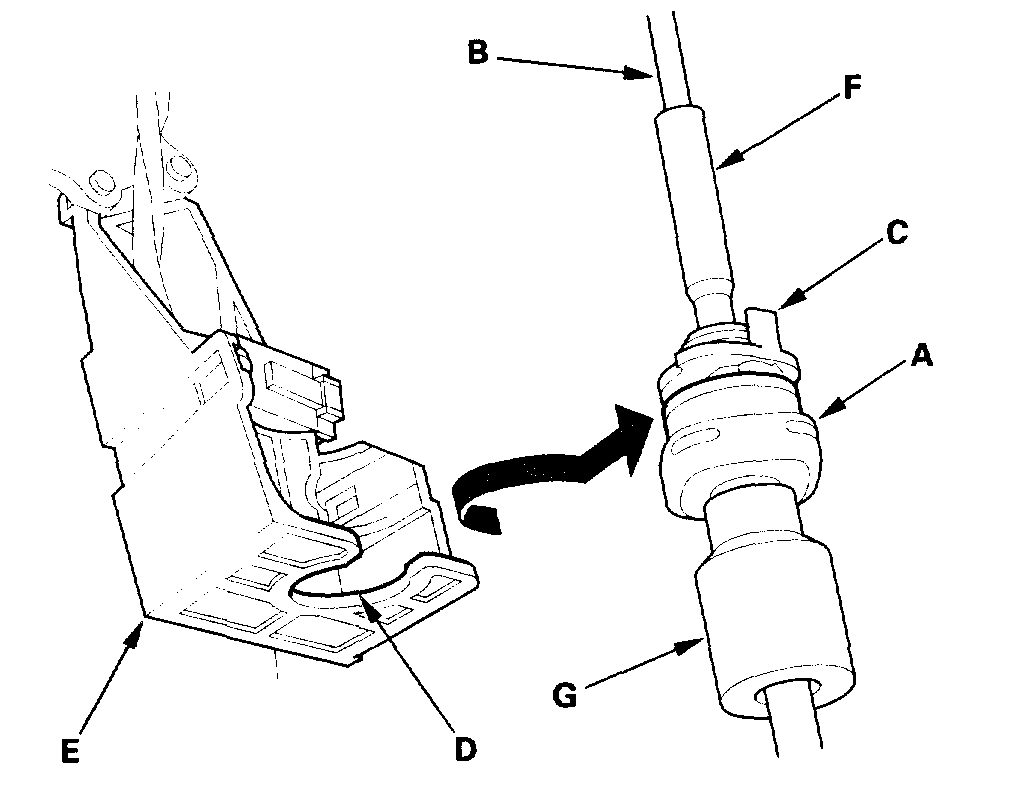
8. Rotate the socket holder (A) on the shift cable (B) a quarter turn; the tab (C) on the socket holder will be in the opening (D) of the shift cable bracket (E). Then slide the holder to remove the shift cable from the shift cable bracket. Do not remove the shift cable by twisting the shift cable guide (F) and damper (G).
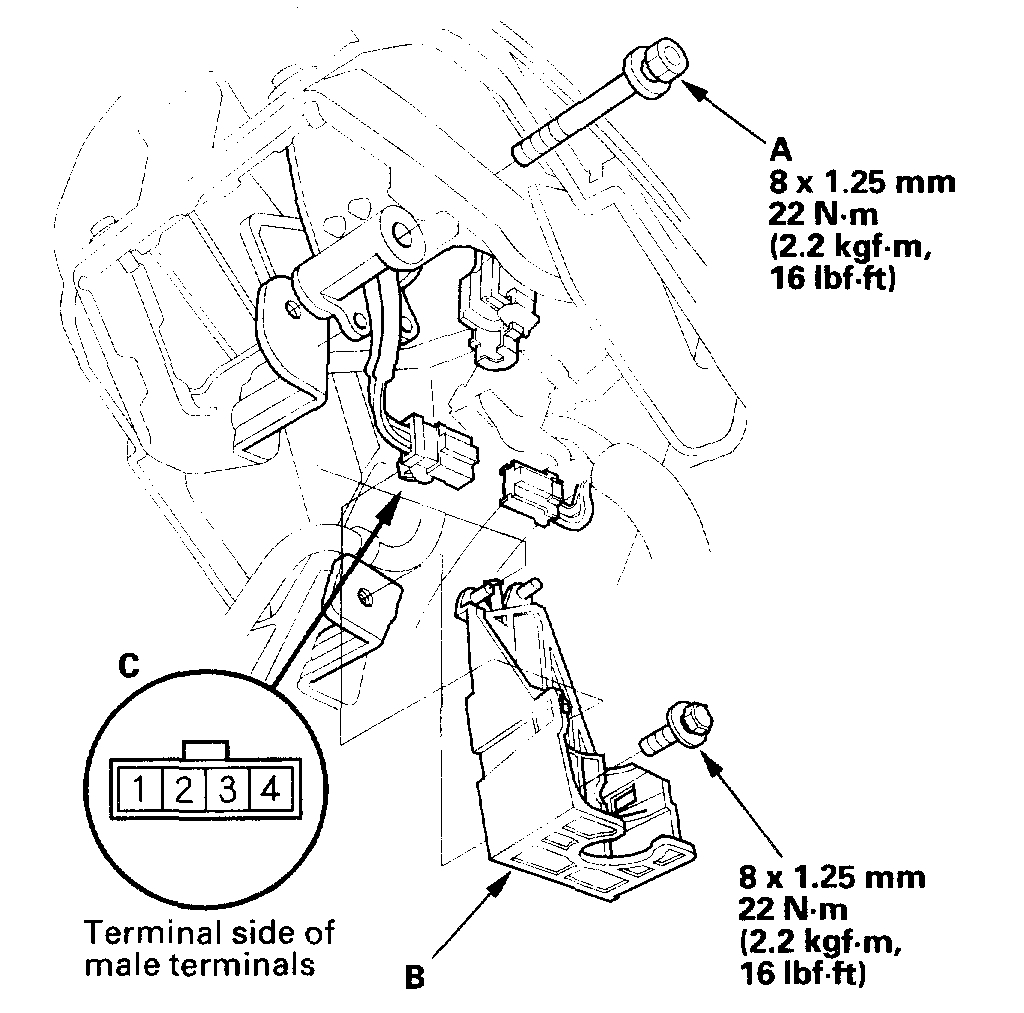
9. Remove the shift lever mounting bolts.
10. Remove the shift lever mounting bolt (A), and remove the shift cable bracket (B).
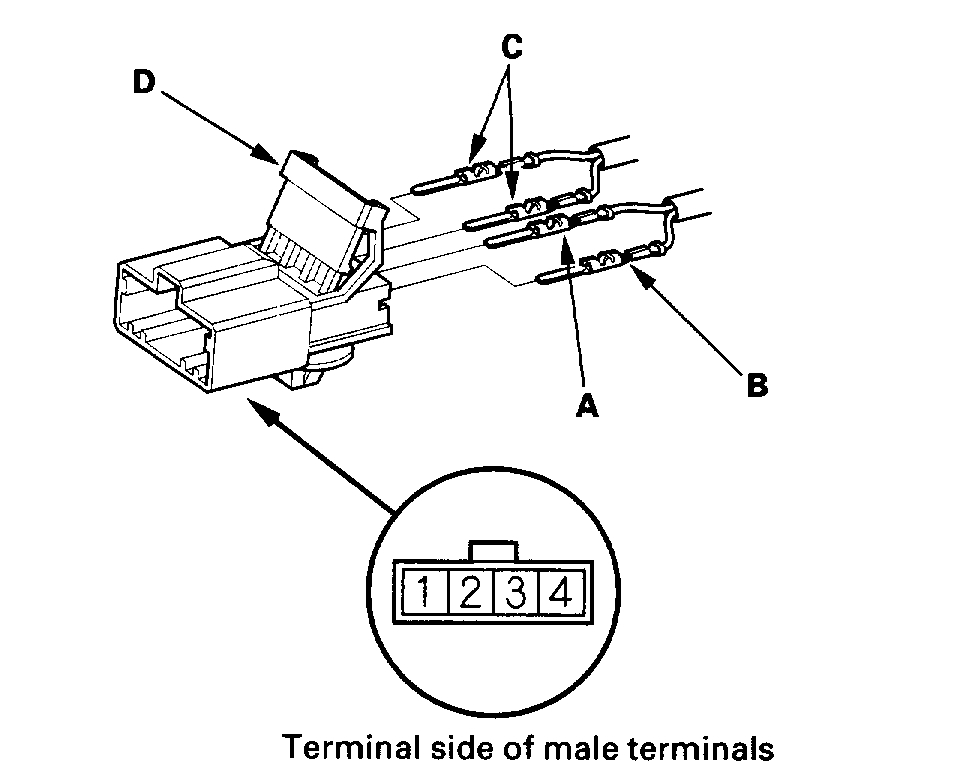
11. Remove the O/D switch/shift lock solenoid connector (C), then disconnect the connector.
12. Connect the battery positive terminal to O/D switch/ shift lock solenoid connector terminal No. 3, and connect the battery negative terminal to connector terminal No. 4. Do not connect the battery positive terminal to the terminal No. 4 or you will damage the diode inside the solenoid.
13. Check that the shift lever can be moved from the P position. Release the battery terminals, move the shift lever back to the P, and make sure it locks.
14. If the shift lock solenoid works properly, connect the connector, and install the removed parts. If the shift lock solenoid is faulty, go to step 15, and replace the shift lock solenoid.
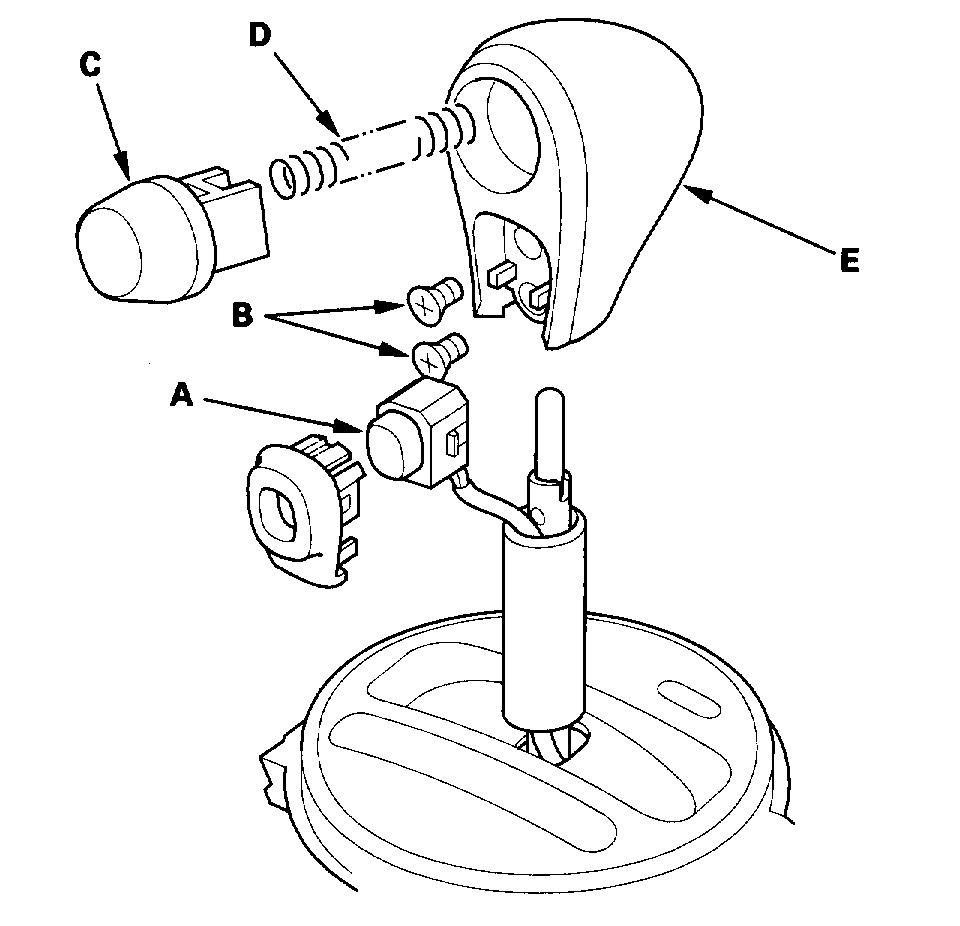
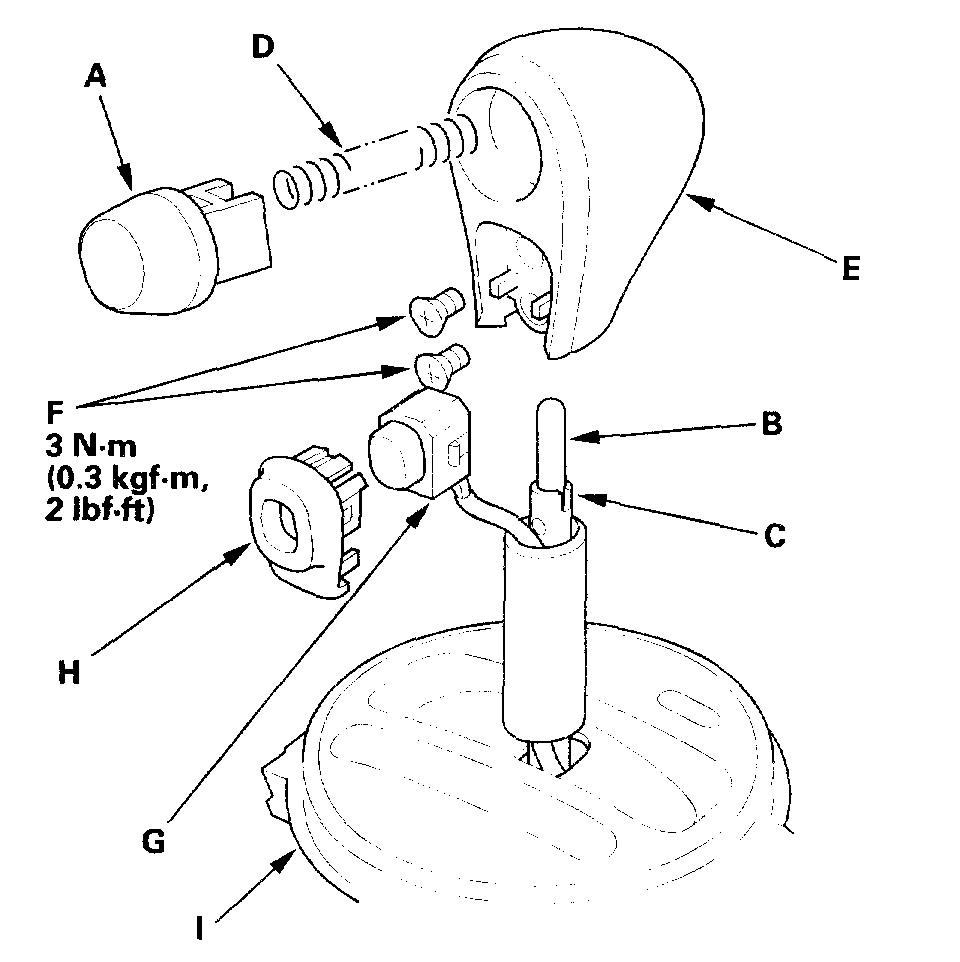
15. Remove the shift lever assembly.
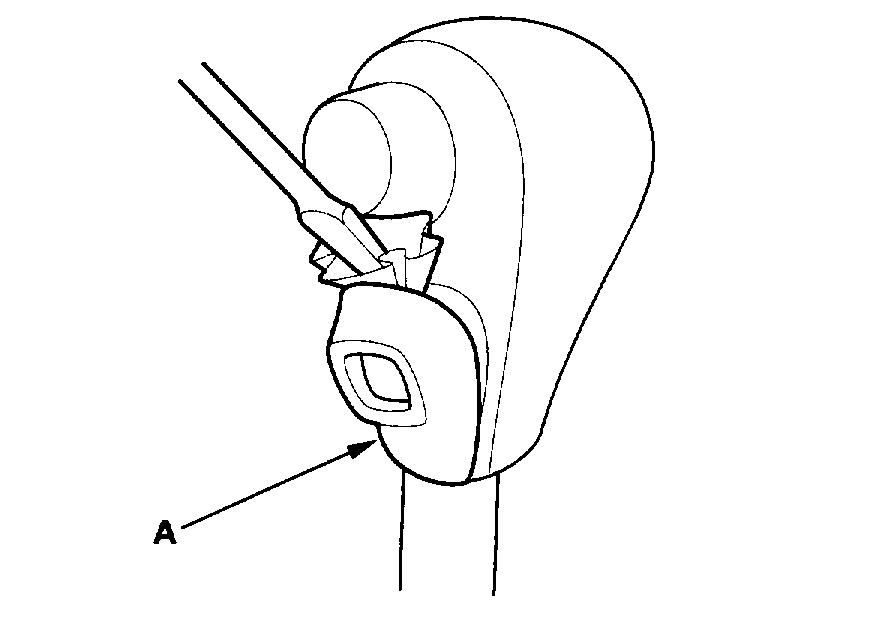
16. Pry the O/D switch cover (A), and remove it.
17. Remove the O/D switch (A) by expanding its locks, and remove the screws (B), shift lever button (C), spring (D), and shift lever knob (E).
18. Remove the A/T gear position indicator panel light socket (A), then separate the A/T gear position indicator panel (B) from the shift lever bracket (C).
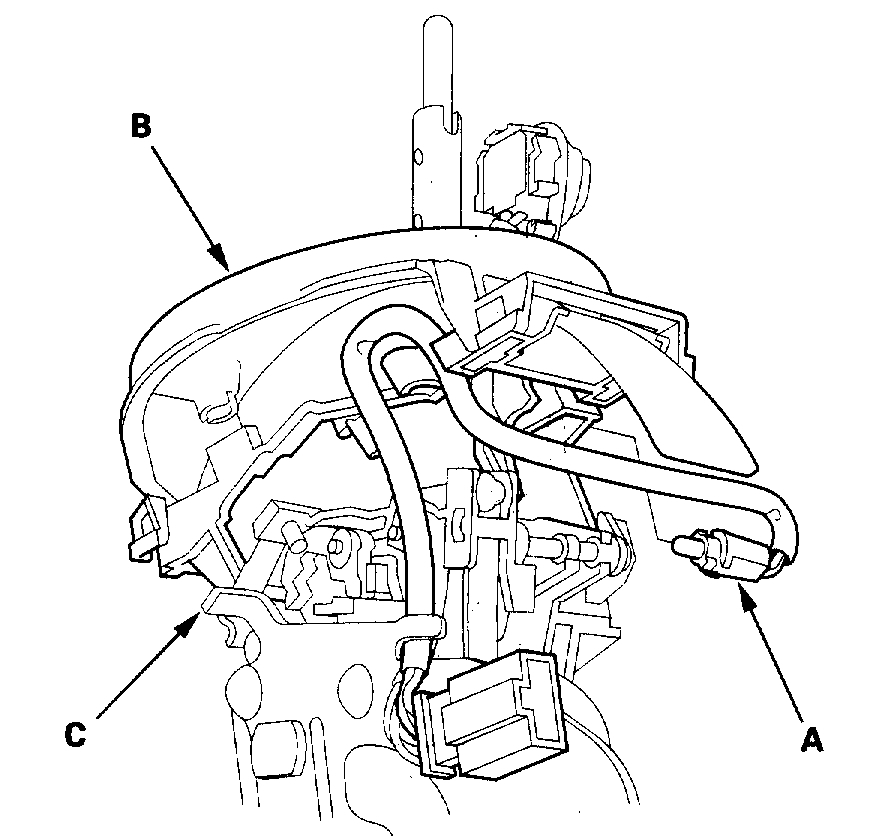
19. Pry the lock tabs on the back of the O/D switch/shift lock solenoid connector (A), and remove the back cover (B).
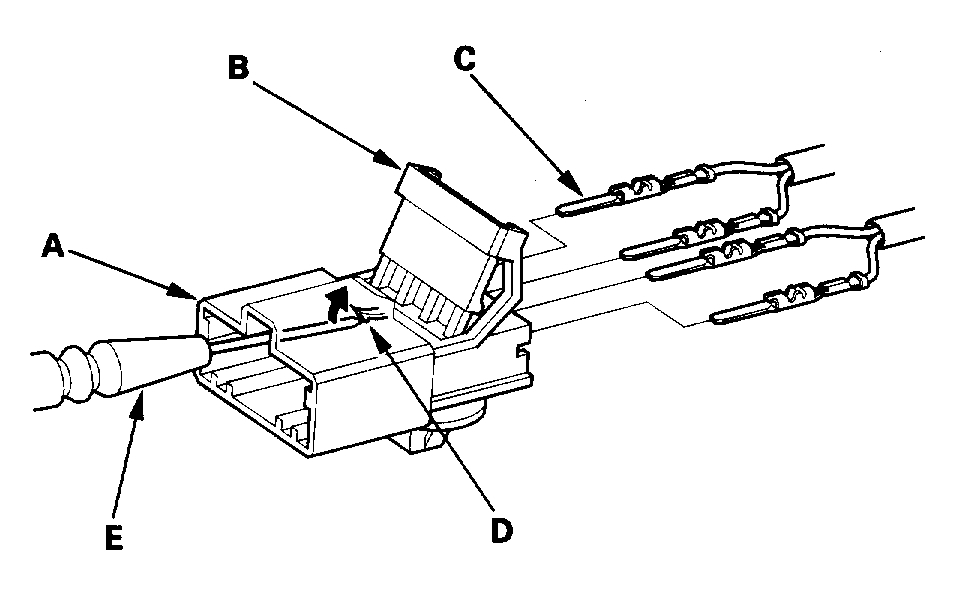
20. Remove the terminal (C) from the connector by pushing the lock tab (D) up in the connector using a thin blade screwdriver (E). Remove all four terminals.
21. Remove the shift lock solenoid harness clamp from the shift lever bracket, and remove the shift lock solenoid.
22. Replace the shift lock solenoid.
23. Install the new shift lock solenoid (A) on the shift lever/bracket assembly (B) with aligning the shift lock solenoid plunger (C) with the tip of the shift lock stop (D).
24. Install the harness clamp (E) on the shift lock solenoid harness (F) at 128 - 138 mm (5.0 - 5.4 inch) (G) from the harness terminal end.
25. Install the clamp in the hole (H) of the shift lever bracket.
26. Apply silicone grease to the shift lever button (A) and push rod (B) of the shift lever (C), and install the spring (D), shift lever button, and shift lever knob (E). Install the screws (F) to secure the shift lever knob to the shift lever.
27. Install the O/D switch (G) and the O/D switch cover (H), and install the A/T gear position indicator panel (I) on the shift lever bracket.
28. Install the A/T gear position indicator panel light socket.
29. Install BLU/RED harness terminal (A) of the shift lock solenoid in the No. 3 cavity, and BLK harness terminal (B) in the No. 4 cavity.
30. Install the O/D switch harness terminals (C) in the No. 1 and No. 2 cavities. Either O/D switch harness terminal can be installed in No. 1 and No. 2 cavities.
31. Make sure that the all four terminals lock securely, then install the back cover (D) securely in place.
32. Install the shift lever assembly.
________________________________________
I hope this is helpful. Let me know if you have other questions.
Take care,
Joe
Images (Click to enlarge)
Sep 14, 2018 at 7:35 PM