Hi and thanks for using 2CarPros.
In a perfect world, that should not happen. However, it can. Regardless, the part should be under warranty. If you purchased a re-manufactured part, there is a higher chance of this happening.
Here is a link that shows how in general to replace one:
https://www.2carpros.com/articles/how-to-replace-a-wheel-cylinder
Here are all the directions for rear brake service and repairs specific to your vehicle. They include the wheel/brake sensor. Check through them to see if there is anything you may have missed. All attached pictures correlate with these directions.
_______________________________________________
Procedures
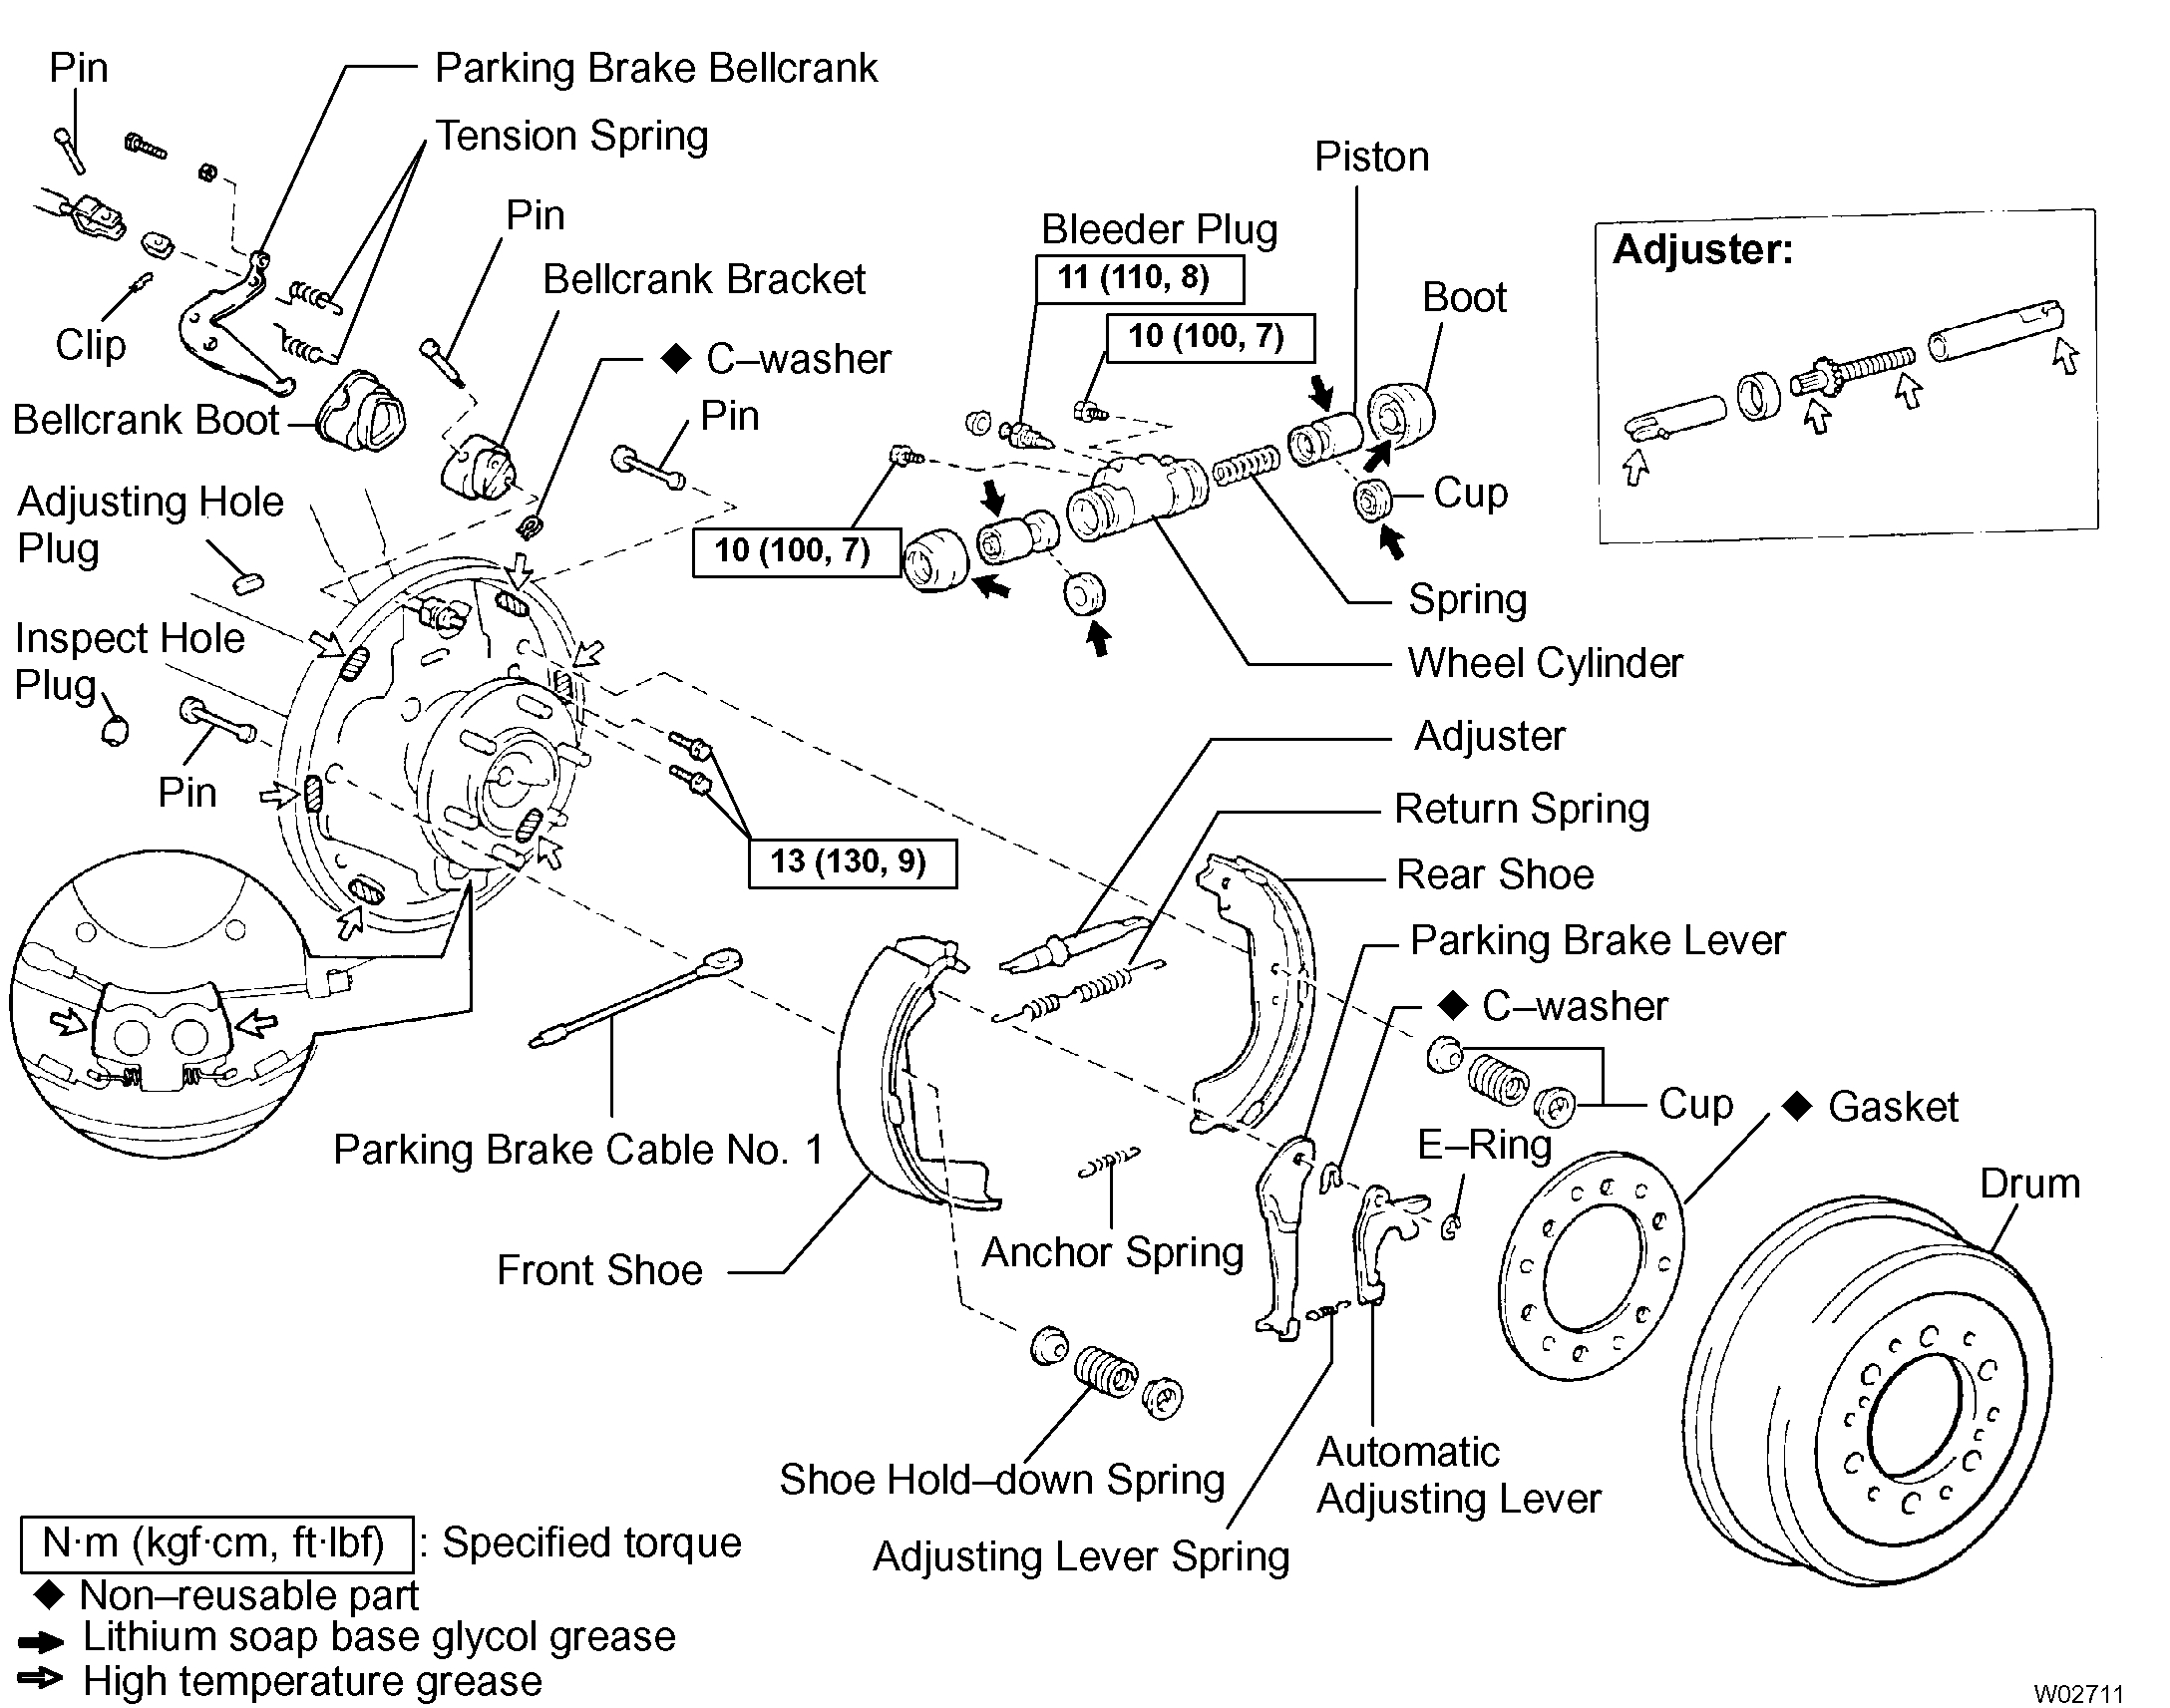
Rear drum brake
Components
REMOVAL
1. INSPECT SHOE LINING THICKNESS
Remove the inspection hole plug, and check the shoe lining thickness through the hole.
If less than the minimum, replace the shoes.
Minimum thickness: 1.0 mm (0.039 inch)
2. REMOVE REAR WHEEL
Torque: 113 Nm (1,150 kgf-cm, 83 ft. lbs.)
3. REMOVE BRAKE DRUM
a. Release the parking brake lever or pedal and remove the brake drum.
HINT: If the brake drum cannot be removed easily, do the following steps.
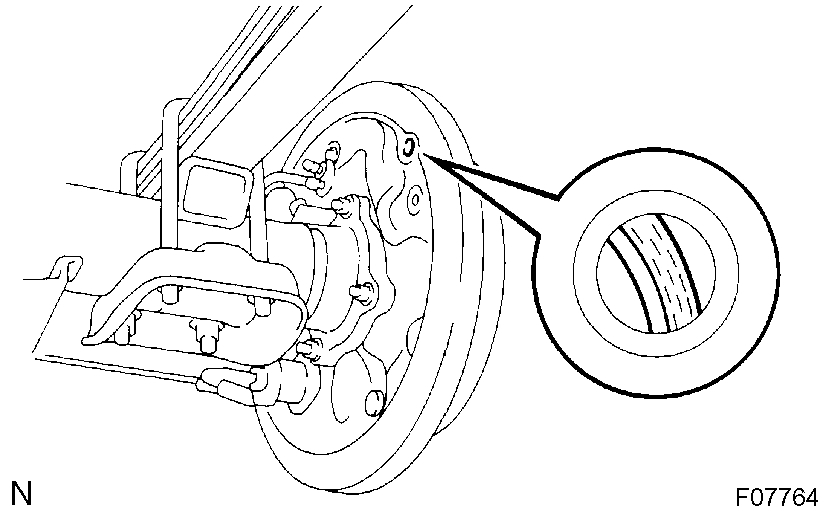
b. Remove the adjusting hole plug from the backing plate.
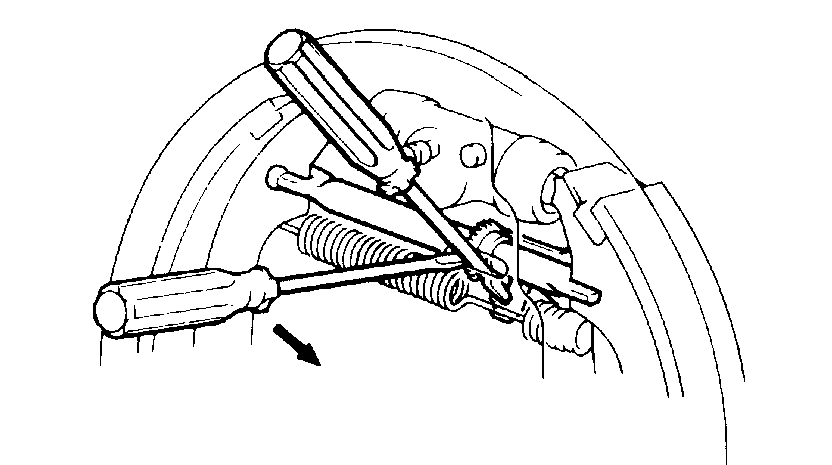
c. Insert a screwdriver through the hole in the backing plate, and hold the automatic adjusting lever away from the adjusting bolt.
d. Using another screwdriver, reduce the brake shoe adjustment by turning the adjusting bolt.
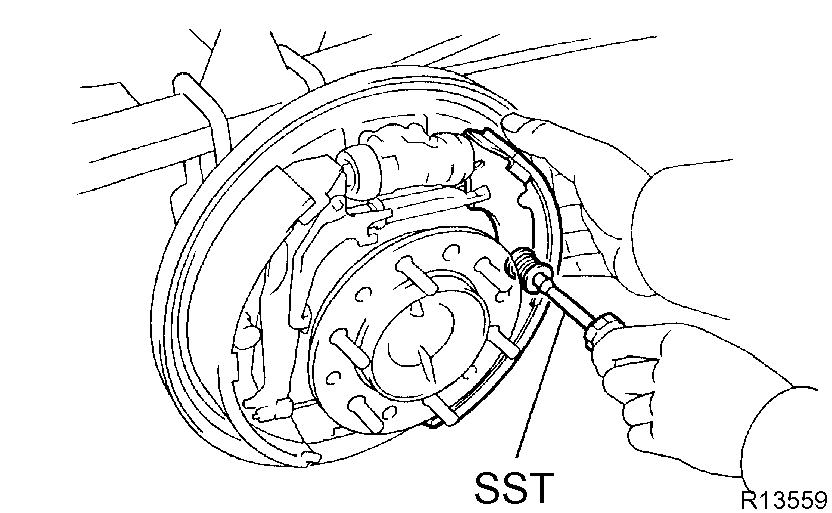
4. REMOVE REAR SHOE
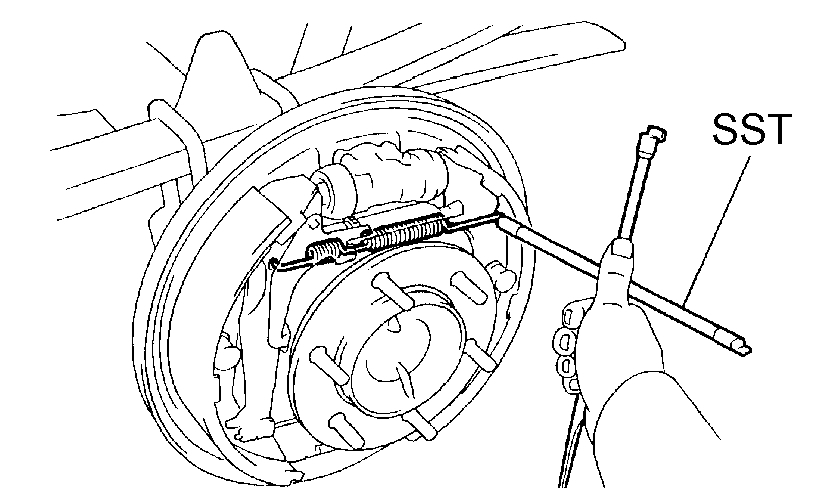
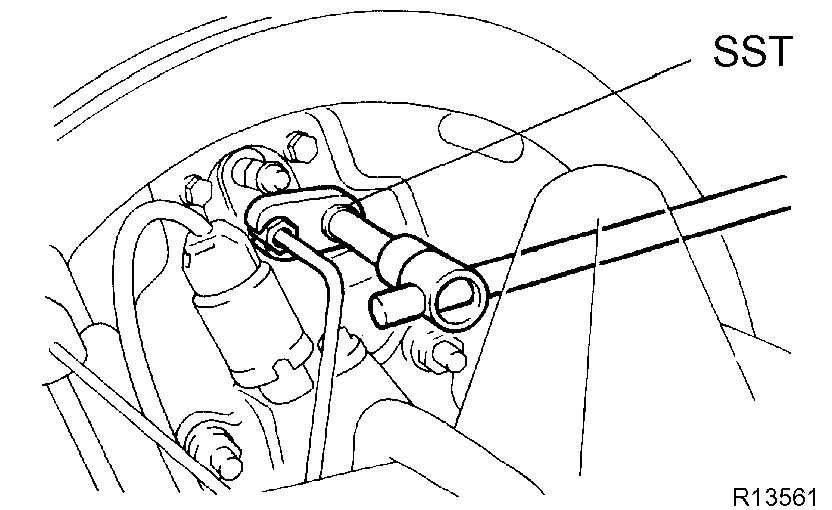
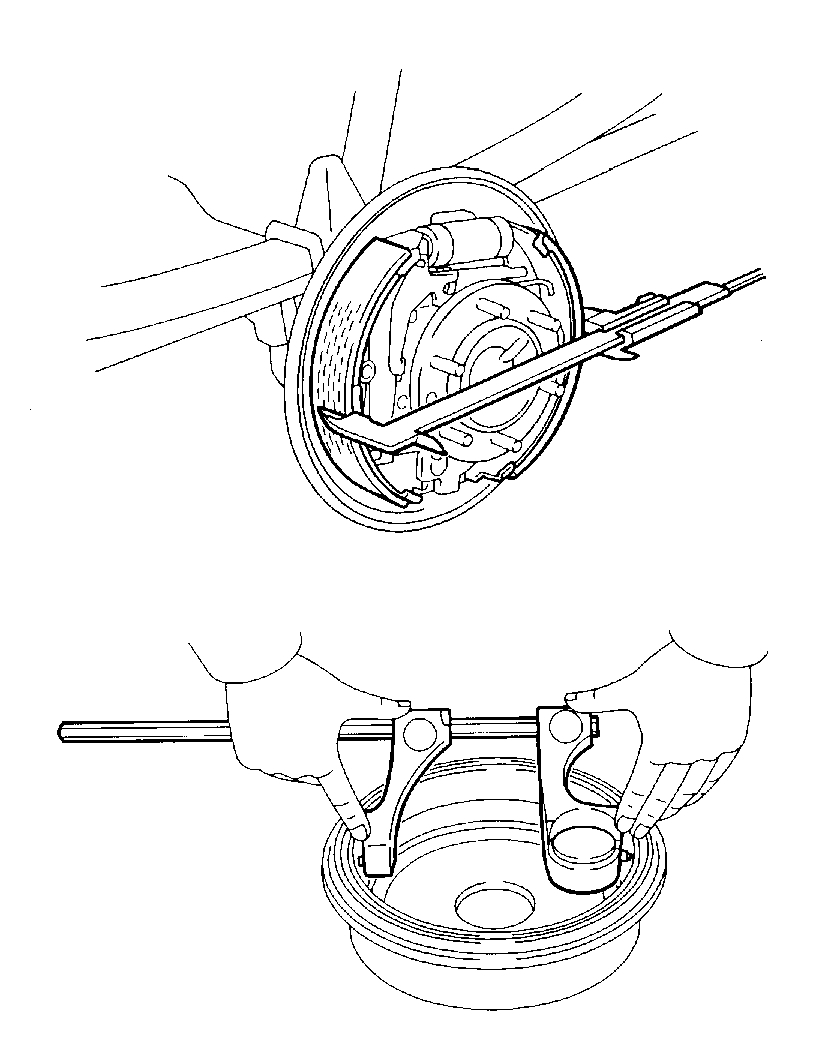
a. Using SST, disconnect the return spring from the rear shoe.
SST 09703-30010
b. Remove the return spring from the front shoe.
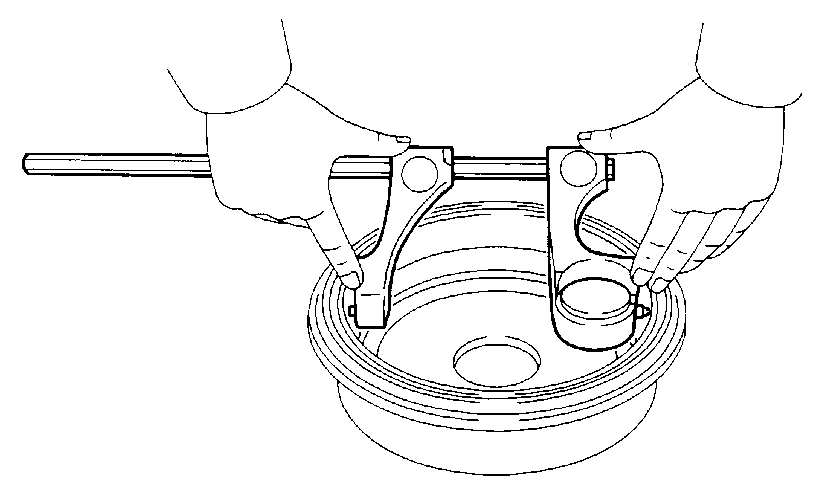
c. Using SST, remove the shoe hold-down spring, 2 cups and pin.
SST 09718-00010
d. Disconnect the anchor spring from the rear shoe and remove the rear shoe.
e. Remove the anchor spring from the front shoe.
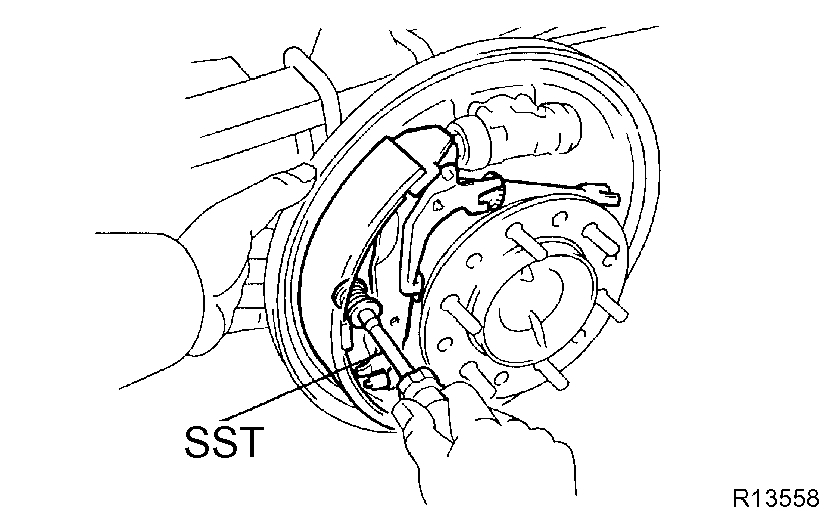
5. REMOVE FRONT SHOE
a. Using SST, remove the shoe hold-down spring, 2 cups and pin.
SST 09718-00010
b. Disconnect the parking brake cable No.1 from the parking brake bellcrank.
c. Remove the front shoe with adjuster.
d. Disconnect the parking brake cable No.1 from the front shoe.
6. REMOVE ADJUSTER FROM FRONT SHOE
a. Remove the adjusting lever spring.
b. Remove the adjuster.
7. REMOVE AUTOMATIC ADJUSTING LEVER AND PARKING BRAKE LEVER
a. Remove the E-ring.
b. Remove the automatic adjusting lever.
c. Remove the C-washer.
d. Remove the parking brake lever.
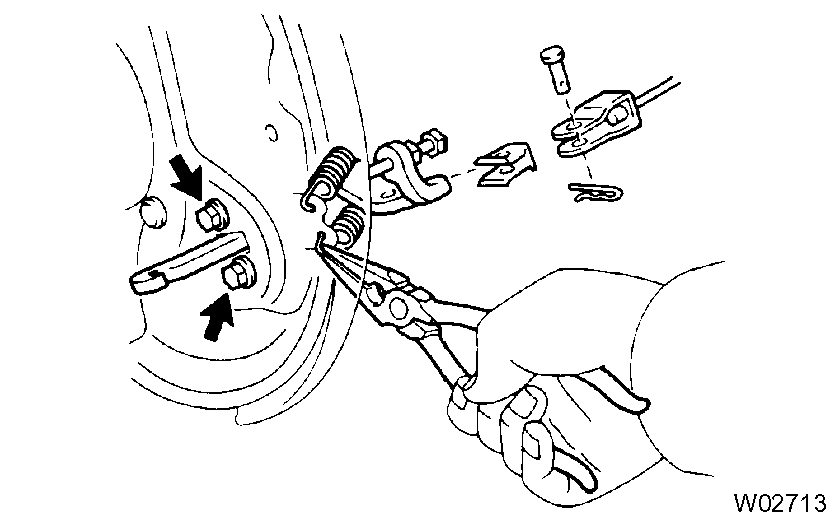
8. REMOVE AND DISASSEMBLE PARKING BRAKE BELLCRANK
a. Remove the clip and pin and disconnect the parking brake cable.
b. Remove the 2 tension springs.
c. Remove the 2 bolts and bellcrank.
Torque: 13 Nm (130 kgf-cm, 9 ft. lbs.)
d. Turn over the bellcrank boot and remove the C-washer and pin.
e. Remove the bellcrank bracket and bellcrank boot from the parking brake bellcrank.
9. REMOVE WHEEL CYLINDER
a. Using SST, disconnect the brake line. Use a container to catch brake fluid.
SST 09023-00101
Torque: 15 Nm (155 kgf-cm, 11 ft. lbs.)
b. Remove the 2 bolts and the wheel cylinder.
Torque: 10 Nm (100 kgf-cm, 7 ft. lbs.)
10. DISASSEMBLE WHEEL CYLINDER
a. Remove the 2 boots, 2 pistons and spring.
b. Remove the 2 piston cups from each piston.
INSPECTION
1. INSPECT DISASSEMBLED PARTS
Inspect the disassembled parts for wear, rust or damage.
2. MEASURE BRAKE DRUM INSIDE DIAMETER
Using a brake drum gauge or equivalent, measure the inside diameter of the drum.
Standard inside diameter: 295.0 mm (11.614 inch)
Maximum inside diameter: 297.0 mm (11.693 inch)
If the drum is scored or worn, the brake drum may be lathed to the maximum inside diameter.
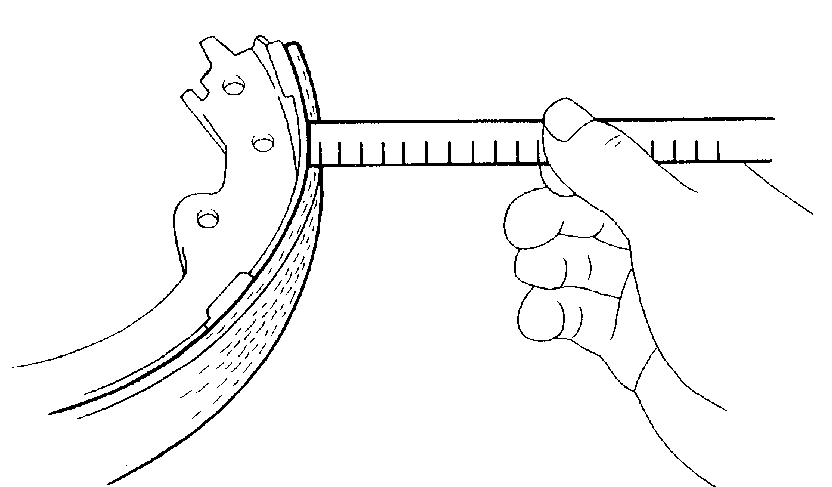
3. MEASURE BRAKE SHOE LINING THICKNESS
Using a ruler, measure the shoe lining thickness.
Standard thickness: 6.0 mm (0.236 inch)
Minimum thickness: 1.0 mm (0.039 inch)
If the shoe lining is less than the minimum, or shows signs of uneven wear, replace the brake shoes.
HINT: If any of the brake shoes have to be replaced, replace all of the brake shoes in order to maintain even braking.
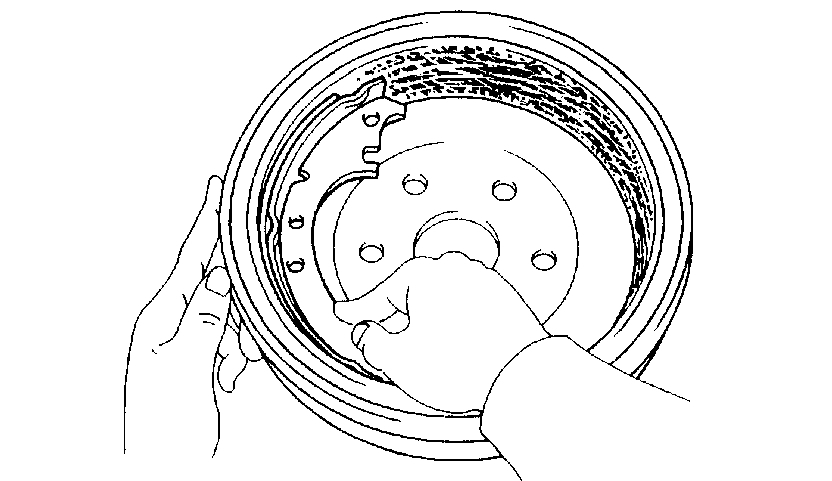
4. INSPECT BRAKE LINING AND DRUM FOR PROPER CONTACT
Apply chalk to the inside surface of the drum, then grind down the brake shoe lining to fit.
If the contact between the brake lining and drum is improper, re pair the lining with a brake shoe grinder, or replace the brake shoe assembly.
INSTALLATION
Installation is in the reverse order of removal.
NOTICE: Apply lithium soap base glycol grease and high temperature grease to the parts indicated by the arrows.
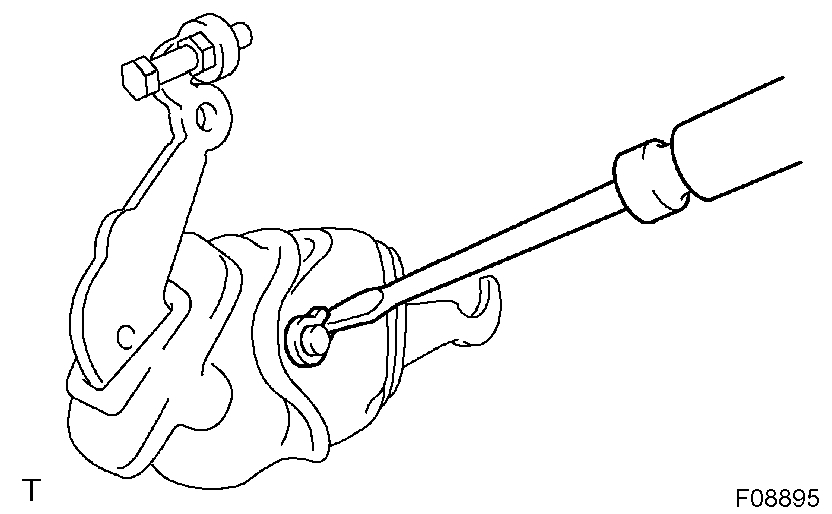
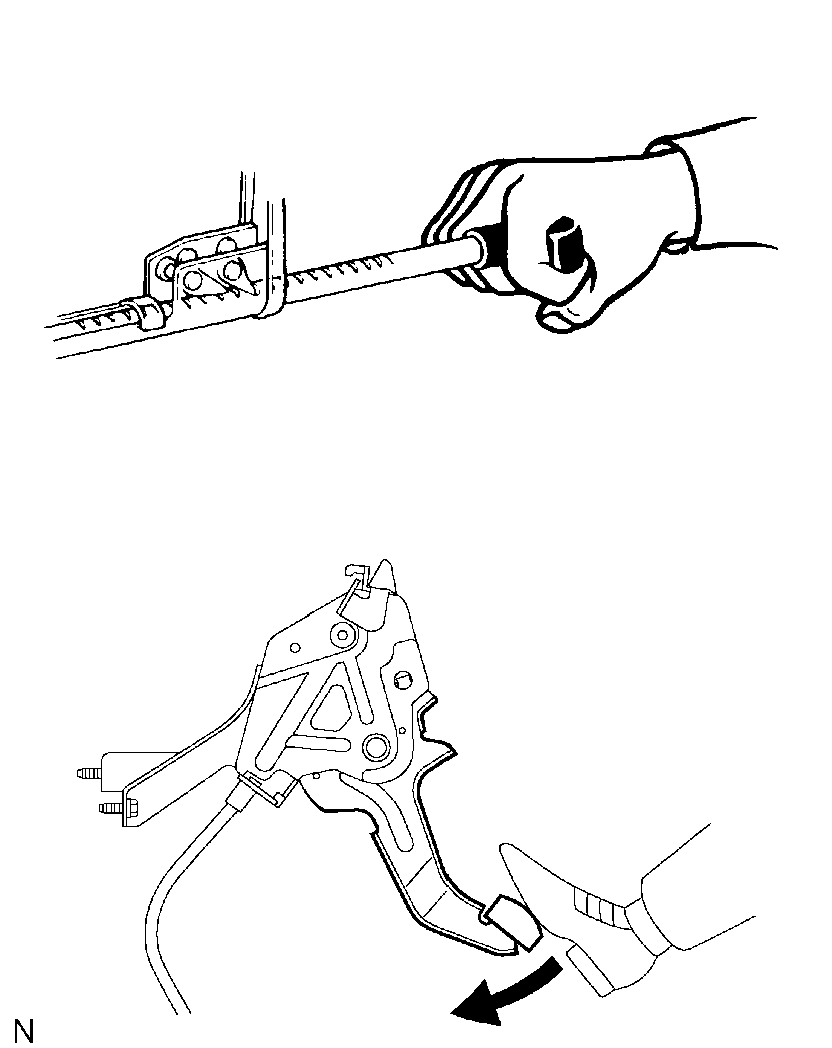
1. ADJUST BELLCRANK
a. Lightly pull the bellcrank in direction A until there is no slack at part B.
b. In this condition, turn the adjusting bolt so that dimension C will be 0.4 to 0.8 mm (0.016 to 0.031 inch).
c. Lock the adjusting bolt with the lock nut.
d. Connect the parking brake cable to the parking brake bellcrank and install the pin and clip.
e. Install the 2 tension springs.
2. CHECK OPERATION OF AUTOMATIC ADJUSTING MECHANISM
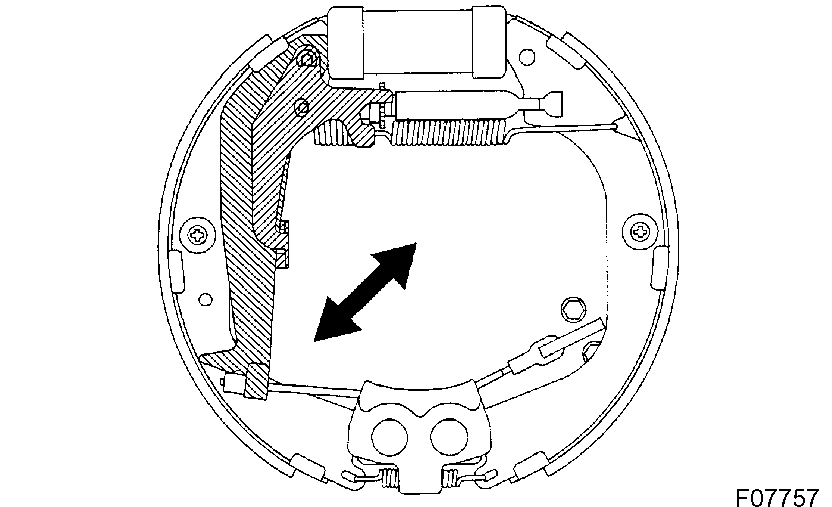
a. Move the parking brake lever of the front shoe back and forth. Check that the adjuster turns.
If the adjuster does not turn, check for incorrect installation of the rear brakes.
b. Adjust the adjuster length as short as possible.
c. Install the brake drum.
d. Pull the parking brake lever all the way up or depress the parking brake pedal all the way until a clicking sound can no longer be heard.
3. CHECK CLEARANCE BETWEEN BRAKE SHOES AND DRUM
a. Remove the drum.
b. Measure the brake drum inside diameter and diameter of the brake shoes. Check that the difference between the diameters is the correct shoe clearance.
Shoe clearance: 0.5 mm (0.020 inch)
If it is incorrect, check the parking brake system.
4. FILL BRAKE RESERVOIR WITH BRAKE FLUID
5. BLEED BRAKE SYSTEM
6. CHECK FOR LEAKS
_________________________________________
Let me know if this helps or if you have other questions.
Take care,
Joe
Images (Click to enlarge)
Dec 12, 2018 at 8:34 PM