Absolutely. Way back, I mentioned this but probably didn't go into enough detail. Everything discussed so far suggests the master cylinder is a common design from GM. Imagine a teeter totter inside that stays balanced, or "neutral". Brake fluid is free to flow out of both ports when the pedal is pressed. One port feeds fluid to the left front and right rear brakes. The other port feeds fluid to the other two wheels.
As long as the same brake fluid pressure builds up in each half of the system, that teeter totter stays balanced. It's when they develop different pressures, or more accurately, different flow volumes, that the teeter totter is pulled off-center, then a valve tip blocks that port. The purpose of this is when you spring a leak, such as from a ruptured rubber flex hose or a rusted metal line, fluid flow to the leak is blocked so you don't pump all the brake fluid out onto the ground. I described previously how the steering and suspension geometry was redesigned to counteract a very hard steering wheel pull when this occurs, so the only clue you have is the red "Brake" warning light. Very often people don't even know they're driving on half their brakes, and they get confused when the pads wear out quickly on one front brake repeatedly, while those on the other side look like new.
I don't know if you can trip this valve by bench-bleeding the new master cylinder. You aren't building any pressure, and both sides flow the same volume. Besides a customer coming in with a leak, this valve commonly trips during pedal-bleeding with a helper. Standard practice is to open just one bleeder screw at a time. That's the same as having a leak. No pressure can build up when the bleeder screw is open. In the other half of the system, pressure does build when the pedal is pressed. THAT is what trips the valve. Too often that tripped valve is misinterpreted as a defective master cylinder, when in fact, it did exactly what it was designed to do. Replacing the master cylinder over and over isn't going to help until you let one of them gravity-bleed without pressing the brake pedal. I think you can get away with pushing the pedal less than halfway to the floor, but we tend to push it too far.
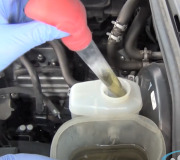
As long as brake fluid flows from two wheels, you might as well finish those up and get the air out, then, the only way I have found to unseat that valve is to give that short, quick shot of compressed air into the open bleeder screw of one of the brakes that is not flowing any fluid. You don't need to force that air all the way up to the master cylinder. That just makes it that much harder to bleed it back out. You also want to avoid pushing air into the anti-lock brake hydraulic controller. Many of them require a scanner to bleed the air out of them. Rather, I use a rubber-tipped air nozzle, and I give it a quick karate chop to the handle. I suspect the air goes in less than a foot up the line because it's all bled out again very quickly. The cap on the brake fluid reservoir should be loose so no pressure builds up there that would fight what you're trying to do.
A lot of experienced professionals will tell you this valve won't trip if you bleed the four brakes in a specific order, usually starting with the right rear, but logic dictates that is not true. Even some service manuals say the same thing, but if you think about it, if that valve doesn't trip when you bleed the right rear first, it won't trip if you develop a leak in that circuit either, so there's no point in having that feature. I always start bleeding with the wheel I'm standing closest to.
Another trick when you do have to replace the master cylinder, is to loosen the two soft metal line nuts a little, then unbolt the master cylinder from the power booster, pull it forward off the mounting studs, use it as a handle to bend the steel lines up a little, then finish unbolting the lines. Bending the lines prevents a little brake fluid from running out. Bench-bleed the new master cylinder, connect it to the lines, bend the lines back down, and bolt the unit in place. You'll need a helper for this next step. Snug one line nut. Leave the other one a little loose. Have your helper push the brake pedal very slowly so it takes roughly 15 seconds to go halfway to the floor. You'll see air bubbles coming out at the loose nut. Be sure to snug that nut first, THEN holler to the helper to release the pedal quickly. Open that nut and do the same thing, and maybe once more, until no air bubbles come out. Next, do the same thing with the other line.
By pushing slowly on the pedal, what little air might be in the line floats back up as brake fluid goes down. By releasing the pedal quickly, the brake fluid rushing back up into the reservoir washes any air bubbles back up with it. In this way, you don't have to bleed at the wheels and there's no chance of getting air trapped in the ABS hydraulic controller. Even if a few tiny air bubbles are still trapped, you'll never know it, and they will eventually flow into the reservoir. Air doesn't float down.
Please come back and tell us this worked.
Monday, September 8th, 2025 AT 5:57 PM