Blower motor replacement

Tiny
MROULET1
  • MEMBER
  • 1999 CADILLAC DEVILLE
  • 4.6L
  • V8
  • 2WD
  • AUTOMATIC
  • 140,000 MILES
So I’m trying to replace my blower motor on my car but none of the blower look alike. They don’t fit. At this point I don’t know what to do.
Thursday, April 15th, 2021 AT 3:25 PM

12 Replies

Tiny
STEVE W.
  • MECHANIC
  • 12,948 POSTS
The OEM number for that car is GM #52494108 and should look like the first image. Fits 1994-1999 DeVilles. However if you have a really late 1999 version it could have the newer design in it which is the second image. Do either look correct? Is yours under the hood or under the dash? The engine bay units were 1999, the newer system has the blower under the dash.
Or are you trying to replace the auxiliary unit that's inside the console on some versions?
Was this
answer
helpful?
Yes
No
Thursday, April 15th, 2021 AT 3:50 PM
Tiny
MROULET1
  • MEMBER
  • 76 POSTS
The one in my car does not look like that at all. It is under the hood.
Was this
answer
helpful?
Yes
No
Thursday, April 15th, 2021 AT 5:45 PM
Tiny
STEVE W.
  • MECHANIC
  • 12,948 POSTS
Please post a picture of it then as those are the ones listed for a 1999 Cadillac Deville. With an image we should be able to figure out what is wrong.
Was this
answer
helpful?
Yes
No
Thursday, April 15th, 2021 AT 9:09 PM
Tiny
MROULET1
  • MEMBER
  • 76 POSTS
I sent picture and video.
Was this
answer
helpful?
Yes
No
Thursday, April 15th, 2021 AT 9:37 PM
Tiny
STEVE W.
  • MECHANIC
  • 12,948 POSTS
I'm sorry, I don't see either one, did you attach them with the add image link?
Was this
answer
helpful?
Yes
No
Thursday, April 15th, 2021 AT 9:44 PM
Tiny
MROULET1
  • MEMBER
  • 76 POSTS
I am sending them again.
Was this
answer
helpful?
Yes
No
Thursday, April 15th, 2021 AT 10:37 PM
Tiny
STEVE W.
  • MECHANIC
  • 12,948 POSTS
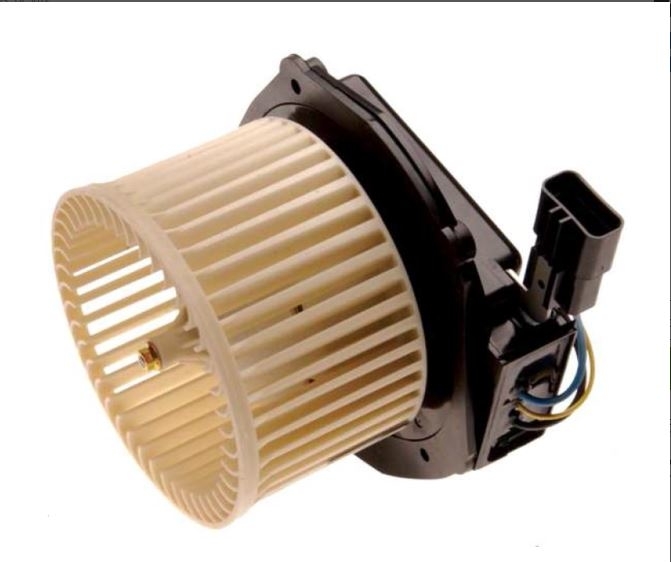
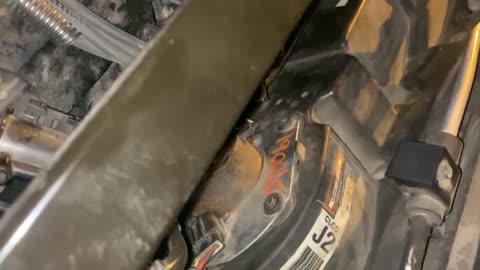
Have you replaced the blower before? The orange writing is typical of salvage yard parts. I ask because that looks like the wrong motor was installed. If you look at the outline on the housing you can see that the original mount flange was shaped differently. These are a mess to get out because of the lack of room which is probably why that one is not the OE. The replacement motors available now are a different design then the OE motor which isn't what you have currently either. However they work much better.

This video is pretty good in showing a method to get the room to do the job, but he only shows the current motor design in a few points in the video. The rest shows the original design. https://www.youtube.com/watch?v=pGOY91CrqfM

This is the TSB related to the replacement.
Bulletin No.: 03-01-37-002
INFORMATION
Subject Revised HVAC Blower Motor Installation Procedures

Models
1994-1997 Cadillac Seville
1994-1999 Cadillac DeVille
1994-2002 Cadillac Eldorado

The intent of this bulletin is to provide technicians information regarding the proper installation of the Heating, Ventilation and Air Conditioning (HVAC) Module blower motor (with impeller) assembly.
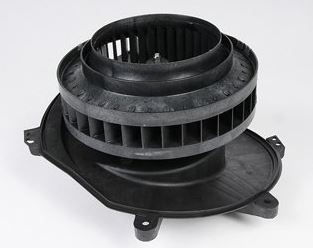
The current available HVAC Module blower motor for the above listed vehicles can be identified by the three mounting holes (see image attached). The original equipment blower motor had five mounting holes.

In order to avoid confusion and ensure a high level of customer satisfaction, when replacing an HVAC Module blower motor, refer to this bulletin for the appropriate procedure.

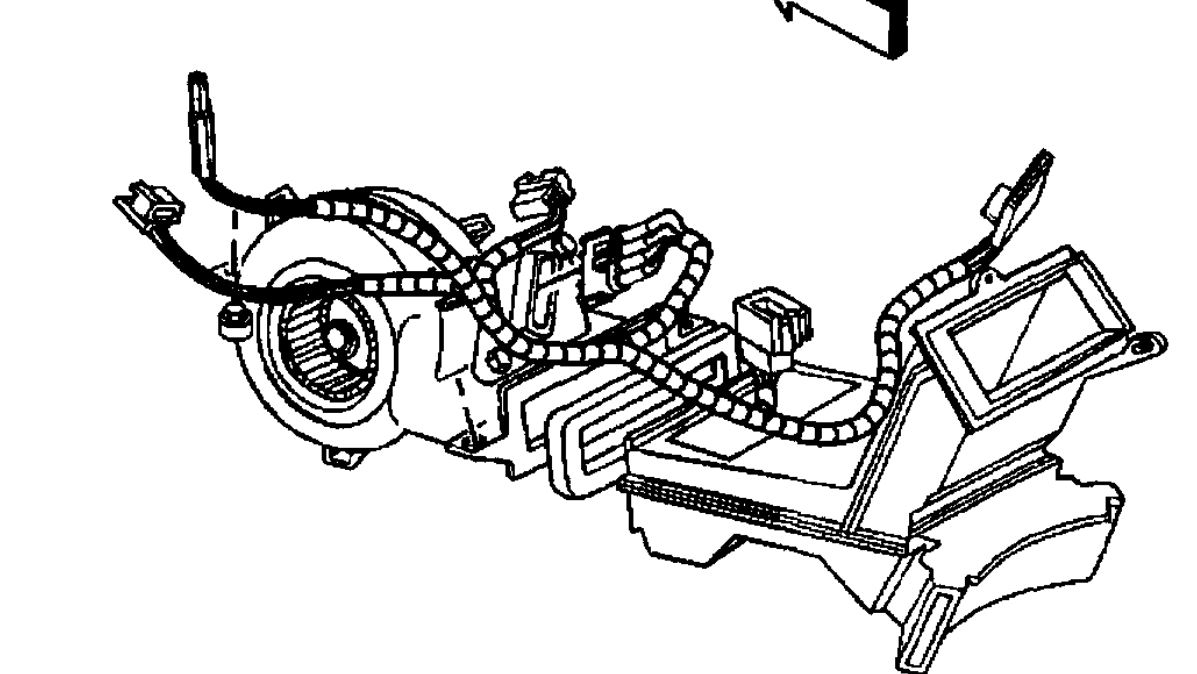
DeVille-HVAC Blower Motor

Removal Procedure

1. Disconnect the negative battery cable. (not really needed)
2. Remove the cross-car brace.

The video shows the method of moving the engine rather than unbolting the items in steps 3 to 5 below.
3. Disconnect and position the ignition control module assembly out of the way.
4. Position the cross-car harness out of the way.
5. Remove the solenoid purge valve.

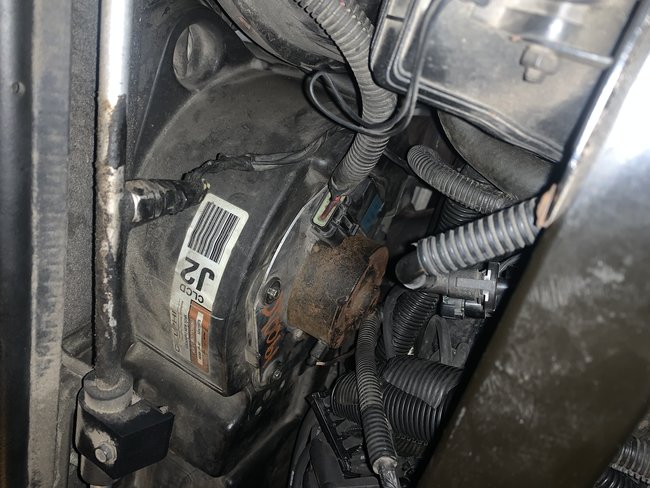
6. Remove the blower motor.
Remove the blower motor screws (either 3 or 5 screws).
Remove the blower motor from the HVAC Module.

Installation Procedure

1. If present, remove the 2 ribs located on the barrier. Refer to the illustrations in the Instruction Sheet, P/N, 52494110, found in the blower motor kit.

Important: Ensure the blower motor gasket makes a complete seal around the blower motor.
2. Install the new blower motor with heat shield. Refer to Steps 4 and 5 in the Instruction Sheet, P/N 52494110, found in the blower motor kit.
3. Install the blower motor retaining screws.
Tighten the screws to 4 N.m (35 lb in).

4. Tighten the lower heat shield retaining screws to 4 N.m (35 lb in).
5. Connect the connector to the blower motor.

Let the engine move back and reinstall the dog bones if you used the video method, or

6. Install the solenoid purge valve.
7. Reposition and connect the ignition control module assembly.
8. Install the cross-car brace.
Was this
answer
helpful?
Yes
No
Friday, April 16th, 2021 AT 5:30 AM
Tiny
MROULET1
  • MEMBER
  • 76 POSTS
I got the car used. That blower motor was already in. If you could see the connector that’s going into that metal plate coming off of the firewall that connector does not fit any of the blower motors that was recommended for my vehicle. Also the connector that runs off the back of the blower motor there’s a two prong and what it connects to it it’s a wiring harness this part of the vehicle.
Was this
answer
helpful?
Yes
No
Friday, April 16th, 2021 AT 5:56 AM
Tiny
STEVE W.
  • MECHANIC
  • 12,948 POSTS
Sounds like someone adapted a different motor and wiring to fit it. The factory wiring has three pins in it, one ground (black) one full time power (red) and the gray wire which is the blower speed control signal from the interior panel. The motor speed is a pulsed signal that tells the motors onboard controller how fast to run. The replacement motors should have a short wiring harness with a plug that fits the original wiring.
Was this
answer
helpful?
Yes
No
Friday, April 16th, 2021 AT 6:16 AM
Tiny
MROULET1
  • MEMBER
  • 76 POSTS
The wire that comes off the firewall has 3.
Was this
answer
helpful?
Yes
No
Friday, April 16th, 2021 AT 6:23 AM
Tiny
MROULET1
  • MEMBER
  • 76 POSTS
I am sorry I gave you false information. You see the metal plate that has the connector? Well it’s 2 connector on that metal plate one at the bottom that the motor plugs into not the wiring harness and the one at the top that you can see with the wire coming off the firewall.
Was this
answer
helpful?
Yes
No
Friday, April 16th, 2021 AT 6:39 AM
Tiny
STEVE W.
  • MECHANIC
  • 12,948 POSTS
Sounds like you have the correct wiring then, just need to fight the new motor in. I have seen people cut the housing as well, some cars were even marked that way. You cut out the top of the housing, changed the motor and then added a new piece over the hole. Moving the engine actually takes less time though.
Was this
answer
helpful?
Yes
No
Friday, April 16th, 2021 AT 7:26 AM

Please login or register to post a reply.

Sponsored links