Here are the directions for tensioner removal. The directions include belt removal. And yes, there are two.
____________________________________________
2008 Volvo C70 T5 L5-2.5L Turbo VIN 67 B5254T7
Tensioner Accessory Drive Belt
Vehicle Engine, Cooling and Exhaust Engine Drive Belts, Mounts, Brackets and Accessories Drive Belt Tensioner Service and Repair Removal and Replacement Tensioner Accessory Drive Belt
TENSIONER ACCESSORY DRIVE BELT
Tensioner accessory drive belt
Special tools:
999 7109 Wrench See: Vehicle > Electrical / Mechanical Repair > 999 7109 Wrench
999 7103 Lifting beam See: Vehicle > Electrical / Mechanical Repair > 999 7103 Lifting Beam
999 5185 HOOK See: Vehicle > Electrical / Mechanical Repair > 999 5185 Hook
Note! The illustrations in this service information are used for different model years and/or models. Some variation may occur. However, the essential information in the illustrations is always correct.
Preparatory work
Removing components
Raise the vehicle.
Remove:
- the right front wheel
- the right-hand fender liner. Slacken off the screws at the front edge and fold back the fender liner.
Removal
Removing the auxiliaries belts
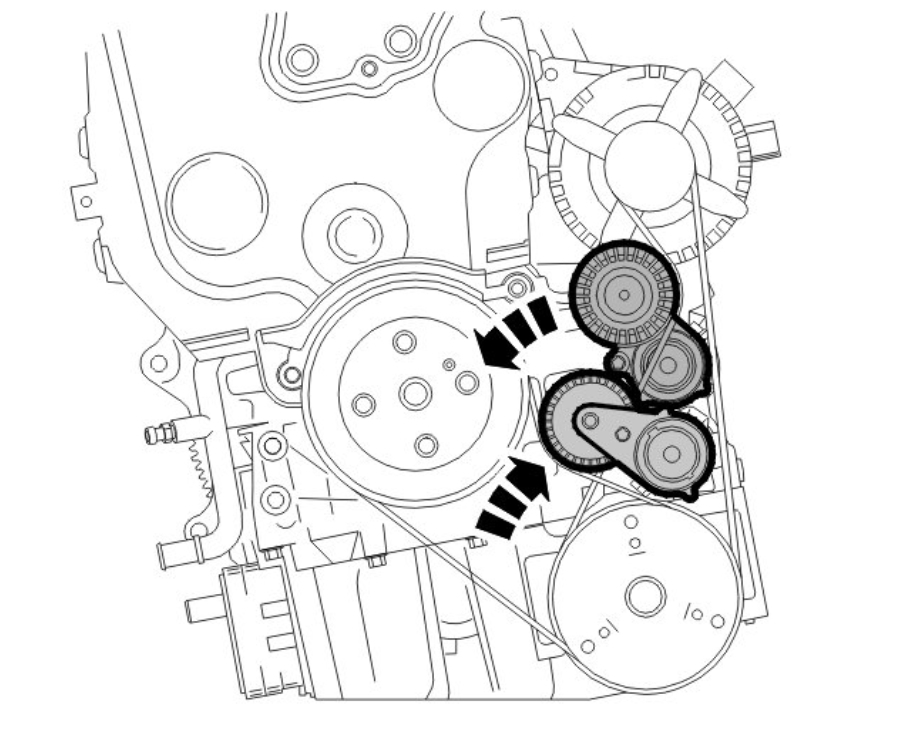
pic 1
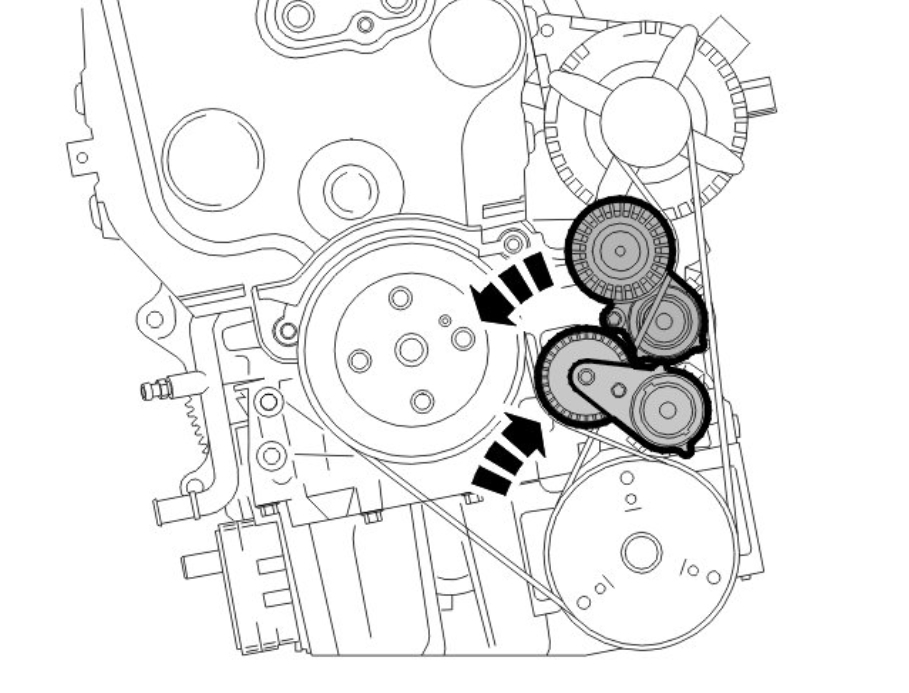
Outer belt
Relieve the load from the belt tensioner. Use: 999 7109 Wrench See: Vehicle > Electrical / Mechanical Repair > 999 7109 Wrench. Turn the belt tensioner clockwise as far as it will go. Remove the belt.
Inner belt
Relieve the load from the belt tensioner using a Torx-wrench. Turn the belt tensioner counter clockwise as far as it will go. Remove the belt.
Lower the vehicle.
pic 2
pic 3
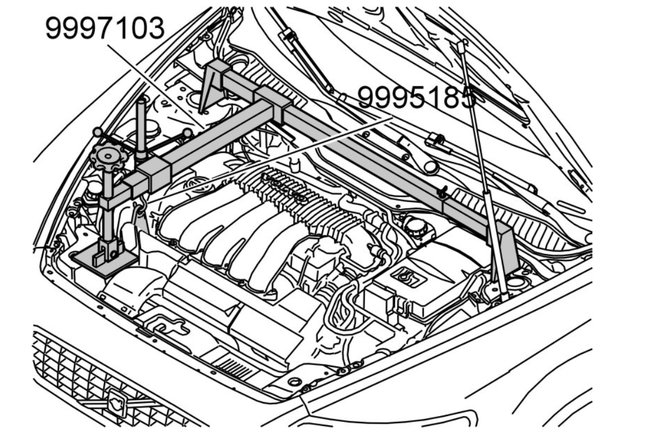
Install lifting beam: 999 7103 Lifting beam See: Vehicle > Electrical / Mechanical Repair > 999 7103 Lifting Beam together with hook: 999 5185 HOOK See: Vehicle > Electrical / Mechanical Repair > 999 5185 Hook. Tension the tool. Lift the expansion tank and place on the engine.
Note! Ensure that no coolant escapes.
Marking the position of the engine pad
pic 4
Mark the position of the engine pad on the frame member. Use a marker pen.
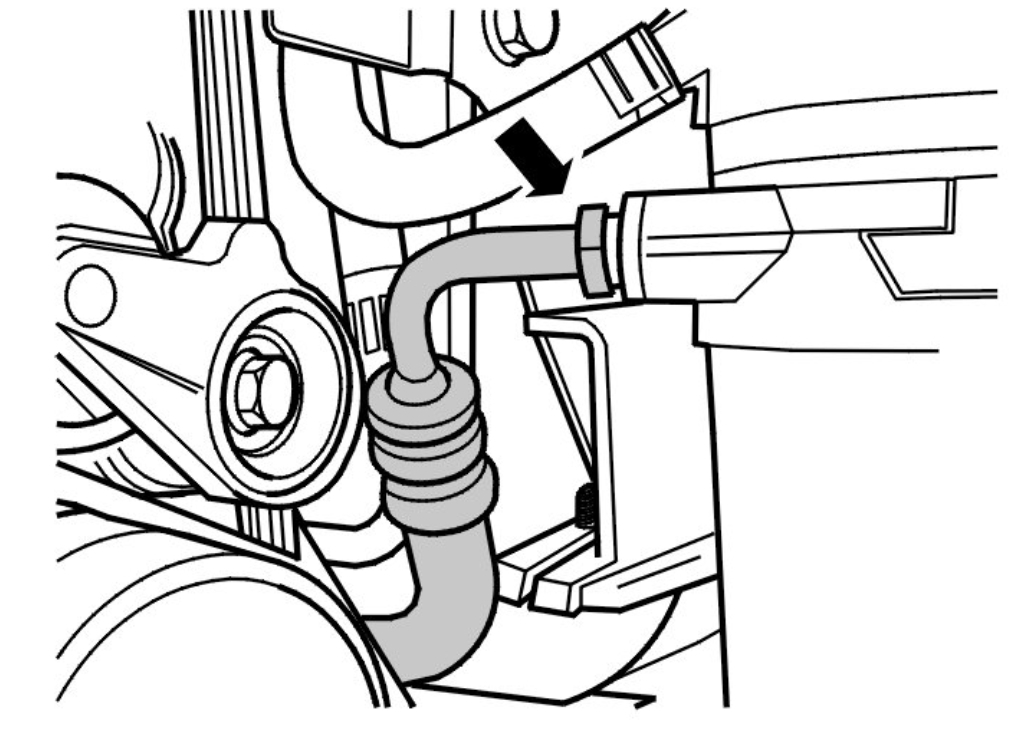
Removing the power steering pump pressure line
pic 5
Caution! Seal the openings.
Note! Clear up any oil spillage under the delivery line.
Disconnect the delivery line from the power steering pump.
Removing components
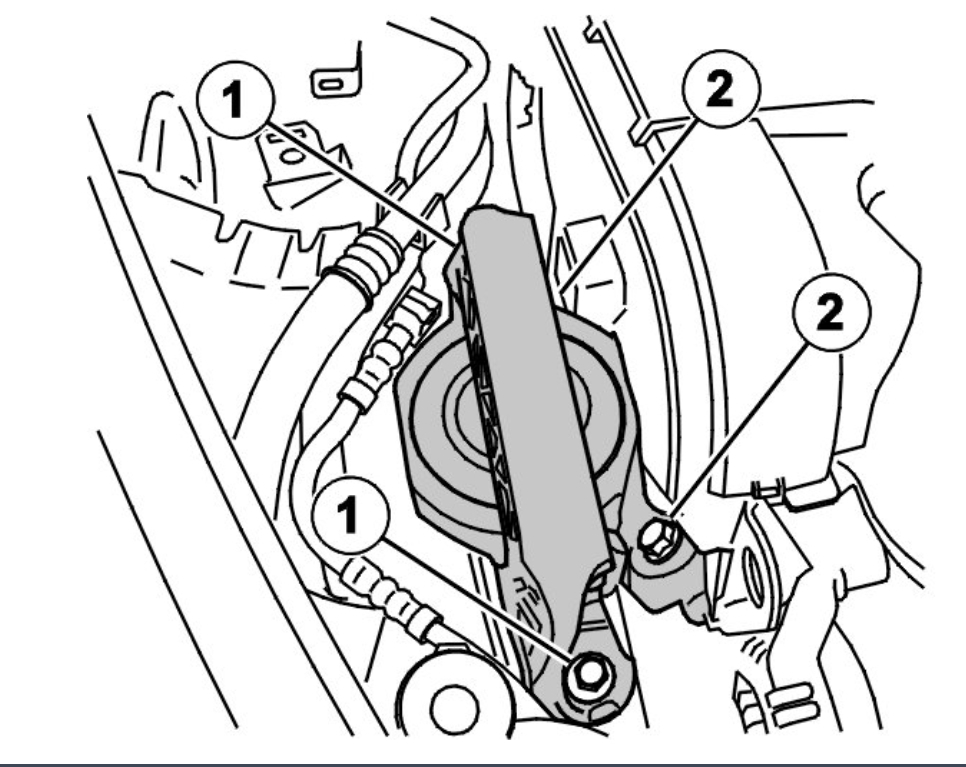
pic 6
Remove:
- the screws (1) for the limiter for the engine pad in the right-hand frame member
- the limiter
- the screws (2) for the engine mounting in the cylinder head
- the engine mounting. Lower the engine approximately 60 mm.
Removing the belt tensioner
Remove:
- screw for outer belt tensioner
- outer belt tensioner
- screw for inner belt tensioner
- inner belt tensioner
Installation
Note! For tightening torques, see Specifications. See: Engine > Mechanical > Tightening Torque.
Installing the inner belt tensioner
Note! Ensure that the guide on the belt tensioner is correctly positioned.
Install:
- inner belt tensioner
- screw for inner belt tensioner. Tighten.
Installing the outer belt tensioner
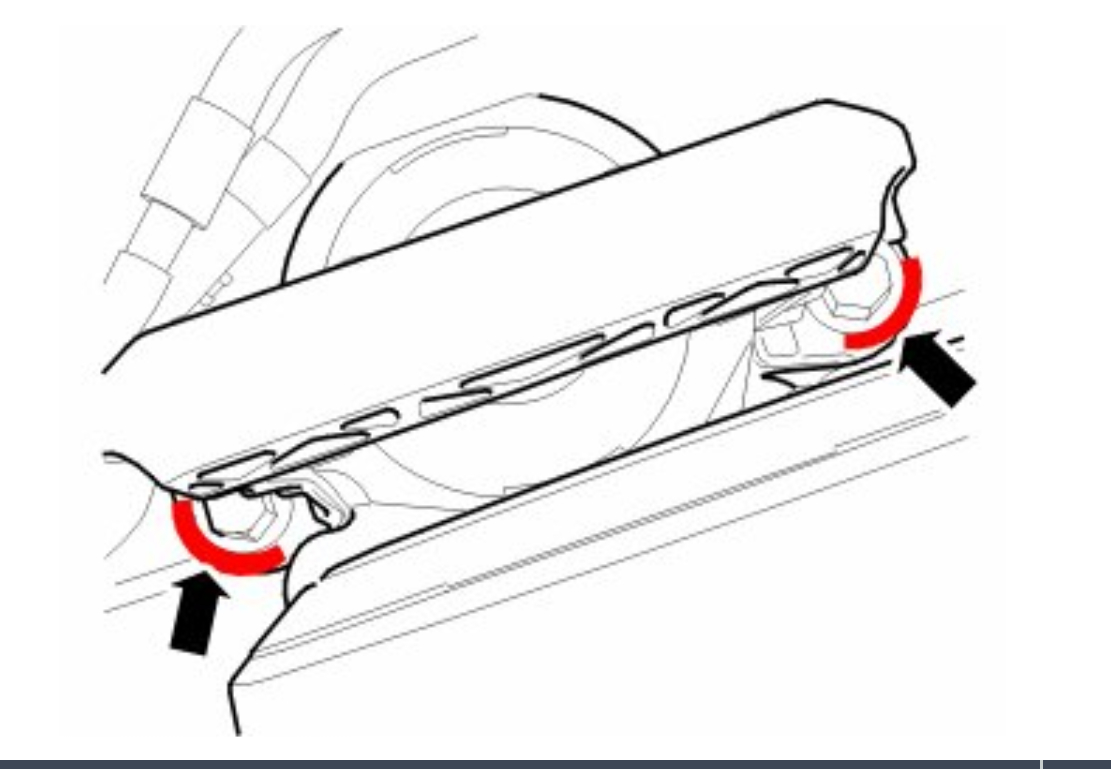
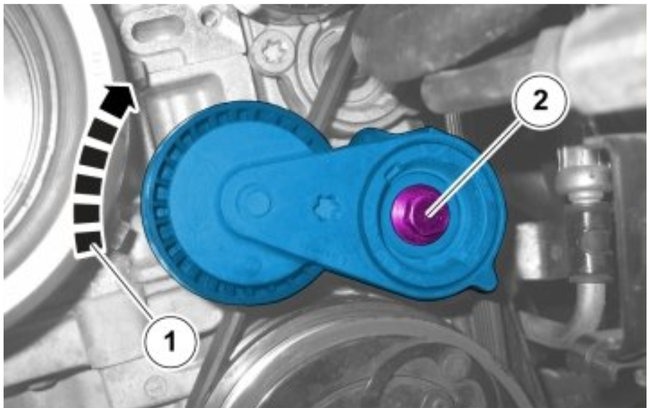
pic 7
When installing the outer belt tensioner, turn the belt tensioner clockwise (1) and hold it in that position.
Tighten screw (2).
Checking belt tensioner
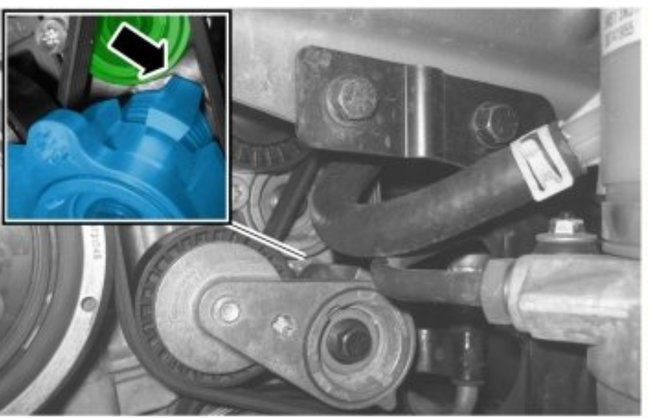
pic 8
Check using a feeler gauge.
The dimension between the inner belt tensioner and deflection limiter on the outer belt tensioner should be 2.5 - 3.0 mm.
Installing the auxiliaries belt
pic 9
Caution! Ensure that the belts are correctly positioned in all the grooves.
Inner belt
Relieve the load from the belt tensioner. Turn the belt tensioner counter clockwise as far as it will go. Use a Torx-wrench. Install the belt.
Outer belt
Slacken off the tensioner. Use: 999 7109 Wrench See: Vehicle > Electrical / Mechanical Repair > 999 7109 Wrench. Turn the belt tensioner clockwise as far as it will go. Install the belt.
Lower the vehicle.
Installing the inner belt tensioner
Relieve the load from the belt tensioner. Turn the belt tensioner counter clockwise as far as it will go. Use a Torx-wrench. Install the belt.
Installing the engine pad
pic 10
Install the engine pad according to the markings.
Fit the front engine bracket
Raise the engine. Use: 999 7103 Lifting beam See: Vehicle > Electrical / Mechanical Repair > 999 7103 Lifting Beam and hook 999 5185 HOOK See: Vehicle > Electrical / Mechanical Repair > 999 5185 Hook. Raise the engine to its original position.
Install:
- the engine mounting on the cylinder head. Tighten. See: Tightening torque, B5254T7 See: Engine > Mechanical > Tightening Torque.
- the limiter over the engine pad on the right-hand side. Tighten. See: Tightening torque See: Steering > Mechanical > Tightening Torque.
Remove:
- the special tool. Use: 999 7103 Lifting beam See: Vehicle > Electrical / Mechanical Repair > 999 7103 Lifting Beam
- the expansion tank. Secure the hoses.
Finishing
Installing components
Install:
- the pressure hose for the power steering pump. Remove the seals
- the fender liner
- the front wheel. See: Wheels See: Wheels > Removal and Replacement.
______________________________________
Let me know if this helps.
Take care,
Joe
Images (Click to enlarge)
Jan 9, 2020 at 6:13 PM