Air temperature actuators, left and right side

Tiny
MOLAH25
  • MEMBER
  • 2014 CADILLAC CTS
  • 3.6L
  • V6
  • TURBO
  • 2WD
  • AUTOMATIC
  • 80,000 MILES
Hello,

My air is blowing warm on both driver and passenger side. The dealer diagnosed the air temperature actuators as sticking on both sides, GM part numbers 22799393 and 22799392.

I cannot find any type of videos, pictures, or how-tos for replacing the actuators on either driver or passenger side for the gen 3 CTS. Where are these specific actuators located on the driver and passenger sides?

Thanks in advance for your help!
Friday, June 26th, 2020 AT 5:45 PM

6 Replies

Tiny
KASEKENNY
  • MECHANIC
  • 18,907 POSTS
I attached the process for each side. They are labeled CJ2 and CJ4. These are not the most difficult things but I am not finding a video either which would help. While they are not complicated to replace, they could be tricky just to gain access.

Let us know is you have questions and we can work through them. Thanks
Was this
answer
helpful?
Yes
No
+1
Friday, June 26th, 2020 AT 7:30 PM
Tiny
MOLAH25
  • MEMBER
  • 4 POSTS
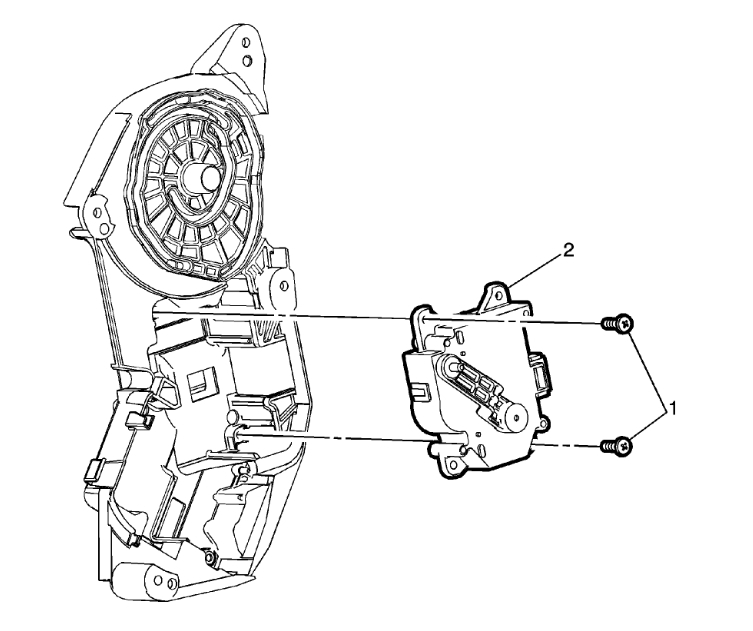
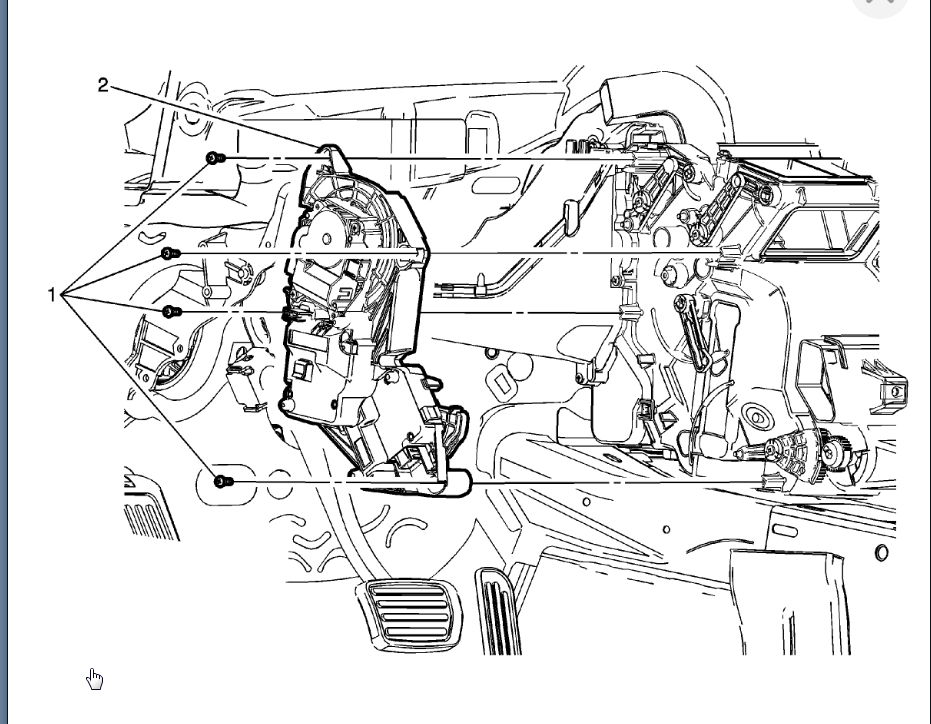
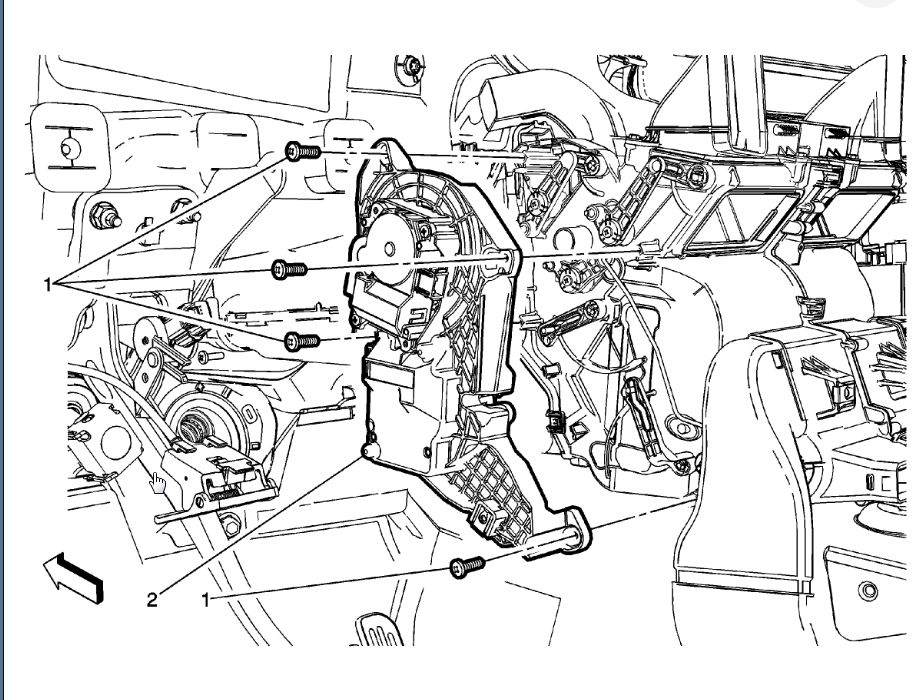
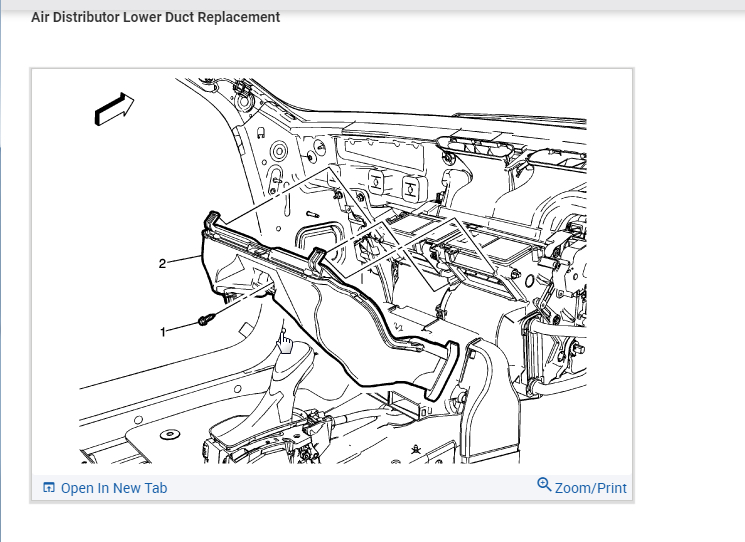
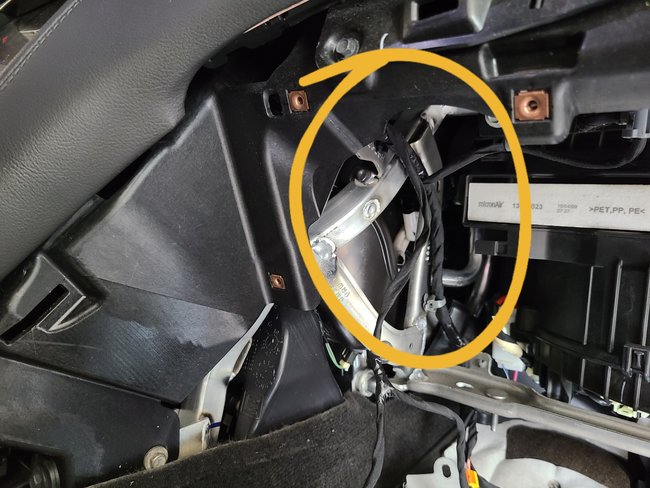
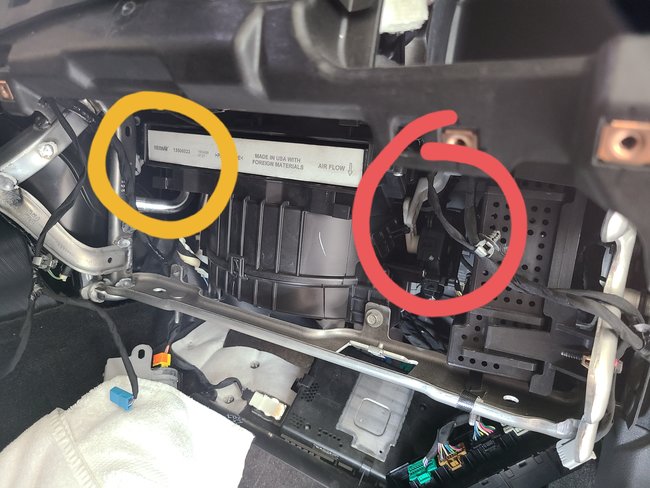
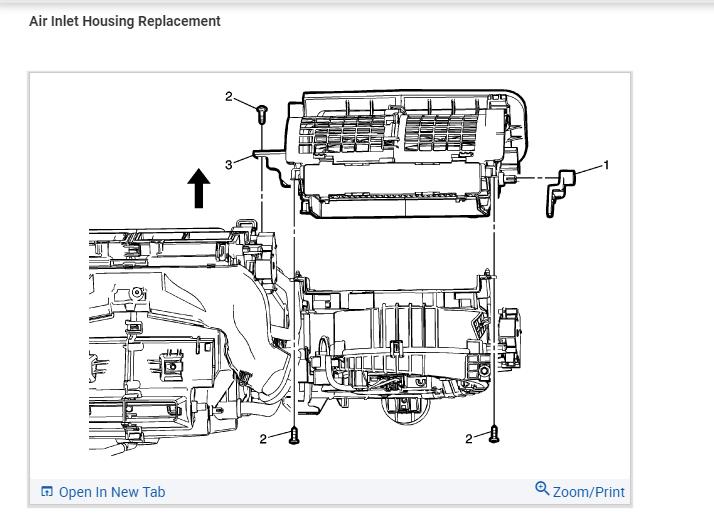
Thank you so much for the quick reply! I guess the biggest concern for me is not being able to definitively tell from those pictures what needs to be removed from the car to gain access. I may be out of luck and won't know until I start disassembling. The drawings appear to show that the driver side actuator is lodged behind the center console but I can't be sure based on the drawing. I suppose it wouldn't hurt to start digging and see what's behind the kick panel and go from there.

Are there procedures for dash removal (i.E. Glove box, kick panels, center console trim, etc.)?

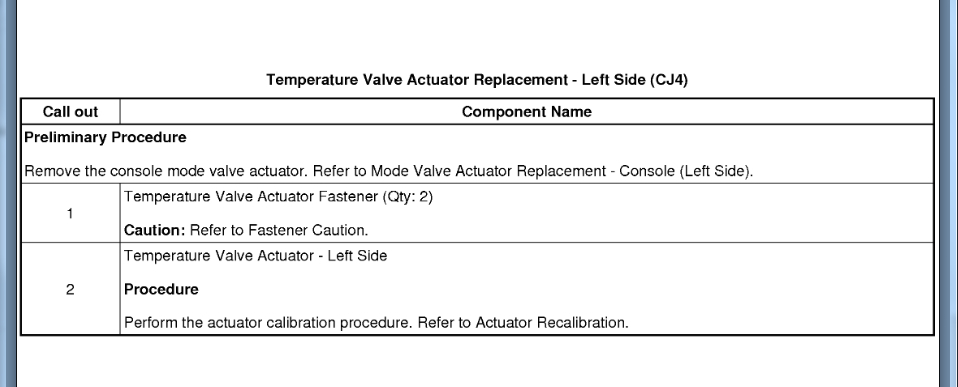
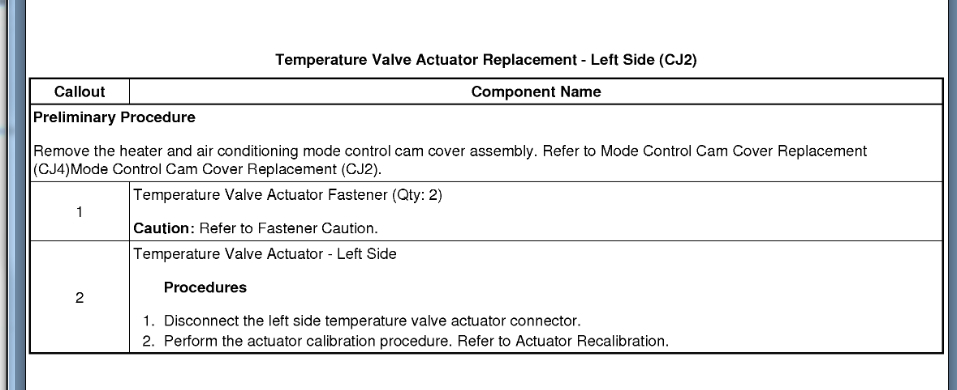
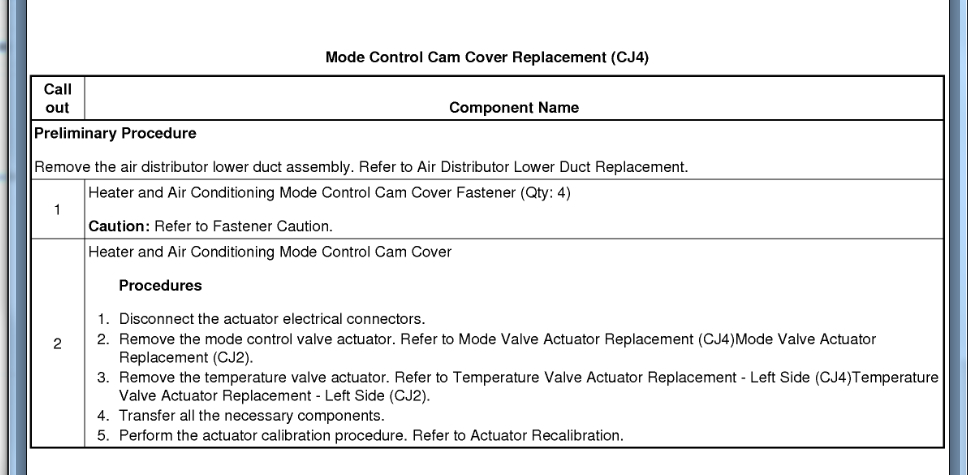
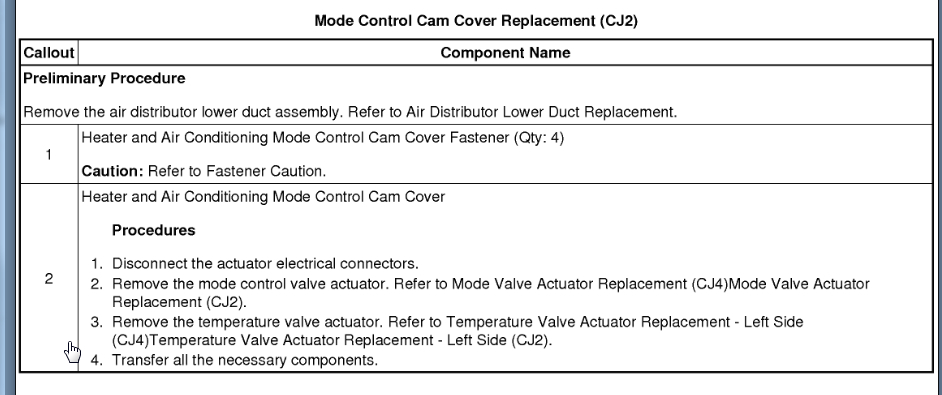
Also, there are references to an actuator calibration procedure. Could you please include that as well? I'm assuming I need to do that once I replace the actuator to ensure its operating correctly before I put everything back together.

I apologize for asking a lot here, I'm just desperate to try and avoid a $2,000.00 bill from the dealership for what amounts to $50.00 in OEM parts.

Thanks again!
Was this
answer
helpful?
Yes
No
Saturday, June 27th, 2020 AT 6:24 AM
Tiny
KASEKENNY
  • MECHANIC
  • 18,907 POSTS
I attached most of the trim panels and ducts that it mentions but you are correct. This is something that is more of "remove as you go" technique. So you look at what is in your way and if you have to remove it, then go for it.

However, these additional documents should help.
Was this
answer
helpful?
Yes
No
+1
Saturday, June 27th, 2020 AT 7:22 PM
Tiny
MOLAH25
  • MEMBER
  • 4 POSTS
Well, my worst fears have been confirmed. The actuator circled in orange appears to be the one I need to change, and it's buried. The one in red looks like it's the defrost actuator as it only moves when I toggle defrost on and off, whereas the one in orange behind the center console moves when I manipulate the temperature controls. At this point it looks like I need to decide if I want to attempt the full dash removal procedure on my own or if I should sell a kidney to have someone do it for me.

Any tips on what I should do from here? Do you know of any tricks to get at this thing without full dash removal?
Was this
answer
helpful?
Yes
No
Sunday, June 28th, 2020 AT 11:12 AM
Tiny
MOLAH25
  • MEMBER
  • 4 POSTS
I purchased the service info from ALLDATAdiy. Com and everything is referring me to Air Inlet Housing Replacement, yet I cannot find this anywhere. Could you steer me in the right direction?
Was this
answer
helpful?
Yes
No
Sunday, June 28th, 2020 AT 11:48 AM
Tiny
KASEKENNY
  • MECHANIC
  • 18,907 POSTS
Yeah. They are not the easiest to navigate at times. I attached the other processes from Alldata that you should need.
Was this
answer
helpful?
Yes
No
+2
Sunday, June 28th, 2020 AT 8:51 PM

Please login or register to post a reply.

Sponsored links