Okay, I attached the procedure for removing the dash panel to access the heater case that holds the evaporator assembly.
Roy
Instrument Panel Carrier Replacement
Removal Procedure
1. Remove the IP retainer.
2. Remove the data link connector fasteners.
3. Remove the passenger inflator module.
4. Disconnect the ignition switch electrical connectors.
5. Remove the shift/park lock cable from the ignition switch.
imageOpen In New TabZoom/Print
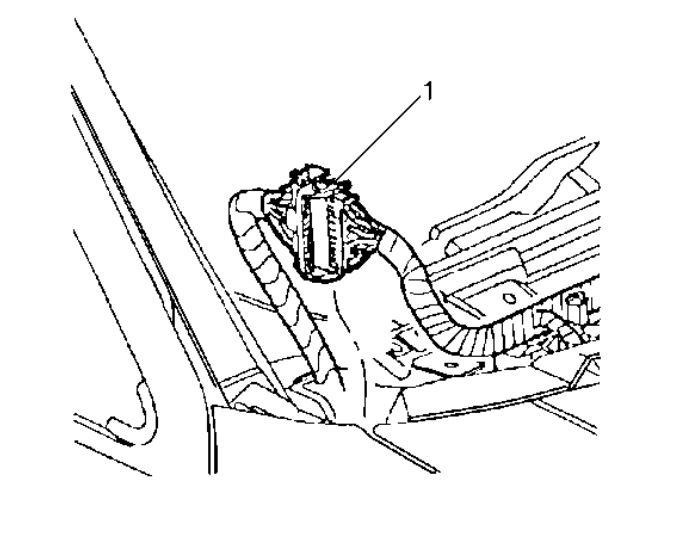
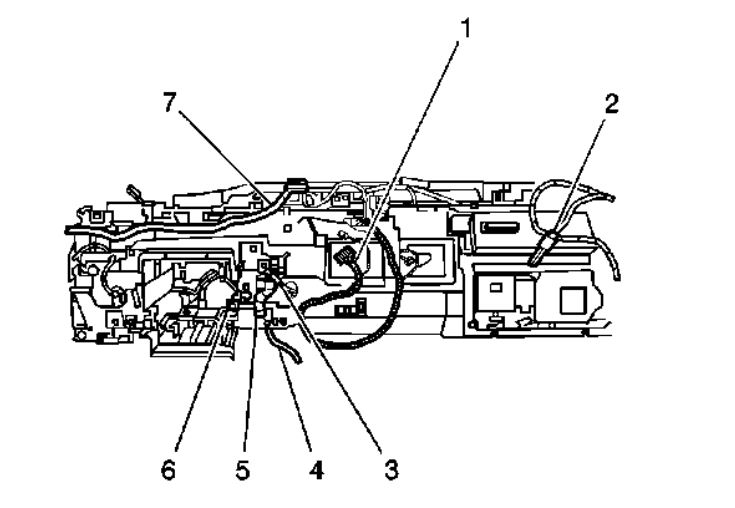
6. Disconnect the body to IP electrical connectors (1) located at the upper right outside corner of the IP carrier.
imageOpen In New TabZoom/Print
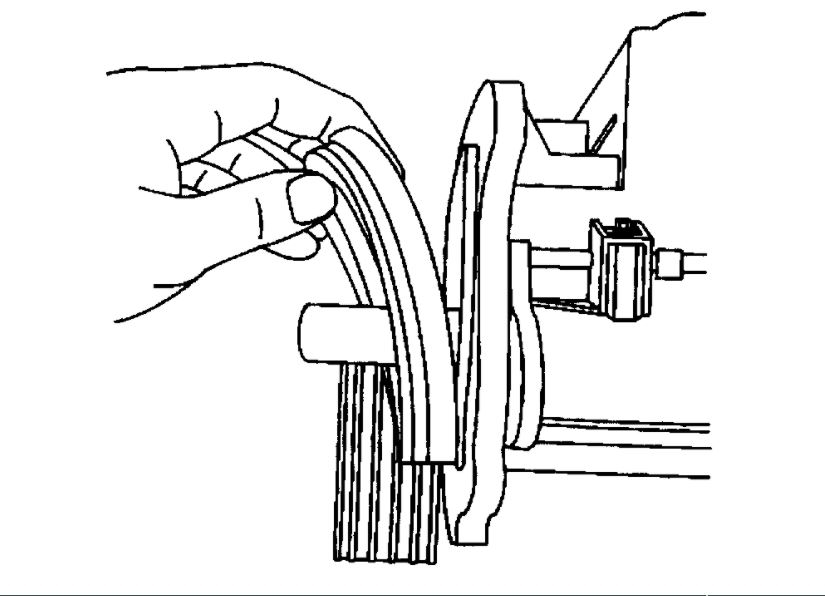
7. Remove the HVAC aspirator tube (5).
8. Feed the ignition switch wiring (4) through the IP carrier.
9. Feed the shift/park lock cable (3) through the IP carrier.
10. Feed the console wiring harness (1) through the IP carrier.
11. Release the SIR harness (6) retainer from the IP carrier.
imageOpen In New TabZoom/Print
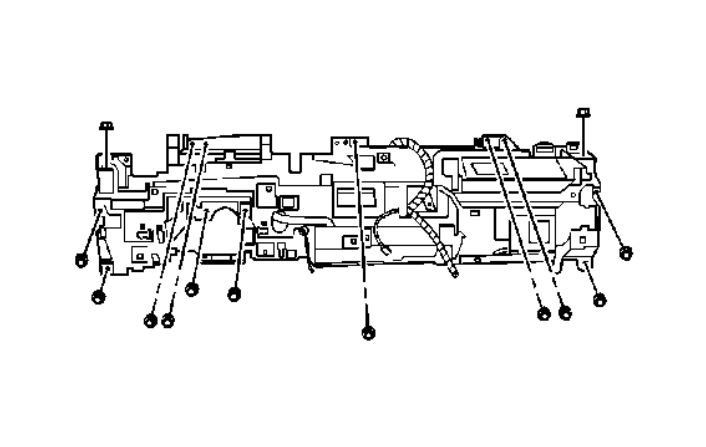
12. Remove the IP carrier fasteners.
13. Remove the IP carrier from the vehicle.
Installation Procedure
imageOpen In New TabZoom/Print
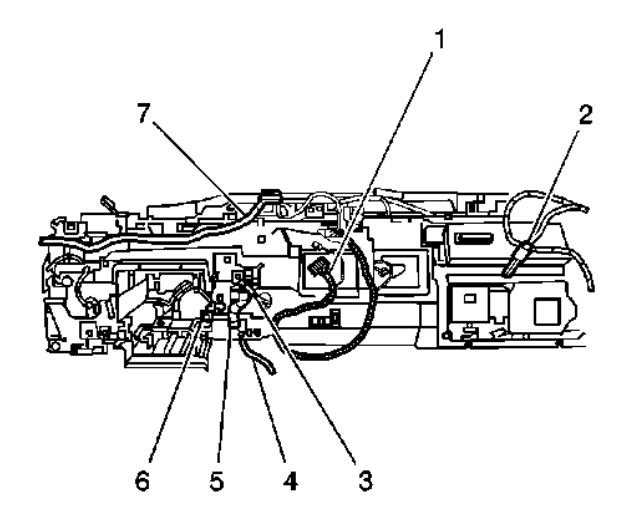
1. Align the instrument panel (IP) carrier to the vehicle.
2. Install the HVAC aspirator tube (5).
3. Feed the ignition switch wiring (4) through the IP carrier.
4. Feed the shift/park lock cable (3) through the IP carrier.
5. Feed the console wiring harness (1) through the IP carrier.
6. Install the SIR harness (6) retainer to the IP carrier.
imageOpen In New TabZoom/Print
Notice: Refer to Fastener Notice in Service Precautions.
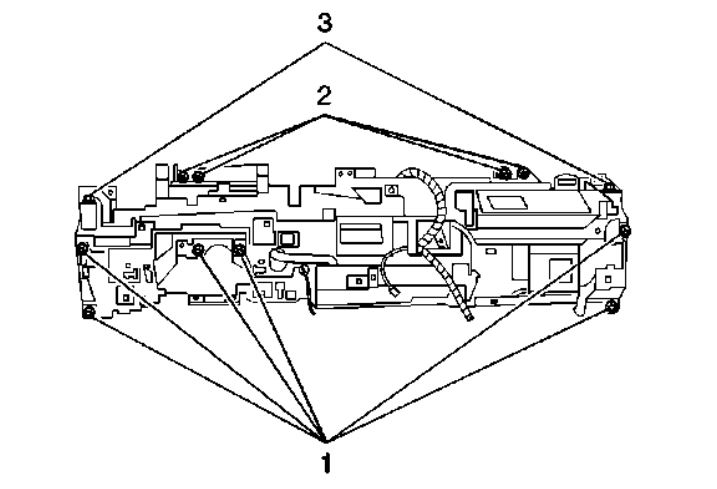
7. Install the fasteners (1) from the IP carrier to hinge pillar.
Tighten the IP carrier fasteners (1) to 25 N.m (18 lb ft).
8. Install the IP carrier to cowl fasteners (2).
Tighten the carrier to cowl fasteners (2) to 25 N.m (18 lb ft).
9. Install the IP carrier to end bracket fasteners (3).
Tighten the carrier to end bracket fasteners (3) to 25 N.m (18 lb ft).
10. Connect the ignition switch electrical connectors.
11. Install the shift/park lock cable to the ignition switch.
12. Install the passenger inflator module.
13. Install the data link connector fasteners.
Tighten the fasteners to 2 N.m (18 lb in).
14. Install the IP retainer.
Images (Click to enlarge)
Mar 30, 2021 at 12:04 PM