Hi,
Front brake pads and rotors really aren't too hard to do. If you do it yourself, make sure to purchase lifetime parts so you'll never have to pay for the parts again.
You can expect brake pads to last approximately 25,000 miles. However, that can change based on terrain and driving habits.
To start, here is a link that shows in general how it's done. You can use this as a guide:
https://www.2carpros.com/articles/how-to-replace-front-brake-pads-and-rotors-fwd
Here are the directions specific to your vehicle. The pics below correlate with the directions.
_________________________________________________
2008 Hyundai Sonata L4-2.4L
Front
Vehicle Brakes and Traction Control Disc Brake System Brake Pad Service and Repair Procedures Front
FRONT
FRONT DISC BRAKE
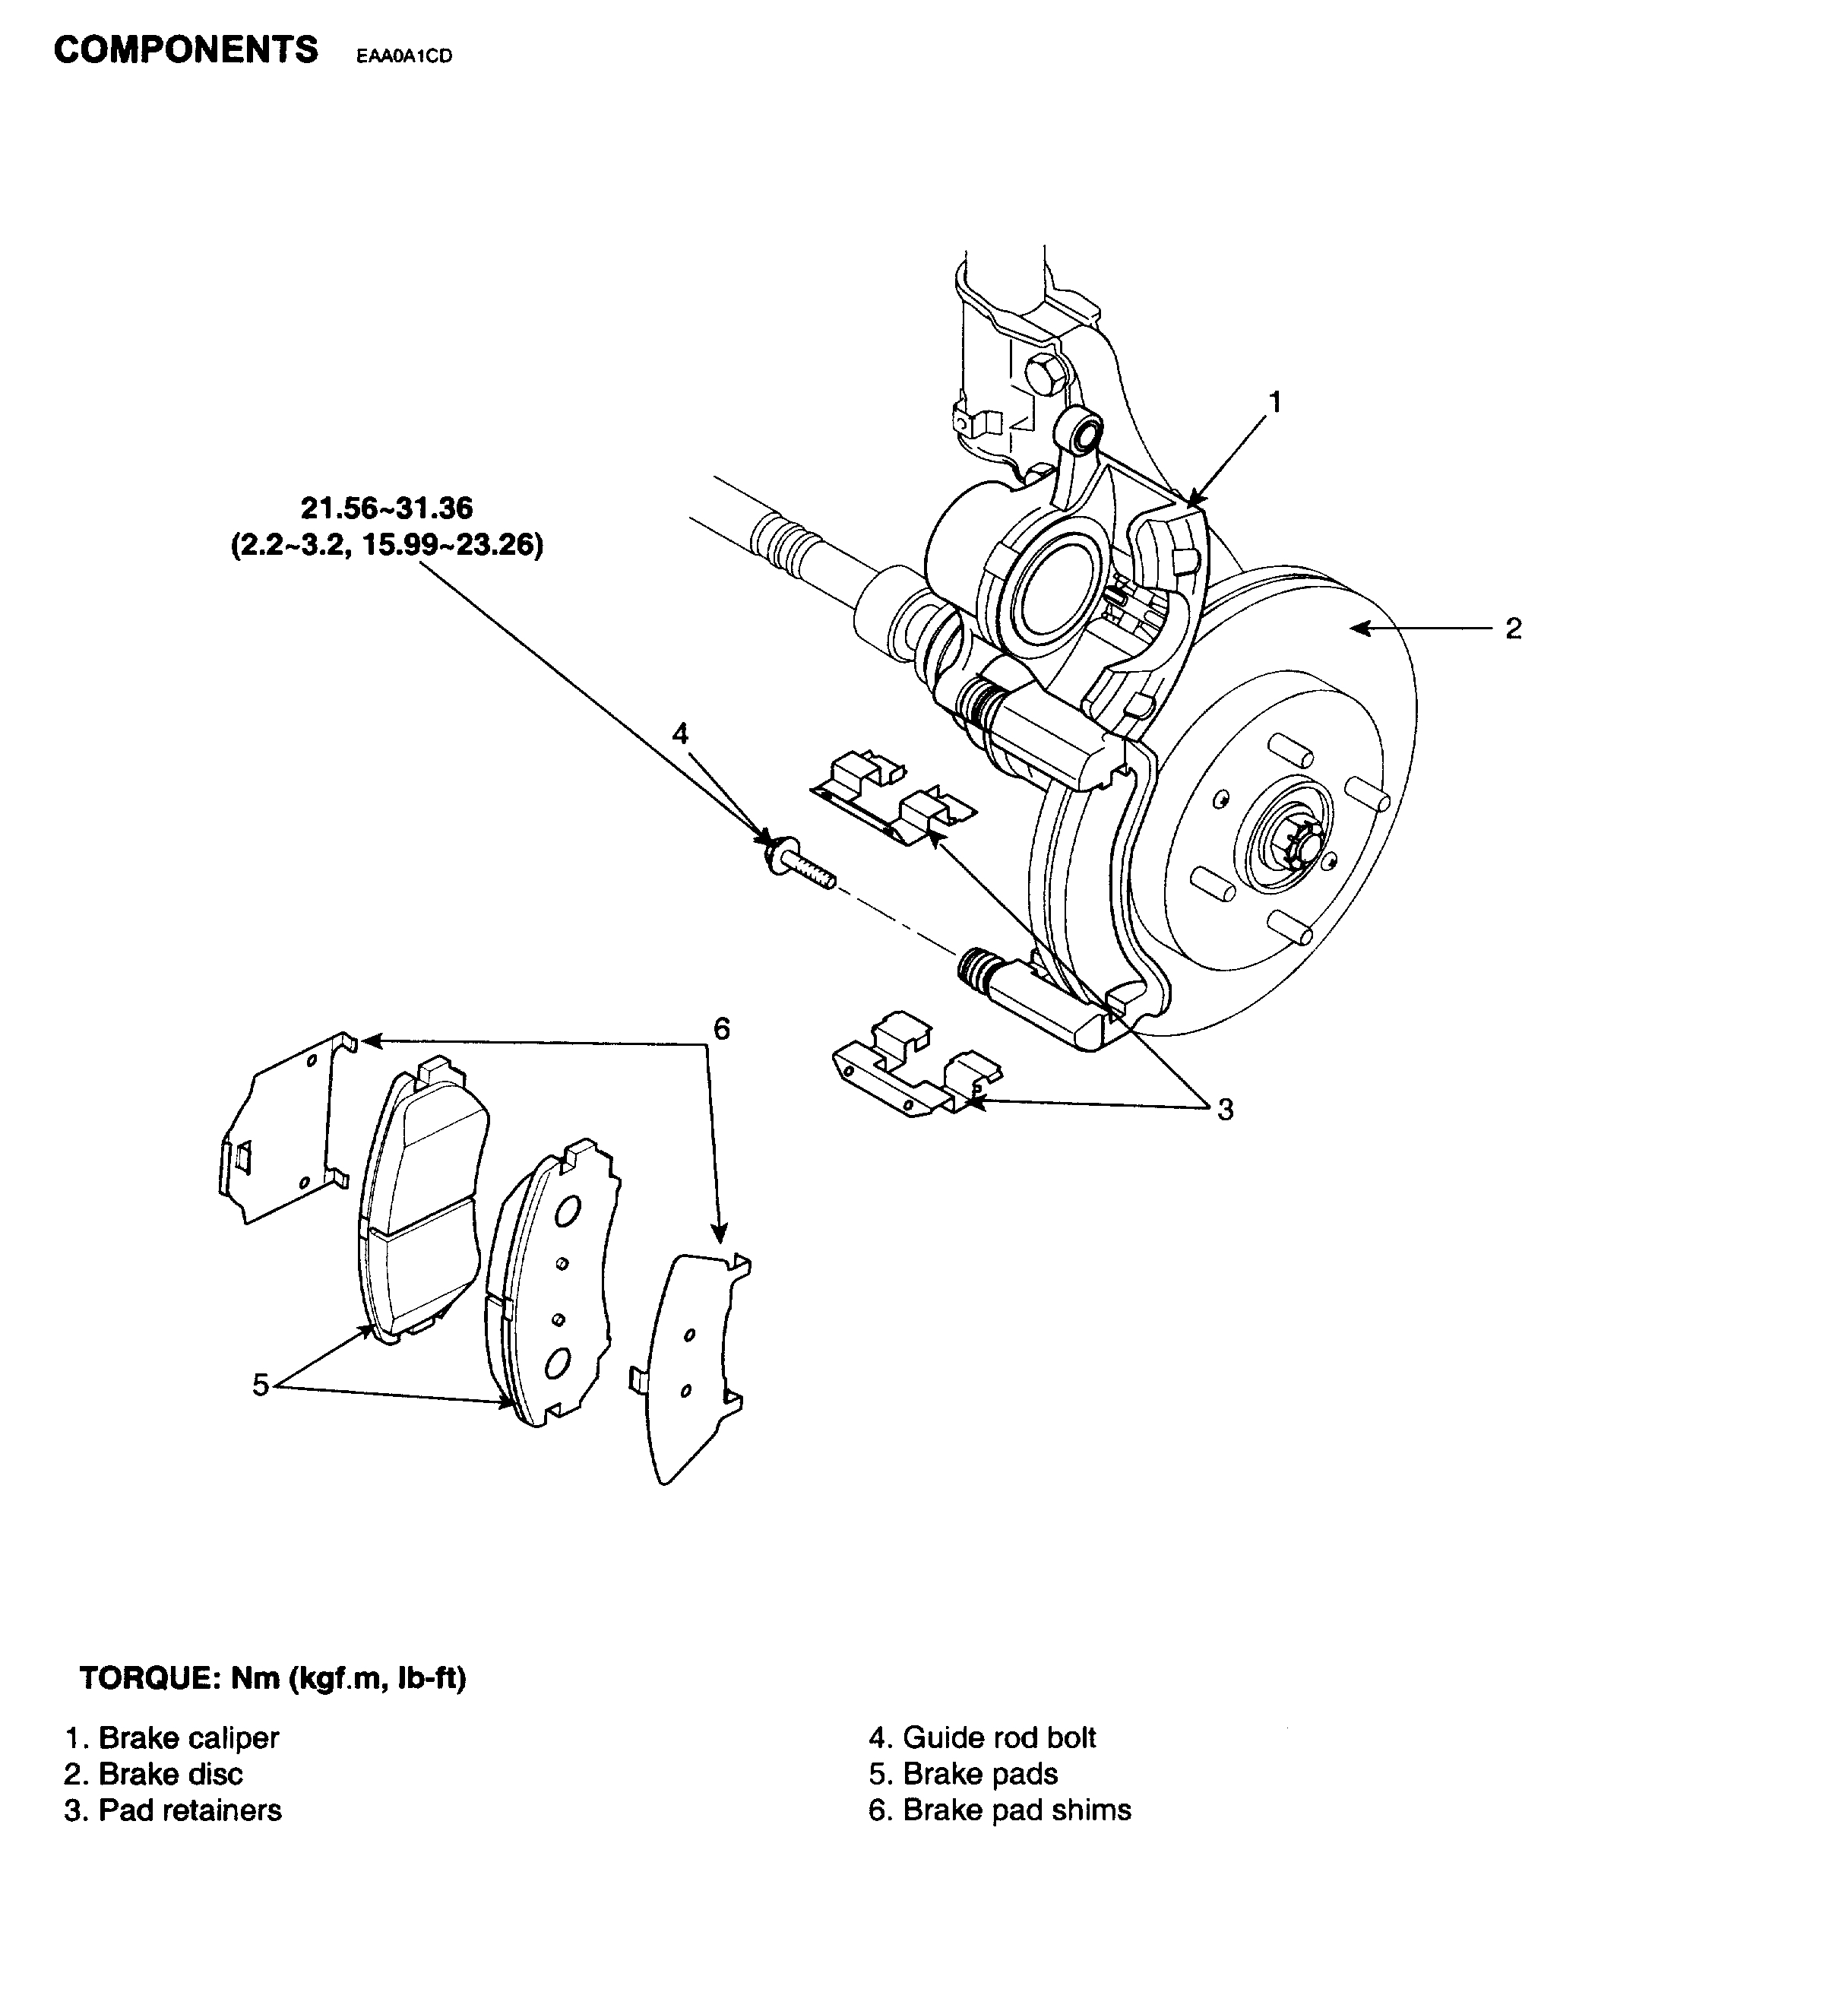
COMPONENTS
pic 1
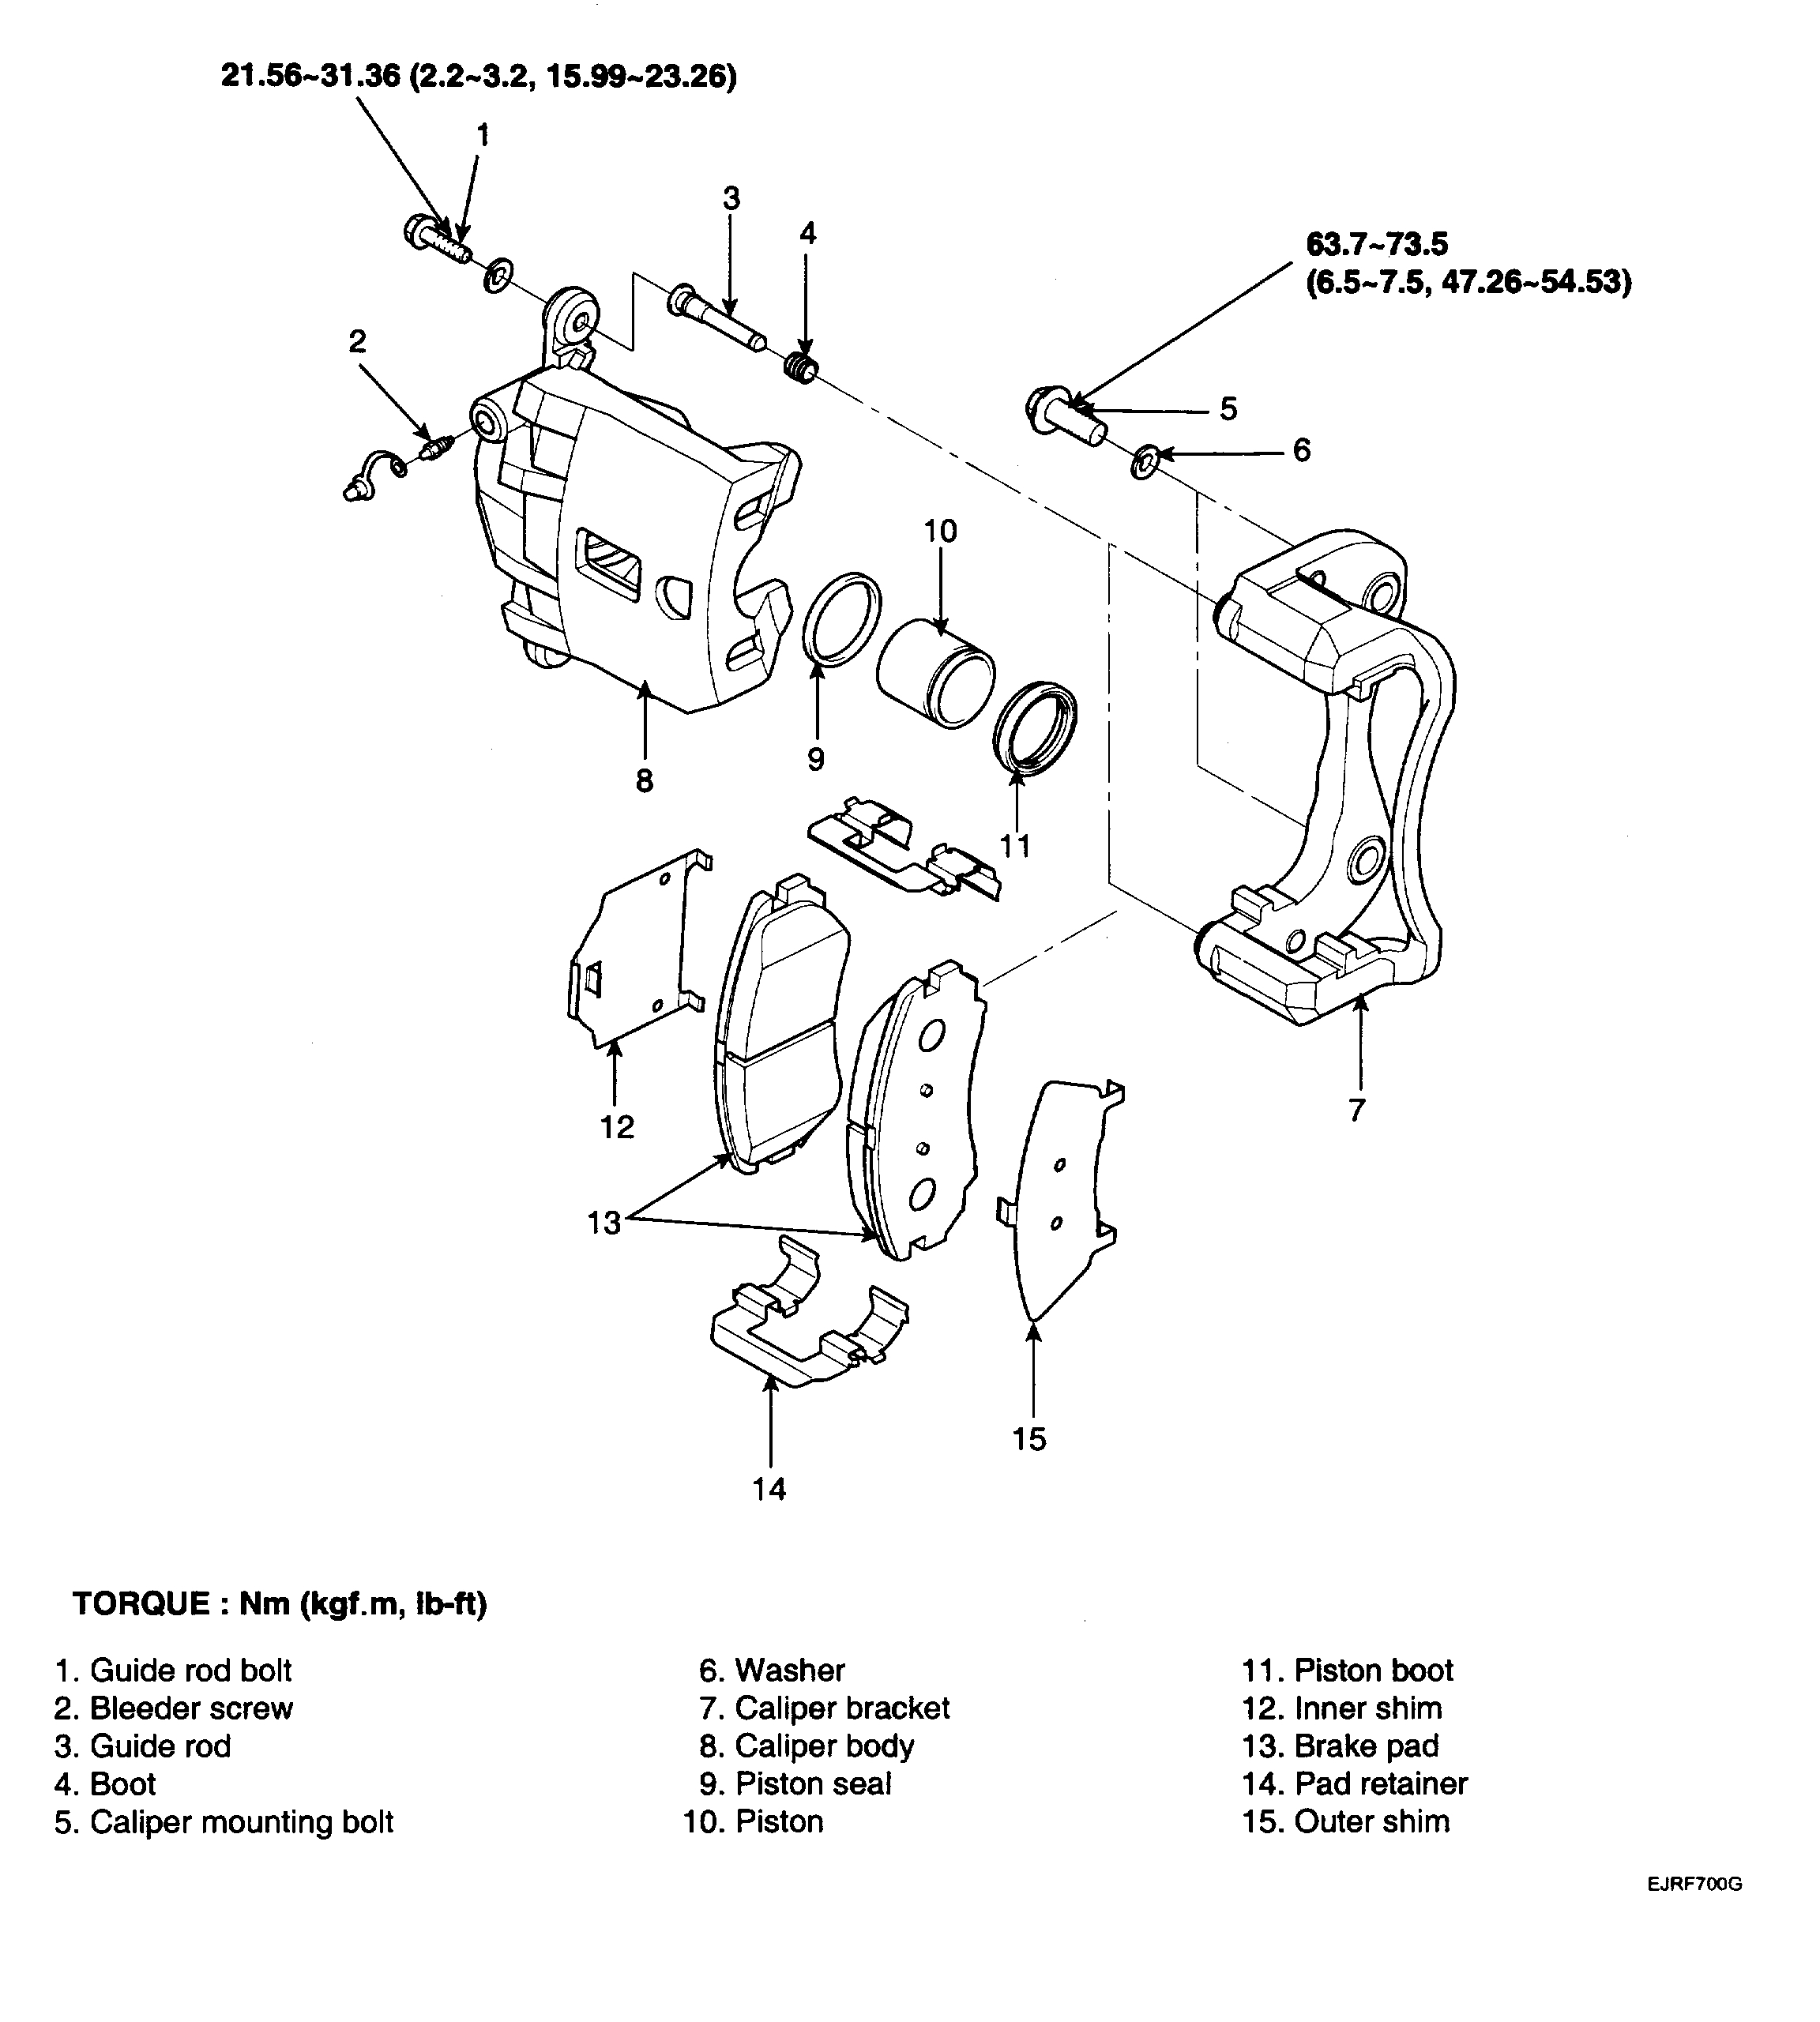
COMPONENTS
pic 2
REMOVAL
CAUTION:
Frequent inhalation of brake pad dust, regardless of material composition, could be hazardous to your health.
Avoid breathing dust particles.
Never use an air hose or brush to clean brake assemblies.
1. Loosen the front wheel nuts slightly. Raise the front of the vehicle, and make sure it is securely supported. Remove the front wheels.
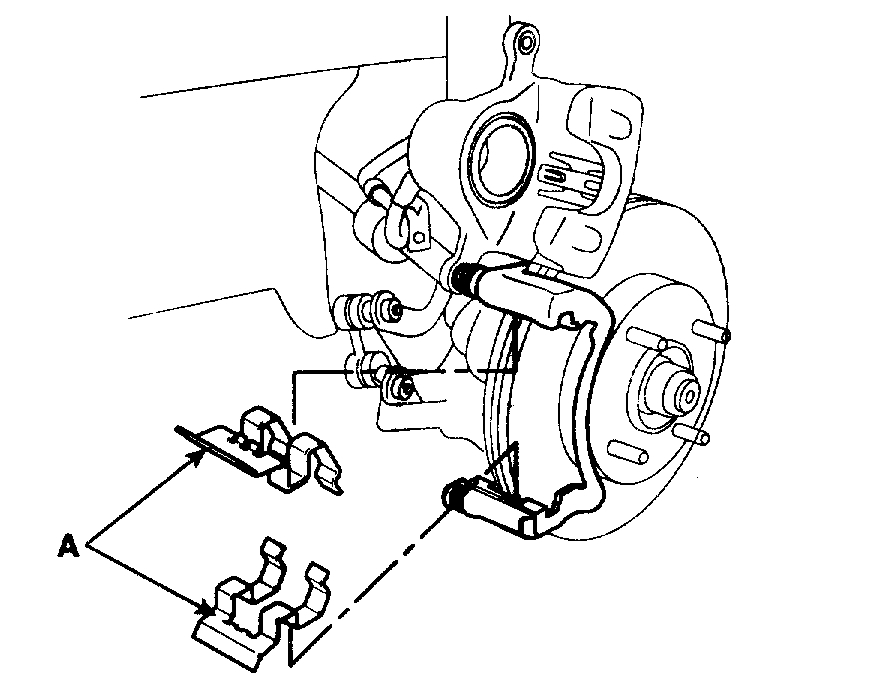
pic 3
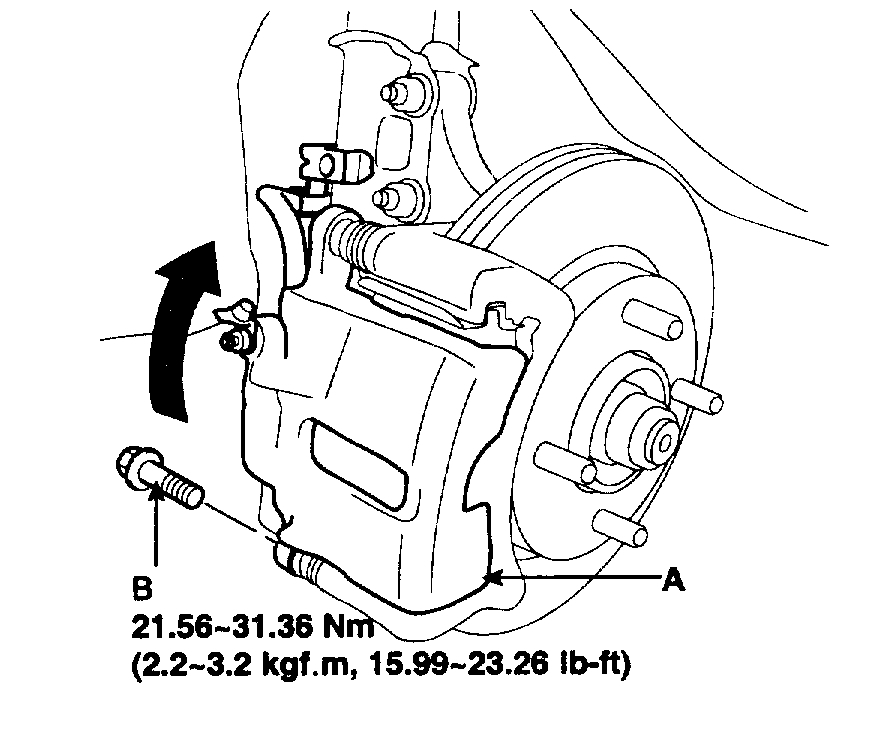
2. Remove the guide rod bolt (B), After raise the caliper assembly (A), support it with a wire.
pic 4
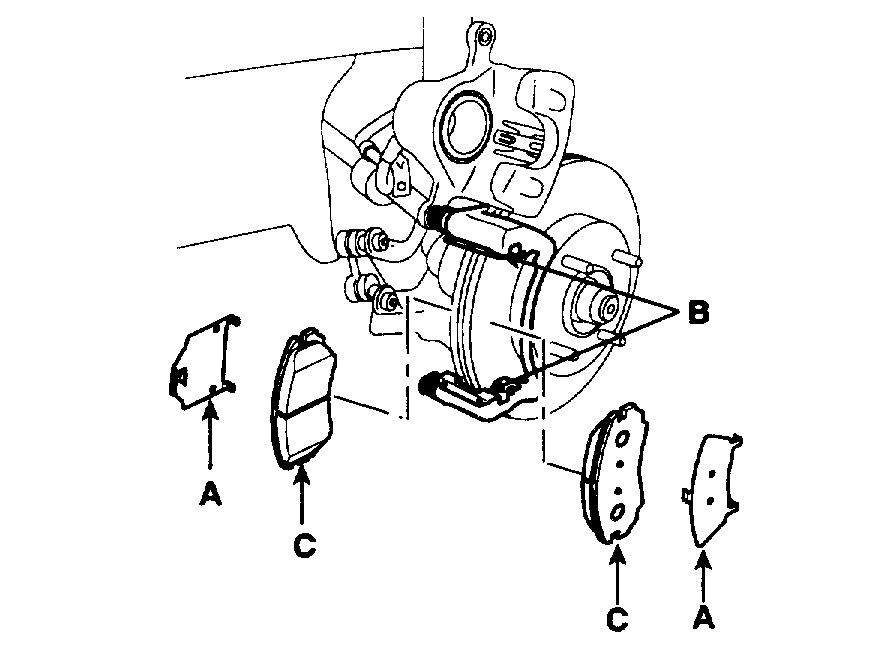
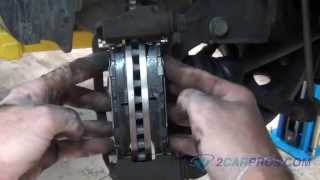
3. Remove pad shim (A), pad retainer (B) and pad assembly (c) in the caliper bracket.
INSTALLATION
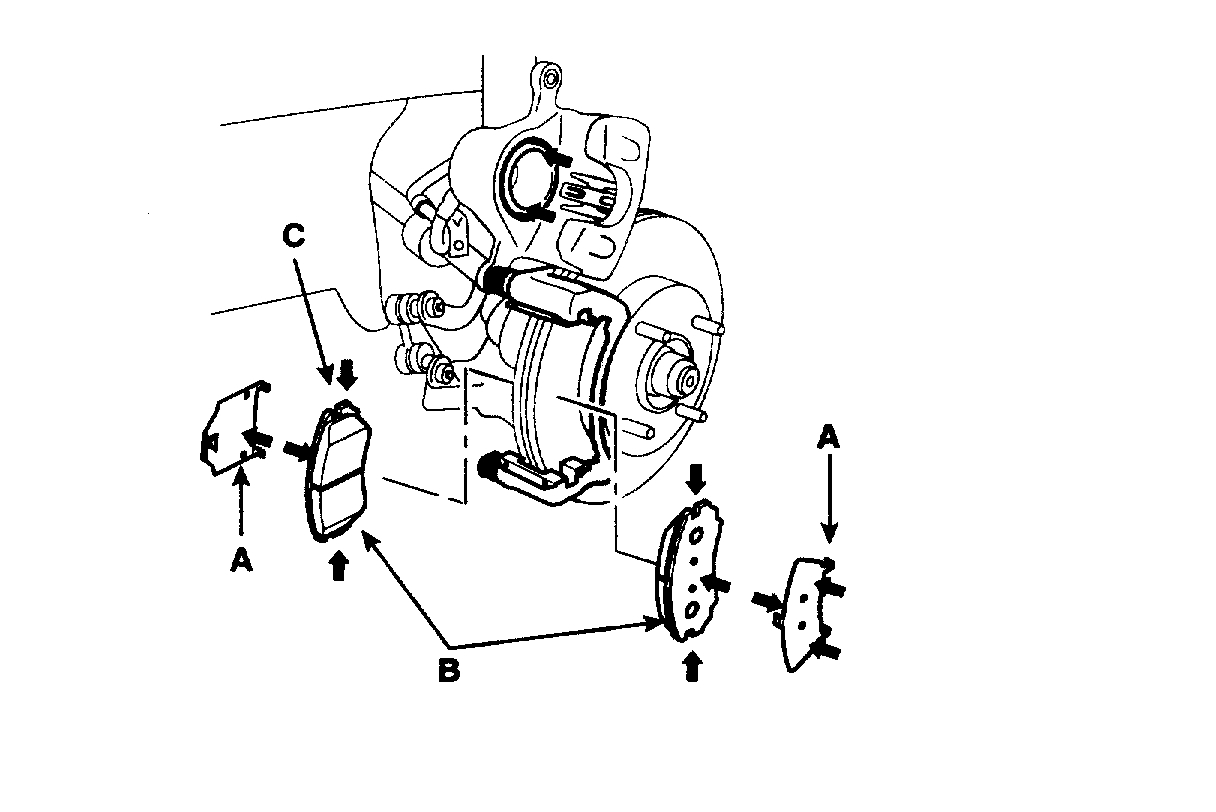
pic 5
1. Install the pad retainers (A) on the caliper bracket.
pic 6
2. Check the foreign material at the pad shims (A) and the back of the pads (B).
Contaminated brake discs or pads reduce stopping ability. Keep grease off the discs and pads.
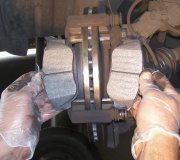
3. Install the brake pads (B) and pad shims (A) correctly. Install the pad with the wear indicator (C) on the inside.
If you are reusing the pads, always reinstall the brake pads in their original positions to prevent a momentary loss of braking efficiency.
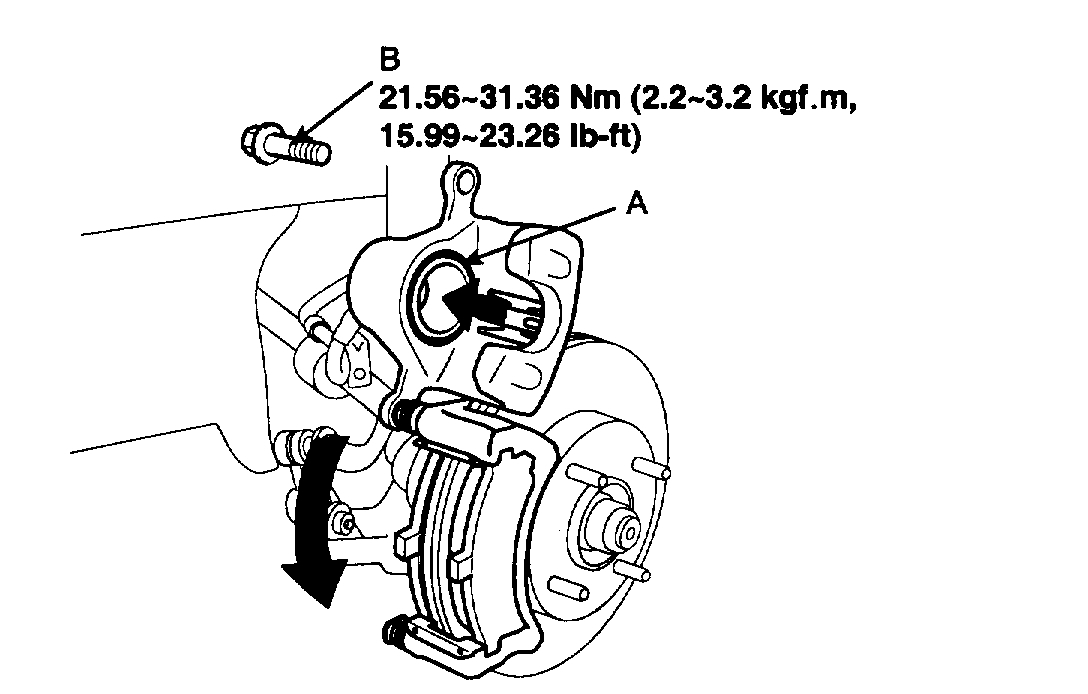
4. Push in the piston (A) so that the caliper will fit over the pads. Make sure that the piston boot is in position to prevent damaging it when pivoting the caliper down.
pic 7
5. Pivot the caliper down into position. Being careful not to damage the pin boot, install the guide rod bolt (B) and torque it to proper specification.
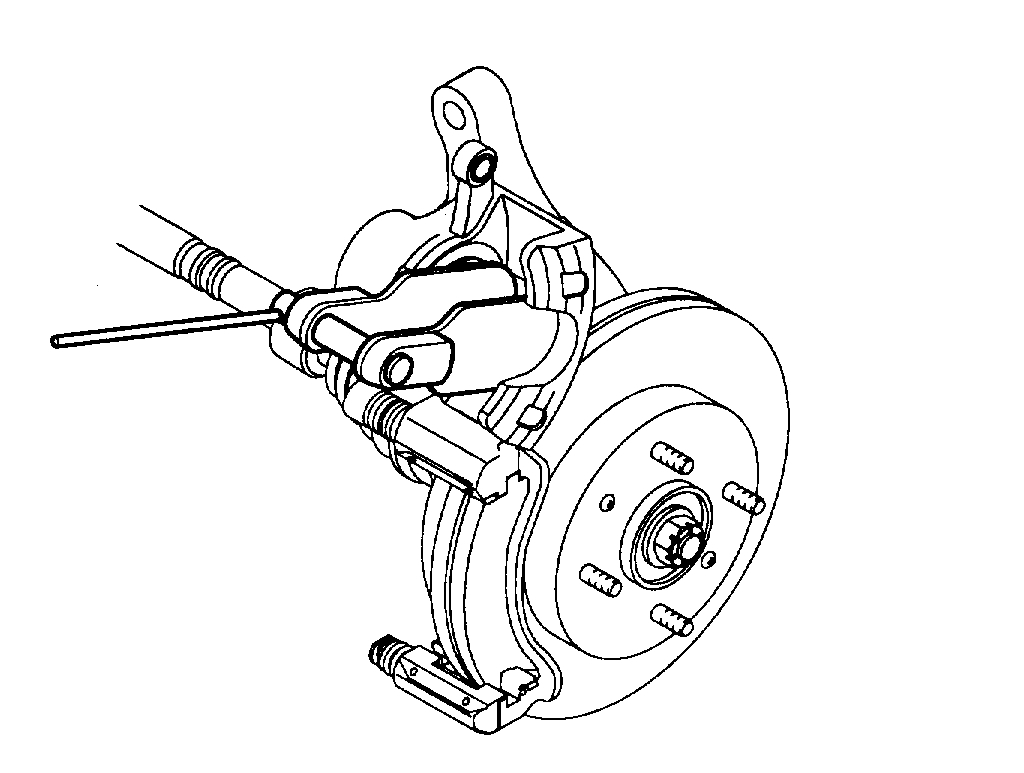
pic 8
NOTE: Insert the piston in the cylinder using the special tool (09581-11000).
6. Depress the brake pedal several times to make sure the brakes work, then test-drive.
NOTE: Engagement of the brake may require a greater pedal stroke immediately after the brake pads have been replaced as a set Several applications of the brake will restore the normal pedal stroke. Be sum to do this before driving the vehicle.
7. After installation, check for leaks at hose and line joints or connections, and retighten if necessary.
_________________________
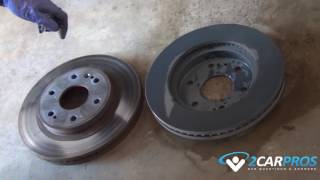
Rotor Replacement
When the brake caliper is removed for pad replacement, you will need to also remove the brake caliper mount. There are two bolts on the rear of the steering knuckle which hold the mount in place. Remove the bolts, remove the mount, and then remove and replace the brake rotor.
_______________________
Let me know if this helps or if you have other questions.
Take care and God Bless,
Joe
Images (Click to make bigger)
Monday, March 15th, 2021 AT 5:52 PM