First thing, the CEL does not and would not indicate that the water pump requires replacement. Some other thing has gone wrong and you need a scan to retrieve the trouble code to understand what is wrong.
What your neighbour is referring to is the noise which could be from the water pump.
WATER PUMP REPLACEMENT (LL8)
Tool Required
J 41240 Fan Clutch Remover and Installer
Removal Procedure
1. Drain the coolant. Refer to Draining and Filling Cooling System.
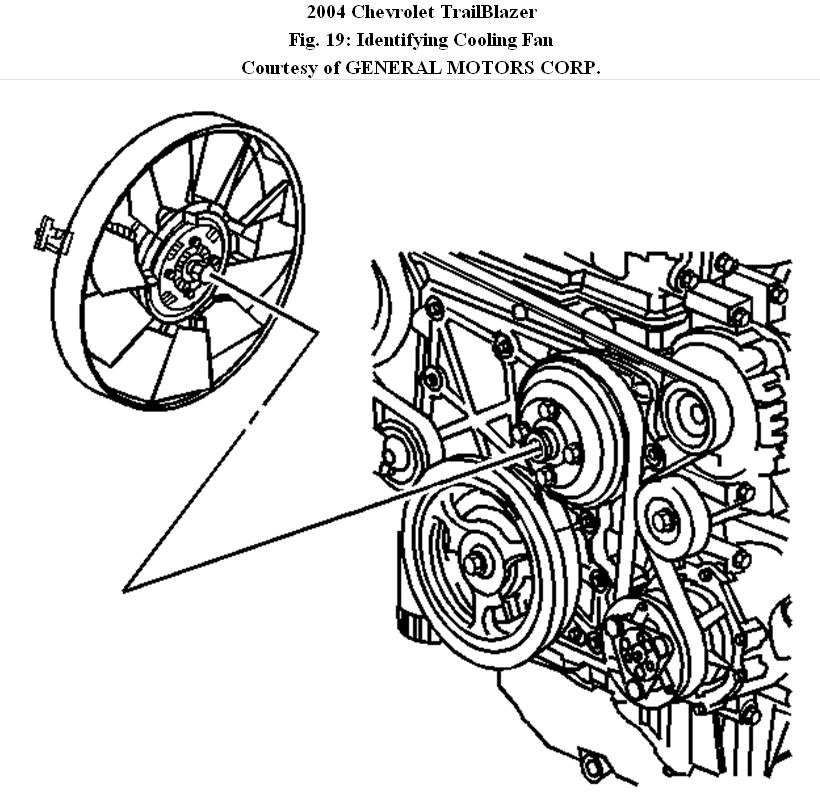
2. Remove the fan and shroud. Refer to Cooling Fan and Shroud Replacement.
3. Remove the drive belt. Refer to Drive Belt Replacement in Engine Mechanical - 4.2L.
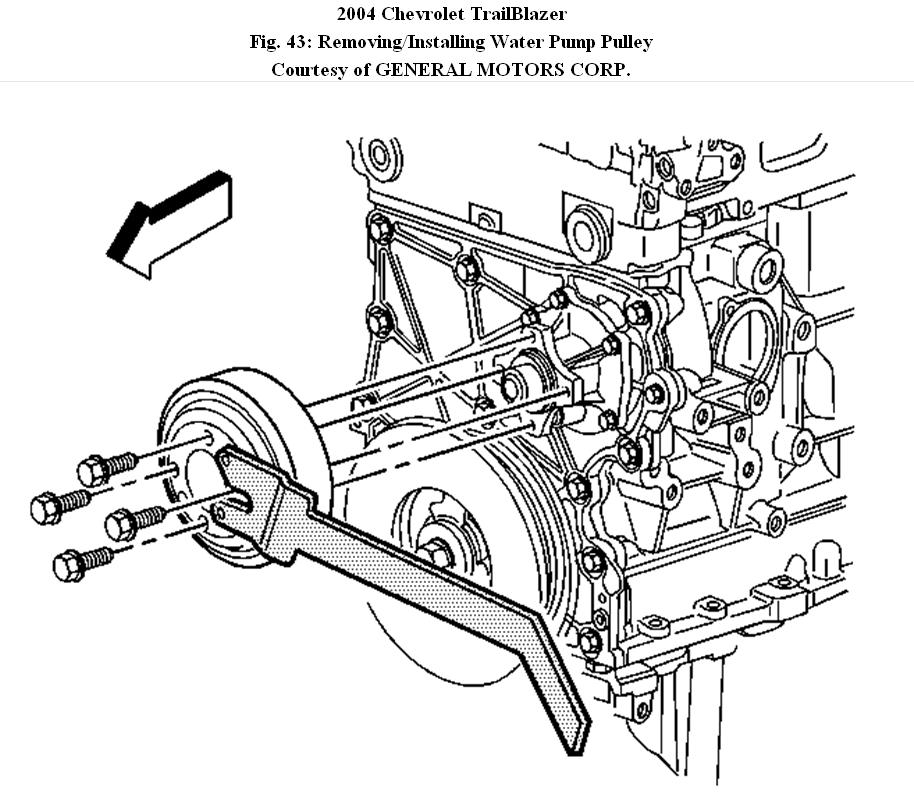
4. Using the J 41240 , secure the water pump pulley and remove the water pump pulley bolts. Without the special tool, loosen the bolts first before removal of drive belts. The drive belt would help to hold the pulley.
5. Remove the J 41240 .
6. Remove the water pump pulley.
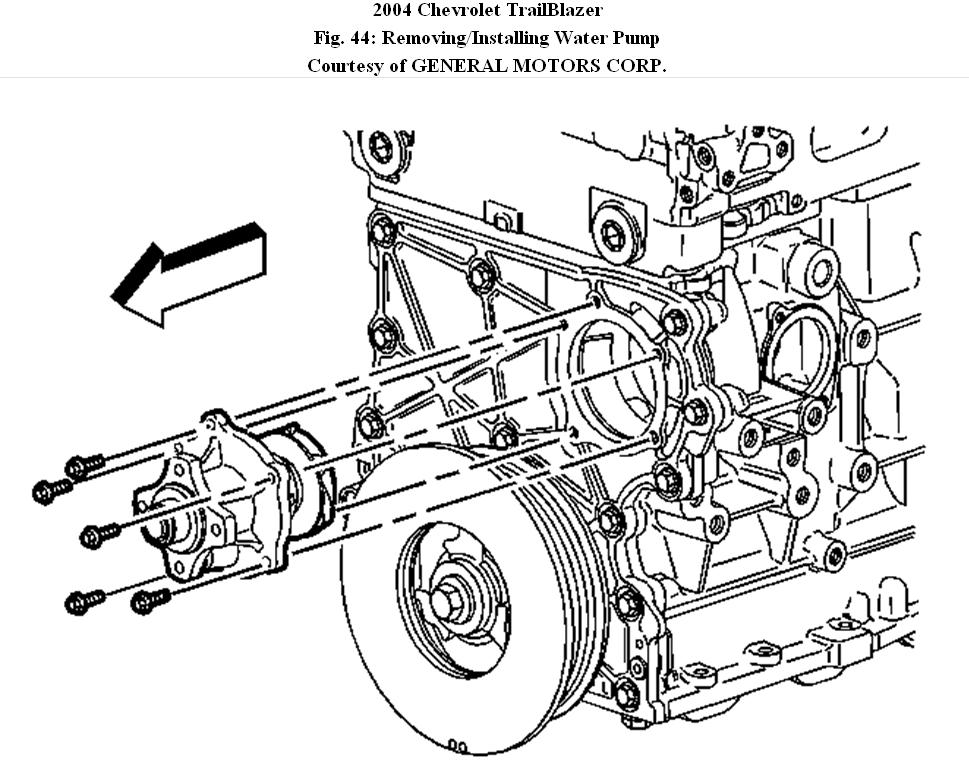
7. Loosen and remove the water pump bolts.
8. Remove the water pump.
9. Discard and replace the gasket.
Installation Procedure
1. Install a new water pump gasket.
2. Install the water pump and secure the water pump with the bolts.
Tighten:
• On the initial pass, tighten the bolts to 4 N.m (35 lb in).
• On the final pass, tighten the bolts to 10 N.m (89 lb in).
3. Install the water pump pulley.
4. Install the water pump pulley bolts.
5. Using the J 41240 , secure the water pump pulley while tightening the water pump pulley bolts. ( Without tools, tighten bolts as much as you can while holding the pulley with your hands. You can use a screwdriver as lefer and hold the pulley by wedging the screwdriver between the bolts, final tightening should be done after installation of drive belt).
Tighten: Tighten the bolts to 25 N.m (18 lb ft).
6. Remove the J 41240 .
7. Install the drive belt.
8. Install the fan and the shroud.
9. Fill the cooling system with the specified coolant and concentration.
10. Inspect for leaks.
© 2008 Mitchell Repair Information Co., LLC.
DRAINING AND FILLING COOLING SYSTEM (LL8)
Tools Required
• J 38185 Hose Clamp Pliers
• J 26568 Coolant and Battery Fluid Tester.
Draining Procedure
CAUTION:To avoid being burned, do not remove the radiator cap or surge tank cap while the engine is hot. The cooling system will release scalding fluid and steam under pressure if radiator cap or surge tank cap is removed while the engine and radiator are still hot.
IMPORTANT:
Draining the cooling system with the pressure cap installed will syphon the coolant from the overflow tank.
1. Park the vehicle on a level surface.
2. Allow the engine to cool.
3. Remove the radiator cap.
4. Raise and support the vehicle.
5. Place a drain pan under the lower radiator hose connection at the bottom of the radiator.
6. Using J 38185 slide the hose clamp back on the hose.
7. Slowly remove the lower radiator hose and drain the coolant into the drain pan.
8.
Coolant Filling Procedure
NOTE:
The procedure below must be followed. Improper coolant level could result in a low or high coolant level condition, causing engine damage.
1. Install the lower radiator hose.
2. Using J 38185 slide the clamp into the original position.
3. Lower the vehicle.
IMPORTANT:
Slowly add a mixture of 50/50 DEX-COOL antifreeze and deionized water to the cooling system through the top of the radiator until full.
4. Remove coolant recovery reservoir cap.
5. Fill the coolant recovery reservoir with the remaining coolant.
6. Install coolant recovery reservoir cap.
7. Install the radiator cap.
8. Start the engine.
9. Run the engine at 2,000-2,500 RPM until the engine reaches normal operating temperature.
10. Allow the engine to idle for 3 minutes.
11. Shut the engine OFF.
12. Allow the engine to cool.
13. Top off the coolant recovery reservoir as necessary.
14. Rinse away any excess coolant from the engine and the engine compartment.
15. Inspect the cooling system for leaks.
16. Inspect the concentration of the engine coolant using J 26568.
© 2008 Mitchell Repair Information Co., LLC.
COOLING FAN AND SHROUD REPLACEMENT
Tools Required
J 46406 Fan Clutch Remover and Installer.
Removal Procedure
1. Drain the cooling system.
2. Remove the air cleaner assembly.
3. Remove the air resonator assembly.
4. Remove the inlet radiator hose.
5. Remove the transmission oil cooler lines from the fan shroud.
6. Disconnect the fan clutch electrical connector.
7. Using J 46406 remove the fan clutch from the water pump.
8. Remove the mounting bolts from the upper fan shroud.
9. Lift and push the fan shroud inward to clear the filler neck on the radiator.
10. Remove the fan and the shroud.
Installation Procedure
1. Install the fan and the shroud.
2. Install the mounting bolts to the upper fan shroud.
Tighten:
Tighten the bolts to 28 N.m (21 lb ft).
3. Using J 46406 install the fan clutch to the water pump.
4. Connect the fan clutch electrical connector.
5. Install the inlet radiator hose.
6. Install the air resonator assembly.
7. Install the air cleaner assembly.
8. Fill the cooling system.
© 2008 Mitchell Repair Information Co., LLC.
Images (Click to enlarge)
Jan 10, 2011 at 7:06 PM