Go through the followng and see if you come up with anytbing.
DIAGNOSTIC SYSTEM CHECK
1. Connect scan tool to data Link Connector (DLC). DLC is located under instrument panel, near steering column. If scan tool powers up, go to next step. If scan tool does not power up, go to appropriate BODY CONTROL MODULES article in ACCESSORIES & EQUIPMENT.
2. Turn ignition on. Attempt to establish communications with Powertrain Control Module (PCM). If communication is established, go to next step. If communication is not established, go to appropriate SELF-DIAGNOSTICS article in ENGINE PERFORMANCE.
3. Following scan tool manufacturers instructions, select DISPLAY DTCs function for PCM. If any Diagnostic Trouble Codes (DTCs) are displayed, go to next step. If no DTCs are displayed, perform procedure for appropriate symptom. See SYMPTOM TESTS.
4. If scan tool displays any DTCs beginning with "U", go to appropriate BODY CONTROL MODULES article in ACCESSORIES & EQUIPMENT. If no DTCs beginning with "U" are displayed, go to next step.
5. If scan tool displays any DTCs beginning with "P", see
DIAGNOSTIC TESTS. If no DTCs beginning with "P" are displayed, go to appropriate SELF-DIAGNOSTICS article in ENGINE PERFORMANCE.
TEST F: COMPRESSOR CLUTCH DOES NOT ENGAGE
NOTE:
Definition: The A/C compressor clutch will not engage when an A/C request has been made and a Powertrain DTC has not been set.
1. If diagnostic system check was not performed, go to DIAGNOSTIC SYSTEM CHECK under SELF-DIAGNOSTIC SYSTEM. If diagnostic system check was performed, go to next step.
2. Connect scan tool. Start engine. If engine coolant temperature indicator is on, check engine for overheating condition and repair as necessary. If indicator is not on, go to next step.
NOTE:
Ensure ambient air temperature is above 38°F (3°C).
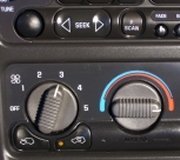
3. Start engine. Place blower motor switch in maximum speed position. Place A/C request switch in ON position. Place air temperature switch in coldest position. If A/C compressor operates, inspect wiring system and connectors for poor connections. If A/C compressor does not operate, go to next step.
4. Park vehicle inside or in the shade. Open windows to ventilate interior of vehicle. If A/C system was operating, allow A/C system to equalize for approximately 2 minutes. Turn ignition off. Install A/C manifold gauge set. Record ambient air temperature at vehicle. Record readings of low and high side STATIC pressures. Compare pressure values with specifications for ambient air temperature. A/C SYSTEM PERFORMANCE TEST under SYSTEM TESTS. If pressure values are within 15 psi (1.05 kg/cm2) of each other and within ambient air temperature specifications, go to next step. If pressure values are not as specified, check for a refrigerant leak.
5. Turn ignition on, engine off. Using scan tool, observe A/C HIGH SIDE PRESSURE parameter in Powertrain Control Module engine data 2 list. Compare A/C High Side Pressure on scan tool to high side pressure value on manifold gauge set. If high side pressure value is within 15 psi (1.05 kg/cm2) of each other, go to next step. If high side pressure value is not within 15 psi (1.05 kg/cm2 ) of each other, go to step 19.
6. If HVAC control assembly is inoperative, go to step 18. If HVAC control assembly is not inoperative, go to next step.
7. Start engine. Using scan tool, observe A/C REQUEST SIGNAL parameter in Powertrain Control Module engine data 2 list. Place air temperature switch in coldest position. Place A/C request switch in ON position. Place blower switch in maximum position. If scan tool indicates A/C REQUEST SIGNAL PARAMETER is ON, go to step 12. If scan tool does
not indicate A/C Request Signal parameter is ON, go to next step.
8. If A/C request indicator illuminates, go to step 10. If A/C request indicator does not illuminate, go to next step.
9. Ensure blower motor switch is in ON position. Turn ignition on. Check blower motor off circuit for a short to voltage. If short to voltage is found, repair as necessary. When repair is complete, go to step 37. If short to voltage is not found, go to step 30.
10. Turn ignition off. Disconnect PCM. Turn ignition on, with engine off. Place air temperature switch in coldest position. Place blower motor switch in maximum speed position. Place A/C request switch in ON position. Measure voltage from A/C request signal circuit of PCM to a good ground. If voltage is within 7.0-12.5 volts, go to step 31. If voltage is not 7.0-12.5 volts, go to next step.
11. Check A/C request signal circuit for a short to ground. If short to ground is found, repair as necessary. When repair is complete, go to step 37. If short to ground is not found, go to step 30.
12. Using scan tool, command A/C Relay ON and OFF. If A/C compressor clutch relay turns ON and OFF with each command, go to step 16. If A/C compressor clutch relay does not turn ON and OFF with each command, go to next step.
13. Turn ignition off. Disconnect A/C compressor clutch relay. Turn ignition on, engine off. Using a test light connected to ground, probe coil side battery positive voltage circuit of A/C compressor clutch relay. If test light illuminates, go to next step. If test light does not illuminate, go to step 26.
14. Connect test light between A/C compressor clutch relay control circuit of A/C compressor clutch relay and coil side battery positive voltage supply circuit of A/C compressor clutch relay. Using scan tool, command A/C Relay ON and OFF. If test light turns ON and OFF with each command, go to step 28. If test light does not turn ON and OFF with each command, go to next step.
15. If test light remains illuminated with each command, go to step
22. If test light does not remain illuminated with each command, go to step 21.
16. Turn ignition off. Disconnect A/C compressor clutch relay. Using test light connected to a good ground, probe switch side battery positive voltage circuit of A/C compressor clutch relay. If test light illuminates, go to next step. If test light does not illuminate, go to step 25.
17. Connect 10-amp Fused jumper wire between switch side battery positive voltage circuit of A/C compressor clutch relay and A/C compressor clutch supply voltage circuit of the A/C compressor clutch. If A/C compressor clutch engages, go to step 28. If A/C compressor clutch does not engage, go to step 23.
18. Check ignition 3 voltage circuit of HVAC control assembly for short to ground, high resistance, or open. If short to ground, high resistance or open condition is found, repair as necessary. When repair is complete, go to step 37. If short to ground, high resistance, or open condition is not found, go to step 20.
19. Check ground circuit of A/C refrigerant pressure sensor for open. If open is found, repair as necessary. When repair is complete, go to step 37. If open condition is not found, go to step 27.
20. Check ground circuit of the HVAC control assembly for an open. If open is found, repair as necessary. When repair is complete, go to step 37. If open condition is not found, go to step 30.
21. Check A/C compressor clutch relay control circuit of A/C compressor clutch relay for an open. If open is found, repair as necessary. When repair is complete, go to step 37. If open condition is not found, go to step 31.
22. Check A/C compressor clutch relay control circuit of A/C compressor clutch relay for a short to ground. If short to ground is found, repair as necessary. When repair is complete, go to step 37. If short to ground condition is not found, go to step 31.
23. Check A/C compressor clutch supply voltage circuit at A/C compressor clutch for a short to ground, a high resistance, or an open. If short to ground high resistance, or an open is found, repair as necessary. When repair is complete, go to step 37. If short to ground high resistance, or an open condition is not found, go to next step.
24. Check ground circuit of A/C compressor clutch for high resistance or an open. If short to ground high resistance, or an open is found, repair as necessary. When repair is complete, go to step 37. If short to ground, high resistance, or an open condition is not found, go to step 29.
25. Repair switch side battery positive voltage circuit of A/C compressor clutch relay. When repair is complete, go to step 37.
26. Repair coil side battery positive voltage circuit of A/C compressor clutch relay. When repair is complete, go to step 37.
27. Check A/C refrigerant pressure sensor harness connector for poor connections. If poor connection is found, repair as necessary. When repair is complete, go to step 37. If poor connection is not found, go to step 32.
28. Check A/C compressor clutch relay for poor connections. If poor connection is found, repair as necessary. When repair is complete, go to step 37. If poor connection is not found, go to step 33.
29. Check A/C compressor clutch harness connector for poor connections. If poor connection is found, repair as necessary. When repair is complete, go to step 37. If poor connection is not found, go to step 34.
30. Check HVAC control assembly harness connector for poor connections. If poor connection is found, repair as necessary. When repair is complete, go to step 37. If poor connection is not found, go to step 35.
31. Check PCM harness connector for poor connections. If poor connection is found, repair as necessary. When repair is complete, go to step 37. If poor connection is not found, go to step 36.
32. Replace A/C refrigerant pressure sensor. When repair is complete, go to step 37.
33. Replace A/C compressor clutch relay. When repair is complete, go to step 37.
34. Replace A/C compressor clutch. When repair is complete, go to step
37.
35. Replace HVAC control assembly. When repair is complete, go to step
37.
36. Replace PCM. Perform programming procedure for PCM. When repair is complete, go to next step.
37. Operate system to verify repair. If condition is corrected, system is okay. If condition is not corrected, go to step 4.
Sunday, February 6th, 2011 AT 7:37 PM