Removal� &� Installation
1. Disconnect� battery� ground� cable.� Disconnect� wiring� connectors� in� engine� compartment.� Remove� 2� bolts� retaining� hood� latch� control� handle� and� cable.� Remove� 2� bolts� attaching� parking� brake� release.
2. Remove� console� (if� equipped).� On� Ranger, � move� transfer� case� control� to� far� forward� position.� On� all� vehicles, � remove� instrument� panel� steering� column� cover� by� removing� 2� screws� and� pulling� on� cover� to� release
grasshopper� clips.
3. Remove� bracket� bolt� at� right� of� accelerator� pedal.� Remove� instrument� panel� steering� column� reinforcement� (6� screws).� Remove� 2� TK� yoke� nuts� from� vehicle� cross� beam, � and� remove� TK� yoke.
4. Open� fuse� panel� door, � and� remove� 2� bolts� holding� instrument� panel� to� cowl.� Remove� bolt� from� right� side� of� instrument� panel.� Remove� one� threadless� fastener� and� 2� push pins� attaching� insulator� to� lower� right� han
instrument� panel.
5. Using� a� flat� wooden� dowel, � lift� edge� of� defroster� grille, � and� pull� up� on� grille� to� release� clips� and� tension� tabs.� Remove� defroster� grille.� Remove� 4� bolts� at� top� of� instrument� panel.� Pull� panel� back� from� cowl.
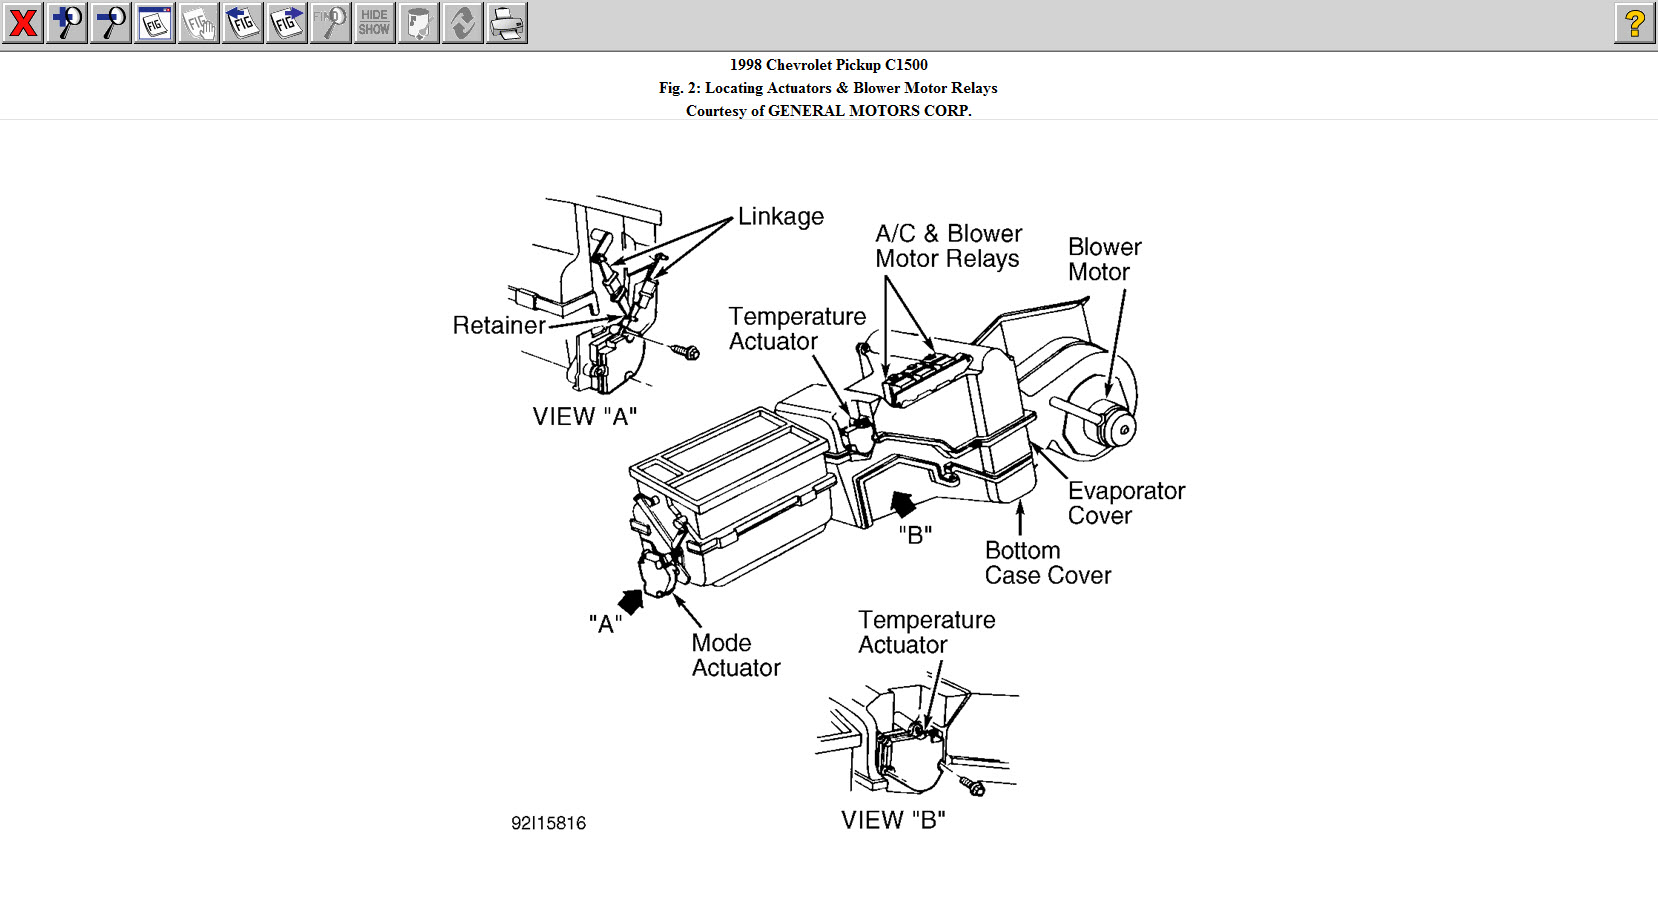
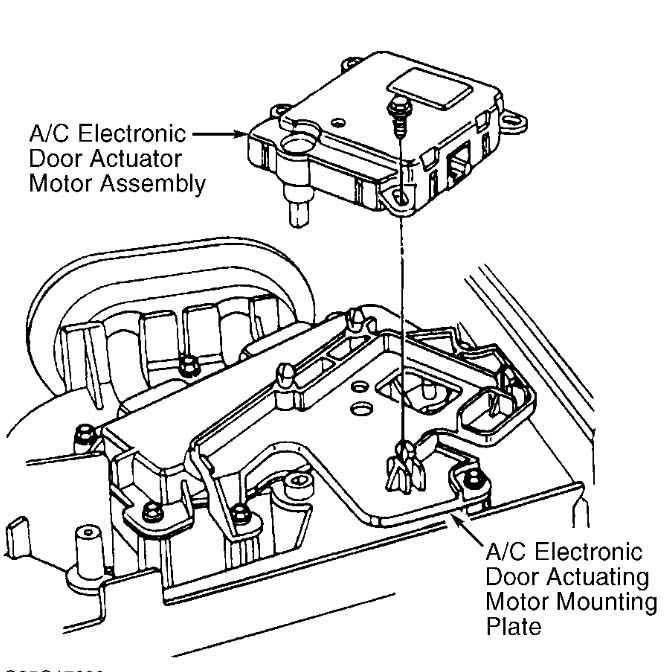
6. Remove� A/C� electronic� door� actuator� motor� electrical� connector� from� bracket� on� evaporator� housing.� Remove� 3� actuator� retaining� screws.
NOTE: Mounting� bracket� remains� in� place� on� evaporator� housing.
7. To� disengage� motor� from� bracket� and� actuator� shaft, � lift� actuator� motor� upward� 1/2� inch, � then� pull� toward� rear� of� vehicle.� To� install, � reverse� removal� procedure.� See Fig.� 3�.
Image (Click to make bigger)
Saturday, November 12th, 2011 AT 5:58 PM