1991 Honda Accord power steering rack removal

Tiny
JMATTHEW97
  • MEMBER
  • 1991 HONDA ACCORD
  • 4 CYL
  • AUTOMATIC
  • 271,000 MILES
Hi,

I have a 1991 Honda Accord LX 4-door sedan. My question is how do I remove the rack and pinion steering rack/gearbox from the vehicle?

I have precisely followed the instructions in the service manual, which are as follows:
1. Drain the power steering fluid. See: Power Steering Fluid\Service and Repair
2. Raise the front of car and support on safety stands in the proper locations.
3. Remove the front wheels.
4. Remove the steering joint cover.
5. Remove the steering joint bolts, and move the joint toward the column.
6. NOTE: Lock the steering shaft with ignition key to keep the steering shaft in position.
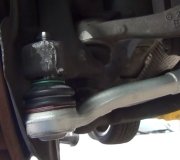
7. Remove the cotter pin from the castle nut and remove the nut.
8. Install the 12 mm hex nut on the ball joint. Be sure that the 12 mm hex nut is flush with the ball joint pin end, or the threaded section of the ball joint pin might be damaged by the ball joint remover.

NOTE: Remove the ball joint using the Ball Joint Remover, 28 mm (07MAC-SL00200l or equivalent.

9. Separate the tie-rod ball joint and knuckle using the special tool.
10. Remove the gearbox shield.
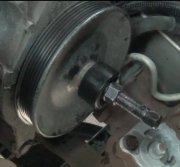
11. Using solvent and a brush, wash any oil and dirt off the valve body unit, its lines, and that end of the gearbox, blow them dry with compressed air.
12. Using flare nut wrenches, disconnect the four lines from the control unit.

A: From pump: 14 mm wrench
B: To oil cooler: 12 mm wrench
C: To reservoir: 17 mm wrench
D: To power steering speed sensor: 12 mm wrench

13. Disconnect the 4P connector from the heated oxygen sensor. (EX, SE only)
14. Remove the exhaust pipe A bracket nuts.
15. Remove the self-locking nuts that connect the exhaust pipe A to the three way catalytic converter, and the exhaust pipe A to the exhaust manifold.
16. Remove the exhaust pipe A.

CAUTION: Replace the exhaust gasket and self-locking nuts when you reinstall the pipe.

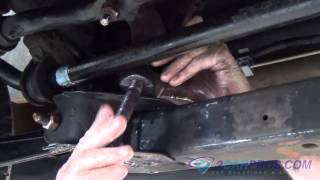
17. Remove the steering gearbox mounting bolts and holder.
18. Remove the left tie-rod end, then slide the tie rod all the way to the right side.
19. Slide the gearbox right so that the left tie rod clears the bottom of the rear beam, then remove the gearbox assembly.

CAUTION: Be careful not to bend or damage the four power steering lines when removing the gearbox assembly.

My problem is at the very end of the procedure, with steps 18 and 19. I have removed the outer tie rods on both sides and the entire rack is loose and ready to be removed; however, I do not have clearance of the shaft that goes from the gearbox up through the floor to the steering wheel. It is disconnected but the rack can't lower enough for it to clear the hole in the floorboard. There are some braces that are welded onto the undercarriage (through which the inner tie rods go) which is preventing the entire rack from lowering enough to get the clearance I need for that steering shaft to drop through the floorboard.

How do I gain the clearance? Please HELP?

Thanks,
John
Monday, February 28th, 2011 AT 10:33 AM

6 Replies

Tiny
CARADIODOC
  • MECHANIC
  • 33,742 POSTS
The cross member should be bolted on. Loosen the front bolts and remove the rear bolts so you can lower it a few inches. You might want to use spray paint around the bolts so you can see where to reinstall the bolts, otherwise the cross member could be shifted sideways. That will affect the alignment and make the car dart around on bumpy roads.
Was this
answer
helpful?
Yes
No
+1
Monday, February 28th, 2011 AT 10:56 AM
Tiny
KHLOW2008
  • MECHANIC
  • 41,815 POSTS
Ensure the steering rack is turned fully to right and if you bend the tierod upwards while pulling the gearbox downwards, you should be able to clear the hole.

If you had not removed the transmission gear shift cable, I would recommend doing it. If you force yourself onto the cable, it is going to bend and result in stiff shifting in and out of Park.
Was this
answer
helpful?
Yes
No
+2
Monday, February 28th, 2011 AT 2:14 PM
Tiny
JMATTHEW97
  • MEMBER
  • 5 POSTS
Thanks KHLow2008, your answer solved my problem. After I re-attached the steering wheel and turned it all the way to the left, then I was able to gain clearance to remove the left (driver's side) inner tie rod from the welded brace that it went trhrough and then I was able to lower the rack enough so that the steering shaft cleared the hole in the floorboard. Also, I had not yet removed the transmission gear shift cable, but did so on your recommendation. I think it would have been possible to do the job without removing it as long as you are careful, but I thought it was better to be safe than sorry, especially since this was my first time doing it. Also, I found the task of rethreading the 4 lines that go into the gearbox a real PITA, they were quite difficult to get started, but once started were easy. Not sure if there is a trick to make that part of the job easier or not. Thanks again, John
Was this
answer
helpful?
Yes
No
+2
Tuesday, March 1st, 2011 AT 7:34 AM
Tiny
KHLOW2008
  • MECHANIC
  • 41,815 POSTS
You're welcome.

For reconnecting the pipes, the trick is to therad them before tightening the steering rack holdng bolts and loosen the clips holding the pipes onto the subframe.

Removing the sway bar links would give you more space to move the pipes whiloe removing and reinstalling.

It is possible to remove the rack without removing the gear cable but when removing the rack you tend to brush against it and any sudden movement would have you regretting.

Glad to know you have fixed the problem.

Have a nice day.
Was this
answer
helpful?
Yes
No
Tuesday, March 1st, 2011 AT 1:59 PM
Tiny
JIM_MONTE
  • MEMBER
  • 1 POST
I just changed mine, which was a 1990 Honda Accord LX with a manual transmission -- not quite the same, but probably very similar. I had looked through a Haynes manual when I was having a problem, and it was not nearly as detailed as the service manual you used or at all helpful in my case. Who's manual is it? Honda's?

I believe your question was answered already, but I would like to mention a few things I remember that might be helpful to others finding this web page.

1) The biggest issue and the one that originally had me stuck was turning the steering to shorten one of the sides. The rack has to be turned from the input shaft (or pushed on the tie rod, either will work) so that the shorter side is as short as possible. That is the left/driver's side. It really has to be as short as possible. Mine was much harder to move that last bit and it seemed that the rack was just too long to get out. This is one of too many instances where Honda could have made the repair a lot easier by making a small design change, in this case a slightly lower loop so that the rack could easily be removed by moving it to nearly the end either range of travel rather than the very end of only one side. But it is what it is.

2) Removing the sway bar is probably a good idea. If it is not removed, the fluid lines will be blocked from moving back while the rack is removed. They possibly could be bent a little, but given their age, it may be something you regret doing. The sway bar is very easy to remove, only one bolt at each link and 2 bolts at each of 2 bushings.

3) Three of the fluid lines need to be freed from brackets holding them from moving. The one with the nut taking a 17 mm wrench has a bolt with a 10 mm head that is easily seen. One of the smaller lines has a squeeze-type retainer that was surprisingly easy to remove. The third one has a blind bolt, another one with a 10 mm head, that you need to feel along the line to find. The remaining line can be moved enough without doing anything.

4) The rubber grommet at the input shaft probably does not have to be removed. I am unsure because I removed it when I had problems getting the rack to clear the body of the car in hopes of getting a bit more space. But I was able to install the replacement after installing the grommet. I reversed the order because getting the grommet to seat properly with the shaft in the way was difficult.

I hope this reply is helpful to someone!
Was this
answer
helpful?
Yes
No
+2
Thursday, September 24th, 2015 AT 5:54 AM
Tiny
JMATTHEW97
  • MEMBER
  • 5 POSTS
Yep, I was using the Honda service manual.
Was this
answer
helpful?
Yes
No
+1
Thursday, September 24th, 2015 AT 4:19 PM

Please login or register to post a reply.

Sponsored links