3/4 and 1 Ton Application
This guide is created to show you how to replace an axle seal and bearing on a 3/4 and 1 ton rear axle. Most trucks and SUV's use the same style of Dana rear end so this guide will pertain to most repair jobs.
Step 1
Remove the Bearing Hub
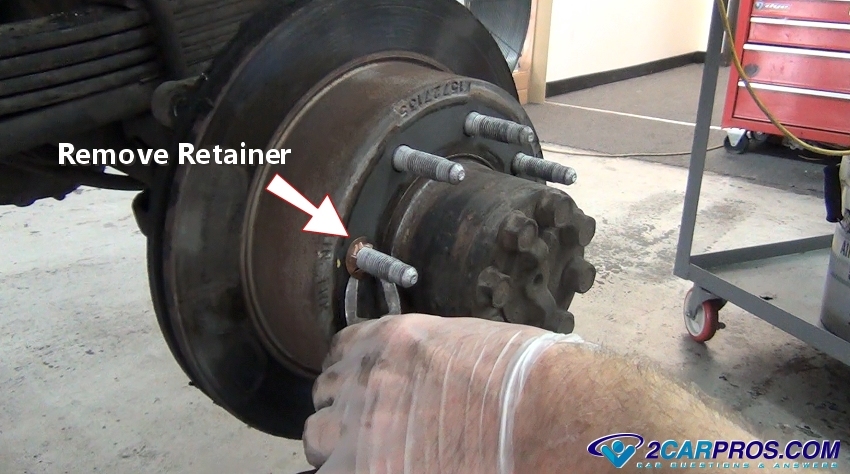
Once the brake caliper, mounting bracket and pads have been removed the brake rotor is next. Some rotors will have this annoying little retainer which is put on during manufacturing to hold the rotor on while the vehicle is moving around in the factory during assembly. This clip can be removed and discarded, use a pair of side cutters (dikes) to get under the clip and with the twisting motion grab the clip to remove.
Sometimes the rotor will be stuck on the bearing hub, use a hammer to "shock" it loose by striking it between the wheel studs being careful not to hit the studs. Grasp the rotor and pull it from the hub.
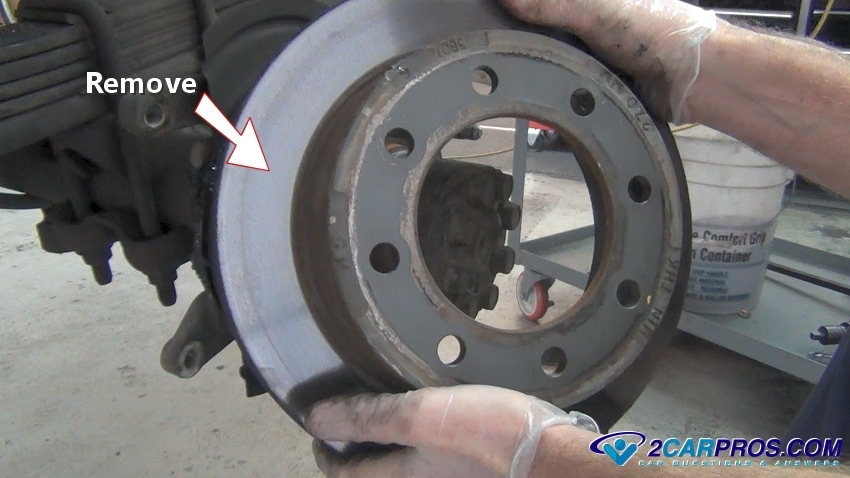
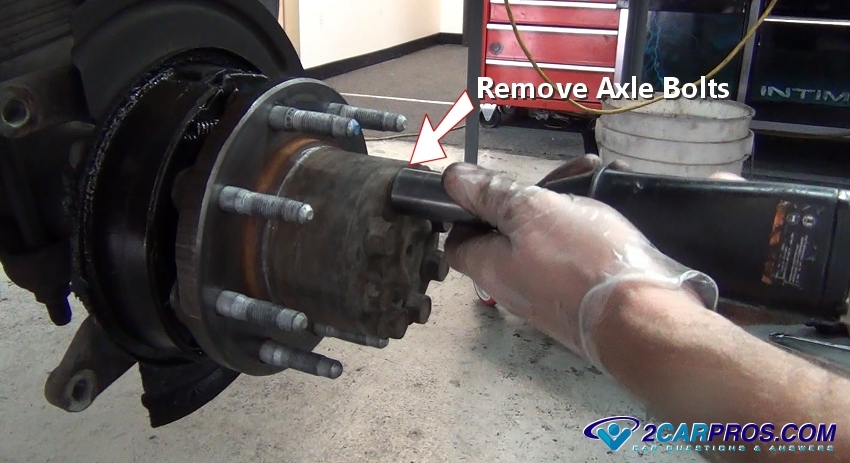
This will expose the parking brake shoes which in this case have been soaked with gear oil and will need to be replaced. If an impact gun is not being used leave the brake rotor on and set the parking brake to help hold the hub from turning while removing the axle bolts. Once the bolts have been broken loose remove the rotor. Continue until all bolts have been removed.
Learn more: How to replace parking brake shoes
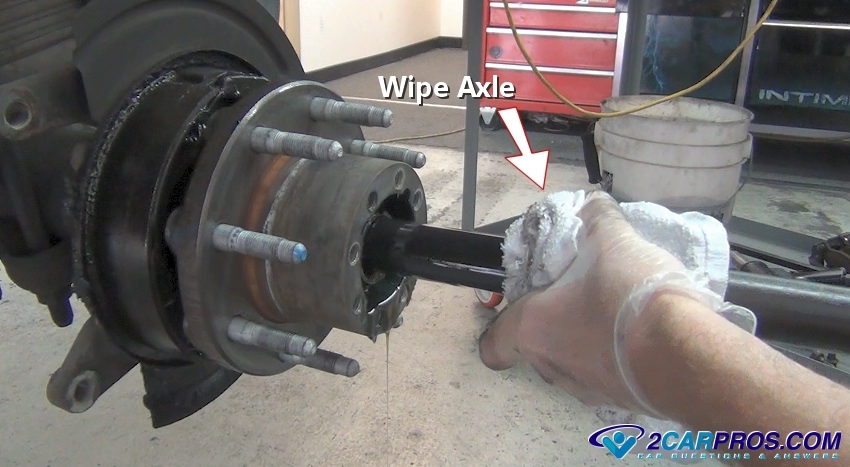
The axle will now be loose, grasp the end and pull outward. This will begin the axle removal, have a fluid catch basin ready because gear oil will leak out.
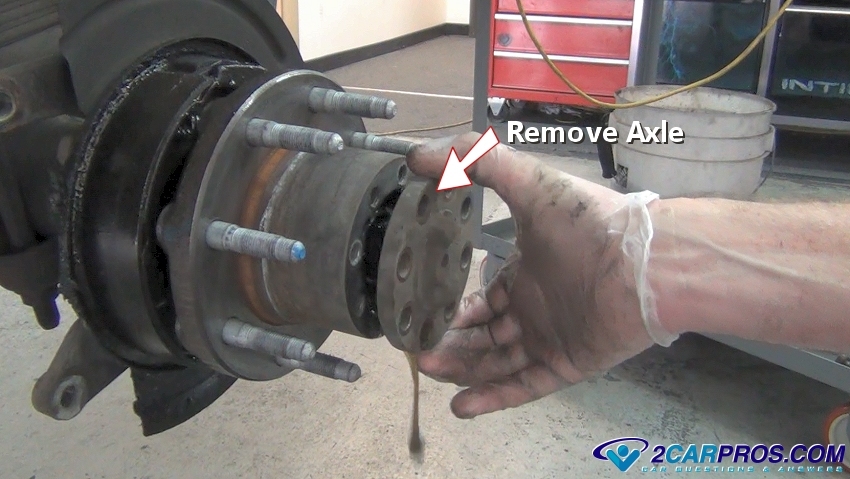
Use a shop towel to rap around the axle and continue to pull it out of the differential. Hold pressure on the towel to wipe the excess gear oil into the fluid catch basin.
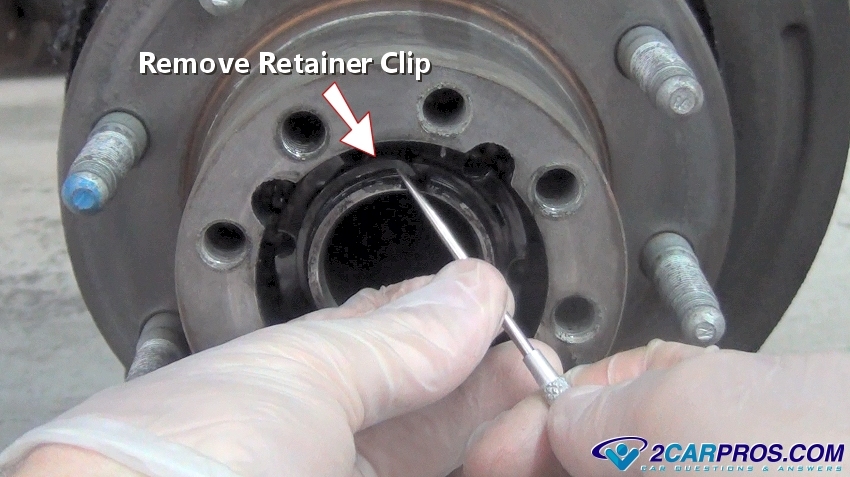
Use a small pick to move the end of the axle nut retainer ring upward. This will allow you to remove the ring while working the retainer ring from the axle tube threads. This ring is made of spring steel so try not to pull on it to hard or it will distort its form and may need to be replaced.
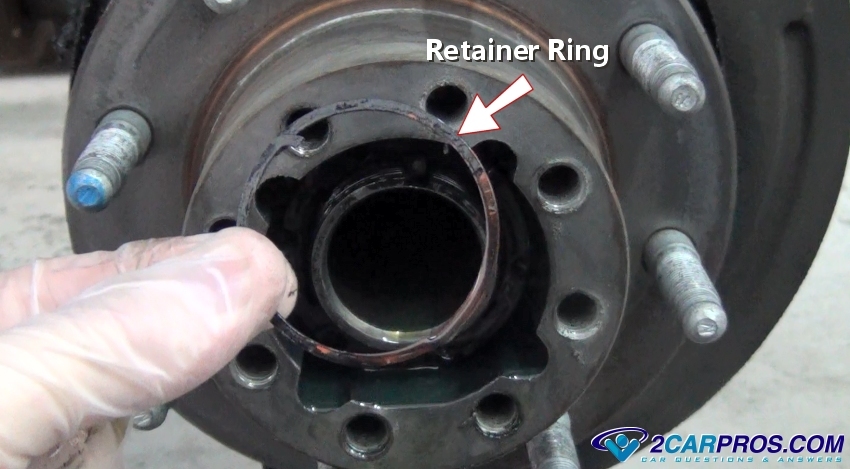
This is what the retainer ring look like when it is fully removed. Wipe this part clean and set it in a plastic container so you do not loose it, there will be more parts to follow.
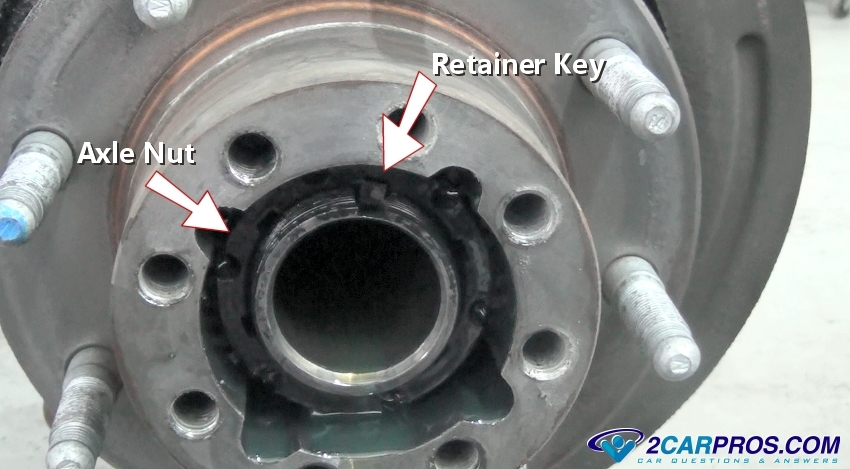
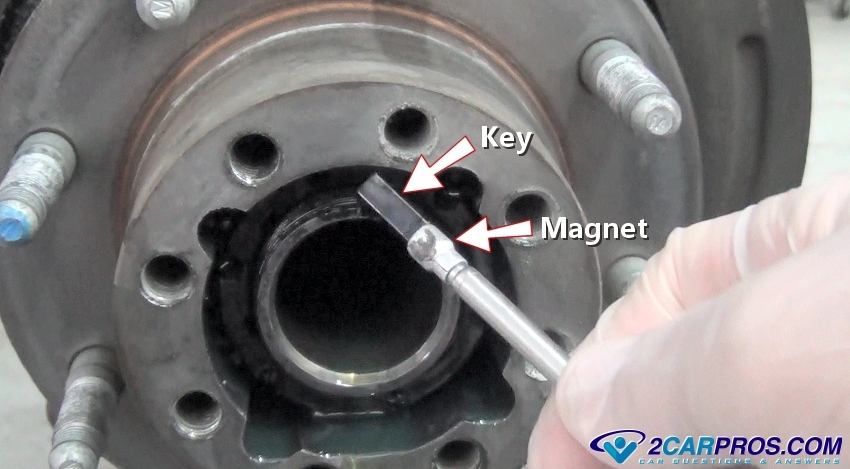
This will expose the retainer key and axle nut. This nut sits on the differential housing loose with the only thing holding it in place is the retainer key. That's why the retainer spring clip is so important to be installed correctly. The key is basically a small square piece of high grade metal the sits in a grove in the axle tube threads in which the axle nut threads onto. You can see the nut has spun a little holding the key from sliding out easily. You can rotate this nut slightly so a small magnet can pull the key outward.
Once the key is removed the nut can basically be removed by hand even though they make special socket for it.
They make a special socket to remove the axle nut but it is not needed even though it makes the removal of the nut easier. Like we said earlier this nut sits loose on the housing threads and can also be removed using the small punch in one of the indentations in the nut.
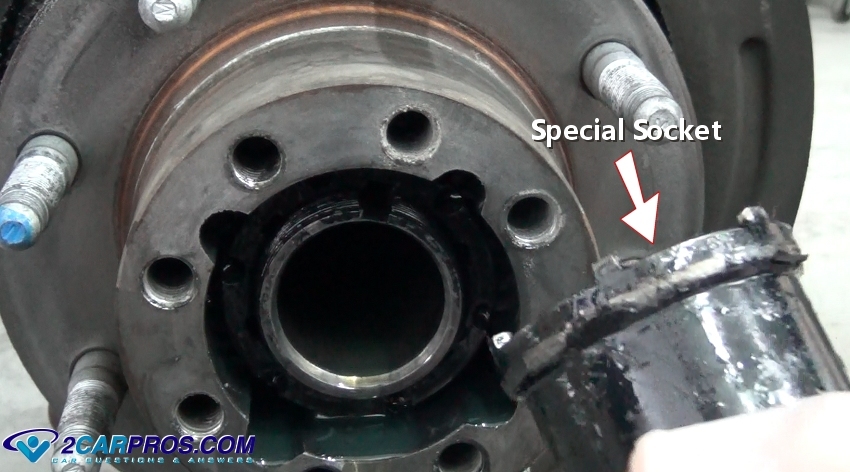
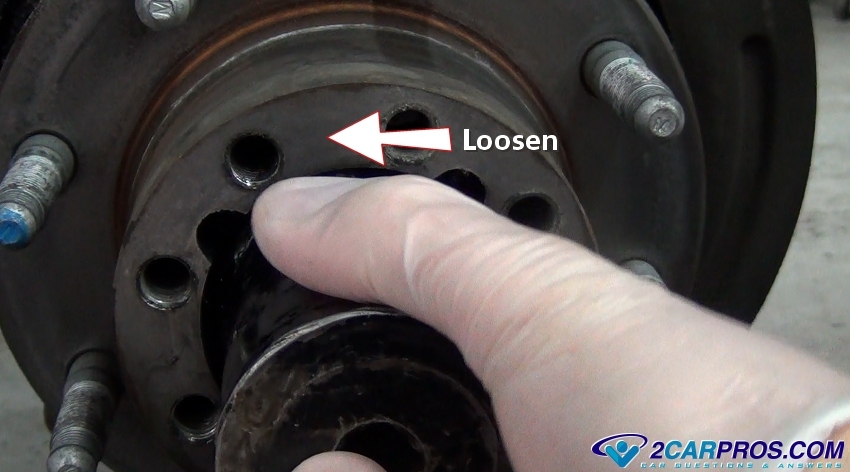
Insert the socket or small punch and start turning the axle nut counterclockwise. You can push the top of the rotor inward which will help take the residual pressure off of the bearing nut and will make it turn even easier. Continue to loosen the nut until fully removed.
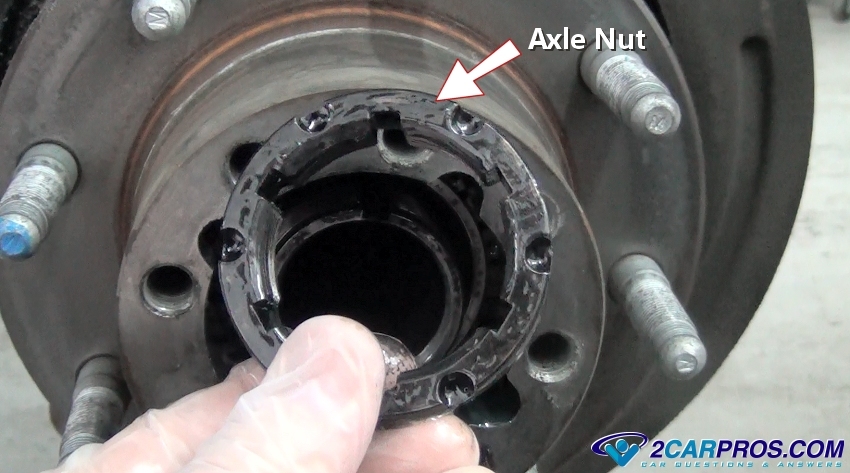
Here is what the axle nut looks like removed for the differential and bearing hub. You can see the symmetrical indentations which are used to remove the nut and the various keyway slots used for the adjustment of the bearing preload.
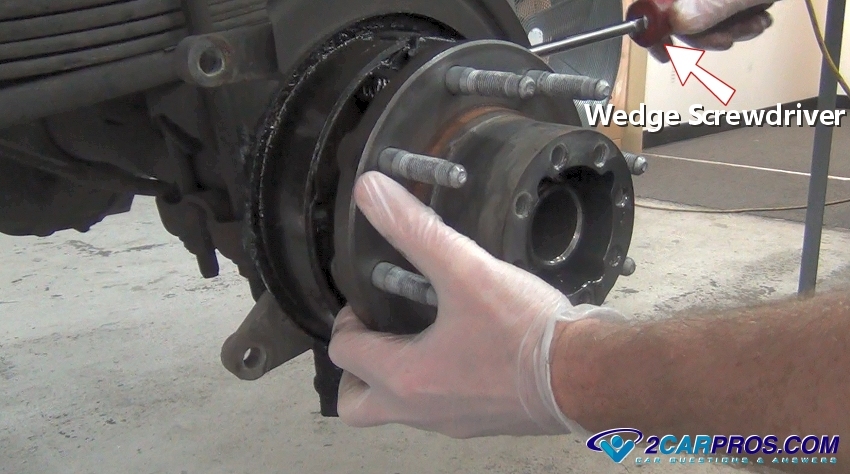
To remove the bearing hub use a large screwdriver or pry bar to "pop" the bearing hub loose. It can be a little stuck because of the oil seal which attached to the hub and the axle tube. Apply pressure to the hub moving it outward while turning the hub slightly.
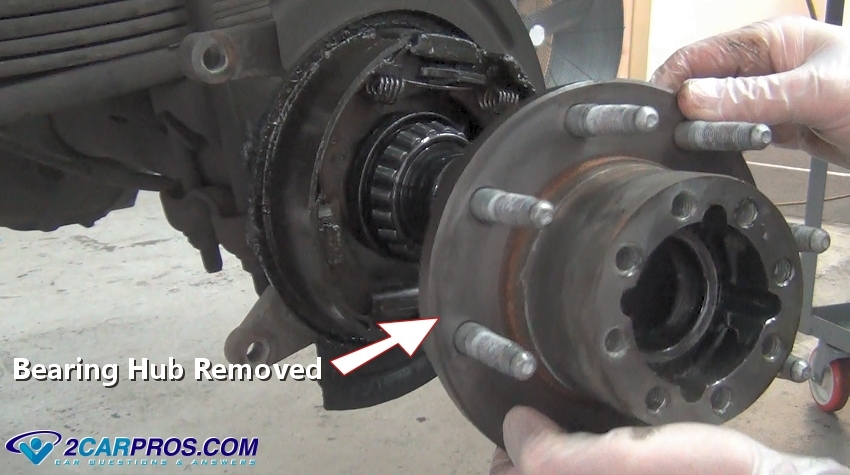
Now the bearing hub will slide off easily. It is heavy though so keep your hands on it so it doesn't fall. A slight amount of gear oil might leak out so have a shop towel ready.
Step 2
Replace the Axle Bearing and Race
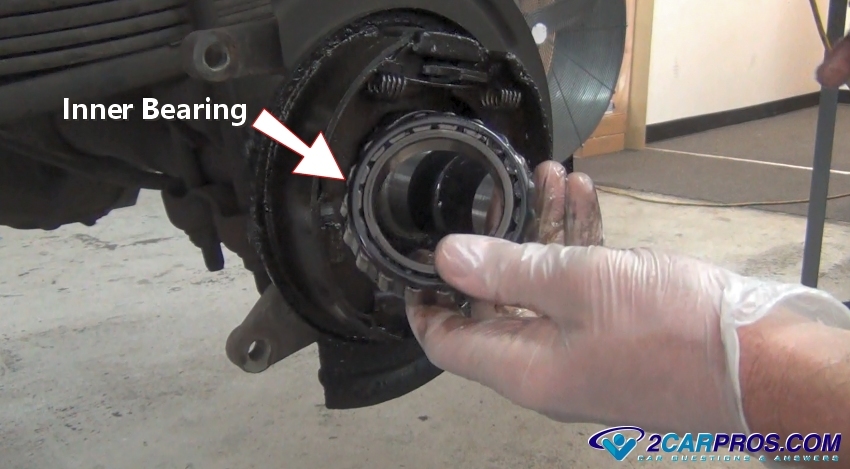
This is what the inner axle bearing looks like when it is removed from the differential housing. This bearing easily slides off of the axle tube and will have gear oil on it.
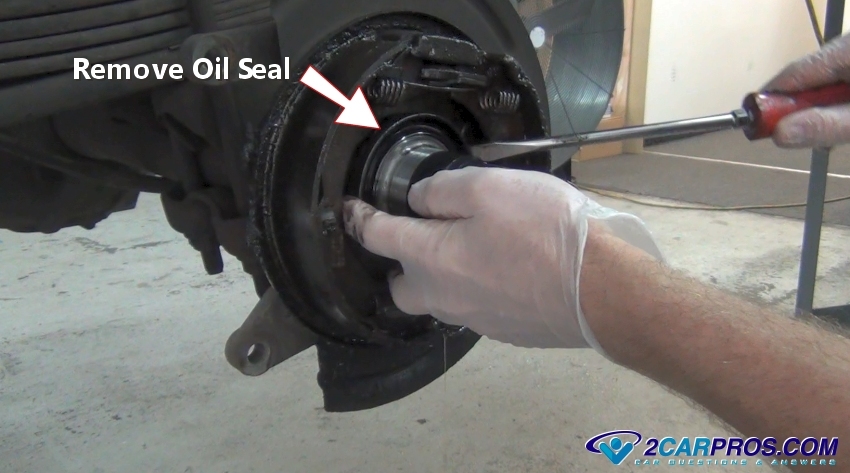
Next, use a large screwdriver or pry bar to force the oil seal from the differential. This seal is wedged between the differential housing and the bearing hub while allowing the hub to turn. This seal is a little different that traditional seals as both upper and lower parts of the seal are stationary wedged onto the bearing hub and axle tube. While the actual seal part is inside the seal assembly itself.
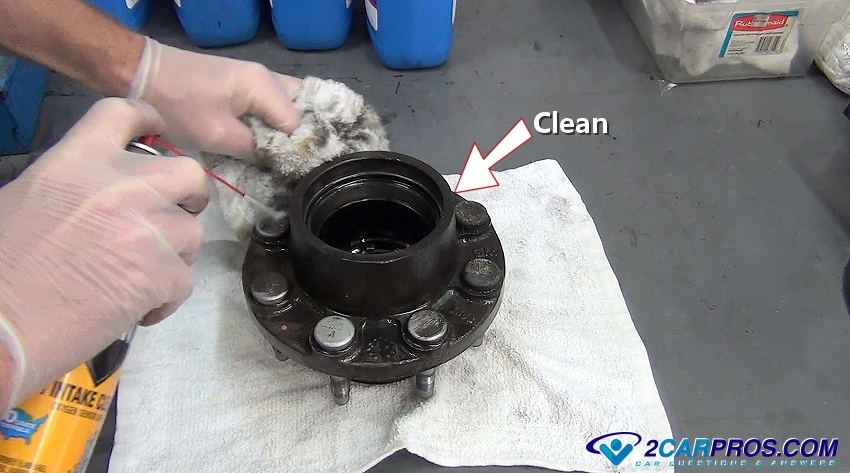
Use a shop towel and carburetor or brake cleaner to wipe clean the bearing hub. This is so when you reassemble the bearings you will be able to avoid getting gear oil onto the parking brake shoes or brake pads. Use care not to get cleaner on the inside of the hub.
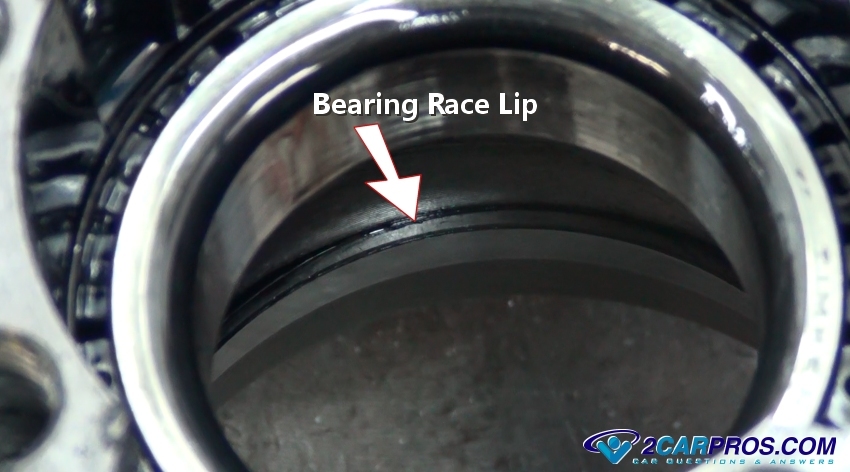
Looking inside the bearing hub you can see the bearing race lip sticking out from the actual hub casting. This is where you will set the large punch against to hammer the race from the hub.
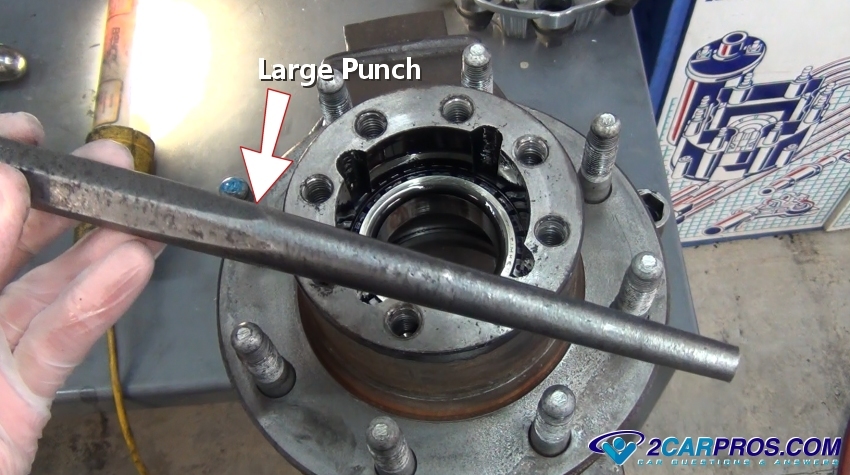
Use a large punch which is show here with a nice square edge at its tip. If the punch tip is rounded use a grinder to flatten the tip before beginning to remove the race. This will help remove the race more efficiently.
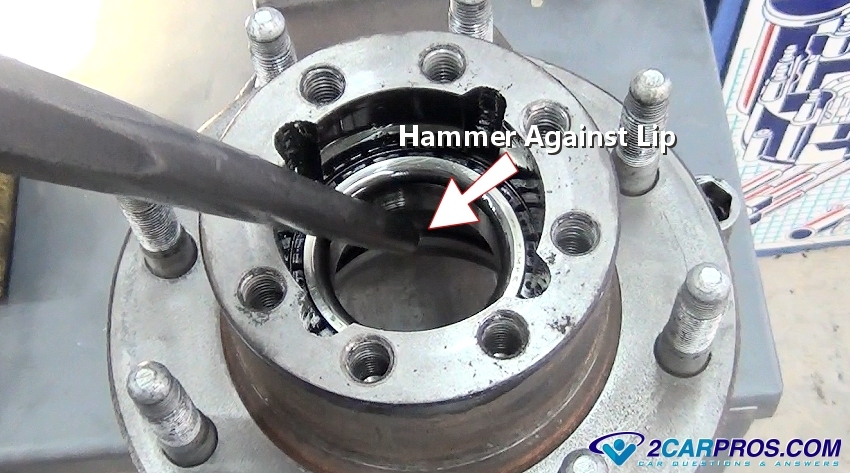
Begin by placing the punch tip against the race lip and begin the removal process by striking the opposite end of the punch with a large hammer. Continue the removal process by working around the race evenly until completely removed. To remove the outer bearing you must remove the snap ring from inside the hub and hammer the bearing out with the race together using a bearing driver tool.
Step 3
Install the Race and Bearing
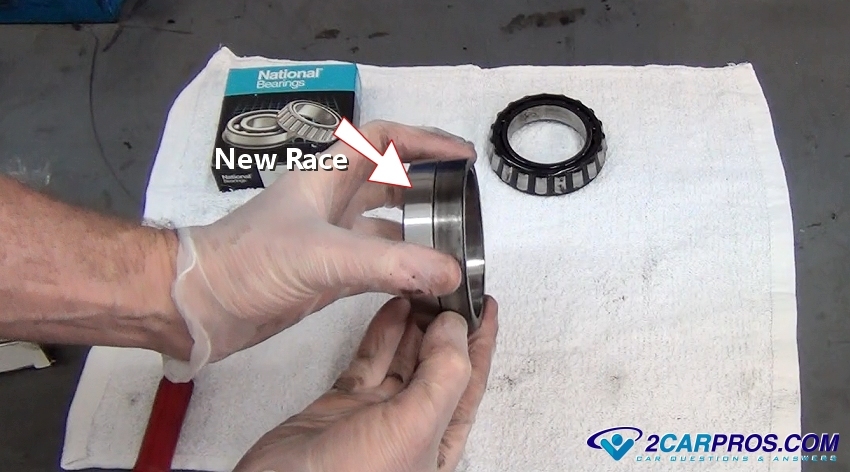
Remove the new replacement race from the box and hold it against the old race to check the outside diameter, they should be the same.
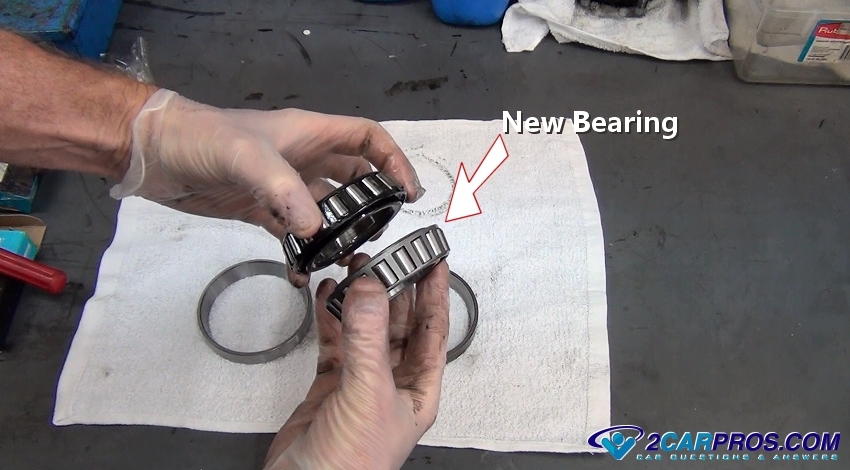
Next, remove the new axle bearing from the box and match it to the old bearing, they also should be identical.
Use a shop towel to wipe clean the bearing mounting surface before installing the race. Get this as clean as possible because you don't want any lubricant between the race and the hub. This can cause the race to lose its press fit in the hub and the hub will need to be replaced.

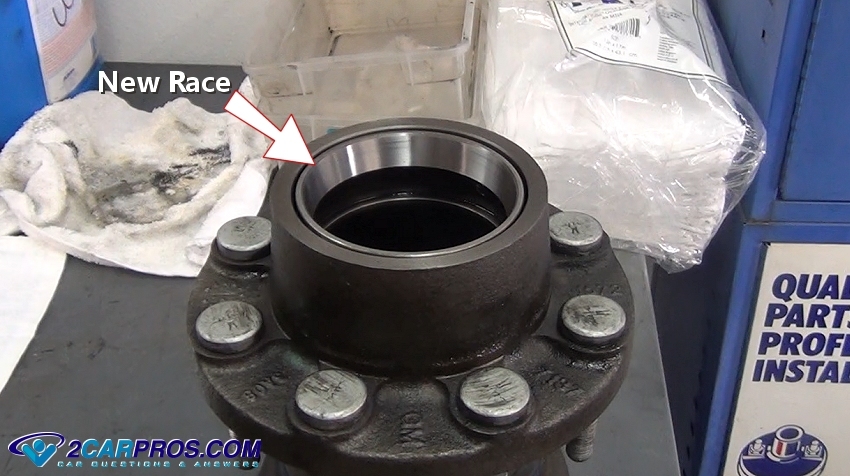
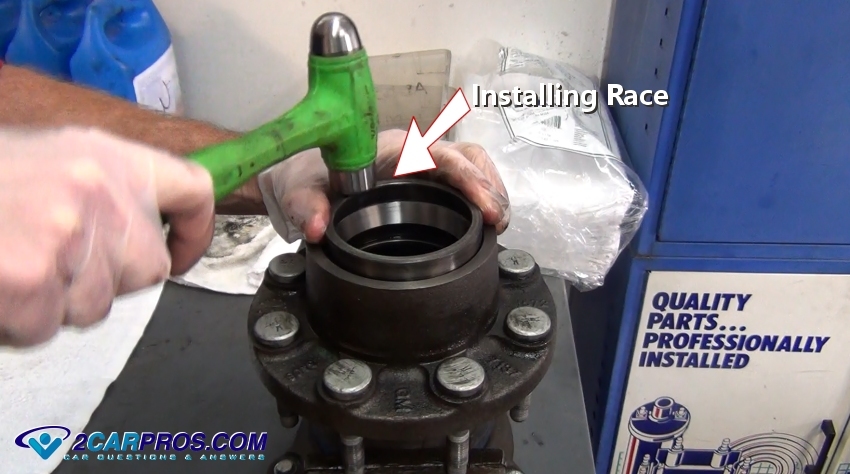
Set the new bearing race squarely into the bearing hub, you want this is flat as possible.
Set the old race onto the new race, this will be used to start the new race installation. A bearing installer can be used for this as well but this works pretty well.
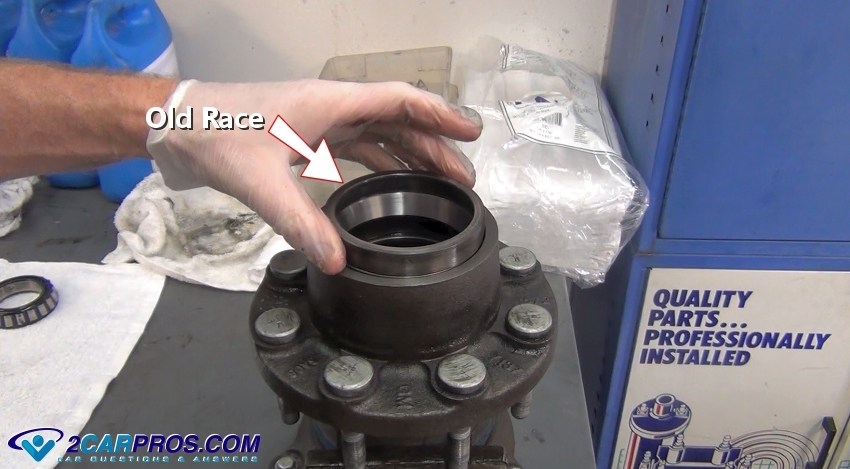
Use a hammer and work around the race evenly to start the installation. Keep checking the old race and stop be for it gets stuck in the bearing hub. You will finish the installation using the large punch.
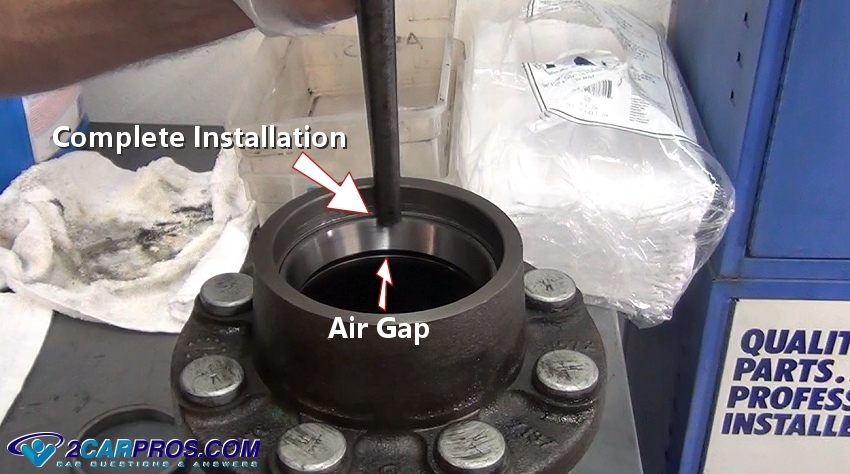
Now, use a large punch to drive the race completely into the bearing hub by circling around the race. You will feel the hammer bounce back once the race is installed completely as the air gap closes. A race driver can also be used for this operation.
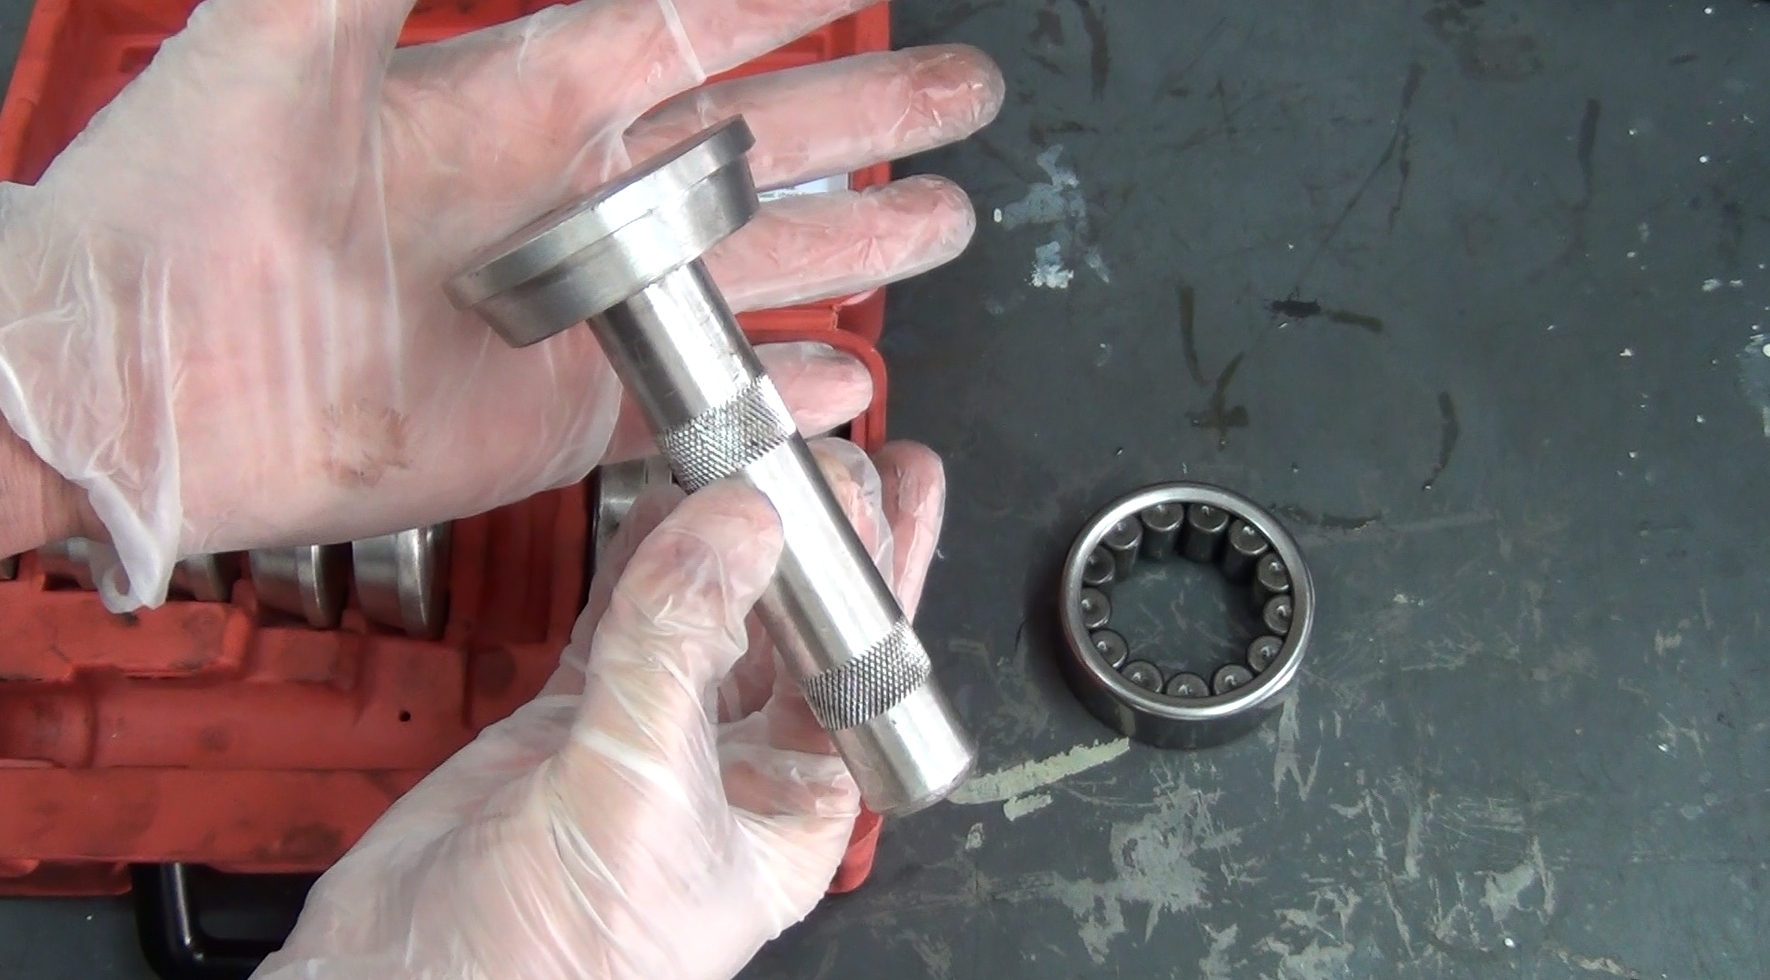
This is what a bearing race driver looks like. Choose the size that is just a little smaller than the race, but not too small as too contact the bearing surface of the race.
Before installing the bearing into the race bath it in gear oil. This will lubricate the bearing and help avoid premature failure.
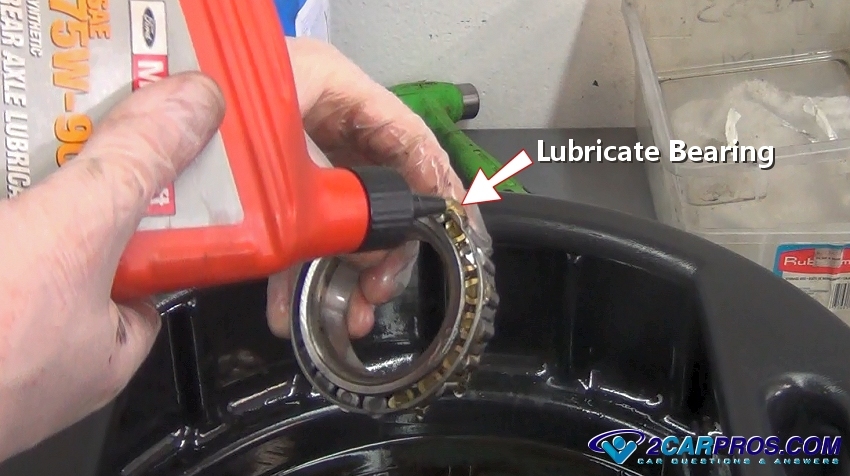
Set the bearing into the race cone side down, then spin the bearing to spread the gear oil around the race.
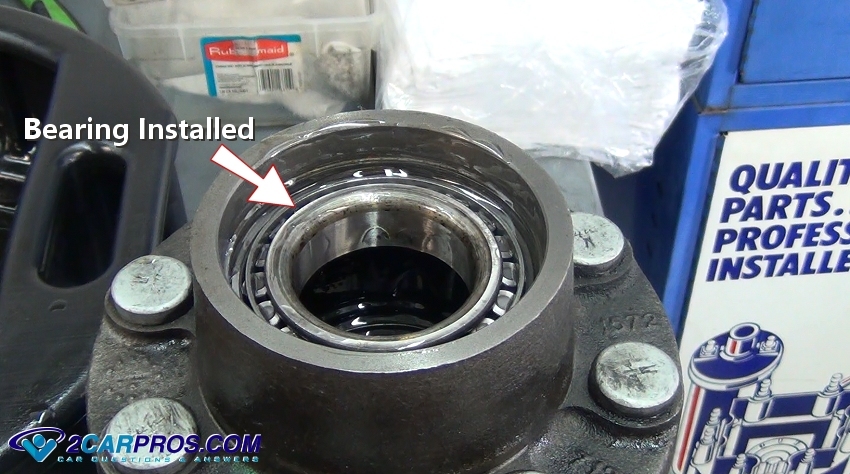
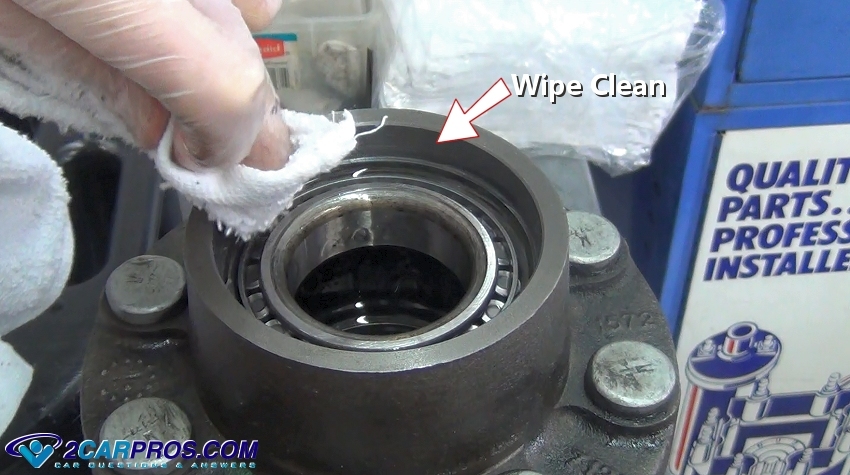
Use a shop towel to wipe clean the bearing hub at the seal surface. Do not install the seal with gear oil present because it will cause the seal to become loose in the hub and leak.
Step 4
Install the Seal
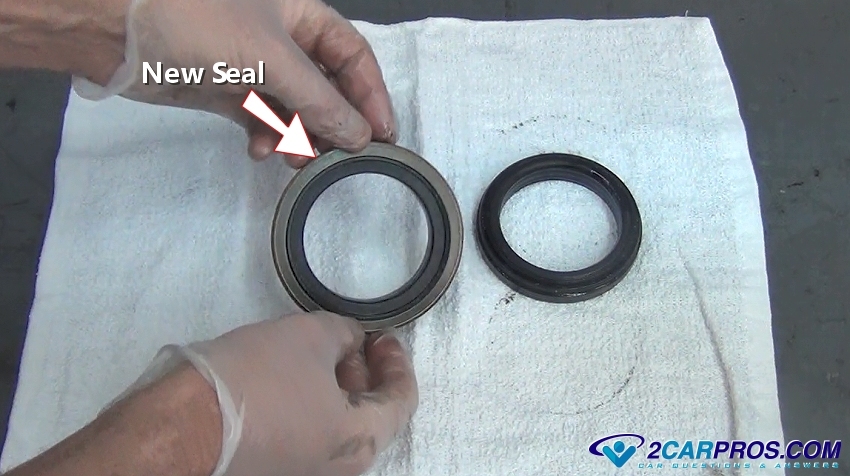
Match the oil seal to the new unit. This particular seal has been redesigned for better performance. The new seal is ready to be installed.
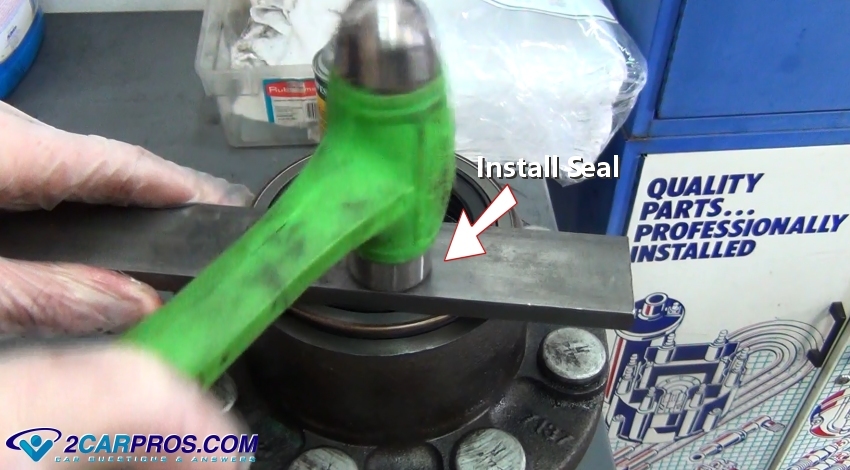
Set the seal flat on the bearing hub while the bearing is in place positioned in the race. Use the seal driver or a flat piece of metal works pretty well. Hammer the seal until flush with the bearing hub.
Step 5
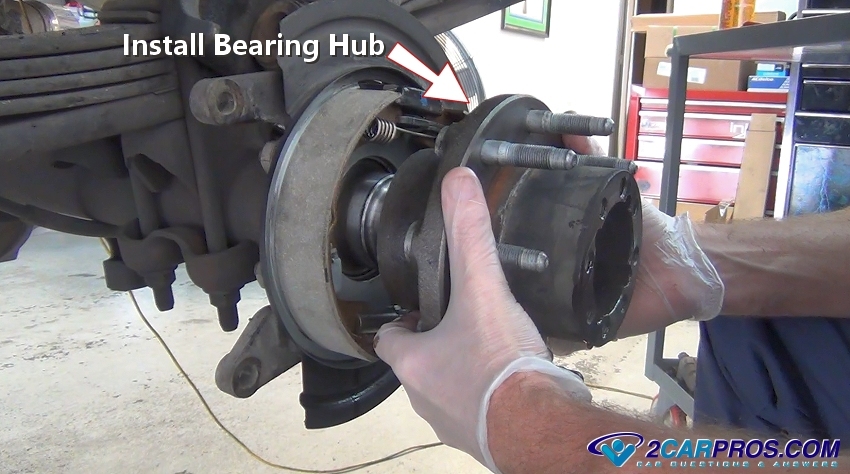
Install the Bearing Hub
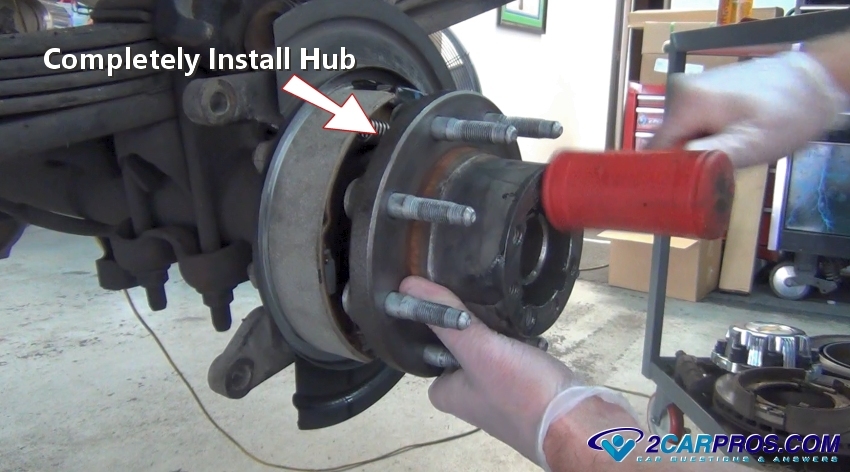
Apply a light coat of gear oil over the differential axle tube surface and then carefully install the bearing hub. Be mindful of the seal as too not allow it to hit the threads while being installed. This can damage to seal and cause a leak. Jog the hub slightly to push the hub completely onto the differential. This will help the tight fit of the bearing to push onto the close clearance of the axle tube.
Next, you will need to use a plastic hammer and push the seal onto the axle tube which is a press fit. This will lock the seal in place between the the hub and the axle tube.
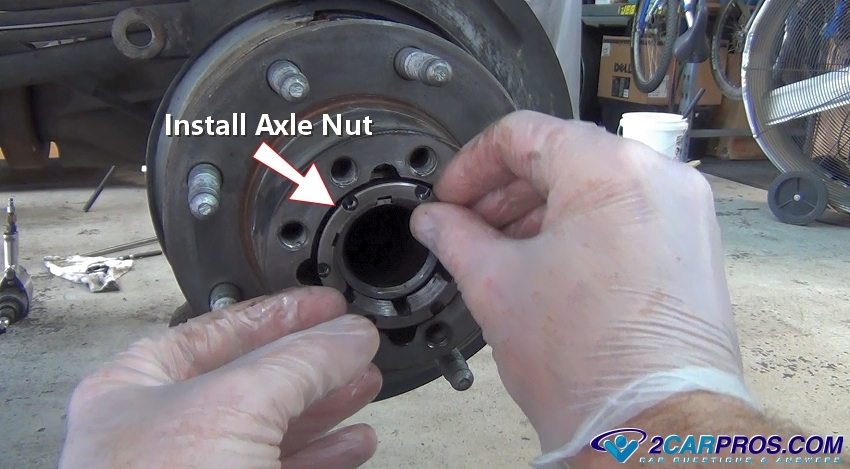
Install the axle tube nut by hand to avoid cross threading by turning it clockwise.
Step 6
Install Axle Nut and Set Bearing Pre-load
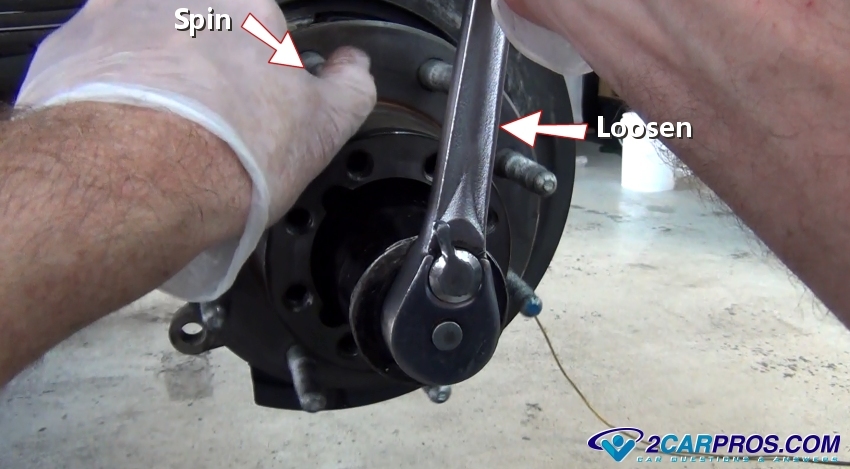
This part is important and must be done correctly or the bearings will fail. While spinning the bearing hub tighten the axle bearing nut by hand to remove the play. You will feel the nut the get tighter as the play is removed, keep spinning the hub while removing all free play from the bearings.

Once you have tightened and removed all of the free play in the bearings, continue turning the hub as you loosen the axle nut about 1/8 of a turn. This looseness is too allow the bearing room to "grow" as they expand with heat. If there is no room, in others word if the bearings have no free play they will self destruct due to heat from expansion once the vehicle is loaded and in motion for any length of time.
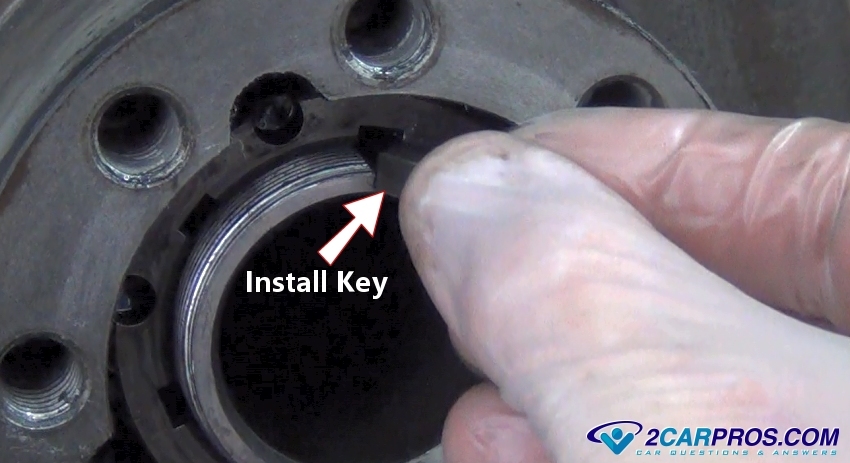
Use a pick or small screwdriver to align the axle nut so the key will be able to be installed. This will move the nut, you will need to make a judgment call on the nut to go slightly tighter or preferably looser.

Clean the axle nut key with a shop towel and then slide the key into potion onto the axle tube and under the axle nut.
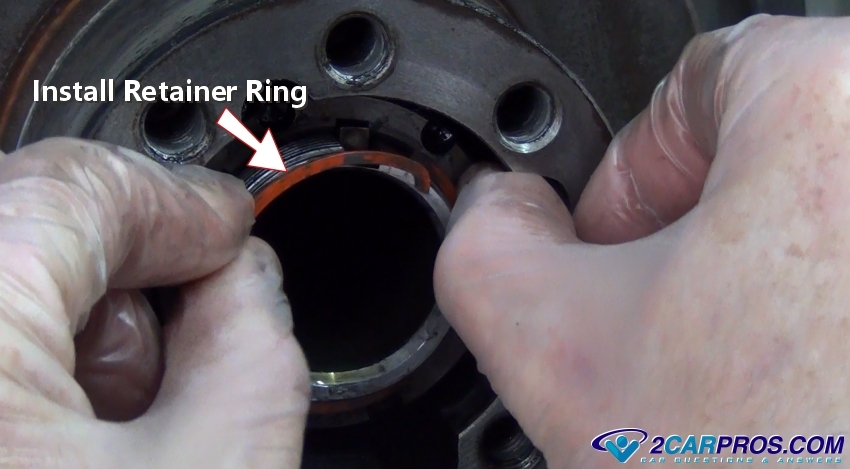
Clean the retainer ring using a shop towel. Start the installation at the side of the ring without the bend. Push it completely flush against the axle nut while working it around onto the axle tube and into the tube threads. The bend is to hold onto the threads of the axle tube. This clip holds the key in place under the axle nut and prevents the nut from unwinding. The axle is ready to be reinstalled.
Step 7
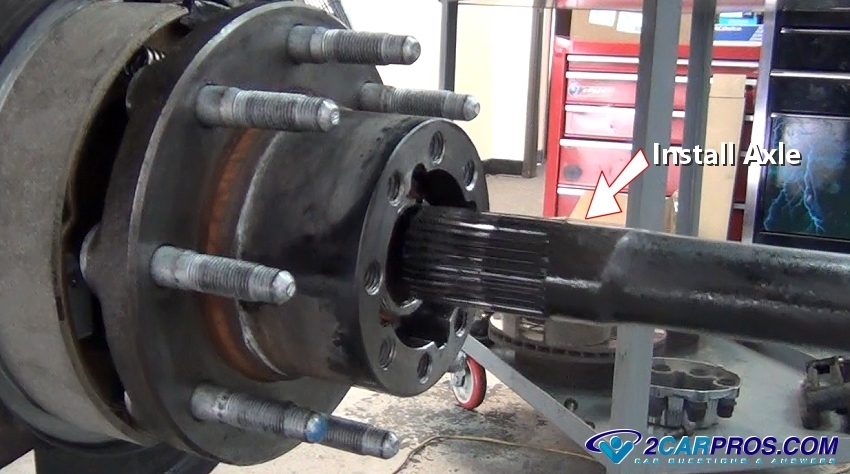
Reinstall the Axle
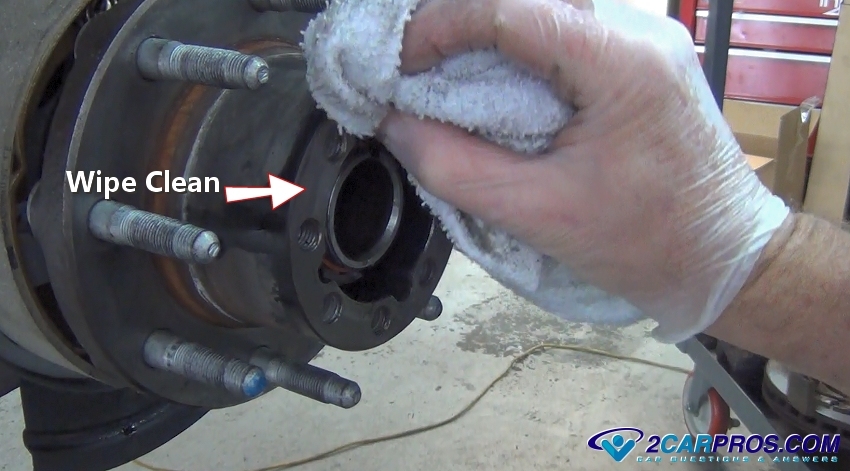
Use a shop towel with carburetor or brake cleaner on it and wipe the bearing hub axle flange mount clean. This must be as clean as possible to avoid leaks after the axle has been installed. Be carful not the get the cleaner into the differential bearing area.
Using a shop towel wipe the axle flange clean using carburetor and brake cleaner. Again this needs to be as clean as possible to avoid leaks once reassembled.

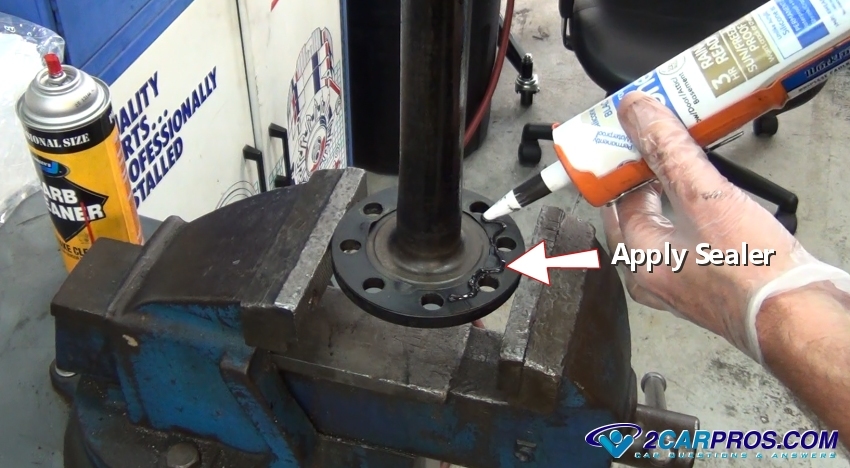
Apply axle sealer to the axle flange. Make sure to go inside the bolt holes while applying to avoid leaks. Spread evenly with you finger until the entire gasket is covered.
Install the axle into the axle tube of the differential. Be sure the axle does not drip gear oil onto the bearing hub axle flange. You will need to rotate the axle so the splines will insert in to the gear carrier inside the differential. Finish by aligning the bolt holes to the bearing hub.
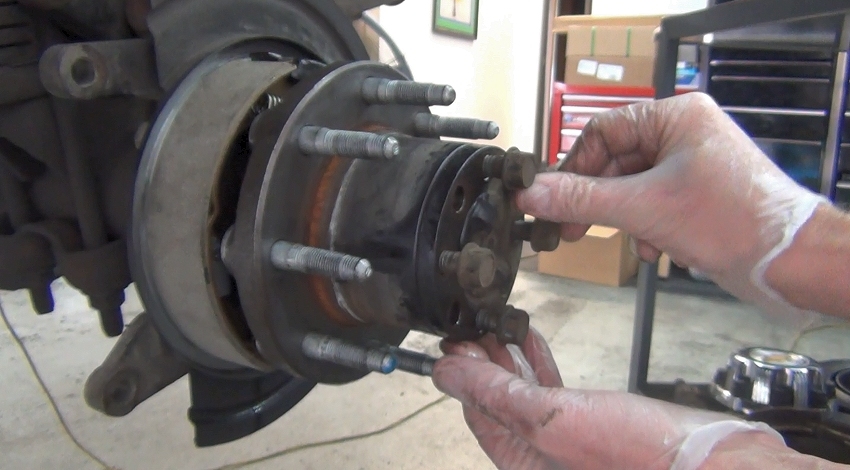
Reinsert all of the axle bolts by hand to avoid cross threading.
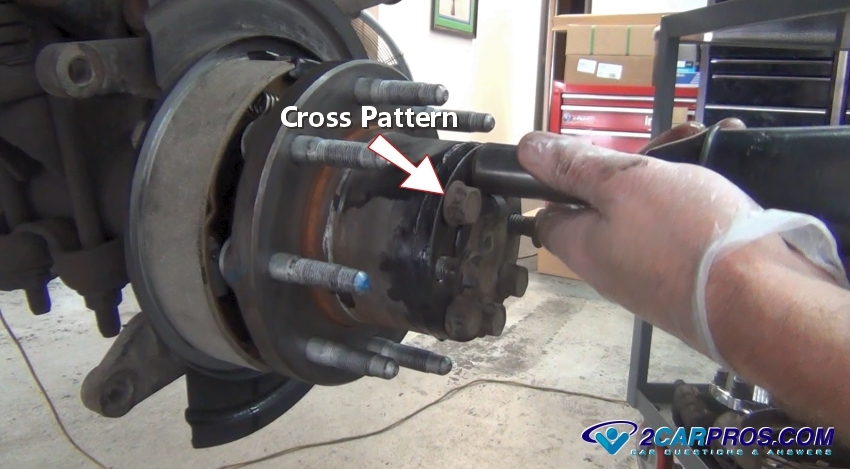
Tighten the axle flange bolts in a cross pattern. Once the wheel is on the ground and after reassemble is complete, toque these bolts to factory specifications which is usually 65 to 75 pounds. Wipe any excess sealer from the bearing hub and axle. Now the brake rotor and the remainder of the brake can be reassembled. If the truck has many miles on it it's a good idea to replace the other side as well. After driving the vehicle for a short time check the hub to make sure it is not leaking.
Watch the Video!
Please watch this video of the job being done, then continue down the guide to glean additional helpful information.
Questions?
If you have any questions about a rear axle bearing, please visit our forum. If you need car repair advice, please ask our community of mechanics who are happy to help. Our service is always 100% free.
Article published 2022-06-13
Rear Axle Seal Replacement

Axle Seal Replacement

Axle Bearing and Seal Replacement