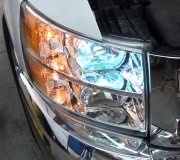
A DRL bulb is used at the front of a car and is designed to help drivers of other cars to be able to see your car better. These bulbs are generally close to the headlights but not as bright and will be on anytime the car is being driven during the day and then going off at night when the headlights are on. DRL bulbs are relatively easy to replace with simple tools and only take a few minutes to change.
What Goes Wrong?s
Because most people drive during the day the DRL bulbs stay on longer then any other bulbs on the car and have a higher burn out rate. Some replacement DRL bulbs are made from higher grade material than standard bulbs so the last longer in most cases.
How Much Does it Cost?
When purchasing a DRL replacement bulb it will cost between $14.00 and $26.00 (US) from Amazon or the local parts store. If you were to take your car into a repair garage or dealer to do the same repair you can expect to pay up $85.00 for the job. When replacing DLR bulbs use high quality bulbs to avoid premature failure. AC Delco provides a heavy duty bulb which is designated by an "LL" which means long life.
There is a video of this job being done at the bottom of this guide.
Let's Get Started
Each car is different when replacing a DRL bulb. Typically the bulb will be removed from behind the lens or the lens will be removed before replacing the bulb as in the example below. It is advised that when replacing one bulb you should do both.
1. Remove Upper Lens
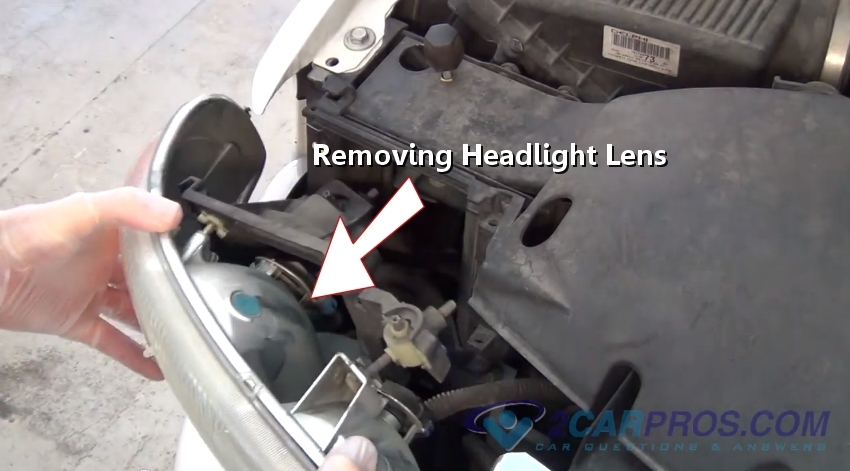
Locate the mounting pins or screws to remove the lens or inspect behind the lens to see if you can get to the bulbs without removing it. Each car is different and if you cant figure out how to get to the bulbs then a online repair manual is needed or you can check on Google images. In the example below the lens is held in by pins which are easily removed. This upper lens must be removed before removing the lower DRL lens.
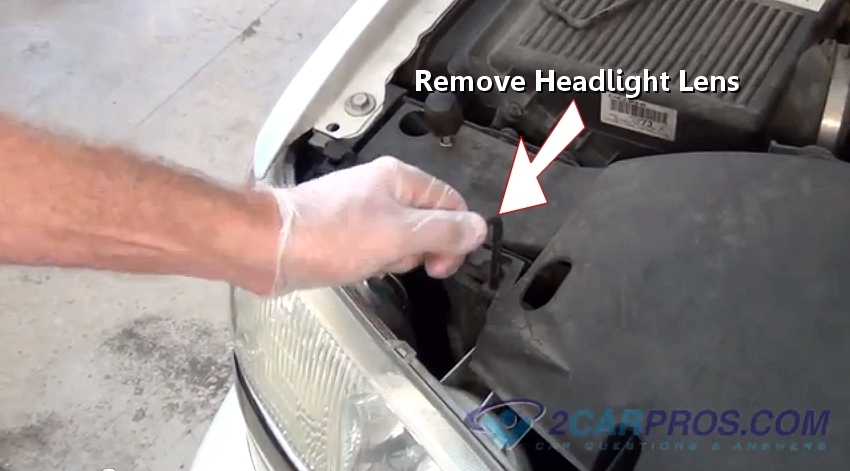
After the retainers or screws have been removed grasp the lens and gently remove it from the lens mounts. There will be wires attached so be careful not to damage them.
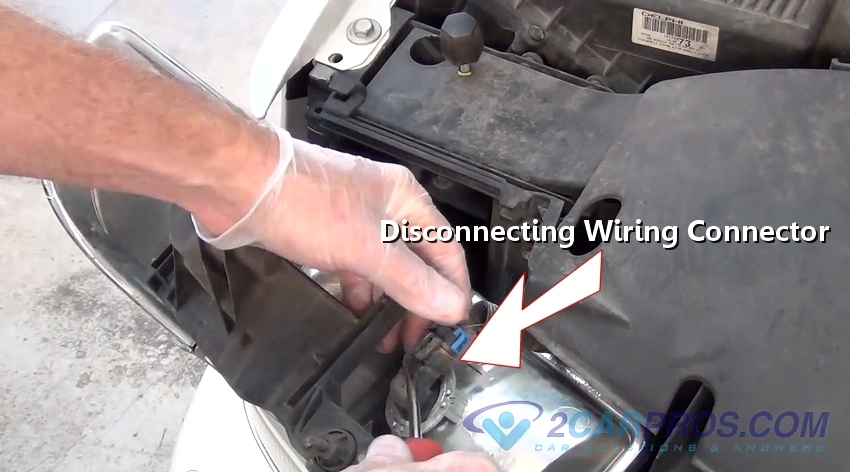
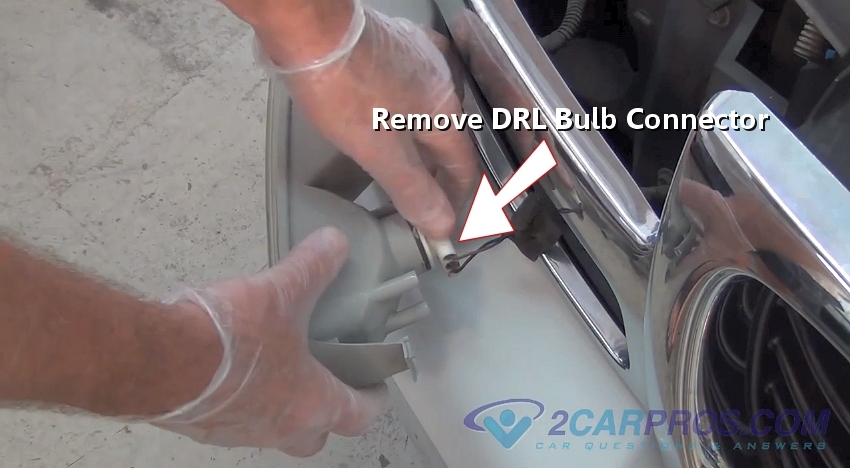
3. Disconnect Wiring
Use a small screwdriver or pick to release the wiring connectors by releasing the safety clips and pulling them gently outward. These connectors can be a little stuck because of the weather packing seal which is meant to keep water out of the connections.
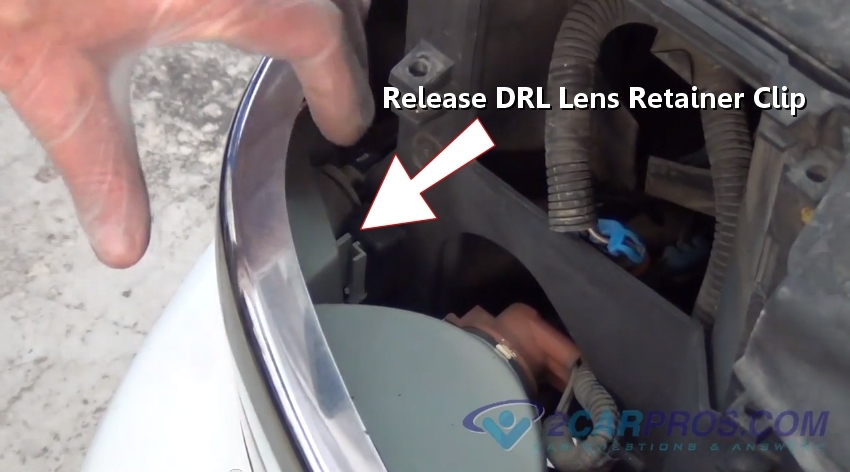
4. Remove DRL Lens
Once the upper lens has been removed locate and release the retainer clip or screws to the DRL lens.
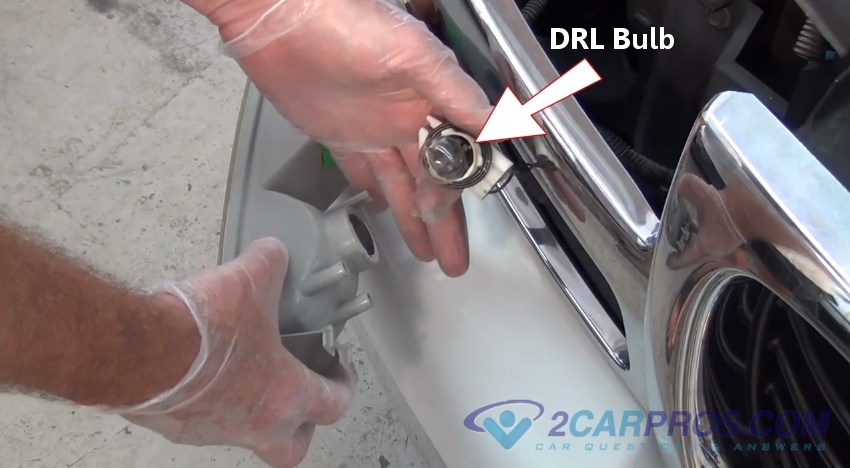
5. Remove DRL Bulb
Grasp the DRL light bulb socket and gently turn it counterclockwise to remove the bulb socket. This can be done by removing a clip as well which will depend on the design.
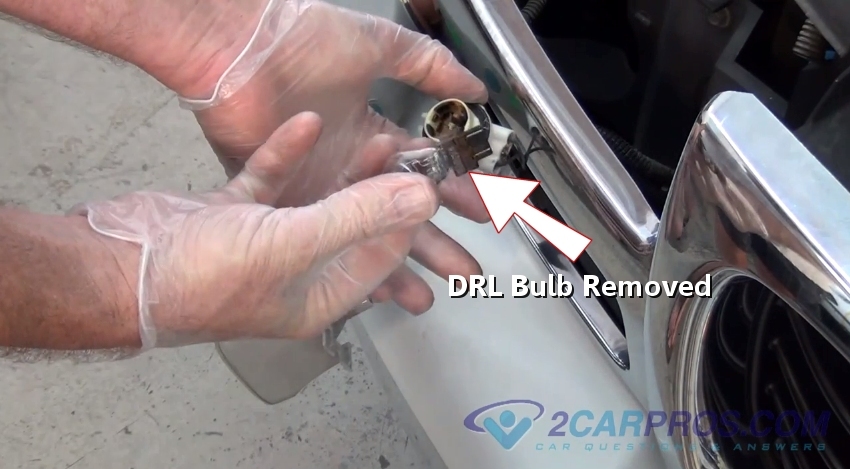
Once the socket is removed the DRL bulb will be exposed.
Gently grasp the bulb and firmly pull the bulb from the socket. The bulb is held in by pressure clips and they will release with a little pressure. Some bulbs you must push downward and turn counterclockwise to remove.
Watch the Video!
Please watch this video of the job being done, then continue down the guide to glean additional helpful information.
6. Install New DRL Bulb
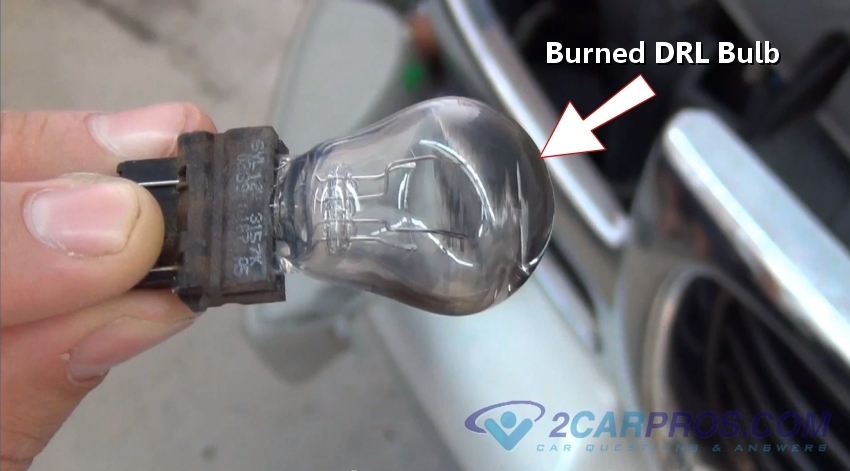
Examine the burned DRL bulb to confirm the failure. Match the new bulb to the old unit to ensure a proper installation. In the example below you can see a grey mark at the top of the bulb letting you know the bulb is burned out.
Gently push the new DRL bulb into the socket by pushing downward. The bulb can be installed either way so don't worry about installing it upside down.
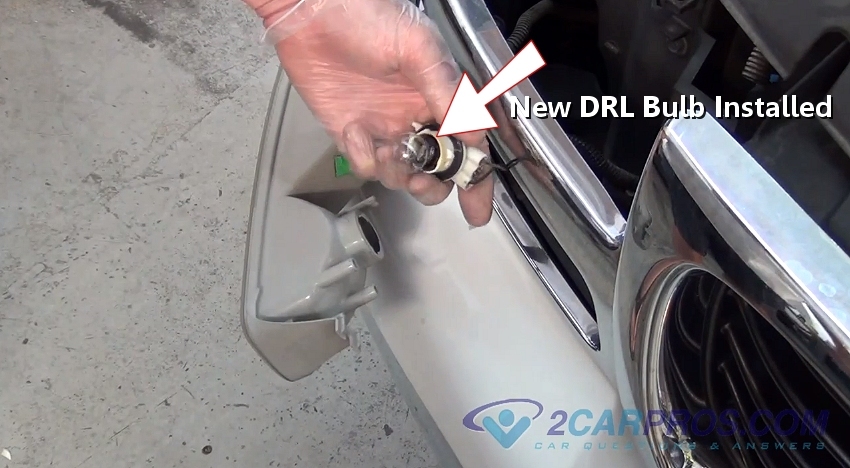
Insert the socket into the lens housing and turn clockwise to tighten. You will feel a distinctive click signaling the completion of the installation.
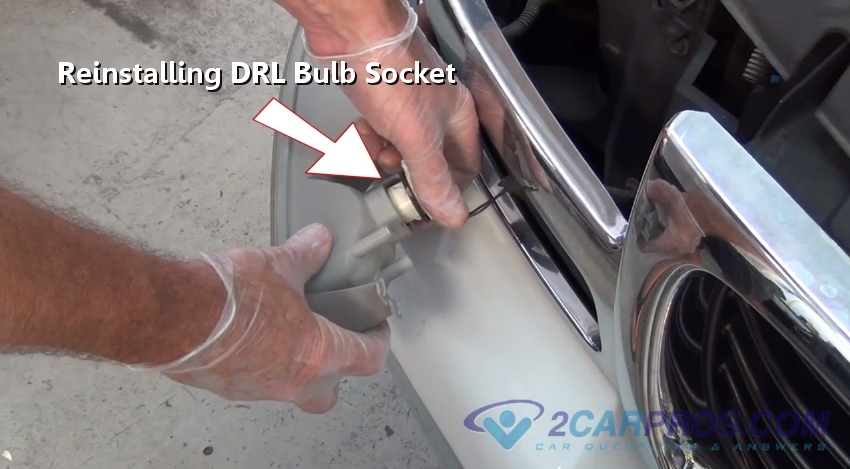
Reinsert the DRL lens back into its holder and secure the retainer clips or screws.
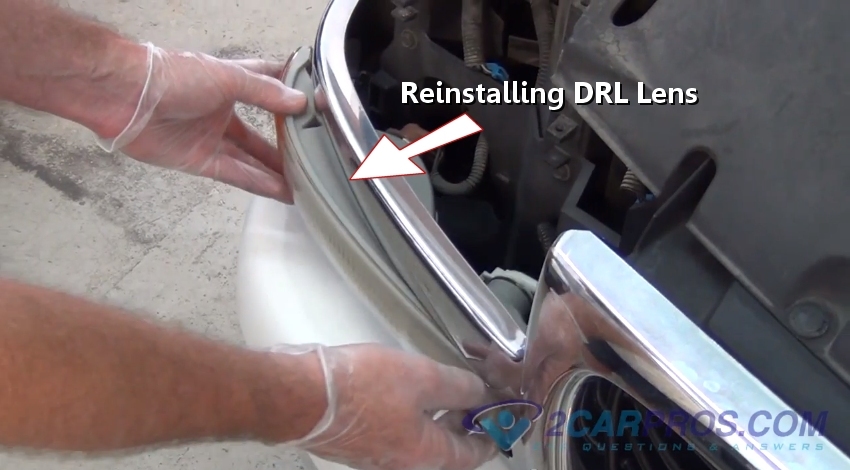
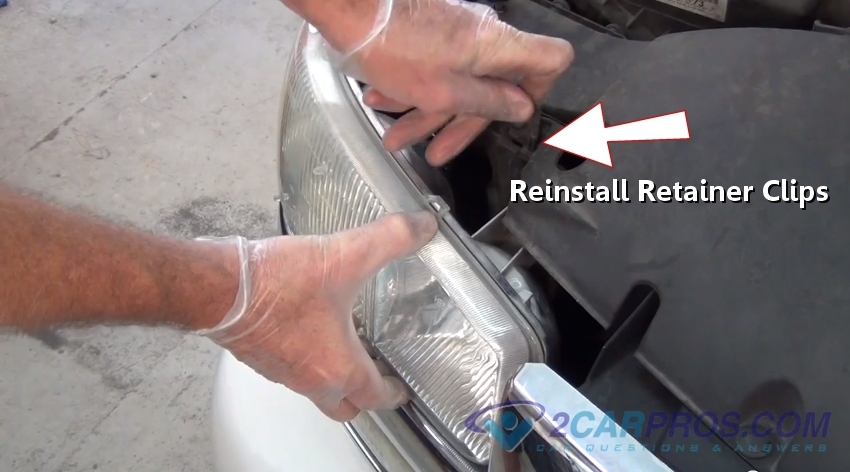
7. Reinstall Upper Lens
Once the DRL lens is in place reconnect the wiring connectors to the upper lens and reinstall into its mounts.
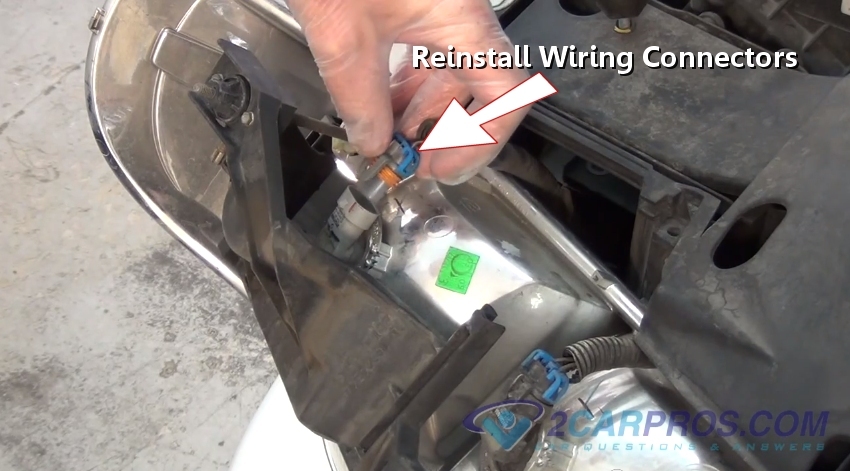
Reinsert the retainer clips or screws and start the engine to activate the DRL bulbs to ensure their proper operation and you are all set.
Got Any Questions?
If you have any DRL questions please visit our forum. If you need car repair advice, please ask our community of mechanics is happy to help you and it is always 100% free.
We hope you enjoyed this guide and video. We are creating a full set of car repair guides. Please subscribe to our 2CarPros YouTube channel and check back often for new videos which are uploaded almost every day.
Article published 2022-03-12