Hi and thanks for using 2CarPros.com.
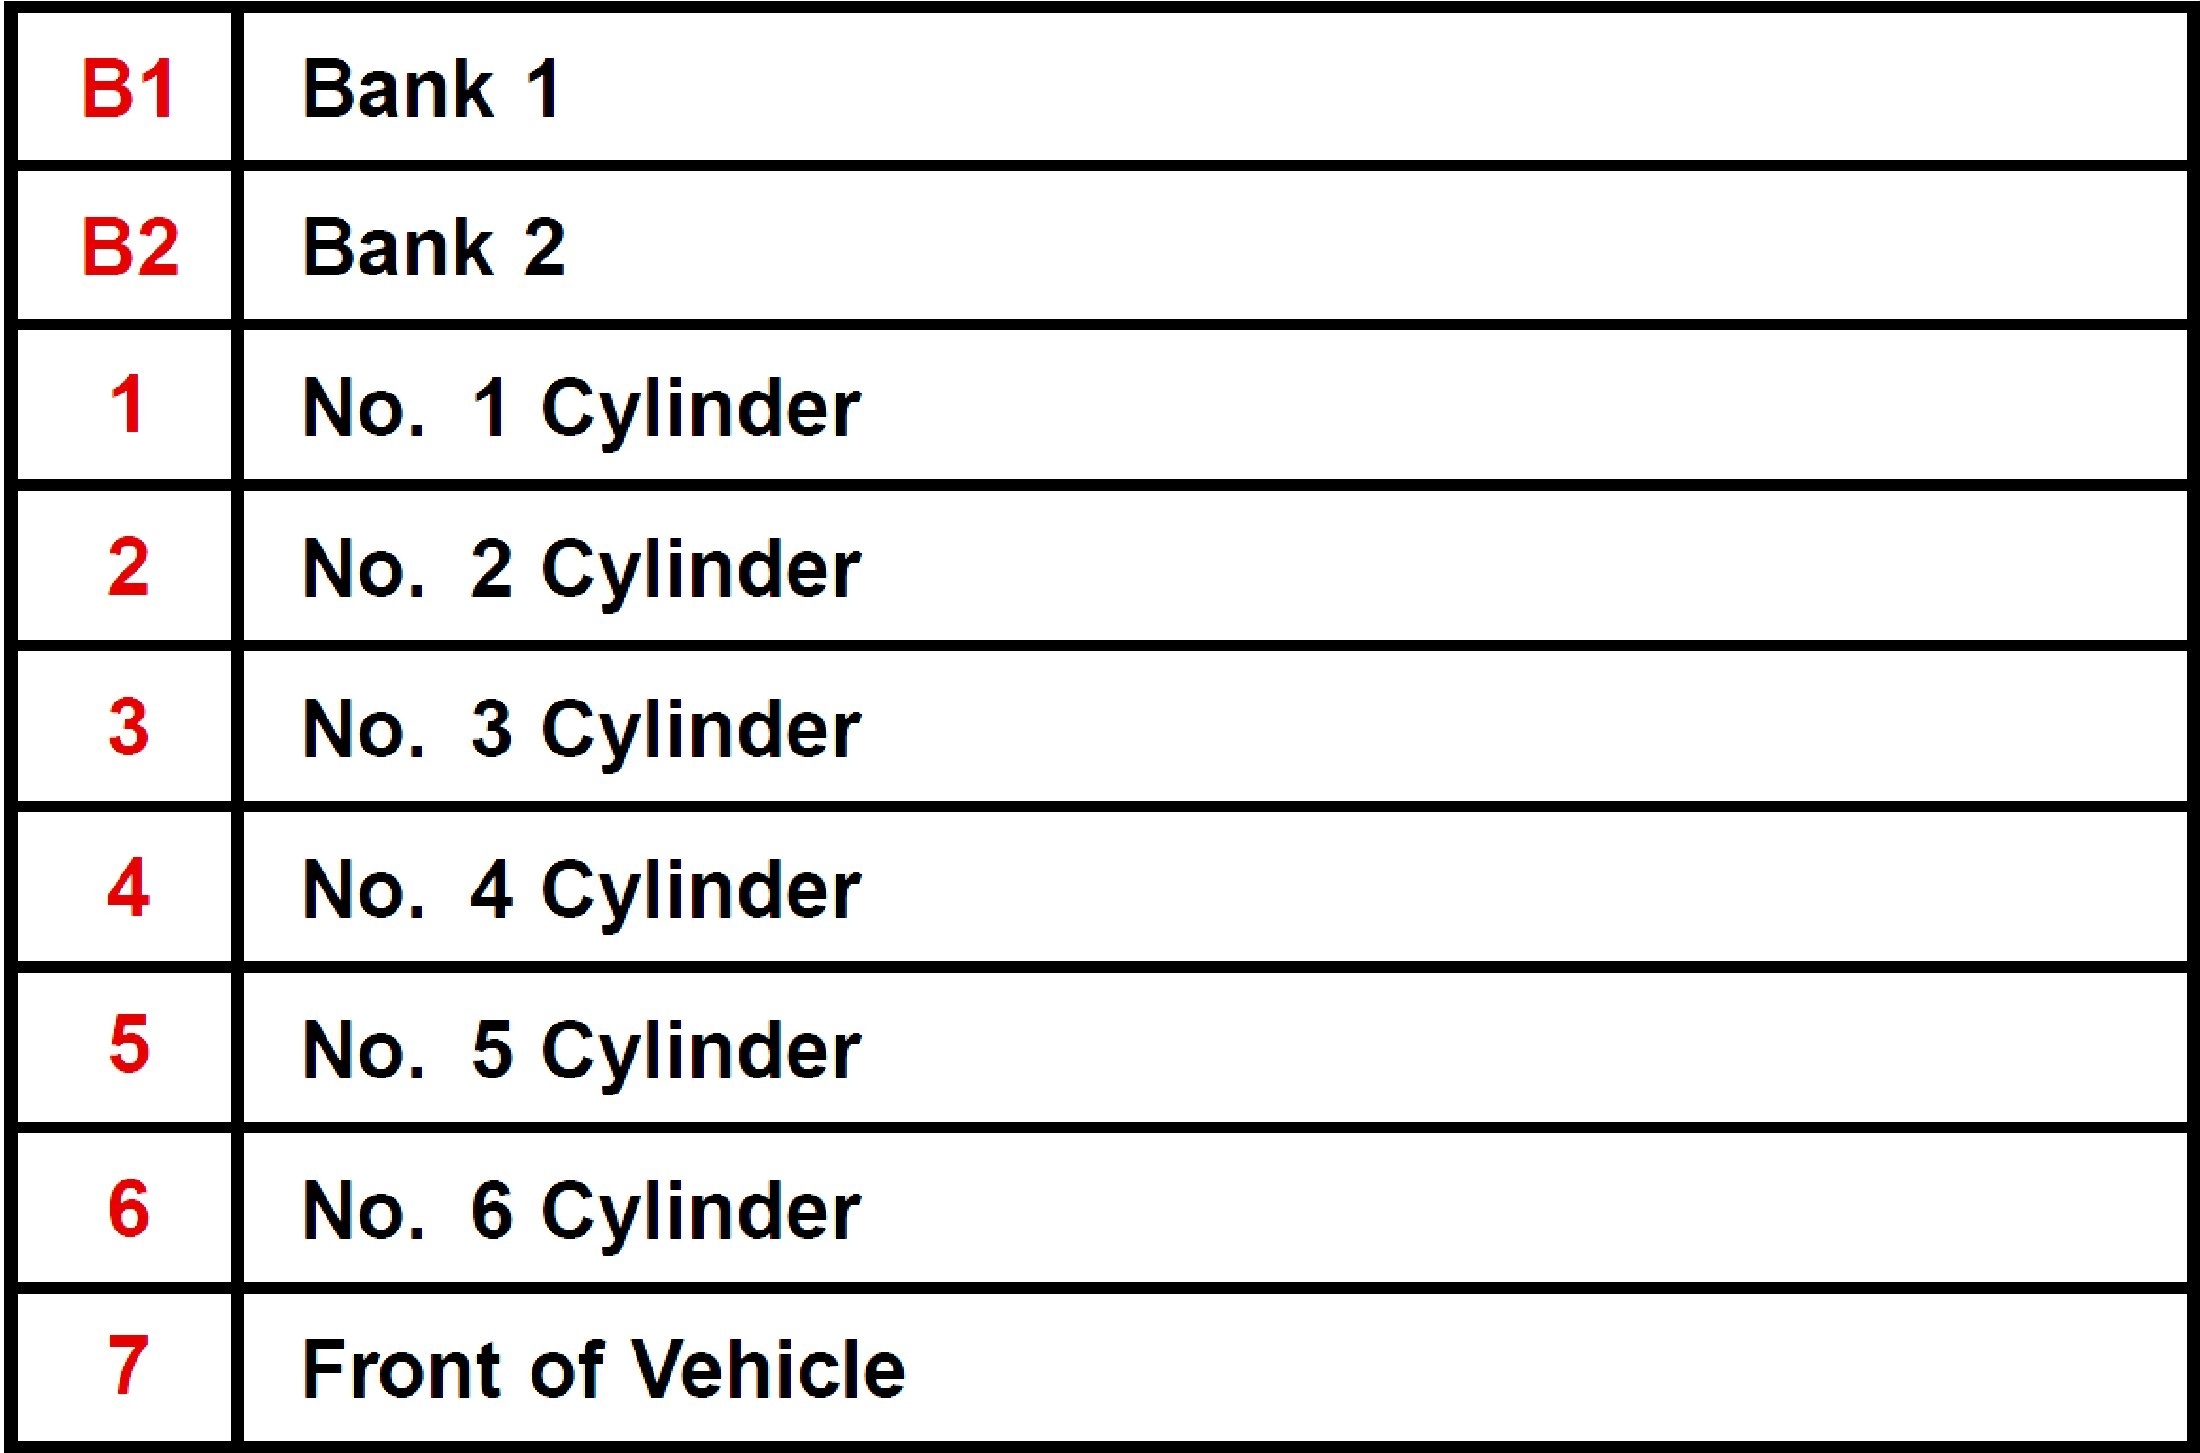
First, are you sure you got the plug wires back on correctly? I attached pictures of the firing order for you to review. (pictures 1 and 2)
If you are sure that is good, then I would suggest checking fuel pump pressure. Here are general directions for that process. Keep in mind, low/high fuel pressure can cause the symptoms you described.
https://www.2carpros.com/articles/how-to-check-fuel-system-pressure-and-regulator
Here are the directions specific to your vehicle for testing fuel pump pressure. The remaining pictures correlate with these directions.
_____________________________________
ON VEHICLE INSPECTION
1. CHECK FUEL PUMP OPERATION
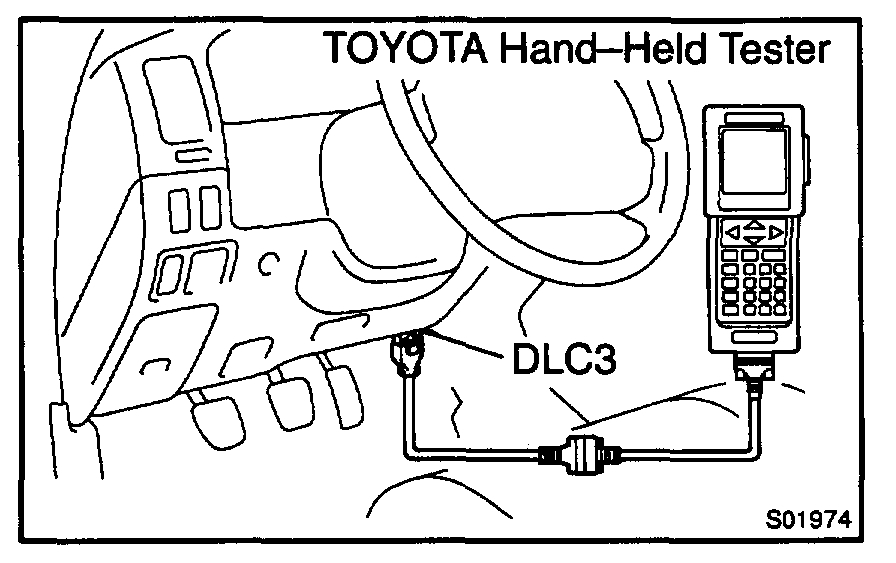
a. Connect a TOYOTA hand-held tester to the DLC3.
b. Turn the ignition switch ON and push TOYOTA hand-held tester main switch ON.
NOTE: Do not start the engine.
c. Select the ACTIVE TEST mode on the TOYOTA hand-held tester.
d. Please refer to the TOYOTA hand-held tester operator's manual for further details.
e. If you have no TOYOTA hand-held tester, connect the positive (+) and negative (-) leads from the battery to the fuel pump connector.
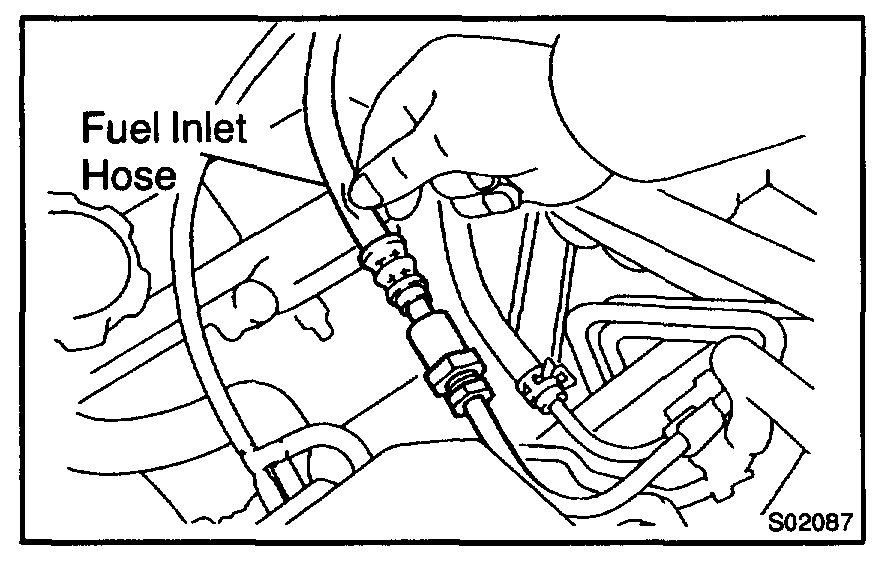
f. Check that there is pressure in the fuel inlet hose from the fuel filter.
HINT: If there is fuel pressure, you will hear the sound of fuel flowing. If there is no pressure, check the H-fuse, M-fuses, fuses, EFI main relay, circuit opening relay, fuel pump, ECM and wiring connections.
g. Turn the ignition switch OFF.
h. Disconnect the TOYOTA hand-held tester from the DLC3.
2. CHECK FUEL PRESSURE
a. Check the battery positive voltage is above 12 V.
b. Disconnect the negative (-) terminal cable from the battery.
c. Remove the 6 bolts, and disconnect the No.2 timing belt cover.
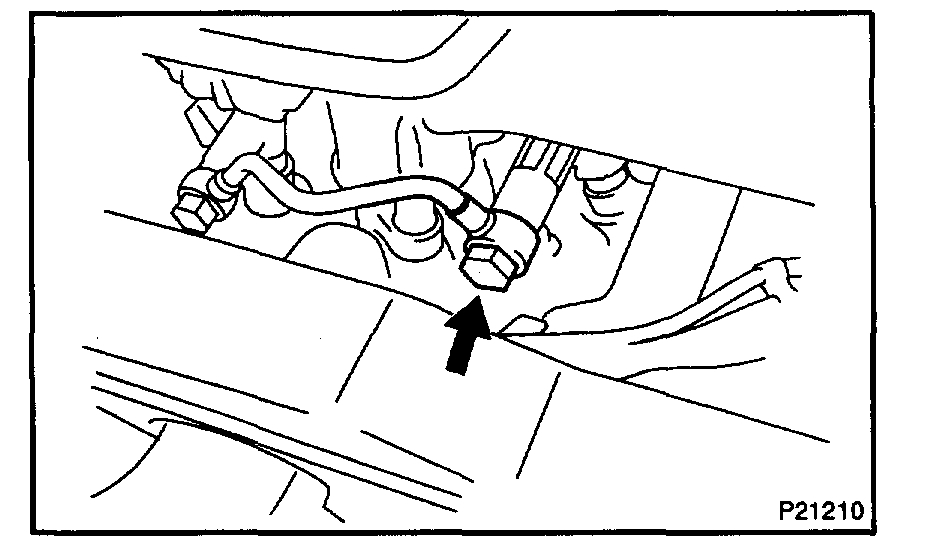
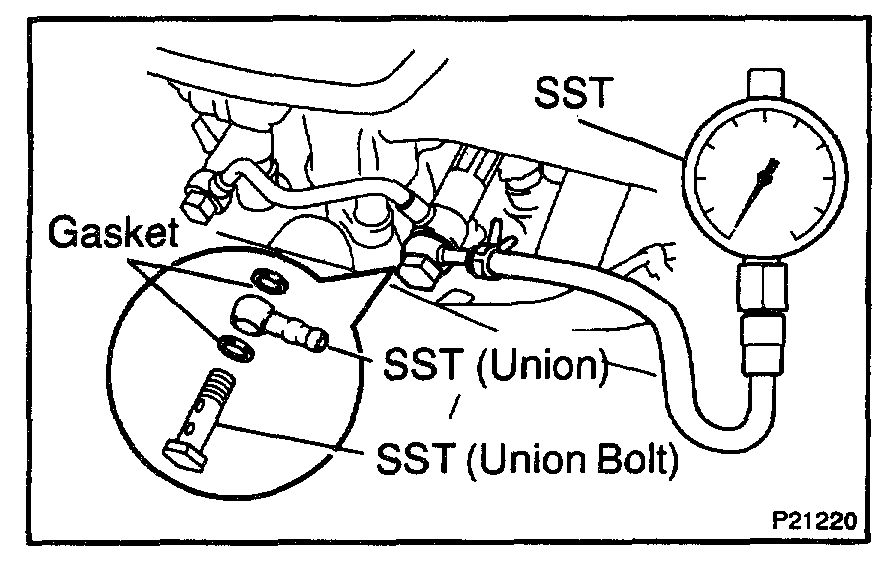
d. Remove the union bolt holding the fuel pipe to the delivery pipe and gasket.
CAUTION:
- Put a shop towel under the delivery pipe.
- Slowly loosen the union bolt.
e. Install SST (pressure gauge) to the delivery pipe with the 2 gaskets and SST (union and union bolt).
SST 09268-45014
Torque: 34.3 N.m (350 kgf.cm, 25 ft.lbf)
f. Wipe off any splattered gasoline.
g. Connect a TOYOTA hand-held tester to the DLC3 (See step 1).
h. Reconnect the negative (-) terminal cable to the battery.
i. Turn the ignition switch ON.
j. Measure the fuel pressure.
Fuel pressure: 265 - 304 kPa (2.7 - 3.1 kgf/sq.cm, 38 - 44 psi)
If pressure is high, replace the fuel pressure regulator. If pressure is low, check the fuel hoses, fuel hose connections, fuel pump, fuel filter, fuel pressure regulator and VSV for the fuel pressure control.
k. Disconnect the TOYOTA hand-held tester from the DLC3.
l. Reinstall the No.2 timing belt cover with the 6 bolts.
Torque: 9 N.m (90 kgf.cm, 80 in.lbf)
m. Start the engine.
n. Disconnect the vacuum sensing hose from the fuel pressure regulator, and plug the hose end.
o. Measure the fuel pressure at idle.
Fuel pressure: 265 - 304 kPa (2.7 - 3.1 kgf/sq.cm, 38 - 44 psi)
p. Reconnect the vacuum sensing hose to the fuel pressure regulator.
q. Measure the fuel pressure at idle.
Fuel pressure: 226 - 265 kPa (2.3 - 2.7 kgf/sq.cm, 33 - 38 psi)
If pressure is not as specified, check the vacuum sensing hose and fuel pressure regulator.
r. Stop the engine.
s. Check that the fuel pressure remains as specified for 5 minutes after the engine has stopped.
Fuel pressure: 147 kPa (1.5 kgf/sq.cm, 21 psi) or more
If pressure is not as specified, check the fuel pump, pressure regulator and/or injectors.
t. After checking fuel pressure, disconnect the negative (-) terminal cable from the battery and carefully remove the SST to prevent gasoline from splashing.
SST 09268-45012
u. Remove the other union bolt, 3 gaskets and fuel pipe from the delivery pipes.
v. Reinstall the fuel pipe with 4 new gaskets and the 2 union bolts.
Torque: 34.3 N.m (350 kgf.cm , 25 ft.lbf)
w. Reconnect the negative (-) terminal cable to the battery.
x. Check for fuel leaks.
3. INSPECT FUEL PUMP RESISTANCE
a. Pull up the LH rear seat cushion.
b. Remove the floor service hole cover with the 3 screws.
c. Disconnect the fuel pump connector.
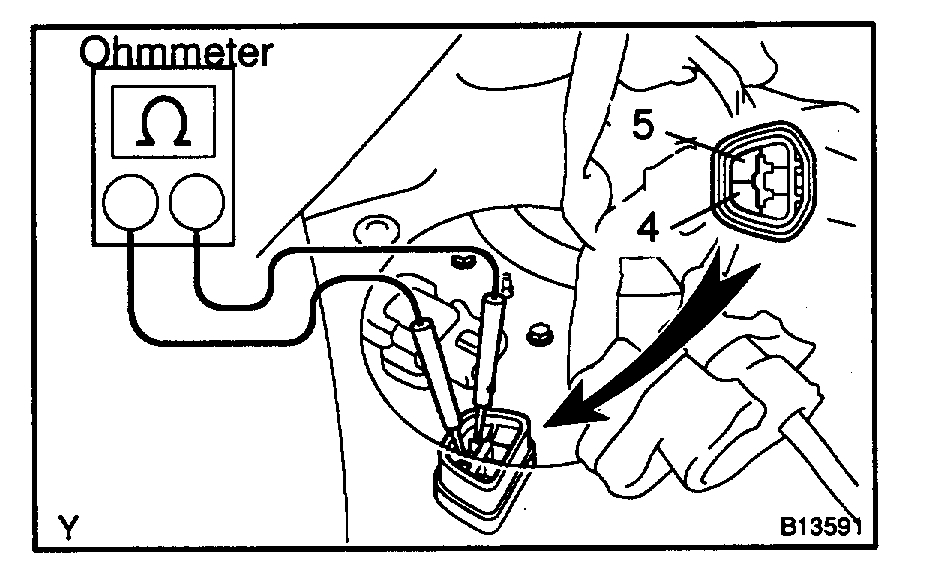
d. Using an ohmmeter, measure the resistance between terminals 4 and 5.
Resistance: 0.2 - 0.3 ohms at 20 °C (68 °F)
If the resistance is not specified, replace the fuel pump and/or set plate.
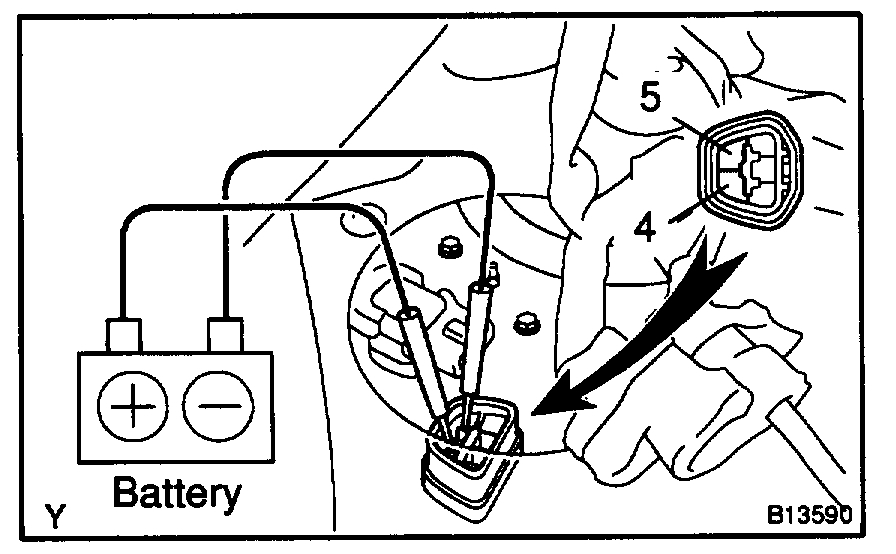
4. INSPECT FUEL PUMP OPERATION
a. Connect the positive (+) lead from the battery to terminal 4 of the connector, and the negative (-) lead to terminal
5. Check that the fuel pump operations.
NOTE:
- These tests must be done quickly (within 10 seconds) to prevent the coil from burning out.
- Keep the fuel pump as far away from the battery as possible.
- Always do switching at the battery side.
If operation is as not specified, replace the fuel pump and/or set plate.
b. Connect the fuel pump connector.
c. Install the floor service hole cover with the 3 screws.
d. Connect the LH rear seat cushion.
_________________________________________________
Let me know if this is helpful or if you have other questions.
Take care,
Joe
Images (Click to make bigger)
SPONSORED LINKS
Tuesday, September 11th, 2018 AT 6:21 PM