Welcome to 2CarPros.
First, here is a link that shows in general how to replace a fuel pump:
https://www.2carpros.com/articles/how-to-replace-an-electric-fuel-pump
___________
Now, the manual doesn't specify directions for the pump itself, but does for the fuel sender which will remove the pump when removed.
The link I attached will help guide you through any confusion you may have. Also, you do not have to remove the fuel tank. There is an access port. Just make sure to disconnect the battery before you begin.
___________
FUEL SENDER ASSEMBLY REPLACEMENT
The OEM service manual does not provide fuel pump service and repair information. Refer to Fuel Sender Assembly.
FUEL SENDER ASSEMBLY REPLACEMENT
TOOLS REQUIRED
J 39765 Fuel Sender Lock Nut Wrench
REMOVAL PROCEDURE
CAUTION: Refer to Actions to Take When Working With Fuel Caution in Service Precautions.
pic 1
1. Relieve the fuel system pressure. Refer to Quick Connect Fitting(s) Service (Plastic Collar).
2. Drain the fuel tank. Refer to Fuel Tank Draining Procedure.
3. Remove the rear compartment floor trim. Refer to Compartment Trim Panel Replacement - Rear in Trunk/Liftgate.
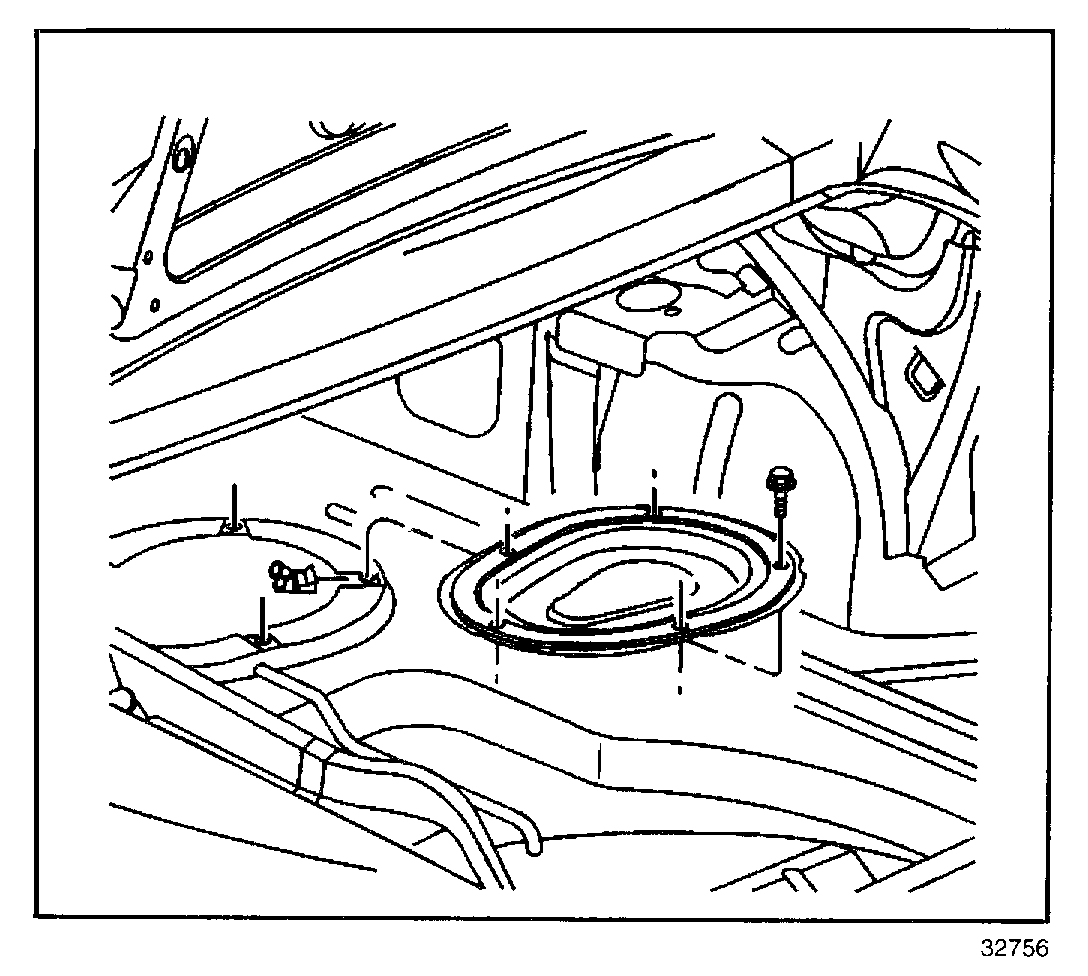
4. Remove the fuel sender access panel bolts.
5. Remove the fuel sender access panel.
NOTE: In order to prevent damage, cover the fuel pipe fittings with a shop towel before disconnecting the fuel pipes or removal of the fuel sender retaining ring, in order to catch any fuel that may leak out. Place the towel in an approved container when procedure is completed.
pic 2
6. Disconnect the fuel sender quick-connect fittings.
7. Disconnect the fuel sender electrical connector.
8. Disconnect the fuel tank pressure sensor electrical connector.
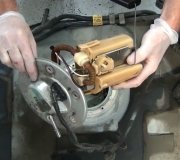
IMPORTANT: The modular fuel sender assembly will spring-up when the locking ring is removed.
9. Remove the fuel sender retaining ring using the J 39765.
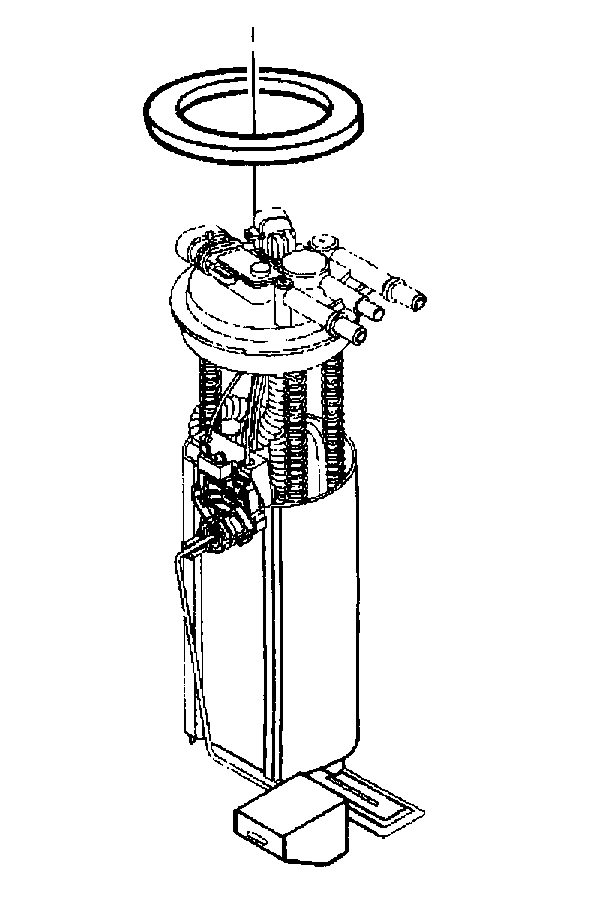
NOTE: Do Not handle the fuel sender assembly by the fuel pipes. The amount of leverage generated by handling the fuel pipes could damage the joints.
IMPORTANT: When removing the fuel sender assembly from the fuel tank, the reservoir bucket on the fuel sender is full of fuel. The fuel sender must be tipped slightly during removal in order to avoid damage to the float. Place any remaining fuel into an approved container once the fuel sender is removed from the fuel tank.
10. Remove the fuel sender assembly.
11. Clean the fuel sender sealing surfaces.
12. Inspect the fuel sender sealing surfaces.
IMPORTANT:
Care should be taken not to fold over or twist the fuel pump strainer when installing the fuel sender assembly, as this will restrict fuel flow. Also, assure that the fuel pump strainer does not block full travel of the float arm.
Always replace the fuel sender seal when reinstalling the fuel sender.
pic 3
1. Position the new fuel sender seal on the fuel tank.
2. Install the fuel sender assembly and the fuel sender lock ring using the J 39765.
3. Connect the quick-connect fittings at the fuel sender.
4. Connect the fuel sender electrical connector.
5. Connect the fuel tank pressure sensor electrical connector.
6. Add fuel to the fuel tank.
7. Install the fuel tank filler pipe cap.
8. Connect the negative battery cable.
9. Inspect for leaks.
9.1.Turn ON the ignition, with the engine OFF for 2 seconds.
9.2.Turn OFF the ignition for 10 seconds.
9.3.Turn ON the ignition, with the engine OFF.
9.4.Inspect for fuel leaks.
NOTE: Refer to Fastener Notice in Service Precautions.
pic 4
10. Install the fuel sender access panel.
11. Install the fuel sender access panel bolts.
Tighten
Tighten the fuel sender access panel bolts to 2 N.m (18 lb in).
12. Install the rear compartment floor trim.
13. Install the fuel injector sight shield.
___________________________________________
Here are the directions you will need to reach the access port. The trunk trim panel will need removed.
___________________________________________
Rear Compartment Trim Panel Replacement
Removal Procedure
pic 5
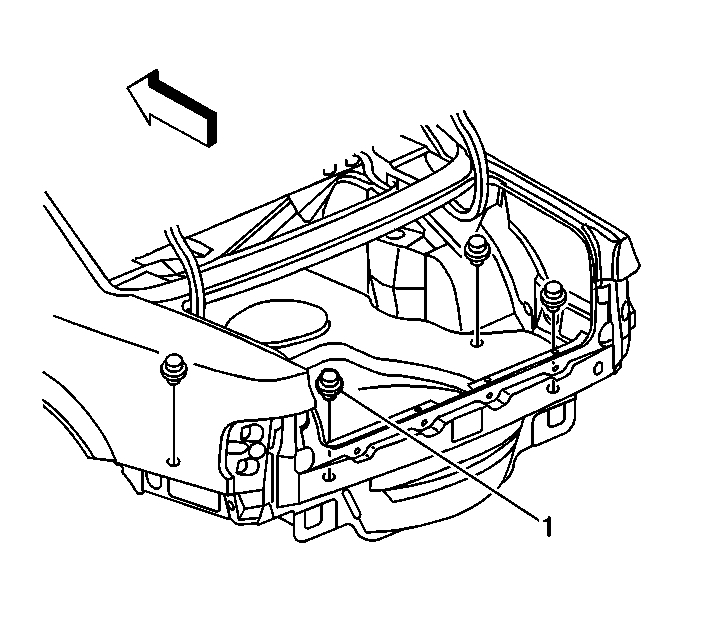
1. Open the rear compartment.
2. Remove the rear compartment sill plate. Refer to Rear Compartment Sill Trim Plate Replacement (See: Scuff Plate > Removal and Replacement > Rear Compartment Sill Trim Plate Replacement).
3. Remove the spare tire.
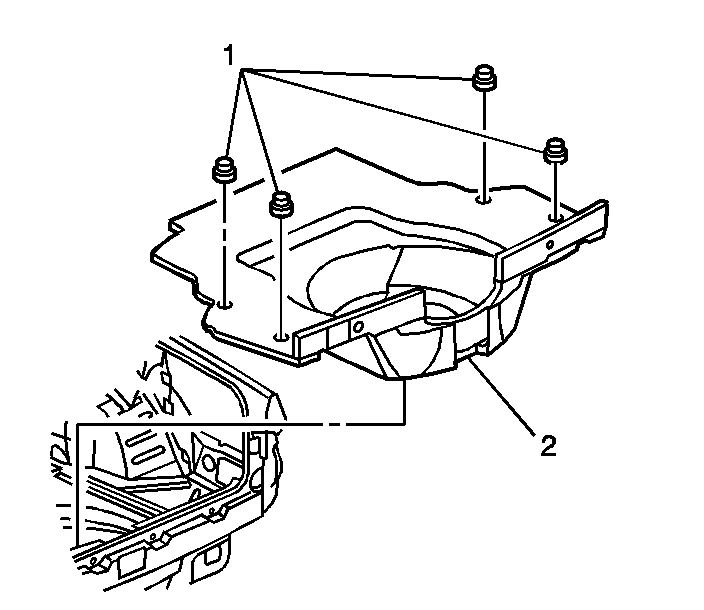
4. Remove the convenience net retainers (1) retaining the rear compartment trim panel to the floor.
5. Remove the rear compartment trim panel.
Installation Procedure
pic 6
1. Install the rear compartment trim panel (2).
2. Install the convenience net retainers (1).
3. Install the spare tire.
4. Install the rear compartment sill plate. Refer to Rear Compartment Sill Trim Plate Replacement (See: Scuff Plate > Removal and Replacement > Rear Compartment Sill Trim Plate Replacement).
5. Close the rear compartment.
____________________________
Let me know if this helps or if you have other questions.
Take care,
Joe
Images (Click to make bigger)
SPONSORED LINKS
Saturday, May 4th, 2019 AT 7:29 PM