1999 Dodge Van relays clicking

Tiny
WILLIAM ROSS
  • MEMBER
  • 1999 DODGE VAN
  • V8
  • 2WD
  • AUTOMATIC
  • 75,207 MILES
When I try to start my van it wont start, all the relays just click continuously.
Monday, March 22nd, 2010 AT 5:09 PM

29 Replies

Tiny
CARADIODOC
  • MECHANIC
  • 33,757 POSTS
Hi William. Your battery is weak, run down, or has a shorted cell, or the cables are loose or dirty. If a jump-start doesn't help, grab a cheap digital voltmeter and I can walk you through the places to take measurements.

Even if you get it started, measure battery voltage when the engine is running. If it is below 13.75 volts, the charging system is the cause of the weak battery.

Caradiodoc
Was this
answer
helpful?
Yes
No
Monday, March 22nd, 2010 AT 10:29 PM
Tiny
WILLIAM ROSS
  • MEMBER
  • 17 POSTS
Ok thanks 4 the reply, engine replaced ran fine 4 a day then was driving and all gauges went to nothing, odometer started flashing then displayed no bus, pulled over shut off van started it and all was good, next morning no start, relays clicking? I dont get it.
Was this
answer
helpful?
Yes
No
Monday, March 22nd, 2010 AT 11:01 PM
Tiny
CARADIODOC
  • MECHANIC
  • 33,757 POSTS
Dandy. That sounds like the charging system is quitting. Based on the replaced engine, the most likely place to start is with the two small wires on the back of the alternator. If they are held on with two tiny nuts, they might have been left off or are loose. If they plug in, the plug might not be fully seated. Also be sure the large wire is tight. Tug on it with your fingers. If you use a wrench and it touches any other metal, there will be a beautiful huge spark and you'll weld the wrench to the engine. (That's not the goal).

Once you check the wires, recharge the battery at a slow rate for about half an hour, then measure the voltage with a cheap digital voltmeter. It should be around 12.6 volts. If you get the engine started, measure the battery voltage again while it's running. It must be between 13.75 to 14.75 volts. If it is still around 12.6 volts, the alternator is not working. This is a rather easy system to diagnose with a test light or voltmeter.

Caradiodoc
Was this
answer
helpful?
Yes
No
Monday, March 22nd, 2010 AT 11:24 PM
Tiny
WILLIAM ROSS
  • MEMBER
  • 17 POSTS
It has brand new battery and cables, should I have the alternator tested?
Was this
answer
helpful?
Yes
No
Tuesday, March 23rd, 2010 AT 4:00 PM
Tiny
CARADIODOC
  • MECHANIC
  • 33,757 POSTS
You can do this quickly yourself. Use a cheap digital voltmeter to measure the voltage between the two battery posts while the engine is running. It must be between 13.75 and 14.75 volts. If it is around 12.0 to 12.6 volts, the charging system is not working. You have to make this measurement when the problem is acting up. It can be intermittent.

If / when the voltage is low, measure the voltage on the three wires on the back of the alternator. The large bolted-on wire must have full battery voltage all the time. One small wire must also have full battery voltage but it will only be there when the engine is running. Otherwise both will read 0 volts. The second wire should have less than the first wire, but not 0 volts. Typically you will find 4 - 11 volts. Those readings will tell us where to go next.

Caradiodoc
Was this
answer
helpful?
Yes
No
Tuesday, March 23rd, 2010 AT 7:09 PM
Tiny
WILLIAM ROSS
  • MEMBER
  • 17 POSTS
Ok I will try what you suggest tomorrow and get back to you to let you know my findings, thanks again.
Was this
answer
helpful?
Yes
No
Tuesday, March 23rd, 2010 AT 8:07 PM
Tiny
WILLIAM ROSS
  • MEMBER
  • 17 POSTS
Ok I tried jumping the battery and still the relays just keep clicking and the van will not start so I cant check the battery with the van running, but with the van not running and the key out of the ignition the battery voltage is 12.7 (had the jumper cables on for about 10 minutes without trying to start the van)
Was this
answer
helpful?
Yes
No
Wednesday, March 24th, 2010 AT 4:02 PM
Tiny
WILLIAM ROSS
  • MEMBER
  • 17 POSTS
1 more thing, all the connections are tight on the alternator.
Was this
answer
helpful?
Yes
No
Wednesday, March 24th, 2010 AT 4:05 PM
Tiny
CARADIODOC
  • MECHANIC
  • 33,757 POSTS
Watch what the headlights do during cranking, or, measure the voltage on the larger of the two wires on the starter while a helper cranks the engine. If it drops to less than 9.6 volts during cranking, the battery is weak, the cable clamps are loose or dirty, there is a corroded section of one of the battery cables under the insulation, or the starter motor is shorted. Check the black negative battery cable where it attaches to the engine to be sure it is clean and tight. Might as well check the little black wire that bolts to the body too.

Caradiodoc
Was this
answer
helpful?
Yes
No
Wednesday, March 24th, 2010 AT 5:31 PM
Tiny
WILLIAM ROSS
  • MEMBER
  • 17 POSTS
Ok, again brand new cables on battery both pos and neg, brand new battery, slould I take the alt off and test it? At autozone or one of there competition
Was this
answer
helpful?
Yes
No
Wednesday, March 24th, 2010 AT 8:30 PM
Tiny
CARADIODOC
  • MECHANIC
  • 33,757 POSTS
Hold off on the alternator. It is real easy to test on the vehicle, but we have to get it started first. The engine will start without an alternator, so it doesn't matter if it's good or bad; we gotta get it to crank.

What happens to the headlights or battery voltage during cranking?

Caradiodoc
Was this
answer
helpful?
Yes
No
Wednesday, March 24th, 2010 AT 10:40 PM
Tiny
WILLIAM ROSS
  • MEMBER
  • 17 POSTS
Ok, when I try to start the van the voltage jumps around down to 10.4 to 13
Was this
answer
helpful?
Yes
No
Thursday, March 25th, 2010 AT 5:26 PM
Tiny
CARADIODOC
  • MECHANIC
  • 33,757 POSTS
10.4 volts should be acceptable. 9.6 is the normally accepted minimum voltage at the starter. Since a small amount of voltage is always lost in the cables and especially in the mechanical connections, it's good to have a little more at the battery.

I assume the starter relay is still chattering. Now, move one of your meter probes from the battery post to the cable clamp and have your helper crank the engine. You should again see 10.4 volts. Then move the second probe from that battery post to its cable clamp. You should see 10.4 volts again. It is common for the voltage to drop a little, but 0.2 volts is the maximum allowable per connection.

This can be a hard way to read the voltage because it will bounce up and down a lot. There's an easier way to do this.

The other way to come up with the same measurements is to place one meter probe on one of the battery posts and the other probe on the cable clamp. Logic says you should read 0.0 volts because both probes are in the same place in the circuit. The problem is there will always be a small amount of resistance in that connection. Any resistance impedes the current trying to get to the starter. The normal resistance in any connection in this circuit is WAY too small to measure, but you CAN measure the results of that resistance. That's what you are doing now.

The proof there is too much resistance in this circuit is the slow cranking starter / chattering relay. This is a hard concept to understand and I won't bore you with the details, but that excessive resistance can be inside the battery. You normally see, again, the results of that resistance, and we call that a "dead battery".

The easiest way to find where excessive resistance is in the circuit is to find where it causes an excessive voltage drop. Just as you can add resistance by squeezing a garden hose, there will be no drop in pressure, (voltage) unless the nozzle is turned on and water is flowing, (current). When resistance is too high, not enough water, ... Ah, ... Current, can get through.

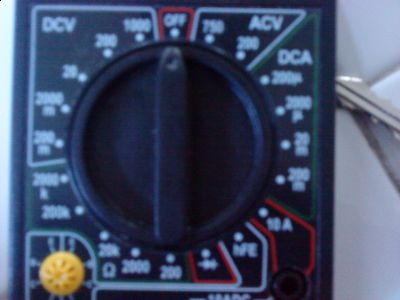
Ok, back to your circuit. Place one meter probe on one battery post. Let's start with the negative one. Put the other probe on the cable clamp right next to the first probe. Put the voltmeter on the lowest scale, then have your helper crank the engine. The highest voltage you want to see is 0.2 volts. Ideally there should be 0 volts, but most circuits aren't ideal. With the symptom you're having, I expect you're going to find at least a couple of volts at the bad spot.

Leave the probe on the battery post. The next step is to move the other probe from the cable clamp to the next accessible point in the circuit. In this case that would be where the negative cable is bolted to the engine block. Since the cable is new and tight, we can jump over multiple points and go right onto the engine itself and bypass the terminal and bolt on the end of the cable. Those are mechanical points where two pieces are joined together. So, one probe on the negative battery post, and one on the engine. Have your helper crank the engine. The maximum acceptable voltage now is 0.4 volts. 0.2 is the maximum for any one connection; 0.4 is the total allowable for the entire negative side of the circuit regardless of how many mechanical connections there are.

Holler back after you take these measurements. I'll start typing already for my next reply so it won't take so long.

Caradiodoc
Was this
answer
helpful?
Yes
No
Thursday, March 25th, 2010 AT 10:37 PM
Tiny
WILLIAM ROSS
  • MEMBER
  • 17 POSTS
Where on this meter should I use to do what you want me to do?


https://www.2carpros.com/forum/automotive_pictures/505144__1.jpg

Was this
answer
helpful?
Yes
No
Friday, March 26th, 2010 AT 5:46 PM
Tiny
CARADIODOC
  • MECHANIC
  • 33,757 POSTS
5 clicks counter-clockwise. The highest the meter will read is 0.2 volts, but they are displaying it in millivolts, so the maximum you want to see at any one connection is 200 millivolts. Anything higher than that and your meter will read some kind of over-range indication. To see what over-range looks like, (how it's displayed, or indicated), just put the probes on the two battery posts. The 12 volt battery is definitely over 200 millivolts. That won't hurt the meter.

If you find this same over-range reading when taking a measurement, switch the range selector one click clockwise. Go another click if you have to, to get a reading. Ideally you would like to see 0.00 volts at every connection during engine cranking, but because we're looking for a problem, you're hoping to find a connection where the voltage is real high.

Caradiodoc
Was this
answer
helpful?
Yes
No
Friday, March 26th, 2010 AT 6:30 PM
Tiny
WILLIAM ROSS
  • MEMBER
  • 17 POSTS
Had my cousin over and we changed the ground strap. Now back to you and the measurements are 3.5 on the post and cable and.2 on the post and engine what next?
Was this
answer
helpful?
Yes
No
Saturday, March 27th, 2010 AT 4:28 PM
Tiny
CARADIODOC
  • MECHANIC
  • 33,757 POSTS
Sorry for the delay in replying. My Verizon e-mail service is down for maintenance going on two days now. I am not receiving automated messages that you posted another comment. Hopefully that will be fixed soon.

Hold everything! I'm not sure which cable you're on, but 3.5 volts across the mechanical connection is way too much. That would be comparable to squeezing a garden hose with two fists. The result would be water dribbling onto your shoe from the nozzle. Take that connection apart and clean him up, then be sure it is tight.

Caradiodoc
Was this
answer
helpful?
Yes
No
Sunday, March 28th, 2010 AT 8:39 PM
Tiny
WILLIAM ROSS
  • MEMBER
  • 17 POSTS
Ok another problem I discoverd, I disconnected the neg cable and put a continuity tester on the neg post and the neg cable and it lit up, I then proceeded to pull the plug on the alt and the light stayed on then I went trough each fuse 1 by 1 and the light stayed on, now I am really really confused. Also checked voltage between neg post and detached cable and its the same as neg post and pos post.
Was this
answer
helpful?
Yes
No
Sunday, March 28th, 2010 AT 10:37 PM
Tiny
CARADIODOC
  • MECHANIC
  • 33,757 POSTS
Is this a test light or a self-powered unit with a battery inside? It sounds like you're reading through the memory circuits in the various computers. A test light will lower the voltage remaining to charge the memory circuits so they won't turn off.

Did you clean the connection where you had 3.5 volts.

Caradiodoc
Was this
answer
helpful?
Yes
No
Sunday, March 28th, 2010 AT 11:10 PM
Tiny
WILLIAM ROSS
  • MEMBER
  • 17 POSTS
The test light I used was a continuity test light and yes the cable and post are clean.
Was this
answer
helpful?
Yes
No
Monday, March 29th, 2010 AT 5:00 AM

Please login or register to post a reply.

Sponsored links