Good afternoon
,
Yes, the heater core needs to be replaced. I attached the procedure for you below of the replacement for the repair.
https://www.2carpros.com/articles/replace-heater-core
I would also replace the thermostat as they may be the reason for the heating up.
https://www.2carpros.com/articles/engine-overheating-or-running-hot
https://www.2carpros.com/articles/replace-thermostat
Roy
Warning: on vehicles equipped with airbags, refer to airbags and seat belts/airbags before attempting any steering wheel, steering column, or instrument panel component diagnosis or service. Failure to take the proper precautions could result in accidental air-bag deployment and possible personal injury.
REMOVAL
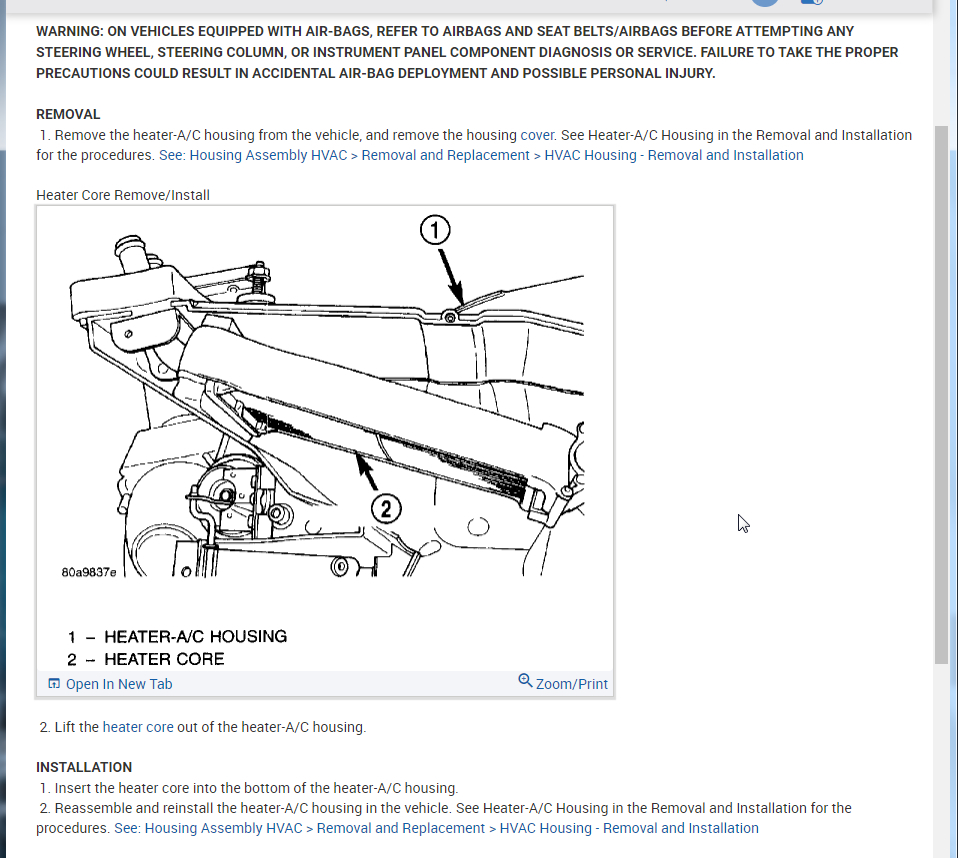
1. Remove the heater-A/C housing from the vehicle, and remove the housing cover. See Heater-A/C Housing in the Removal and Installation for the procedures. See: Housing Assembly HVAC > Removal and Replacement > HVAC Housing - Removal and Installation
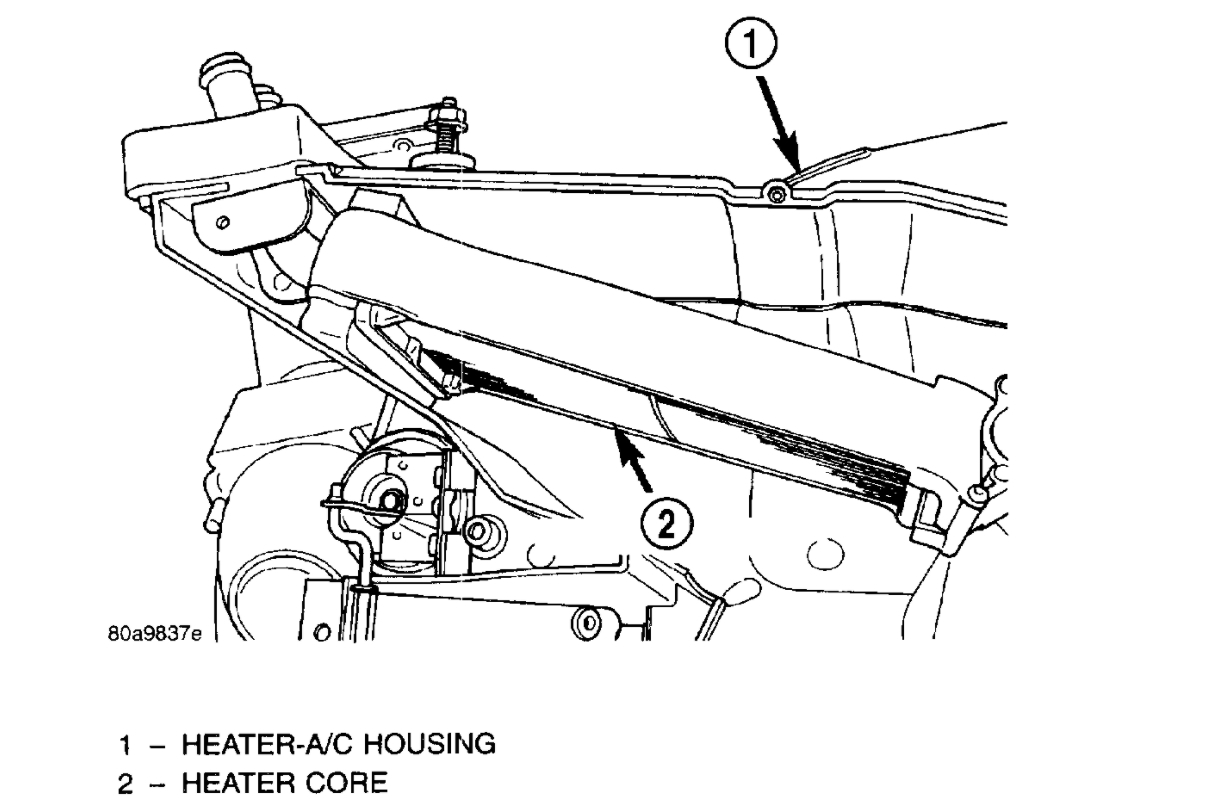
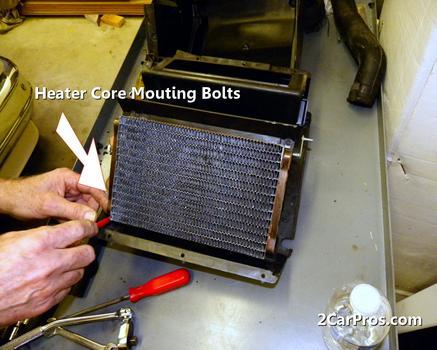
Heater Core Remove/Install
imageOpen In New TabZoom/Print
2. Lift the heater core out of the heater-A/C housing.
INSTALLATION
1. Insert the heater core into the bottom of the heater-A/C housing.
2. Reassemble and reinstall the heater-A/C housing in the vehicle. See Heater-A/C Housing in the Removal and Installation for the procedures. See: Housing Assembly HVAC Removal and Replacement > HVAC Housing - Removal and Installation
The heater-A/C housing assembly must be removed from the vehicle and disassembled for service access of the blower motor, blower motor wheel, heater core, evaporator coil, blend-air door, and each of the various mode control doors.
Warning: on vehicles equipped with air-bags, refer to airbags and seat belts/airbags before attempting any steering wheel, steering column, or instrument panel component diagnosis or service. Failure to take the proper precautions could result in accidental air-bag deployment and possible personal injury.
REMOVAL
1. Disconnect and isolate the battery negative cable.
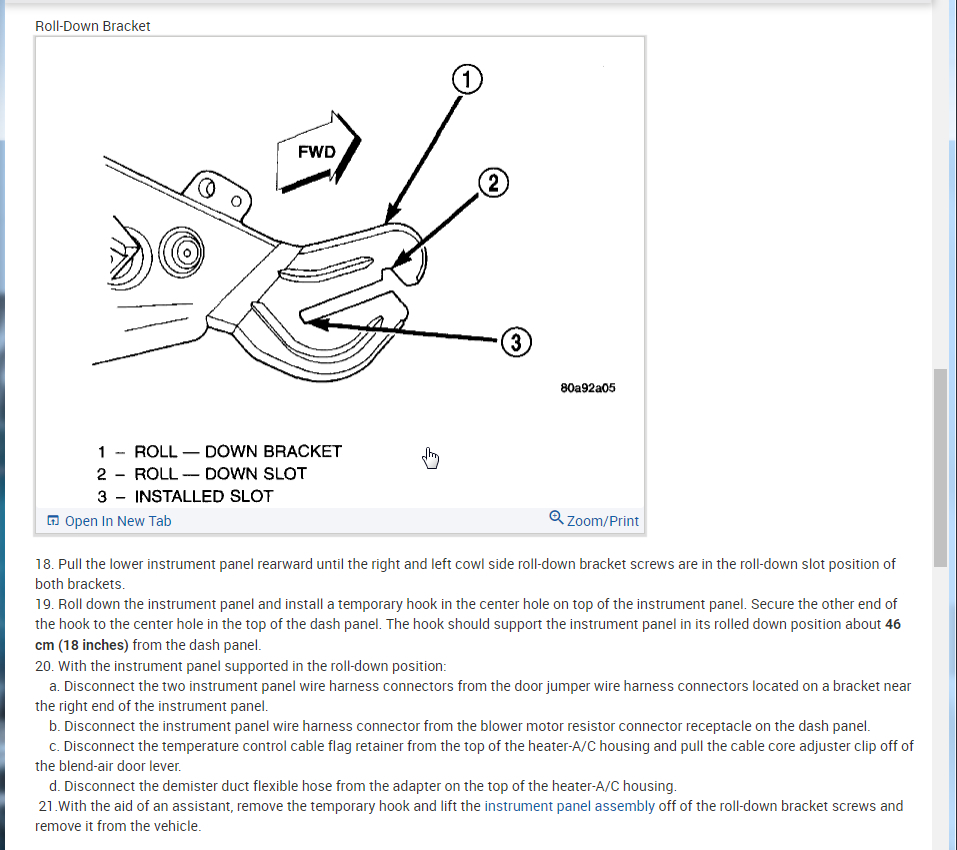
2. Remove the instrument panel from the vehicle. Refer to: Body and Frame, Interior Trim, Dashboard/Instrument Panel, Service and Repair, Instrument Panel Service Procedures, Instrument Panel Assembly Replacement, See: Dashboard / Instrument Panel > Removal and Replacement > Instrument Panel Assembly
3. If the vehicle is not equipped with air conditioning, go to Step 6. If the vehicle is equipped with air conditioning, recover the refrigerant from the refrigerant system. See Refrigerant Recovery in the Service Procedures. See: Heating and Air Conditioning > Procedures > Refrigerant System Recovery
4. Disconnect the liquid line refrigerant line fitting from the evaporator inlet tube. See Refrigerant Line Coupler in the Removal and Installation for the procedures. Install plugs in, or tape over all of the opened refrigerant line fittings. See: Coupler HVAC > Procedures
5. Disconnect the accumulator inlet tube refrigerant line fitting from the evaporator outlet tube. See Refrigerant Line Coupler in the Removal and Installation for the procedures. Install plugs in, or tape over all of the opened refrigerant line fittings. See: Coupler HVAC > Procedures
6. Drain the engine cooling system.
7. Disconnect the heater hoses from the heater core tubes.
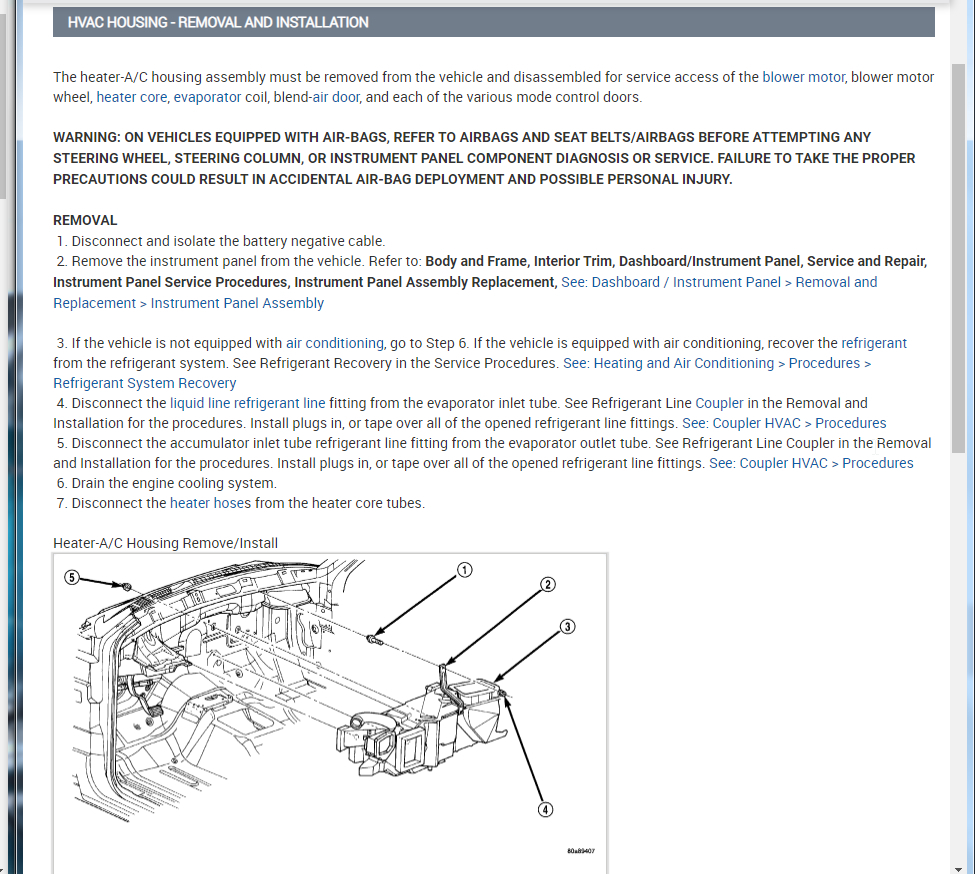
Heater-A/C Housing Remove/Install
imageOpen In New TabZoom/Print
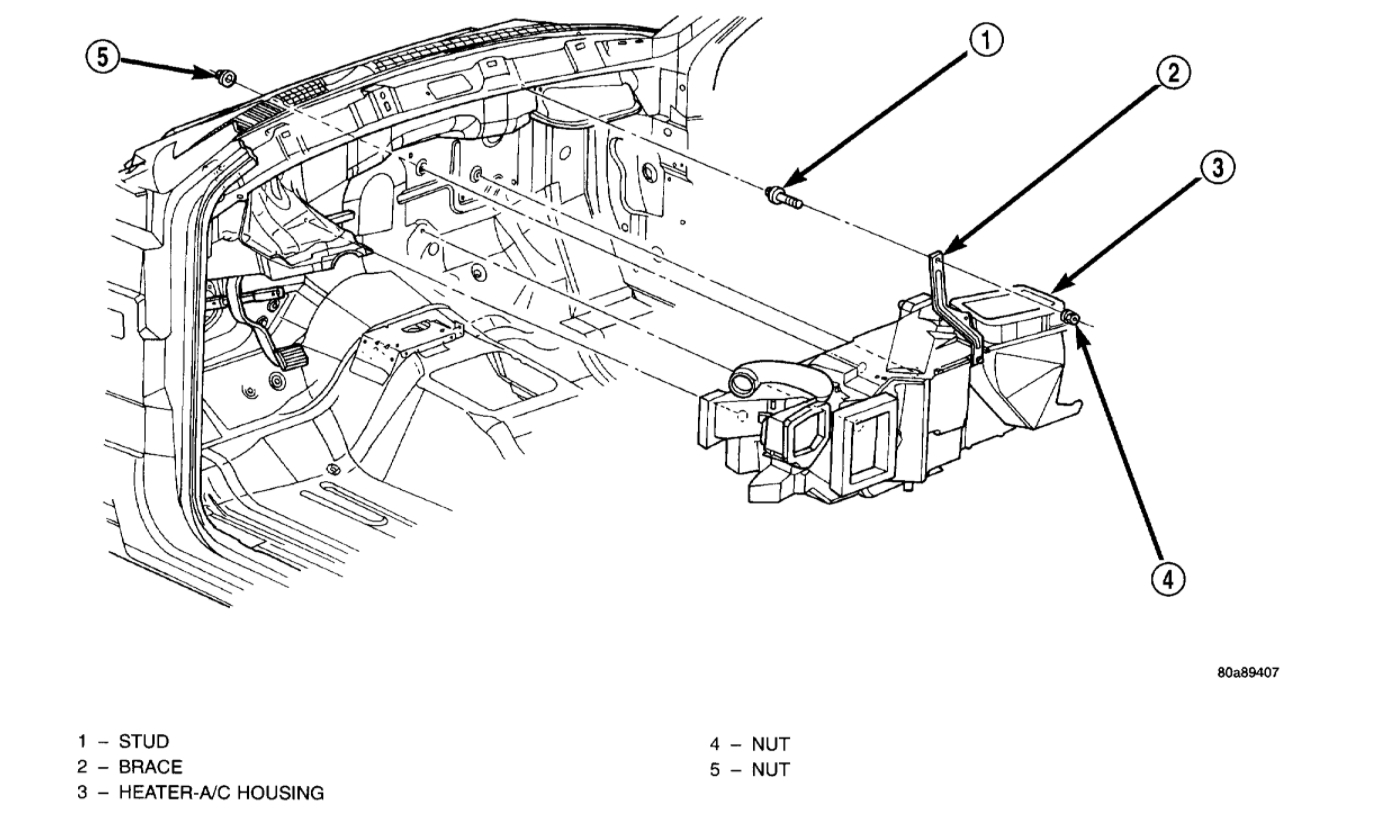
8. Remove the four nuts from the heater-A/C housing mounting studs on the engine compartment side of the dash panel.
9. Remove the nut that secures the heater-A/C housing mounting brace to the stud on the passenger compartment side of the dash panel.
10. Pull the heater-A/C housing rearward far enough for the mounting studs and the evaporator condensate drain tube to clear the dash panel holes.
11. Remove the heater-A/C housing from the vehicle.
INSTALLATION
1. Position the heater-A/C housing to the dash panel. Be certain that the evaporator condensate drain tube and the housing mounting studs are inserted into their correct mounting holes.
2. Install the nut that secures the heater-A/C housing mounting brace to the stud on the passenger compartment side of the dash panel. Tighten the nut to 11 Nm (95 in. lbs.).
3. Install and tighten the four nuts onto the heater-A/C housing mounting studs on the engine compartment side of the dash panel. Tighten the nuts to 7 Nm (60 in. lbs.).
4. Unplug or remove the tape from the heater core tubes. Connect the heater hoses to the heater core tubes and fill the engine cooling system.
5. If the vehicle is not equipped with air conditioning, go to Step 9 If the vehicle is equipped with air conditioning, unplug or remove the tape from the accumulator inlet tube and the evaporator outlet tube fittings. Connect the accumulator inlet tube coupler to the evaporator outlet tube. See Refrigerant Line Coupler in the Removal and Installation for the procedures. See: Coupler HVAC > Procedures
6. Unplug or remove the tape from the liquid line and the evaporator inlet tube fittings. Connect the liquid line coupler to the evaporator inlet tube. See Refrigerant Line Coupler in the Removal and Installation for the procedures. See: Coupler HVAC > Procedures
7. Evacuate the refrigerant system. See Refrigerant System Evacuate in the Service Procedures. See: Heating and Air Conditioning > Procedures > Refrigerant System Evacuate
8. Charge the refrigerant system. See Refrigerant System Charge in the Service Procedures. See: Heating and Air Conditioning > Procedures > Refrigerant System Charge
9. Reinstall the instrument panel in the vehicle. Refer to: Body and Frame, Interior Trim, Dashboard/Instrument Panel, Service and Repair, Instrument Panel Service Procedures, Instrument Panel Assembly Replacement, See: Dashboard / Instrument Panel > Removal and Replacement > Instrument Panel Assembly
10. Connect the battery negative cable.
11. Start the engine and check for proper operation of the heating and air conditioning systems.
REMOVAL
Warning: do not loosen radiator draincock with system hot and pressurized. Serious burns from coolant can occur.
Do not waste reusable coolant. If solution is clean, drain coolant into a clean container for reuse.
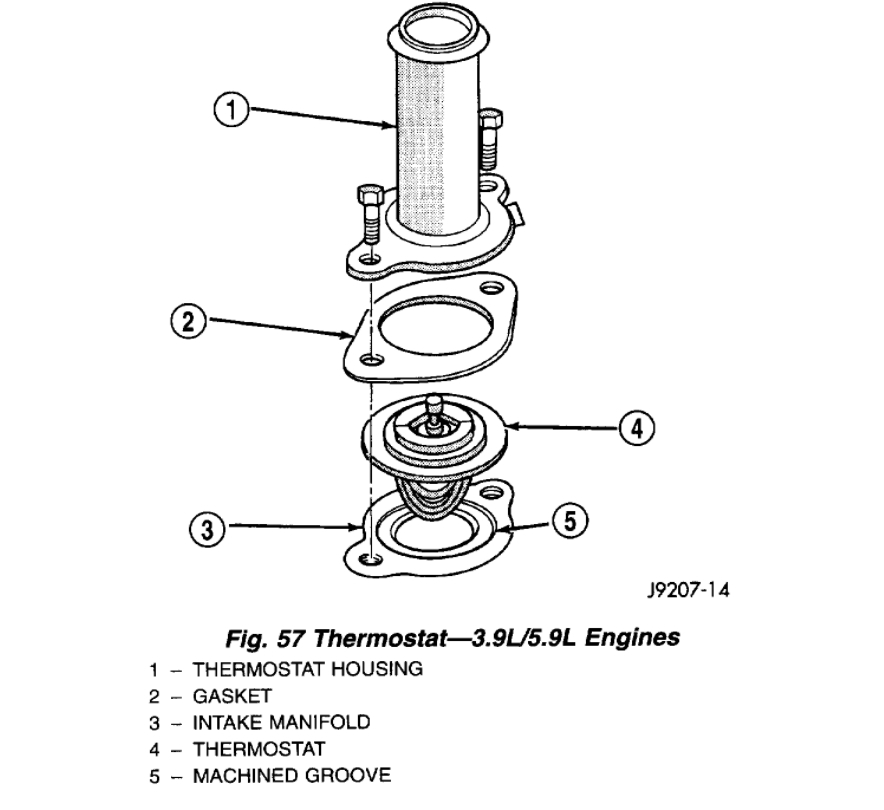
If thermostat is being replaced, be sure that replacement is specified thermostat for vehicle model and engine type.
Factory installed thermostat housings on 3.9L/5.9L engines are installed on a gasket with an anti-stick coating. This will aid in gasket removal and clean-up.
1. Disconnect negative battery cable at battery.
2. Drain cooling system until coolant level is below thermostat.
imageOpen In New TabZoom/Print
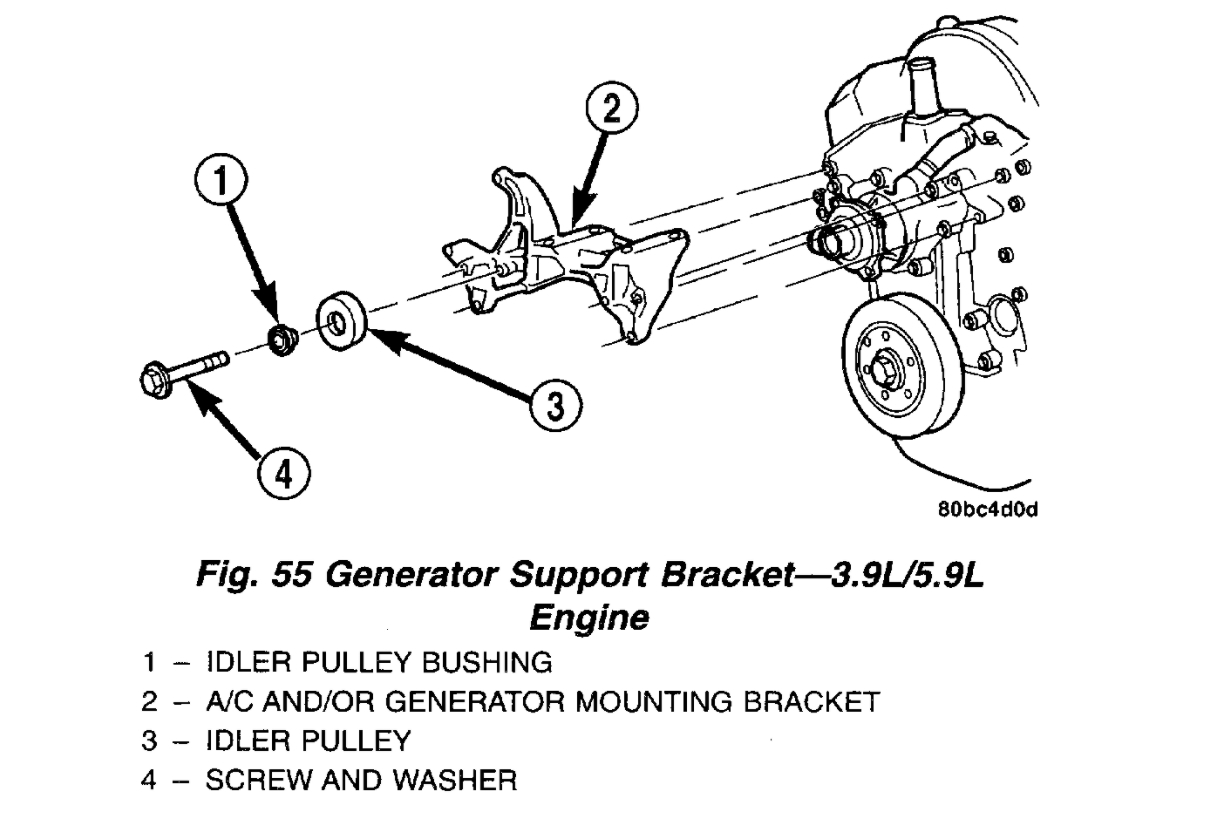
3. Air Conditioned vehicles: Remove support bracket (generator mounting bracket-to-intake manifold) located near rear of generator.
4. On air conditioning equipped vehicles, the generator must be partially removed.
imageOpen In New TabZoom/Print
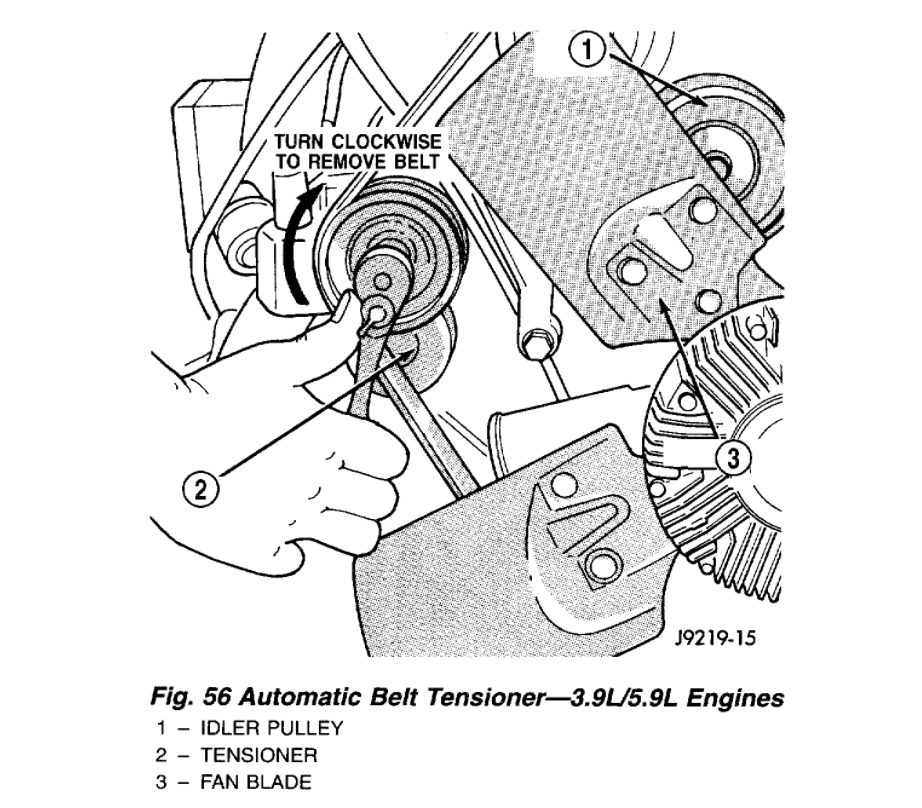
a. Remove generator drive belt as follows: Drive belts on both 3.9L and 5.9L engines are equipped with a spring loaded automatic belt tensioner.
b. Attach a socket/wrench to pulley mounting bolt of automatic tensioner.
c. Rotate tensioner assembly clockwise (as viewed from front) until tension has been relieved from belt.
d. Remove belt from vehicle.
e. Remove two generator mounting bolts. Do not remove any wiring at generator. If equipped with 4WD, unplug 4VVD indicator lamp wiring harness (located near rear of generator).
f. Remove generator. Position generator to gain access for thermostat gasket removal.
imageOpen In New TabZoom/Print
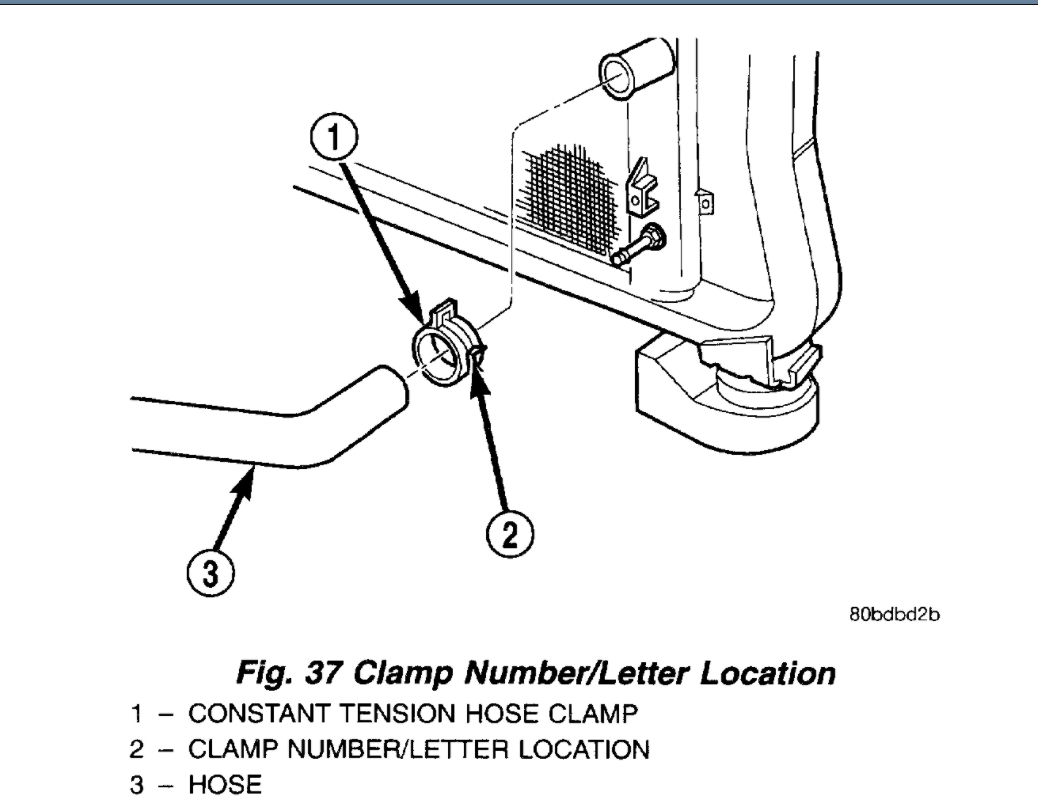
Warning: constant tension hose clamps are used on most cooling system hoses. When removing or installing, use only tools designed for servicing this type of clamp, such as special clamp tool (number 6094). Snap-on clamp tool (number hpc-20) may be used for larger clamps. Always wear safety glasses when servicing constant tension clamps.
imageOpen In New TabZoom/Print
CAUTION: A number or letter is stamped into the tongue of constant tension clamps. If replacement is necessary, use only an original equipment clamp with matching number or letter.
5. Remove upper radiator hose clamp and upper radiator hose at thermostat housing.
6. Position wiring harness (behind thermostat housing) to gain access to thermostat housing.
imageOpen In New TabZoom/Print
7. Remove thermostat housing mounting bolts, thermostat housing, gasket and thermostat. Discard old gasket.
Images (Click to make bigger)
Tuesday, December 1st, 2020 AT 12:33 PM