Hi and thanks for using 2CarPros.com. The problem you mentioned could be a few things. Since, however, you just purchased the vehicle, you are most likely not familiar with the maintenance which has been done in the past. What I would suggest is to flush the cooling system and replace the thermostat. Here are general directions for flushing the cooling system:
https://www.2carpros.com/articles/coolant-flush-and-refill-all-cars
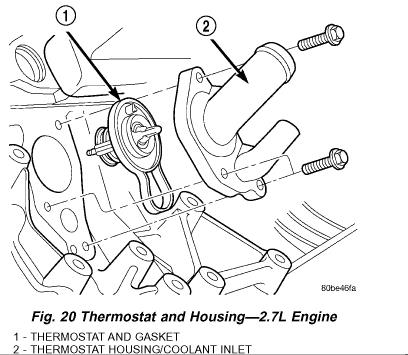
Additionally, as preventative maintenance, I would suggest replacing the thermostat. Here are the directions for that and should be done at the same time you flush the system since the coolant will already be drained. Picture 1 is the thermostat and housing.
SERVICE AND REPAIR
REMOVAL
Disconnect negative cable from remote jumper terminal.
WARNING: DO NOT REMOVE PRESSURE CAP OR ANY HOSE WITH THE SYSTEM HOT AND UNDER PRESSURE BECAUSE SERIOUS BURNS FROM COOLANT CAN OCCUR.
Drain cooling system.
Raise vehicle on hoist.
Remove right front wheel and belt splash shield.
Remove accessory drive belts.
Remove lower generator mounting bolt.
Lower vehicle.
Disconnect generator electrical connectors.
Disconnect AC clutch and AC pressure sensor electrical connectors. Reposition wiring harness.
Remove oil dipstick and tube. Plug hole in oil pan where dipstick tube mounts with water tight stopper.
WARNING: IF HOLE FOR DIPSTICK TUBE IN OIL PAN IS NOT PLUGGED, COOLANT WILL ENTER OIL PAN. SERIOUS ENGINE DAMAGE CAN OCCUR.
Remove remaining generator mounting bolts. Remove generator.
Disconnect hoses at thermostat housing.
Remove thermostat housing bolts.
Remove thermostat and housing.
INSTALLATION
Clean gasket sealing surfaces.
NOTE: Install thermostat with the bleed valve located at the 12 o'clock position.
Install thermostat and gasket into the thermostat housing.
Fig. 20 Thermostat and Housing - 2.7L
Install thermostat and housing to cylinder block. Tighten attaching bolts to 12 Nm (105 in. lbs.) .
Connect hoses at thermostat housing.
Install generator and attaching bolts.
CAUTION: Before removing plug in oil pan, clean residual coolant from area.
Remove plug in oil pan and install engine oil dipstick tube.
Reconnect AC clutch and AC pressure sensor connectors.
Reconnect generator connectors.
Raise vehicle on hoist.
Install accessory drive belts.
Install belt splash shield and right front wheel.
Lower vehicle.
Reconnect negative battery cable.
Fill cooling system.
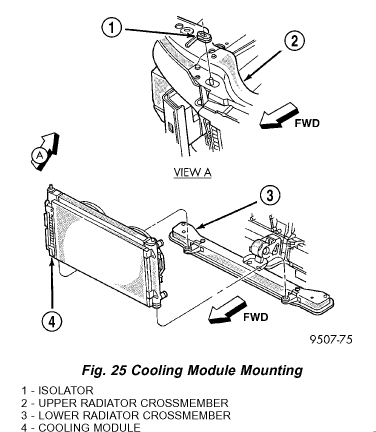
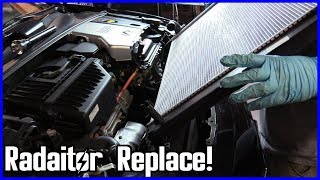
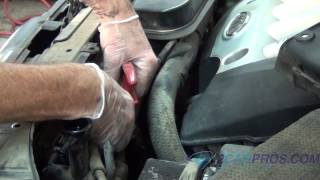
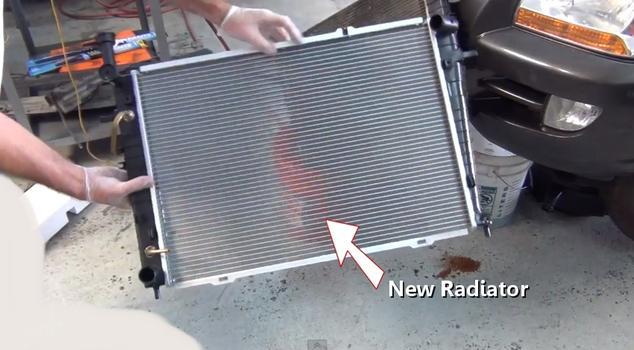
If you find the radiator to be bad, here are directions to remove and replace it. I've attached pictures for the process. Pictures 2 and 3 are related to these directions.
2002 Dodge Stratus Sedan V6-2.7L VIN R
Vehicle � Engine, Cooling and Exhaust � Cooling System � Radiator � Service and Repair
SERVICE AND REPAIR
RADIATOR
REMOVAL
Disconnect negative cable from auxiliary jumper terminal.
WARNING: DO NOT REMOVE PRESSURE CAP OR ANY HOSE WITH THE SYSTEM HOT AND UNDER PRESSURE BECAUSE SERIOUS BURNS FROM COOLANT CAN OCCUR.
Drain cooling system.
Fig. 25 Cooling Module Mounting
Remove upper radiator crossmember.
CAUTION: Plastic tanks, while stronger than brass are subject to damage by impact, such as wrenches.
Disconnect the radiator fan electrical connector.
Remove radiator fan.
Disconnect hoses from radiator.
Remove screw that holds support bracket for transmission cooler tubes at left side of radiator (if equipped).
CAUTION: Avoid bending the condenser inlet tube. Care should be taken not to damage radiator or condenser cooling fins.
Fig. 26 A/C Condenser Mounting
Remove the air conditioning condenser attaching screws located at the front of the radiator. Disengage AC condenser from radiator. It is not necessary to discharge the air conditioning system to remove radiator.
Radiator can now be lifted free from engine compartment. Care should be taken not to damage radiator or condenser cooling fins during removal.
CLEANING
Clean radiator fins are necessary for good heat transfer. The radiator and air conditioning fins should be cleaned when an accumulation of debris has occurred. With the engine cold, apply cold water and compressed air to the back (engine side) of the radiator to flush the radiator and/or A/C condenser of debris.
INSPECTION
Inspect the radiator tanks for cracks, broken or missing fittings also inspect the joint where the tanks seam up to the radiator core for signs of leakage and/or deteriorating seals.
Inspect radiator core for corroded, bent or missing cooling fins. Inspect the core for bent or damaged cooling tubes.
INSTALLATION
Slide radiator into position and seat the radiator assembly lower rubber isolators in the mount holes.
Attach air conditioning condenser to radiator. Tighten mounting screws to 5 Nm (45 in. lbs.) Install transmission oil cooler tube support bracket and attaching screw to left side of radiator. Tighten mounting screw to 5 Nm (45 in. lbs.) .
Connect hoses to radiator.
Install radiator fan.
Connect radiator fan electrical connector.
Install upper radiator crossmember.
Connect negative cable to auxiliary jumper terminal.
Fill cooling system.
I hope this is helpful. Let me know if you have other questions.
Take care,
Joe
Images (Click to make bigger)
SPONSORED LINKS
Saturday, May 19th, 2018 AT 9:49 PM