Good morning,
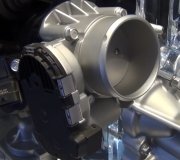
The idle speed is controlled by the idle air control on the throttle body itself.
https://www.2carpros.com/articles/how-to-replace-an-idle-speed-control-motor-iac
Put the timing back to where it was prior to your adjusting.
Base Timing, with Manual and Automatic Transmissions: 0° (TDC).
I would move it to 6 degrees advanced due to the age.
I attached the guide and the some pictures for you of the idle speed control motor.
Roy
1987-90 All: Ground diagnostic terminal (see COMPUTER DIAGNOSTIC CODES), turn ignition on but do not start engine. Wait 30 seconds then disconnect the IAC connector. Remove ground from the diagnostic terminal, start engine and turn throttle stop screw to obtain the specified setting speed.
NOTES:
a. The Idle Air Control (IAC) valve is an electrical component and must not be soaked in any liquid cleaner or solvent. Otherwise damage could result.
b. The IAC valve for this application is thread-mounted and has a dual taper, 10 mm diameter, pintle. Any replacement of the IAC valve must have the correct part number, with the appropriate pintle taper and diameter for proper seating of the valve in the throttle body.
REMOVAL:
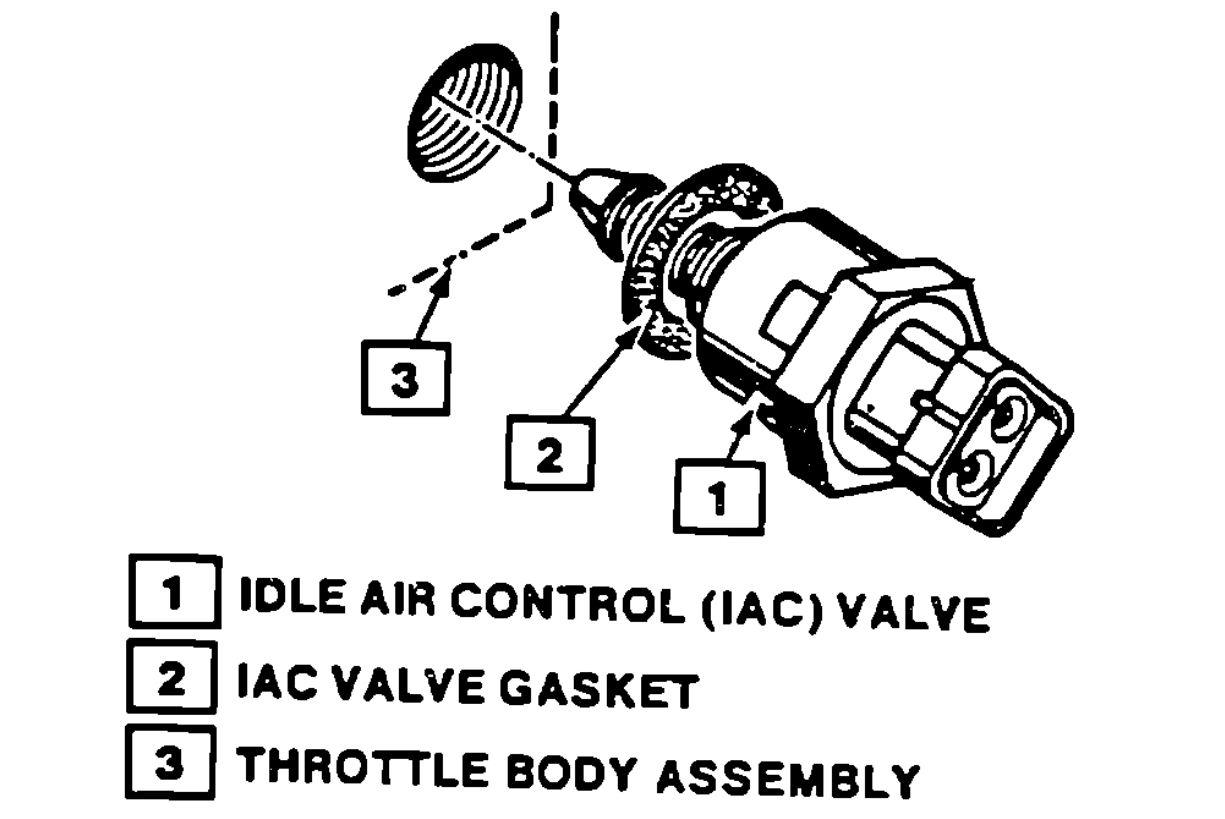
1. Disconnect electrical connector.
2. Remove IAC valve, use a 32 mm (1 1/4") wrench.
3. Remove IAC gasket and discard.
4. Clean old gasket material from surface of throttle body assembly to insure seal of new gasket.
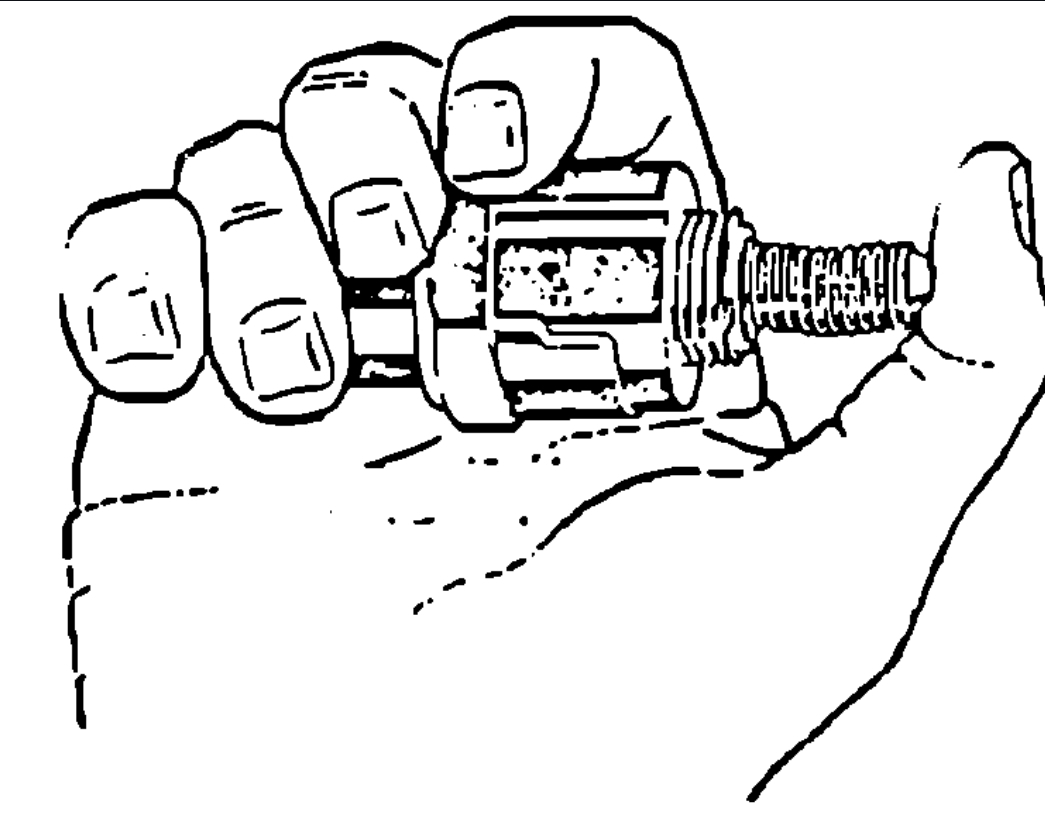
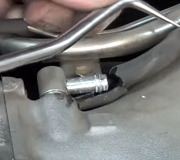
Idle Air Control Valve Pintle Retraction (Manually)
imageOpen In New TabZoom/Print
NOTES:
a. If the IAC valve was removed during service, its operation may be tested electrically with the IAC/ISC Motor Tester (J-37027 or BT-8256K) or equivalent. Before installing a IAC valve, measure the distance between the tip of the valve pintle and the mounting surface. If the dimension is greater than 28.0 mm (1.10 inches), the valve pintle must be retracted to prevent damage to the valve. This may be done electrically using an IAC/ISC Motor Tester or manually by exerting firm pressure, as shown in the illustration, with a slight side to side movement on valve pintle to retract it.
b. No physical adjustment of the IAC valve assembly is required after installation. The IAC valve pintle is reset by turning the ignition ON for ten seconds and then OFF. The ECM then resets the pintle to the correct position. Proper idle regulation should result.
INSTALLATION:
1. Install the IAC valve into the throttle body with new gasket.
NOTE: New IAC valves have been reset at the factory and should be installed in the throttle body in an "as is" condition, without any adjustment.
2. Tighten IAC valve assembly to 18.0 Nm (13.0 lb-ft).
3. Reconnect electrical connector to IAC valve.
4. START engine and allow it to reach operating temperature.
Ignition Timing
Caution: To prevent possible personal injury from a moving vehicle or operating engine do the following before performing the checks:
1. Engage the parking brake and block the wheels.
2. Place the automatic transmission in park or the manual transmission in neutral.
1. Refer to the Vehicle Emissions Control Information label located on the radiator support panel. Follow all instructions on the label.
2. Refer to the Fuel and Emissions Service Manual for information on the bypass timing mode.
3. With the engine control switch off, connect the pickup lead of the timing lamp to the number one spark plug. Use a jumper lead between the wire and plug or an inducting type pickup. DO NOT pierce the wire or attempt to insert a wire between the boot and the wire. Connect the timing lamp power leads according to the manufacturer's instruction.
4. Follow all instructions on the Vehicle Emissions Control Information label. Start the engine, and aim the timing lamp at the timing mark. The line on the balancer or pulley will line up at the timing mark. If a change in necessary, loosen the distributor hold-down clamp bolt at the base of the distributor. While observing the mark with the timing lamp, slightly rotate the distributor until the line indicates the correct timing. Tighten the hold-down bolt, and recheck the timing.
5. Turn off the engine and remove the timing lamp. Reconnect the number one spark plug wire, if removed.
Images (Click to make bigger)
SPONSORED LINKS
Thursday, February 4th, 2021 AT 1:56 AM