There's a different page I would rather see that just lists a whole pile of numbers, but that's more for checking for proper crash damage repair. I can offer a few comments related to this printout.
First, while it doesn't say it, it appears the top drawing is the "Before" readings, meaning what the vehicle came in with, and the bottom one is the "After" readings once all the adjustments were completed.
The top number on each side is for "caster". Visualize how the fork on a bicycle angles rearward at the top. When you put weight on the tire, it makes the wheel want to squirt out straight ahead. That is what allows you to ride no-handed. Caster on the car has to do with the upper ball joint or the upper strut mount being further rearward than the lower ball joint. Those are the two steering pivots. Being offset from the center of the tire, "positive caster" which is the upper pivot behind the lower pivot, makes each front wheel want to turn toward the center of the vehicle. The higher the caster, the harder that wheel wants to turn in when vehicle weight is placed on it. As late as the 1960s, it was common to call for negative caster, meaning the upper ball joint was forward of the lower ball joint. That made for very easy steering. Even large trucks could be steered easily.
By the late '60s, we were driving faster, but negative caster is very unstable. Cars wandered all over which made them tiring to drive with the constant steering corrections. We went to positive caster for greatly improved stability, but it makes steering much more difficult. The wheel turning out is actually raising that corner of the car. To deal with the increased steering effort, power steering was added. We still can't adjust caster too high as it would still take too much effort to control the car, especially at lower speeds.
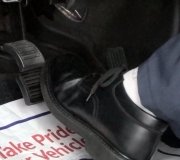
To put this in perspective, imagine standing beside the car, looking at the side of the tire. If the upper ball joint is directly over the lower ball joint, that would be 0 degrees caster. Now imagine the spindle and upper ball joint are rotated more and more until the upper ball joint is behind the lower one, (more or less right under the brake pedal). That would be 90 degrees. Most car and light truck models call for around 3 degrees caster. That's plenty to provide easy steering with no wander. Of more importance than the actual values, we want caster to be equal on both front wheels. Looking at your printout, RF caster is 3.2 degrees which makes that wheel want to turn left simply from the weight on it. LF caster is higher at 3.5 degrees, so the left wheel wants to turn to the right, but slightly harder than the right wheel. When the two spindles are connected together with the steering linkage, those two pulls are supposed to be equal and cancel each other out. In this case the 0.3 degree higher pull on the left wheel will more than cancel the pull on the right wheel, with a little left over to cause the vehicle to pull to the right when you let go of the steering wheel. Don't panic; more on that in a moment.
I have to add a comment here about tire wear. Caster has no appreciable effect on tire wear, however, for anyone preparing to take the ASE certification test for Steering and Alignment, they DO consider caster to be a tire wear angle. That's because due to the geometry of the spindle and the suspension system, the wheel turning out, away from the center of the car, will tilt that way on top. That tilt is actually very easy to see when standing beside the car. Because of that tilt, the tire is riding on the outer edge of the tread, so that edge is going to wear much faster. Common sense tells us that wear is going to take place when turning sharply in either direction, which is typical of driving through a parking lot. That microscopic wear will never be seen, yet technically it is taking place. The only people in the world who care about that wear are those writing the certification test. A few models, including some Mercedes and some older Jeeps called for as much as 11 degrees caster to reduce steering wander. Even those would never show tire wear due to those settings.
As a side note for caster, the majority of front-wheel-drive cars are completely immune to pulling to one side due to unequal caster. I can't offer an explanation for that, but I've had as much as 3.0 degrees difference, and there was no pull. With that much difference on a rear-wheel-drive car, you'd have to hold onto the steering wheel with both hands to keep it going straight. Many of those front-wheel-drive models, particularly imports, don't even provide a means of adjusting caster. You just take what you got and move on.
Caster is the hardest alignment angle to explain and visualize. "Camber" is the easiest. That has to do with the top of the wheel tilting in or out. If the wheel is perfectly straight up and down, that would be 0 degrees camber. Imagine that wheel being tipped out on top more and more until it is laying flat on the ground. That would be 90 degrees. Tipped out on top is positive camber and is by far the most common. A few models call for negative camber, meaning tipped in on top, usually to overcome some design issue and achieve decent tire wear. For most models, 0.5 degrees, give or take a quarter of a degree, is a typical value for camber. One of the big unknown purposes of camber is the tilt causes the vehicle's weight to be placed directly over the larger inner wheel bearing, (when we had the big inner and smaller outer bearing that we had to grease periodically). Today everyone uses a different style sealed bearing and hub assembly, but camber is still responsible for eliminating a sideways or twisting stress on those assemblies. Correct camber helps those bearing live longer.
The most talked about purpose of correct camber is to reduce tire wear. If camber is too high positive, the tire will ride more on the outer edge of the tread and make it wear faster. Too much negative camber causes accelerated wear on the inner edge of the tread. This is part of the wear patterns we "read" when looking for what needs to be corrected when we start the alignment. (It's also why we would prefer to align your car right before you buy new tires, not right after). As long as all the old tires are the same size, we can read them and make all the adjustments needed, then you can have the new tires installed.
Another very important fact about camber is the value on a wheel affects the tire wear on only that one tire. Camber can be out of adjustment on multiple wheels, each with its corresponding bad wear, but misadjusted camber on one wheel never affects the wear pattern on another tire.
Next, camber has the biggest effect on pulling to one side. A tire wants to roll in the direction it is leaning, so positive camber on the left front wheel makes that tire pull to the left. The goal is to set camber on the right side to the same value so the two pulls offset each other and the car goes straight. Camber on your left front is 0.1 degrees. Without knowing what the specs call for, I'd call that quite respectable. It's the right front that disappoints me. The negative 1.3 degrees is a real lot. That tire is going to develop accelerated wear on the inner edge very soon, and with only the 0.1 degree on the left to offset it, the 1.2 degree difference is going to cause a significant pull to the left.
At this point I want to add two noteworthy points of interest. First, camber has twice the effect on pulling as does caster. In other words, if all the other variables are equal side to side, and only camber has a 0.5 degree pull, the car would pull just as hard as if there was only a 1.0 caster pull. A better way to say that is if you had a 1.0 degree caster pull to the left, and a 0.5 degree camber pull to the right, the two would offset each other perfectly and the car would go straight. Remember, this only applies to rear-wheel-drive cars. For front-wheel-drive models, caster usually doesn't play a part in a pull or in correcting it.
Second, (you won't be tested on this or be expected to remember it), but you can run into a car with horrendous tire wear on one edge of one or both front tires while the customer says the car goes straight with no pull. If camber is excessively positive on both wheels or excessively negative on both wheels, both will wear fast on one edge of the tread and the pulls can offset each other. But you can also run into accelerated wear on the outer edge of one tire and on the inner edge of the other tire. Logic dictates both are tipped the same way and you should have a very hard pull. Instead, what can happen is while there is that hard camber pull one way, it can be offset by a very hard caster pull the other way. The car could go straight, but you will usually feel something isn't right. About half of alignment specialists perform a preliminary test drive before starting the alignment. A trick to identifying this caster / camber problem is to drive over a bump that goes all the way across the road. Railroad tracks are perfect, and many in-town intersections work too. Let go of the steering wheel, but watch it as you go over that bump. You'll see the car continues to go straight, but the steering wheel turns left and right as the front end bounces up and down. That's a huge clue that settings are not equal on both front wheels. The unequal camber leads to the tire wear patterns, but there has to be unequal caster to offset that unequal camber.
For my third comment of value, all alignment computers can be set to read caster and camber to two places after the decimal point. Years ago, with big heavy rear-wheel-drive cars, mechanical alignment equipment could read to an eighth of a degree if we were careful, and that was more than good enough for those vehicles. Today the computers can read those angles to the hundredth of a degree, and we need that precision for tiny lightweight cars. Back in the '90s with front-wheel-drive Chryslers, I found 0.06 degrees more camber on the left wheel than on the right one was just perfect to make them go straight. I haven't mentioned "road crown" yet. That's where roads lean to the right to make water run off. Most cars will follow that tilt and appear to be pulling to the right. We always adjust in a small camber or caster pull to offset that road crown. That's what that 0.06 degrees did. When a person sets up their computer to read to just the tenth of a degree, it means they value time more than precision. When a number displayed on the screen turns green it means it is "in specs". We can do better if we had more precision, but for many techs, "in specs" is good enough. That is indeed good enough for much older cars, but when you need 0.06 degrees difference but can only read to tenths of a degree, the computer is rounding two values. Had you been reading to the hundredth of a degree, the actual difference could be anywhere between 0.00 and 1.50 degrees. Either of those extremes would leave you with a pull. It might be small enough that the car owner doesn't notice, but some will. It only takes a couple of extra minutes to set the computer to read to hundredths of a degree, and make more precise adjustments the first time. When I visit a shop and I see the alignment computer set to read to tenths of a degree, I keep my mouth shut, but I know they could do a better job for their customers.
The last of the three main alignment angles is "toe". That's the direction each of the four wheels is steering when the steering wheel is straight. Changing caster or camber usually causes the toe value on that wheel to change, but adjusting toe has no noticeable affect on the camber and caster settings. For that reason, toe is always the last thing to be adjusted. For your preliminary numbers, there's no way to know if the steering wheel was straight when this "snapshot" was taken by the computer. Don't panic if your observations when driving to the shop disagree, but for the sake of this sad story, we'll assume the steering wheel is straight. The left front wheel is at minus 0.20 degrees. Negative toe means that wheel is steering away from the center of the vehicle, but by just a little. The right front is at positive 1.40 degrees. That's a bunch, but very respectable considering this was right after the tie rod ends were replaced. I'd be very happy to get all of mine that close. That wheel is steering to the left. Overall, whenever both wheels had equal weight on them, (you weren't driving over a bump in the road), the vehicle is going to steer to the left. You have to turn the steering wheel to the right to make the car go straight.
This brings me to some more exciting points of interest. First, this unequal toe results in an off-center steering wheel. A car could go perfectly straight down the road without you touching the steering wheel, but the wheel is not straight. That is very different than when you have a caster or camber pull and you have to turn the steering wheel by hand to counteract that pull. Many car owners have a hard time understanding the difference between an off-center steering wheel vs. One that has to be turned off-center to counteract a pull.
Next, to my knowledge, all alignment computer will only read toe to the hundredth of a degree. I don't think they can be set to read to tenths because all vehicles require the higher precision. A typical spec for many years has been 0.20 degrees plus or minus 0.20 degrees. We're picking tiny nits here to get it right, and tenths of a degree just aren't good enough.
The last thing here is the computer is reading toe in degrees. I don't have a good feel for that. Mine was always set to read it in inches which is what many race cars are set to with a tape measure. A reading in degrees will be exactly twice as big as the same one in inches. That means I can have 0.25" of toe and if I change my computer to display it in degrees, it will show 0.50 degrees. This isn't important except when we're analyzing a printout and we fail to notice which unit of measurement is used.
One more critical note. Unlike where a bad camber adjustment causes wear on just that one tire, we always have to look at "total toe", and when it is out-of-specs, it always causes the same wear pattern on both tires on that axle. "Toe" is the setting on one wheel, then we look at the toe setting on the other wheel. The computer also adds them up and displays that as "total toe". You have -0.20 degrees on the left, and positive 1.40 degrees on the right. Total toe is 1.20 degrees. THAT is the reading involved with that part of tire wear. That equates to 0.60 inches. The front or leading edges of the metal wheels are roughly 5/8" closer together than the rear edges of the wheels. That will definitely lead to tire wear, but it likely was good enough that it wasn't too miserable to drive to the alignment shop.
Total toe wear shows up as a choppy pattern on the tread. You can stand next to the vehicle and see it when it's really bad, and you'll see it on both tires. When it's not too bad yet, run your hands over the tread and you'll feel it. Look at one individual block of rubber. One edge will be higher than on the other side of that block, and higher than on the edge next to it on the adjacent block. You fingertips will glide rather smoothly in one direction, but catch on the raised edges when you run your hand the other way. I used to be able to tell if total toe was toed in too much or toed out too much by which way those raised edges appeared. Today I have to stop and think about it a while. You'll feel this when running your fingers around the tire and across the tire.
Imagine you're holding a pencil upright with the eraser down. Set the eraser down onto a table, press down, then drag it across the table. The leading edge gets ground down and creates eraser crumbs. The trailing edge lifts up off the table and no wear takes place on that part. Do that long enough and the eraser won't be flat on top. It will be worn slanted.
It takes some visualizing to compare that to what happens with tires. Imagine both front wheels are steering away from the vehicle's center. Now imagine they're turned out even more, ... And more, until they're sideways and steering fully to the left and right. Now it's easy to see the inner edge of the tread is the leading edge. Of course if you could actually try to drive a car like that, the tires wouldn't even rotate. They'd just skid along the road surface like the pencil eraser did. Now, instead of that unrealistic example, if we just had as little as a quarter inch of total toe out, that is more than enough to set up the same wear patterns, but it will take many miles to show up. Pulls and crooked steering wheels can be seen right away. Camber and toe wear take many miles to show up.
My next concern is when looking at the "After" readings, front toe on those two wheels is all that was adjusted. They may have only been interested in that due to the new tie rod ends, but in good conscience, I couldn't leave the right front camber like that. Even if there was such a thing as an "economy" alignment that didn't include adjusting caster and camber, I'd still try to make it better. In fairness, some trucks need to have special offset ball joints installed to make camber corrections. That's a big job that would warrant an additional expense, but it's usually only done once to a wheel in the life of the vehicle. That right front camber will actually come up quite a noticeable amount by simply letting a few pounds of air pressure out of that tire.
Your vehicle is too new for me to be familiar with it, but it looks like it has independent rear suspension. With an older design solid rear axle, camber and total toe for both wheels would be 0.00 degrees / inches. Even a solid axle can be mounted slightly turned, so all alignment computers look at the two rear toe readings, then calculate where they want us to adjust each front toe to get a straight steering wheel. With independent suspension, ride quality is seriously improved, but at the expense of tire wear if it isn't adjusted to specs. Here you have 0.20 degrees toe-in on each wheel. I'd look twice at that 0.40 degrees total, but without knowing the specs, I'd suspect that to be quite acceptable. The fact that toe is exactly equal on both wheels is extremely rare and quite the coincidence. No correction to the front toe settings was needed, but if it was, we don't do or calculate anything. The computer does that and we just adjust each front wheel to where it tells us to.
The negative camber settings on the rear are not that uncommon. I think they're doing that for better cornering, but it could be for comfort or it could be with lots of test-driving, that's the setting the engineers found that gives the best tire wear.
There's way more than you wanted to know about your alignment. If you're having any issues or symptoms I didn't cover, let me know and I'll start over!
Thursday, August 17th, 2023 AT 1:15 AM