Welcome to 2CarPros.
Alex, it sounds like you have two different problems. Temperature is controlled by the blend air door actuator. However, air flow directions is controlled by what is called a mode door actuator.
Here are the directions for the left blend air door actuator. To prevent confusion, it is referred to as an Air Temp Actuator in the manual, but most people call it a blend air door. The attached pictures correlate with the directions.
_________________________
2003 Chevy Truck C 1500 Suburban 2WD V8-5.3L VIN T
Air Temperature Actuator Replacement - Left
Vehicle Heating and Air Conditioning Air Door Actuator / Motor Service and Repair Procedures HVAC System - Automatic Air Temperature Actuator Replacement - Left
AIR TEMPERATURE ACTUATOR REPLACEMENT - LEFT
REMOVAL PROCEDURE
Notice: In order to avoid actuator damage, DO NOT apply power to the actuator when it is not installed in the HVAC module.
1. Remove the I/P insulator panel. See: Dashboard / Instrument Panel > Removal and Replacement > Instrument Panel (IP) - Insulator Replacement
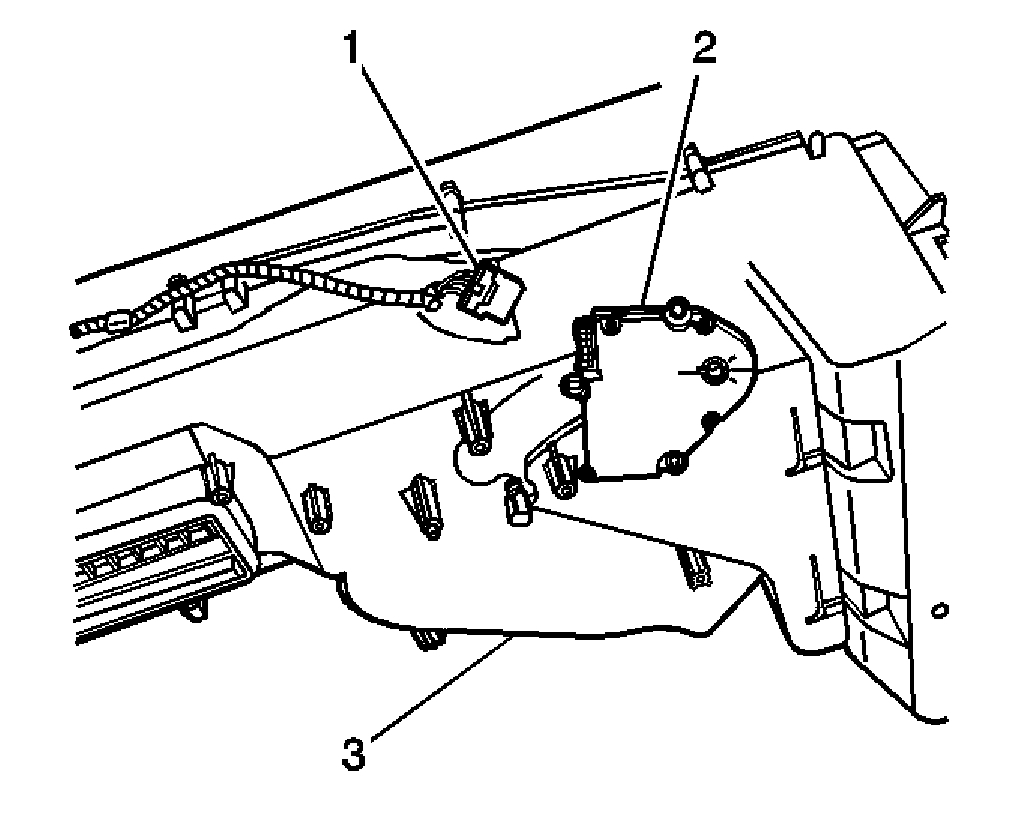
pic 1
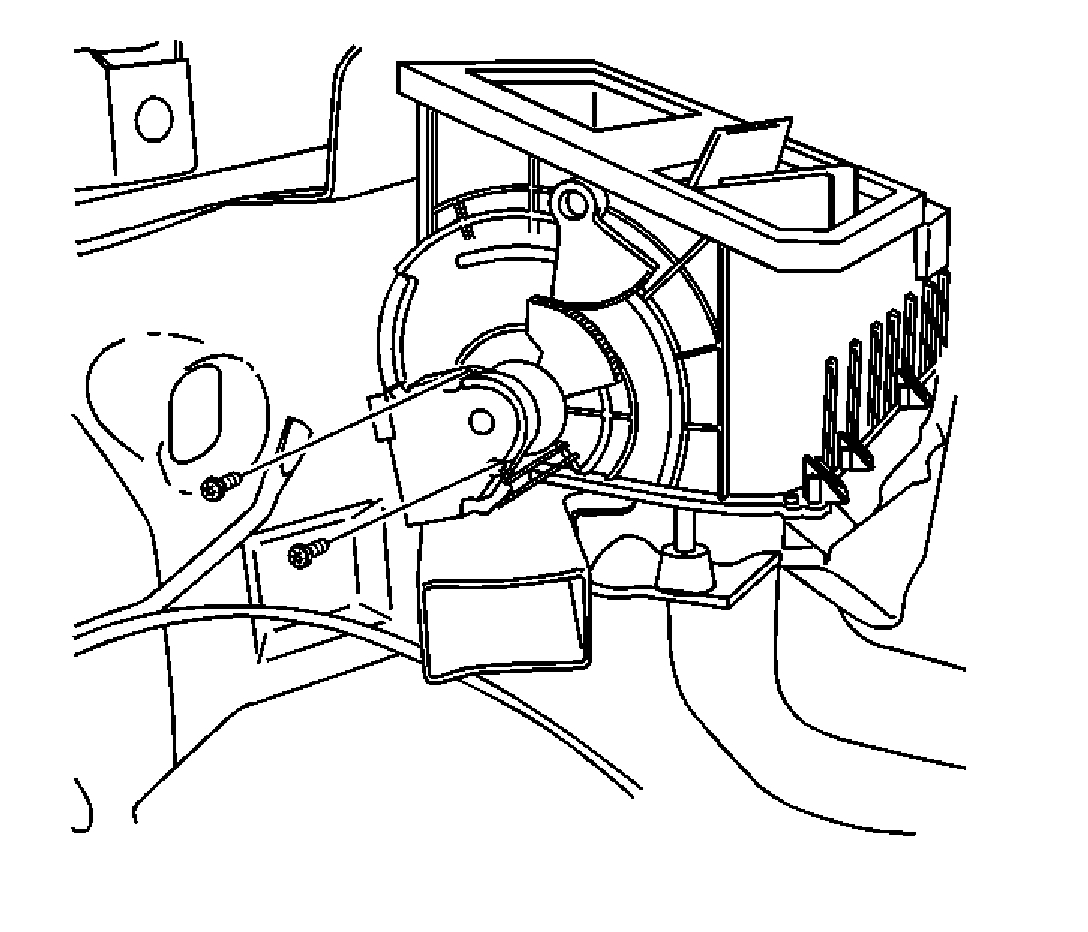
2. Disconnect the electrical connector (1) from the left air temperature actuator (2).
3. Remove the screws from the left air temperature actuator (2).
4. Remove the left air temperature actuator (2) from the HVAC module assembly (3).
INSTALLATION PROCEDURE
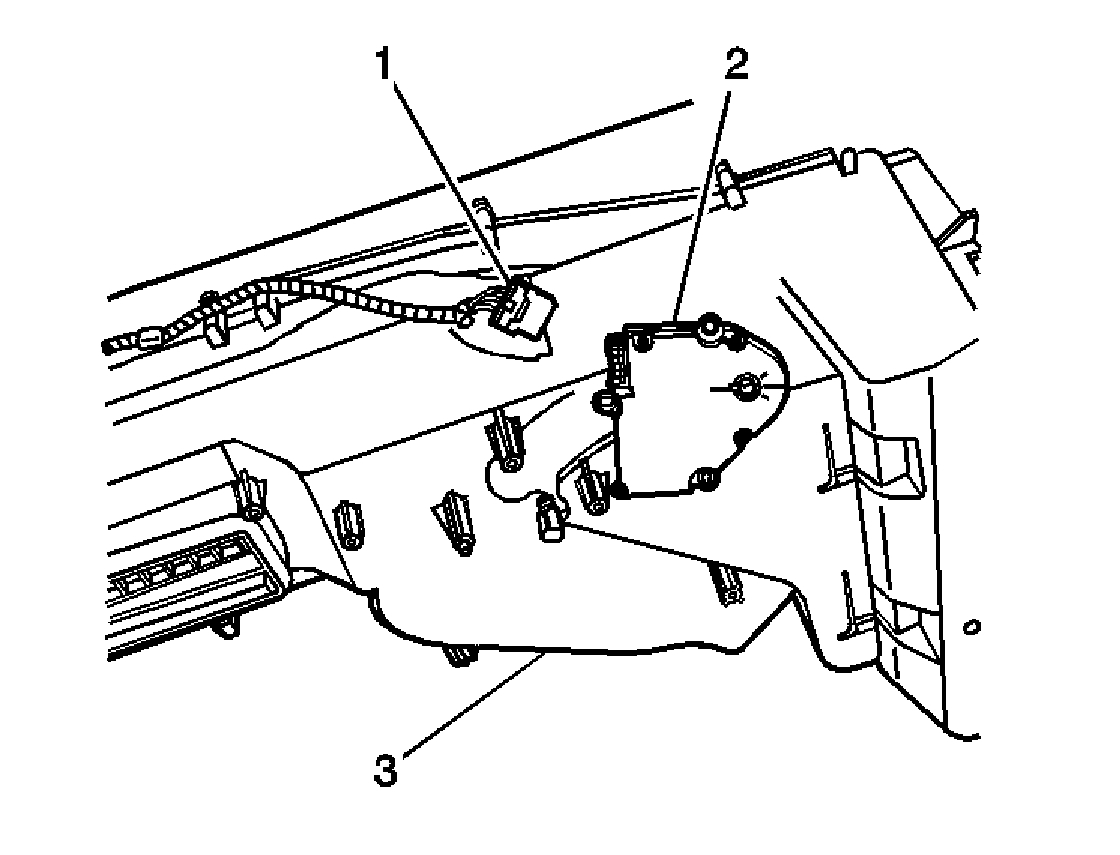
pic 2
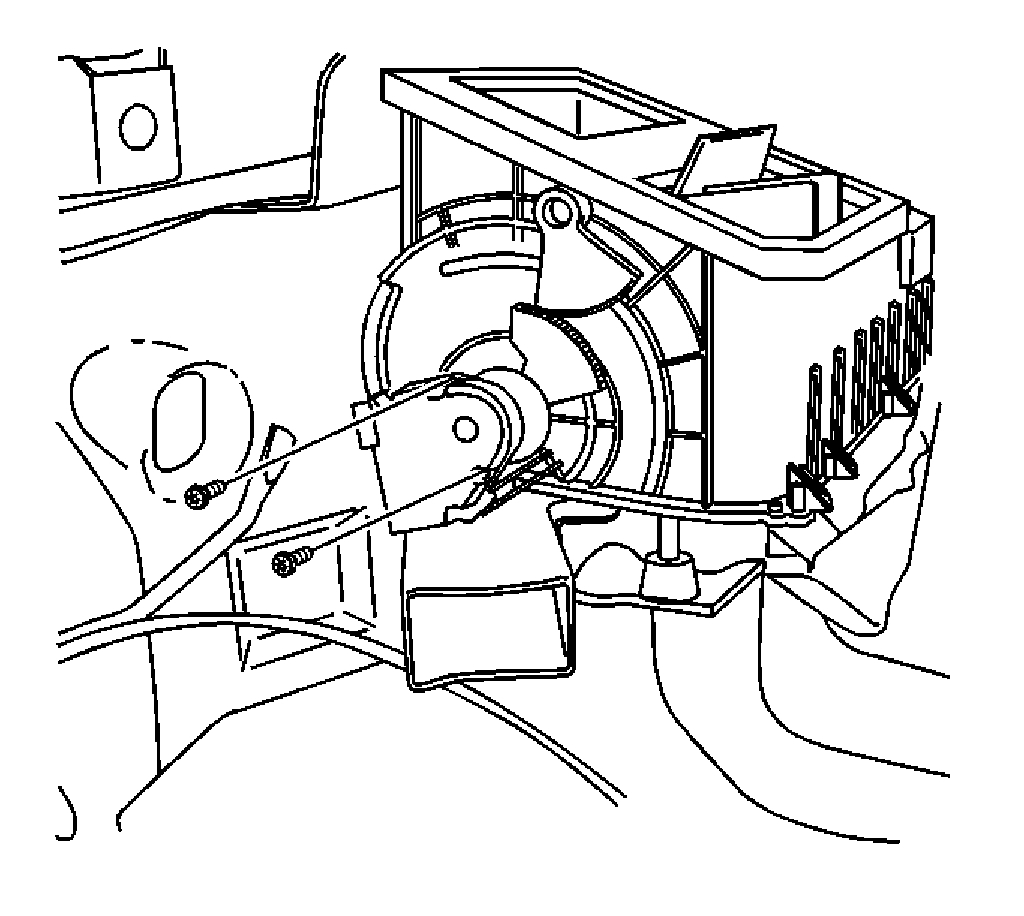
1. Install the left air temperature actuator (2) to the HVAC module assembly (3).
2. Install the screws to the left air temperature actuator (2).
Notice: Refer to Fastener Notice in Service Precautions.
Tighten
Tighten the screws to 2 N.M (18 lb in).
3. Install the electrical connector (1) to the left air temperature actuator (2).
4. Install the I/P insulator panel.
5. Reprogram the left air temperature actuator. See: Vehicle > Programming and Relearning
______________________
Here are the directions for programming / relearning. It is preferred to do it with a scan tool, but here are the directions without.
Alternative Method (w/o Scan Tool)
1. Clear all DTCs.
2. Place the ignition switch to the OFF position.
3. Install the HVAC actuator.
4. Connect all previously disconnected components.
5. Remove the HVAC/ECAS fuse for a minimum of 10 seconds.
6. Install the HVAC/ECAS fuse.
7. Start the vehicle.
8. Wait 40 seconds for the HVAC control module to self-calibrate.
9. Verify that no DTCs have set as current DTCs.
________________________________
Here are the directions for the mode door actuator.
____________________________________
2003 Chevy Truck C 1500 Suburban 2WD V8-5.3L VIN T
MODE ACTUATOR REPLACEMENT (W/ D07)
REMOVAL PROCEDURE
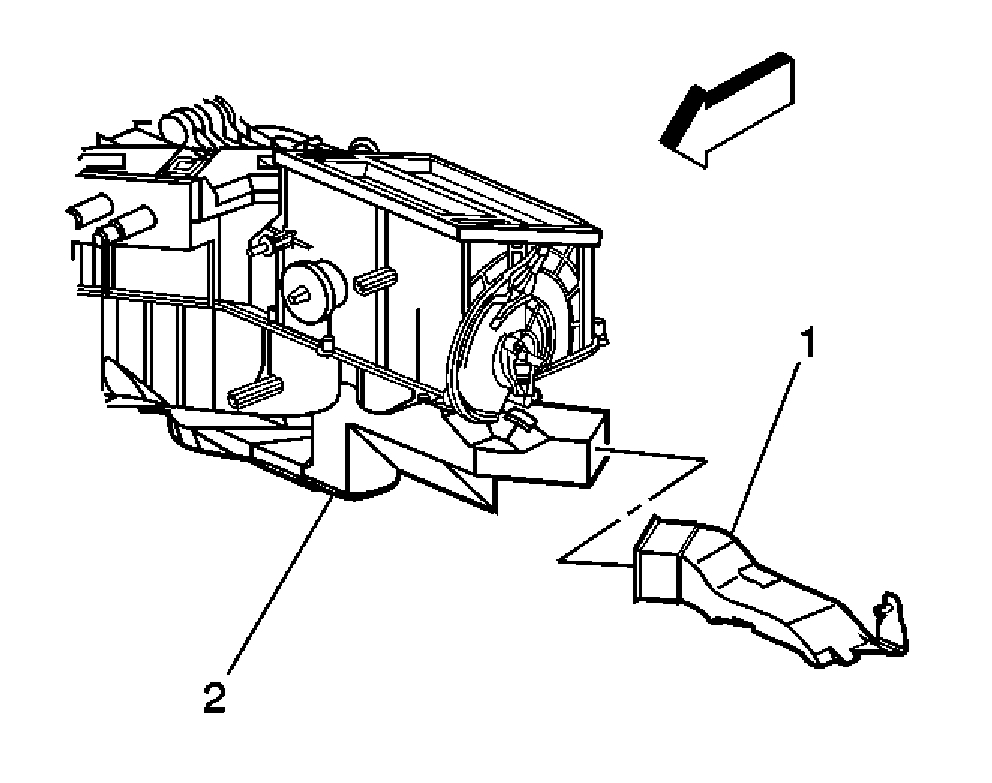
pic 3
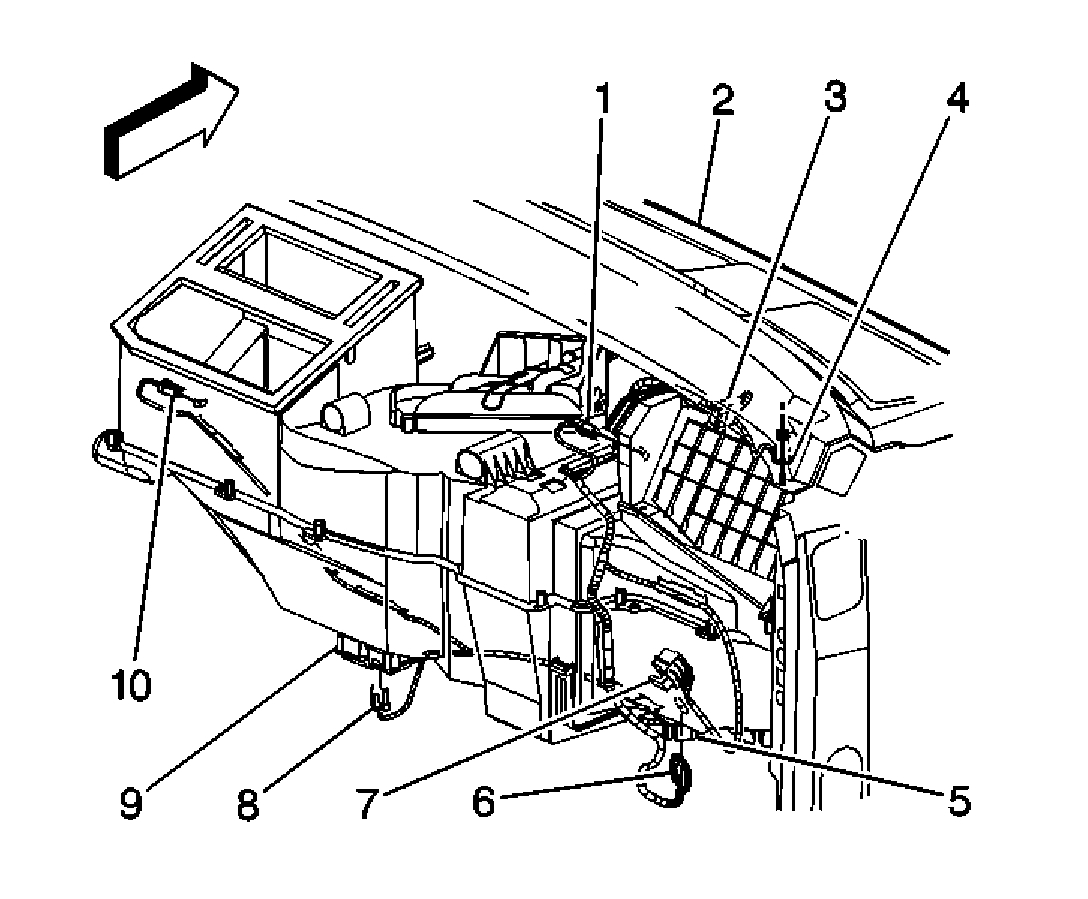
1. Remove the floor air outlet duct extension (1) from the floor duct (2).
2. Remove the center console.
3. Remove the screws from the center console duct.
4. Remove the center console duct.
Pic 4
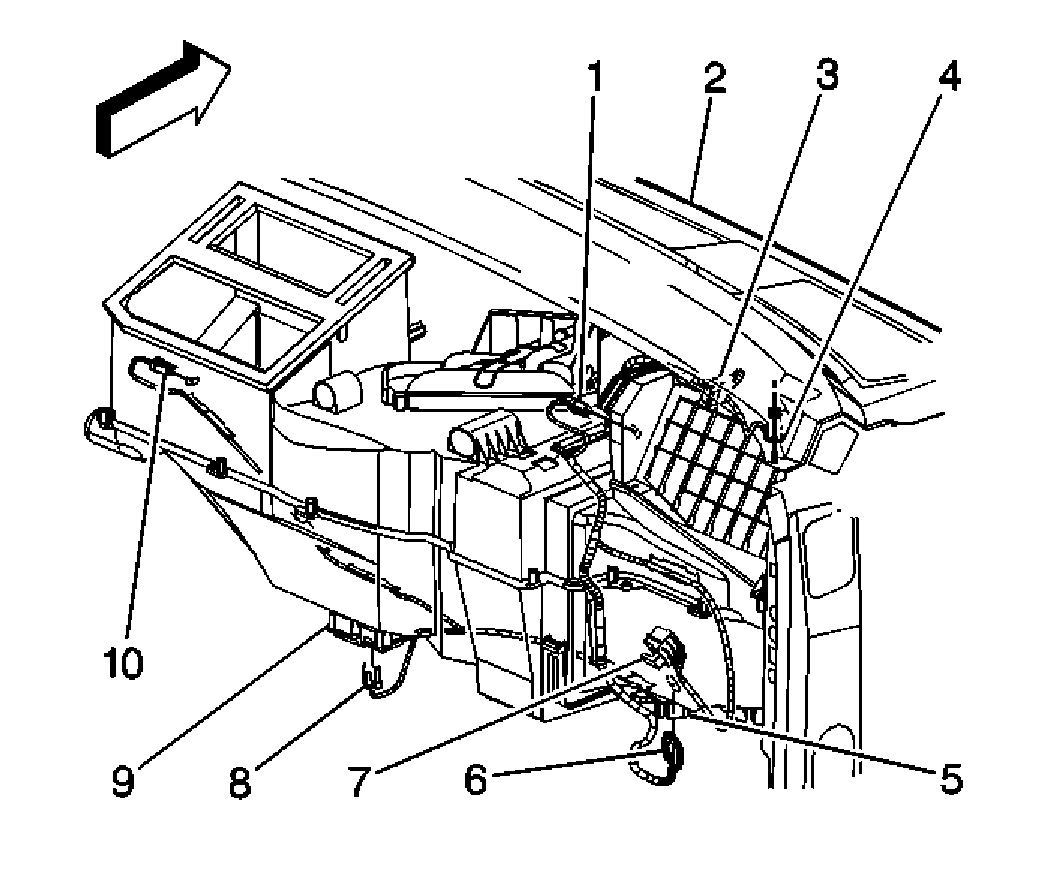
5. Disconnect the electrical connection from the mode actuator (10).
Pic 5
6. Remove the mode actuator mounting screws from the HVAC module.
7. Remove the mode actuator as an assembly with the actuator cam.
INSTALLATION PROCEDURE
pic 6
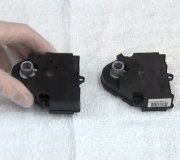
1. Install the mode actuator as an assembly with the actuator cam.
- Line up the heater/defroster valve lever with the mode actuator cam slot.
- Line up the A/C valve lever with the mode actuator cam.
2. Install the mode actuator mounting screws to the HVAC module.
NOTE: Refer to Fastener Notice in Service Precautions.
Tighten
Tighten the screws to 1.6 N.M (14 lb in).
Pic 7
3. Connect the electrical connection at the mode actuator (10).
Pic 8
4. Install the center console duct.
5. Install the screws to the center console duct.
Tighten
Tighten the screws to 1.6 N.M (14 lb in).
6. Install the center console.
7. Install the floor air outlet duct extension (1) to the floor air duct (2).
________________________
I hope this helps. Let me know if you have other questions.
Take care,
Joe
Images (Click to make bigger)
SPONSORED LINKS
Friday, August 16th, 2019 AT 10:02 PM