
The brake master cylinder is the most important part of the brake system and is used to pressurize the hydraulic brake caliper and wheel cylinders which apply pressure to the brake pads and shoes to help stop the car. When this part fails it must be replaced promptly to avoid brake system operation failure. In this guide we will show you the correct method for replacing any automotive brake system master cylinder step by step.
How Much Does It Cost?
If you are having the job done at a repair garage or a dealership you can expect to pay between $370.00 and $580.00 dollars. There are two kinds of replacement master cylinder's, rebuild and new. We recommend a new unit simply because the brake system is a vital part of your car's safety. A new master cylinder will cost between $55.00 and $175.00 dollars at Amazon or your local parts store. Brake fluid will cost about $4.00 and the bleeder kit about $8.00.
Tools and Materials Needed
- New master cylinder
- Brake fluid
- Wrench set
- Brake line wrench
- Bleeder kit
- Drain pan
- Safety glasses
- Gloves
- Shop towels
Safety Precautions
- Always wear safety glasses and gloves to protect yourself from harmful chemicals.
- Work in a well-ventilated area.
- Use jack stands to support the vehicle if needed.
- Refer to your vehicle's shop manual for specific instructions and torque specifications.
- Do not spill brake fluid onto the paint of the car
- Only use brake fluid from a sealed container
Getting Started
Park the car on level ground with the engine off and the emergency brake set. You will be dealing with brake fluid so wear eye protection and gloves. Brake fluid is corrosive to paint so if you get any on the cars finish, if so quickly wash the area with soap and water. Only use brake fluid from a seal container to avoid moisture contamination which can damage the brake system.
Remove Old Brake Master Cylinder
1. Raise the hood to identify the master cylinder location which is usually near the fire wall on the driver's side. There will be two or four brake lines connected the main body of the master and a small wiring connector attached to the brake fluid reservoir.

2. Before removing the brake master cylinder you will want to remove as much of the old brake fluid as possible to avoid spillage during the removal. Begin by removing fluid reservoir cap and insert a turkey baster to remove the fluid and then reinstall the cap.

3. Release the safety clip of the electrical connector and gently pull it from the brake fluid level sensor in the reservoir.

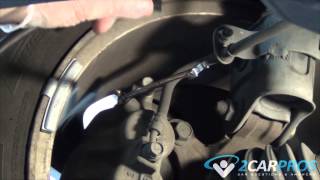
4. Use a line wrench and firmly secure it on the brake fluid lines to remove them. These line wrench sizes are usually 13mm, 14mm, 15mm or 16mm. Apply force to the wrench in a counterclockwise motion to loosen and remove the line fitting, repeat the operation until all fluid lines are removed. These lines can be fairly tight so be ready. As you loosen the lines brake fluid will start to leak out, you can install a shop towel below the master to catch the fluid and then discard the towel once the job is completed.

5. Once all of the lines have been removed use a wrench or socket to loosen and remove the master cylinder mounting bolts from the brake booster. These nut sizes are usually 14mm or 15mm. After all mounting bolts are removed push the master forward and then lift it off the mounting studs and then out of the engine compartment. Have a shop towel ready for the removal to avoid dripping brake fluid from potentially getting on the car's paint.

Install New Brake Master Cylinder
Before the new master cylinder can be installed it must be bench bled, do not install the brake master cylinder unless you have a brake system pressure bleeder. In these next steps we will show you how to bleed the brake master to avoid pumping air into the brake system.
1. Hold the master cylinder in a vise so it doesn't move. Then remove the fluid lid of the reservoir and remove the dust caps that cover the line ports of the master. Then install the master cylinder bleeder kit which is two or four plastic fittings and rubber/plastic hoses which will be connected to the fittings and then routed back into the fluid reservoir. Make sure the lines are far enough into the reservoir as to not suck in air.

2. Make sure the brake bleed tubes are down inside the fluid reservoir and fill the brake master with brake fluid to just under the full line. The idea is you don't want these tubes to suck air in when working the master cylinder's plunger.

3. Use a large Phillips screw driver and place it at the rear of the master and into the plunger and slowly start pushing the plunger into the master, air bubbles will begin to come out of the plastic lines inside the reservoir as you press inward. Once the plunger has bottomed out, release the screwdriver (slowly) which will draw fluid into the master, you should be able to watch the brake fluid level go down in the reservoir. Continue this operation until no air bubbles are present, refill the reservoir as needed to retain the fluid level. Do not allow the plastic bleed lines to suck in air.

4. Once completed remove the bleeder kit and reinstall the reservoir cap, a small amount of fluid will start to leak out. Use a shop towel to help guard against paint damage as you reinstall the brake master back into the car.

5. Slide the master back over the brake booster studs and reinstall the mounting nuts finger tight. While the master is still a little loose reinstall the brake lines, this will help in the line installation. Use a regular wrench to snug up the lines to stop the master from leaking additional fluid. Never allow the brake fluid to drain completely out of the master. If the fluid runs completely out of the master it will need to be re-bled.
6. Once the mounting bolts have been fully tightened use a line wrench to put the final tighten on the brake lines. The torque spec on the master cylinder's mounting bolts is usually between 24 and 32 foot pounds. Reconnect the fluid level sensor and refill the master cylinder with fluid and reinstall the cap. Once the job is complete bleed the remainder of the brake system to remove any air from the system. Carefully pay attention to the brake pedal feel and stopping power. If everything is in order, the replacement is complete. Never drive a car that does not have good brake pedal pressure.

Pro Tip
- Before giving the brake lines on the brake master their final tightening, loosen the brake lines one turn and have a helper press down on the brake pedal and then hold it on the floor while you tighten the brake line fittings, this will help remove any air from the system.
- If you are not confident in performing this task, it is recommended to seek the assistance of a professional mechanic. Improper installation of brake components can lead to brake failure. Ensure all steps are followed accurately to maintain vehicle safety.
Watch the Video!
Please watch this video of the job being done to glean additional helpful information.
Credits
This guide knowledge base was created by the 2CarPros Team, and by Ken Lavacot: Automobile repair shop owner and certified master automobile technician of over 30 years. If you have question or need help please ask one of our experts we are happy to help. Please visit our 2CarPros YouTube Channel.

Article published 2024-07-15

Bleed and Flush Your Brake System Correctly
Bleed your ABS Brake System Correctly Video