Hi Frank and thanks for using 2CarPros.com.
This may sound a bit confusing, but I feel code 102 is being caused by 403. The P0403 code indicates an issue with the exhaust gas re-circulation system (EGR). The code indicates that the EGR solenoid is either bad, has contaminates causing it to stick open or closed, a wiring issue, or the power control module (PCM) is failing. Common symptoms include misfire under acceleration, rough idle, or the engine shutting off altogether.
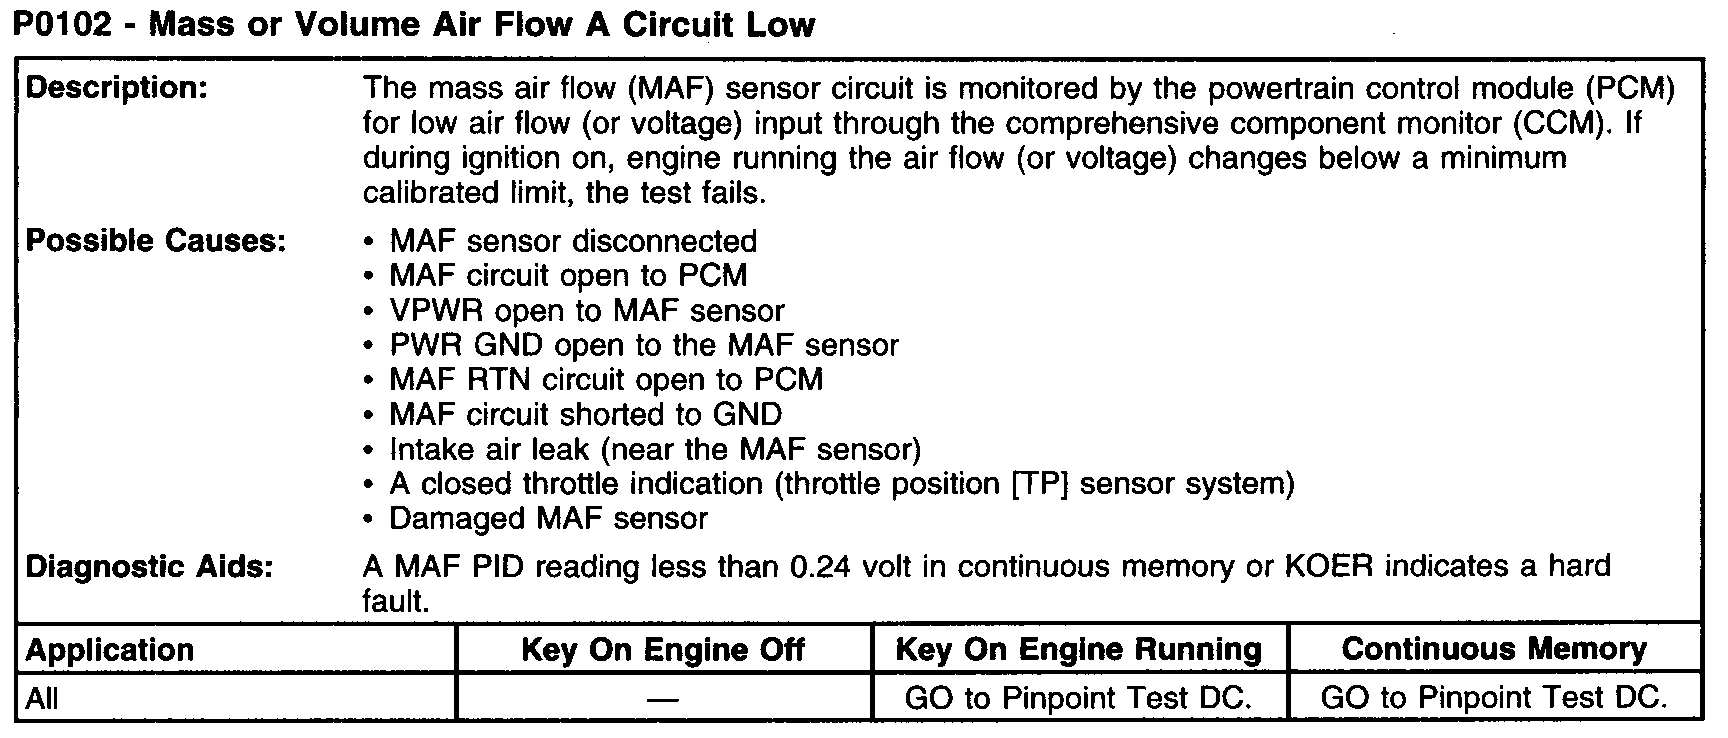
Now the P0102 is related to the mass air flow sensor (MAF). THe MAF meters the air that enters the engine. This trouble code is indicating the readings of the MAF are not within the standard specifications. The cause of this can be related to added air into the engine which is not being measured via the MAF. So, a vacuum leak can be the cause. Since the EGR code can be related to a fault with the solenoid, there may be a vacuum leak at that point. Thus the EGR code is set and the MAF.
Okay, if I have not made this confusing enough, here we go with more.
First, I need you to simply check for engine vacuum leaks. Here is a link that shows how it is done. You will need a vacuum gauge for this test. Most parts stores will lend or rent one to you.
https://www.2carpros.com/articles/how-to-use-an-engine-vacuum-gauge
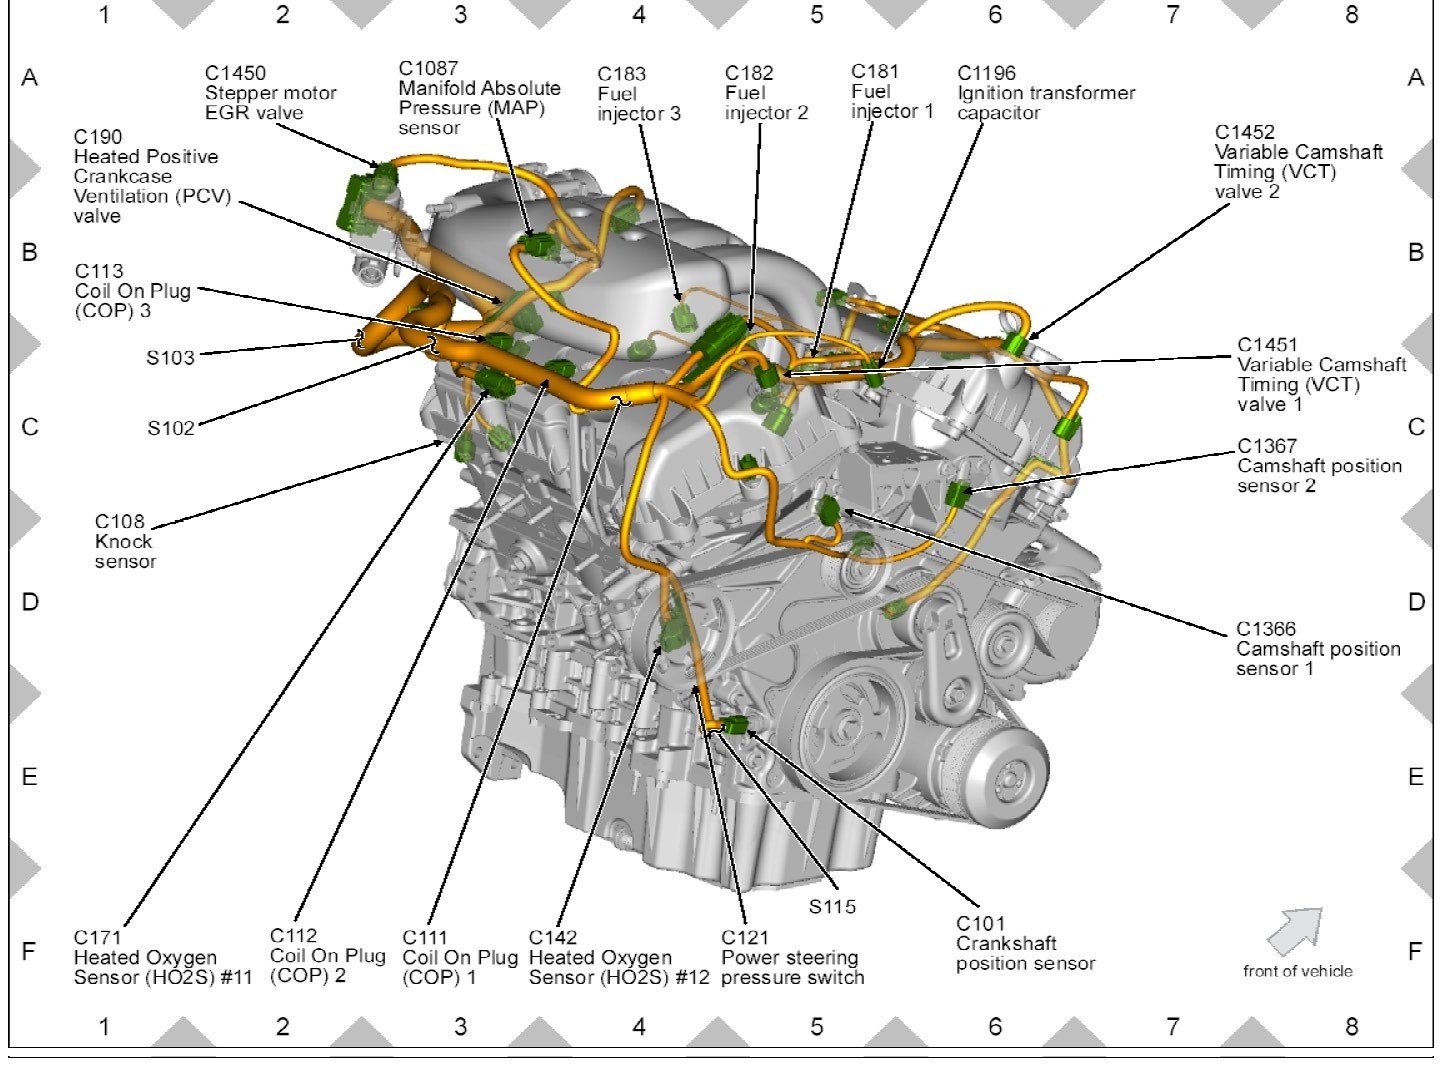
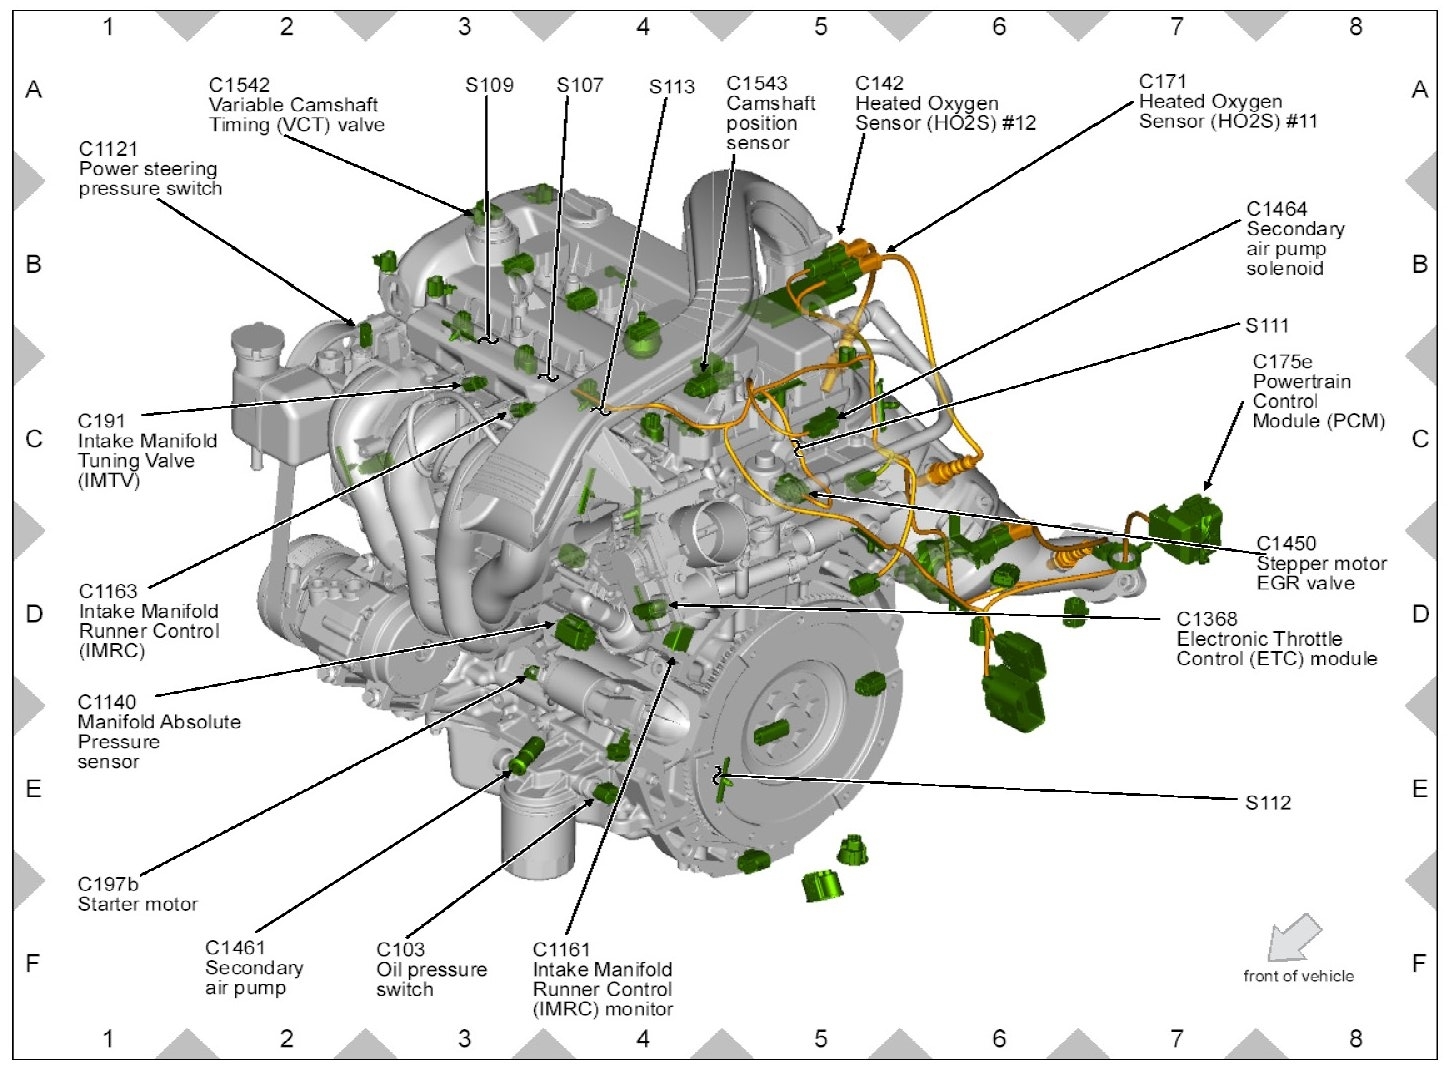
If it is determine there is a vacuum leak, I need you to locate the EGR. (See picture 1 for location) Check for broken or damaged vacuum hoses.
If none are found, remove the EGR for inspection. Make sure there is no excessive carbon build up in the valve or where it attaches. If there is, clean it. Carburetor cleaner can be very helpful in doing this.
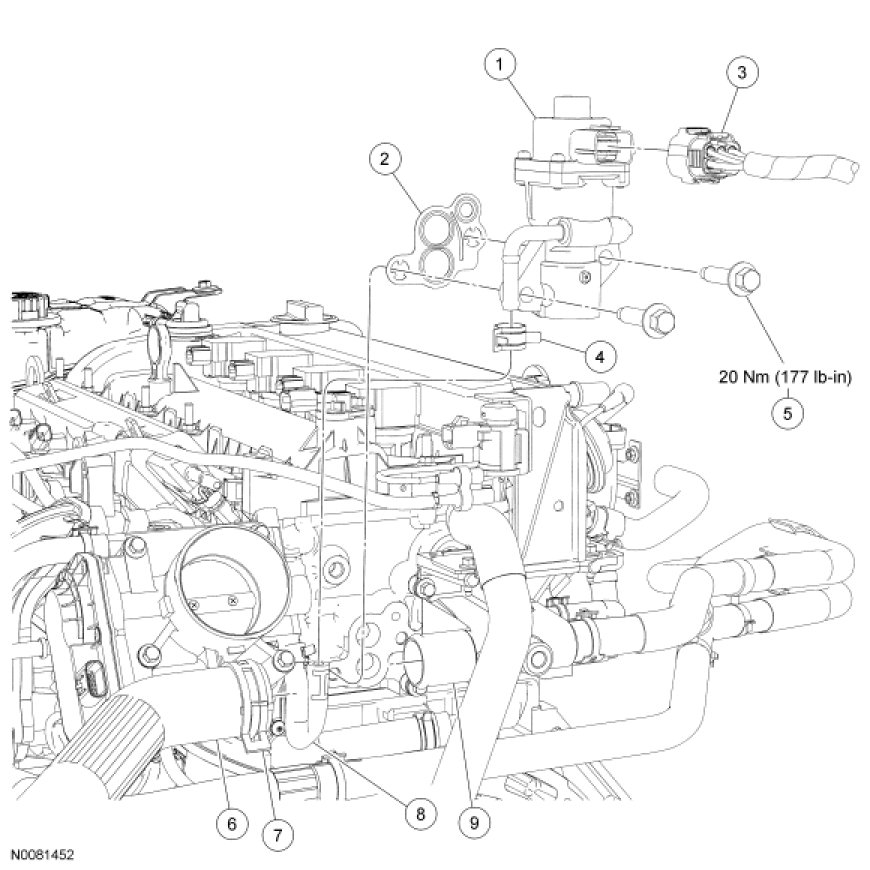
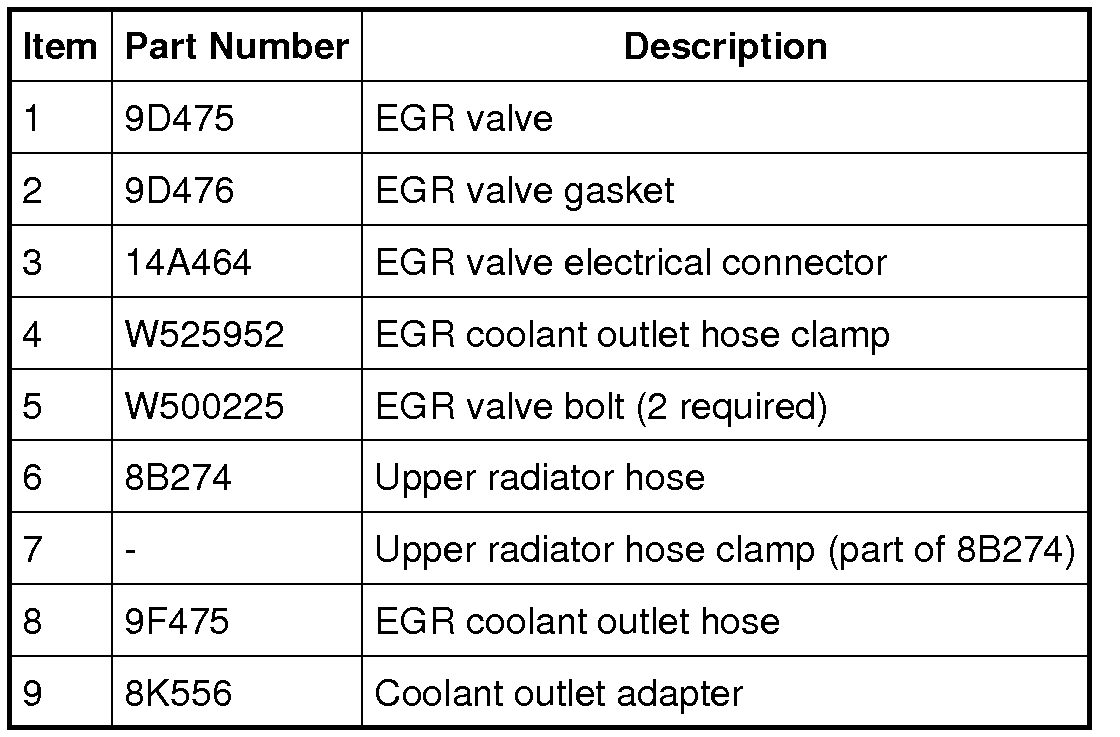
Here are the directions for removal of the EGR valve. Once removed, make sure where it mounts to the intake (internally) it is not plugged with or have excessive carbon. The attached pictures (starting with picture 3) correlate with these directions.
_________________________________________________
Exhaust Gas Re-circulation (EGR) Valve
Removal and Installation
1. Drain the cooling system.
2. Remove the air cleaner outlet pipe.
3. Disconnect the EGR valve electrical connector.
4. Release the clamp and remove the upper radiator hose from the coolant outlet adapter.
5. Release the clamp and remove the EGR coolant outlet hose from the EGR valve.
6. Remove the two bolts and the EGR valve.
- Discard the gasket.
- To install, tighten to 20 Nm (177 lb-in).
7. Notice: Do not use metal scrapers, wire brushes, power abrasive discs or other abrasive means to clean the sealing surfaces. These tools cause scratches and gouges that make leak paths. Use a plastic scraping tool to remove all traces of the exhaust gas re-circulation (EGR) valve gasket.
Note: If there is no residual gasket material present, metal surface prep can be used to clean and prepare the mating surfaces.
Clean the mating surfaces of any residual gasket material.
8. To install, reverse the removal procedure.
9. Fill and bleed the cooling system.
_______________________________________________--
I also need you to pay close attention to the EGR tube. Make sure there are no crack or leaks.
I hope this helps. If you have questions or need help, let me know.
Take care,
Joe
Images (Click to enlarge)
Oct 2, 2018 at 8:42 PM