Welcome to 2CarPros.
It is under the dash about center of the vehicle. Here are the directions for replacement. The attached pictures correlate with the directions.
_______________________________
1998 Ford Truck Expedition 2WD V8-5.4L SOHC VIN L
Blend Door Motor
Vehicle Heating and Air Conditioning Air Door Actuator / Motor Service and Repair Procedures Blend Door Motor
BLEND DOOR MOTOR
Temperature Blend Door Actuator
Warning: To avoid accidental deployment and possible injury, the backup power supply must be depleated before repairing or replacing any front or side air bag supplemental restraint (SRS) components and before servicing, replacing, adjusting or striking components near the front or side air bag sensors, such as doors, instrument panel, console, door latches, strikers, seats and hood latches.
To deplete the backup power supply energy, disconnect the battery ground cable and wait at least one minute. Be sure to disconnect auxiliary batteries and power supplies ( if equipped ).
1. Disconnect the battery ground cable and wait at least one minute.
Vehicles equipped with floor console
2. Remove the floor console.
All vehicles
pic 1
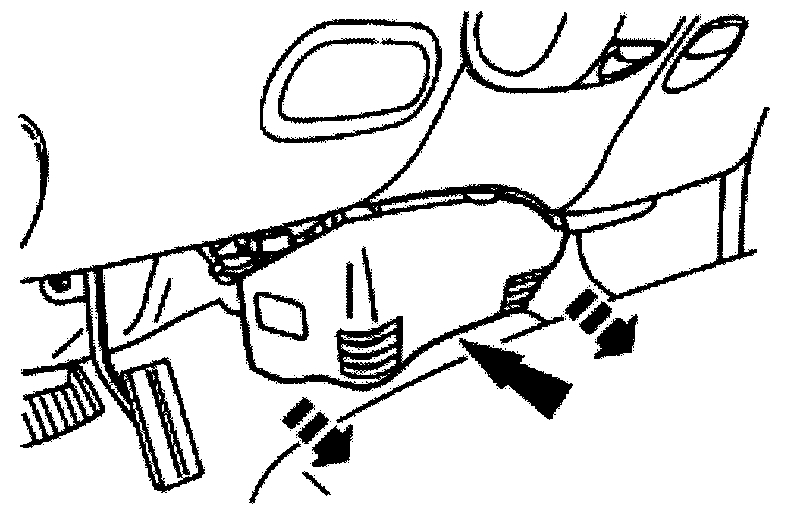
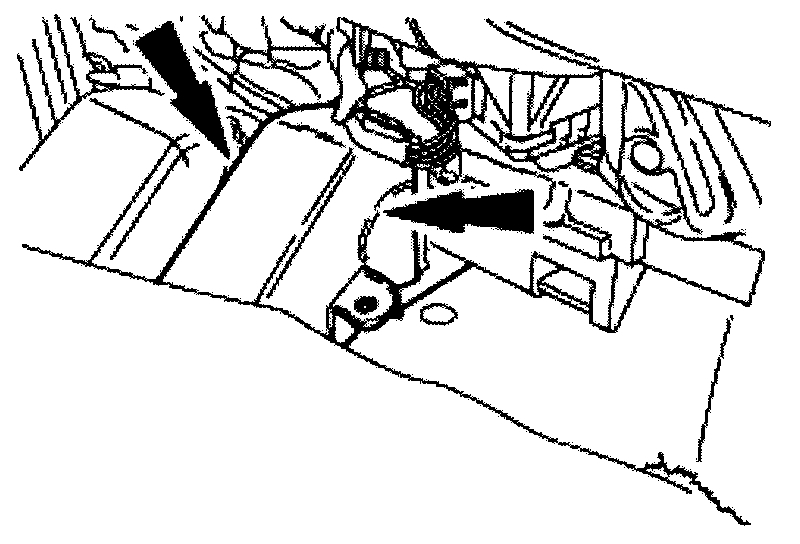
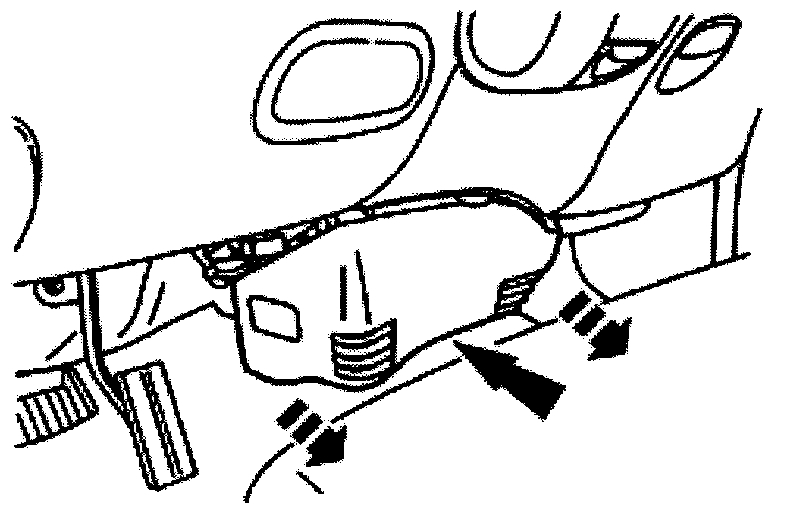
3. Remove the floor duct panel.
- Remove the pin-type retainers and release the expander clip.
pic 2
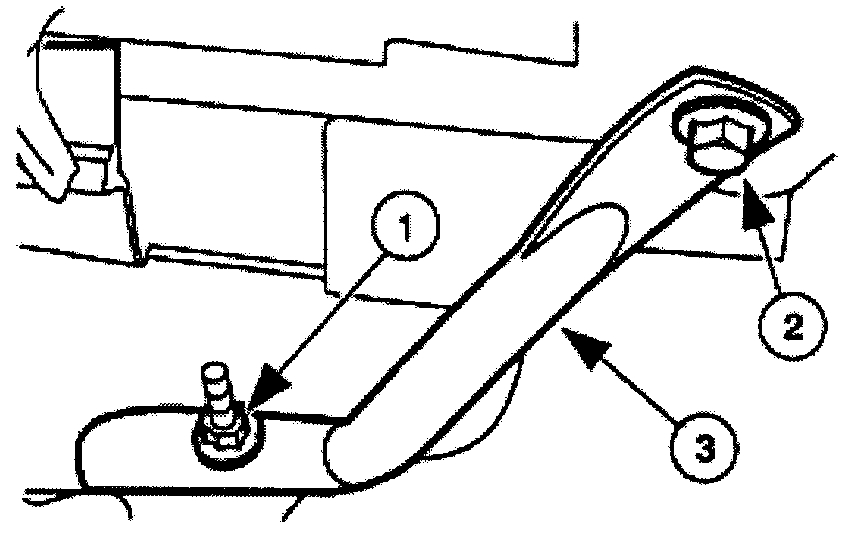
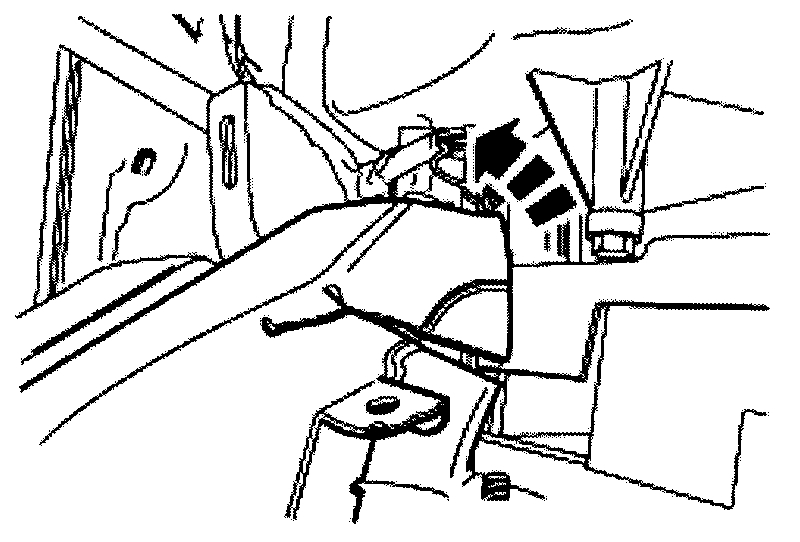
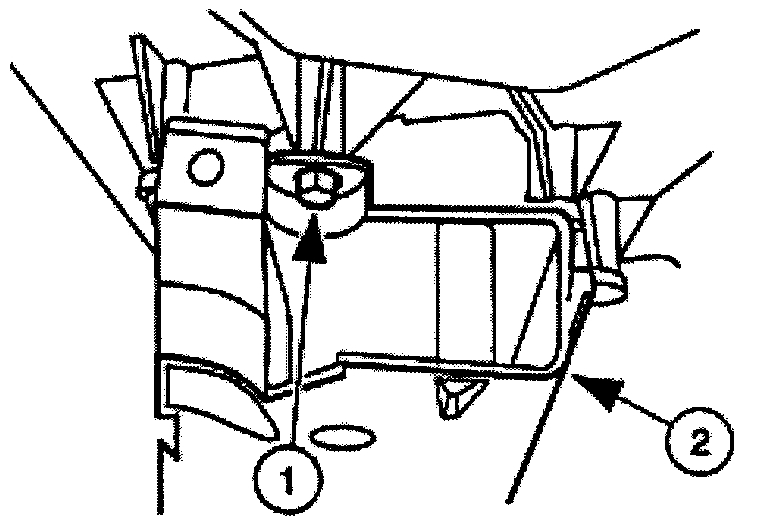
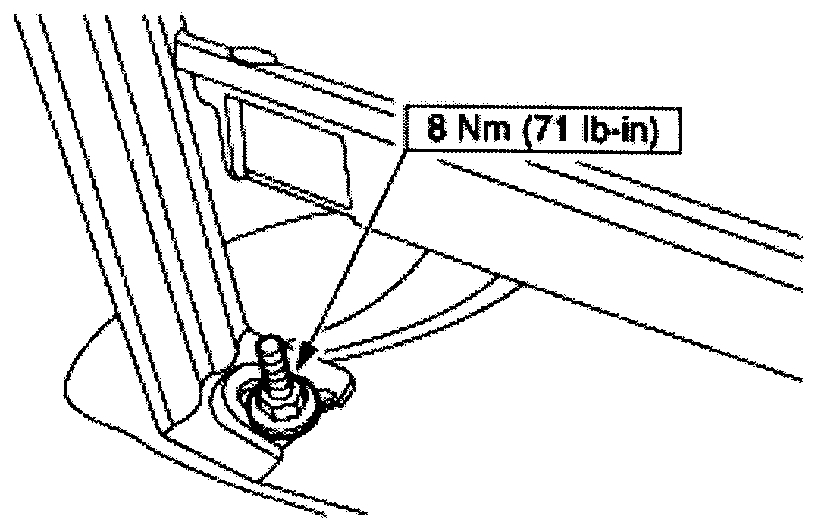
4. Remove the RH instrument panel brake.
1. Remove the nut.
2. Remove the bolt.
3. Remove the brace.
pic 3
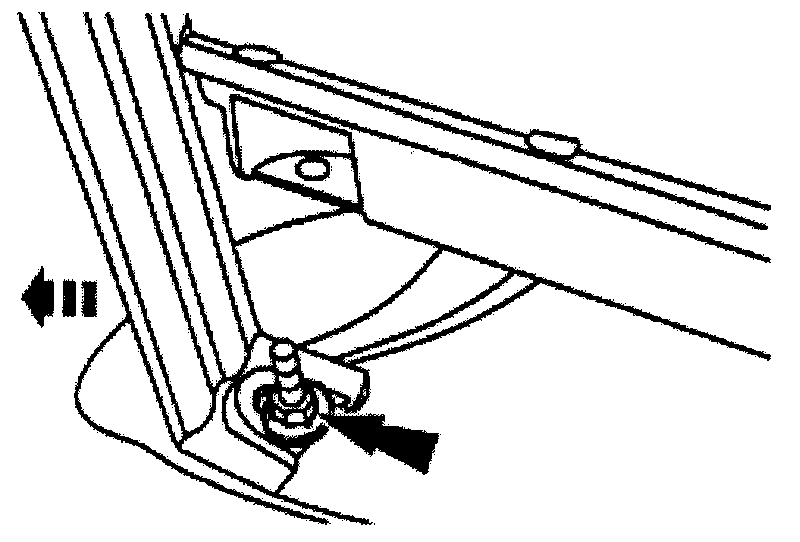
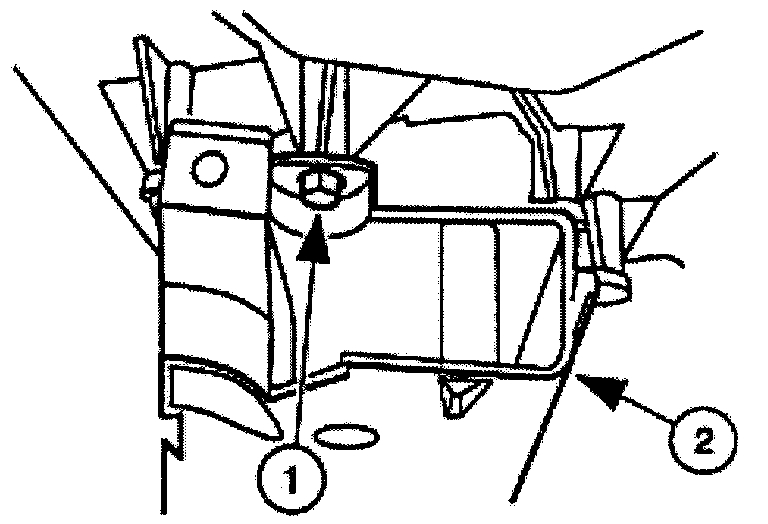
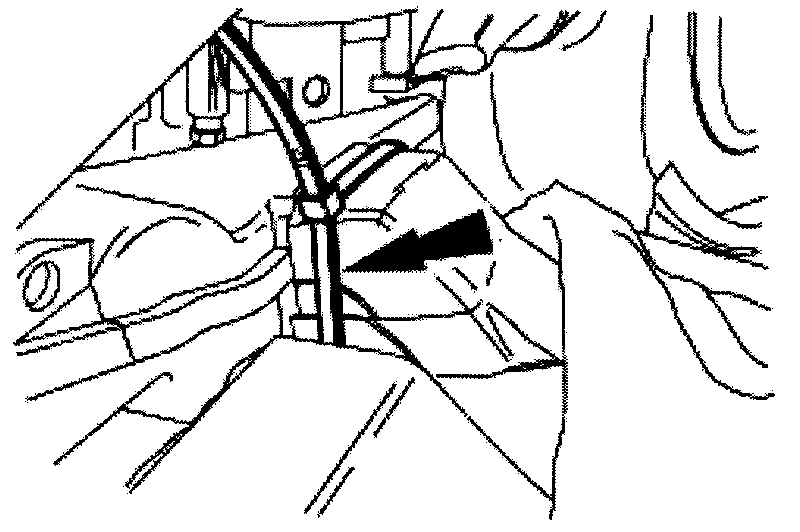
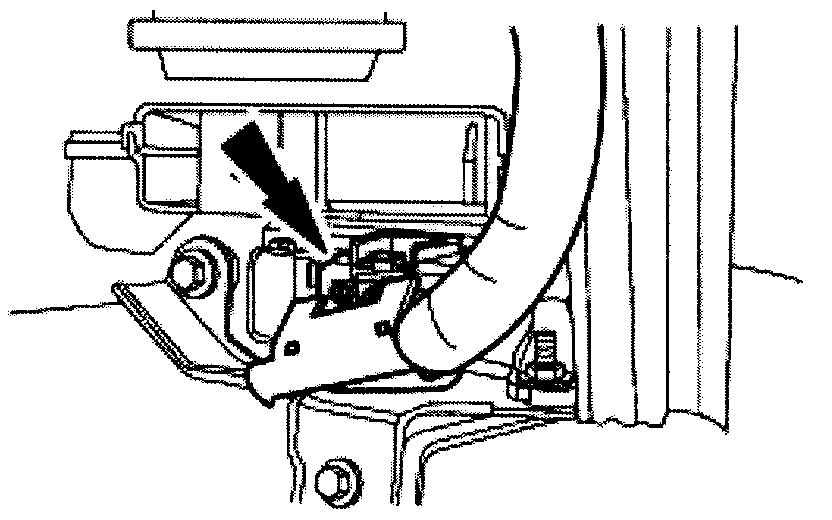
5. Remove the LH instrument panel lower nut and position the brace aside.
pic 4
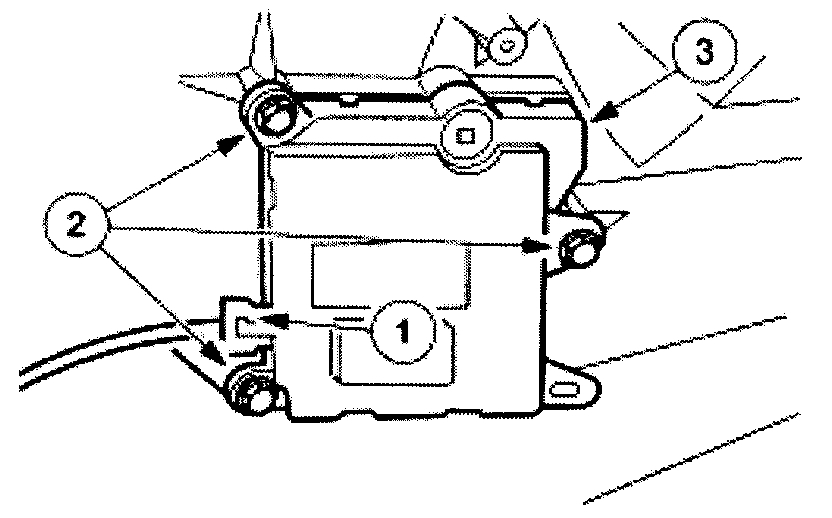
6. Disconnect the restraints control module (RCM) electrical connector.
pic 5
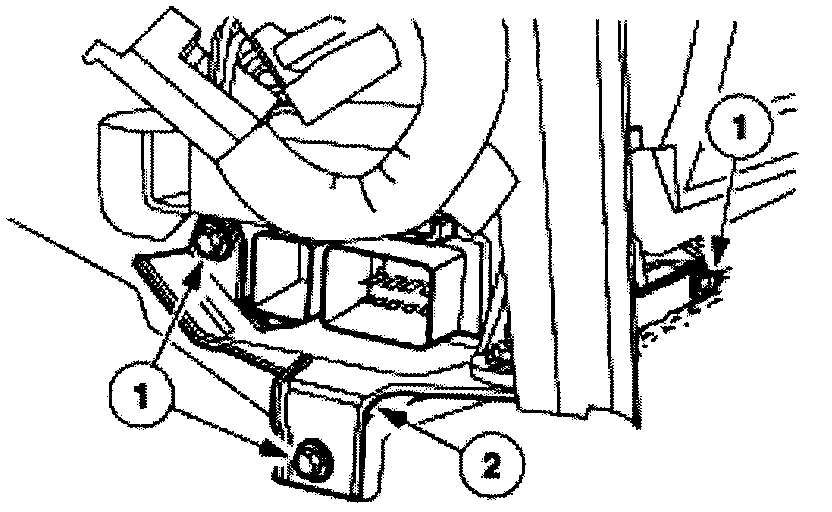
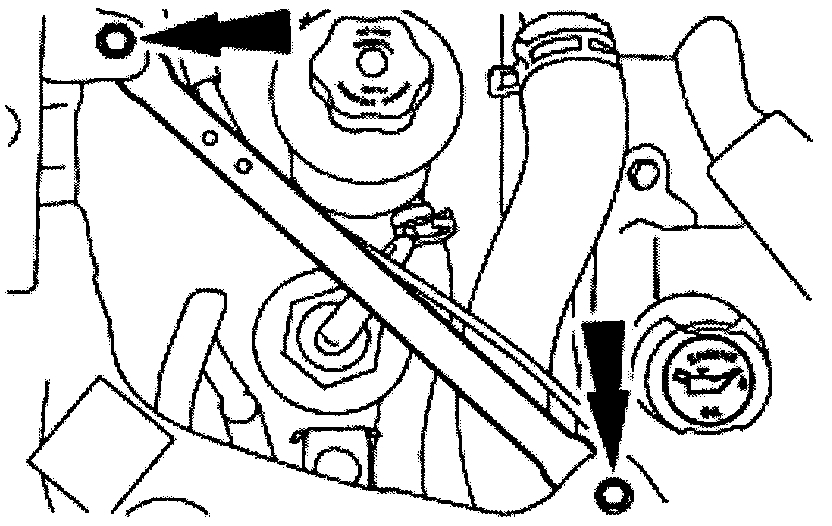
7. Remove the RCM and bracket assembly.
1. Remove the bracket retaining bolts.
2. Remove the RCM and bracket assembly.
Vehicles equipped with rear airflow duct
pic 6
8. Cut the rear seat airflow duct along both sides.
- Fold back carpet.
- Cut rear seat airflow duct.
pic 7
9. Fold the air duct rearwards.
All vehicles
pic 8
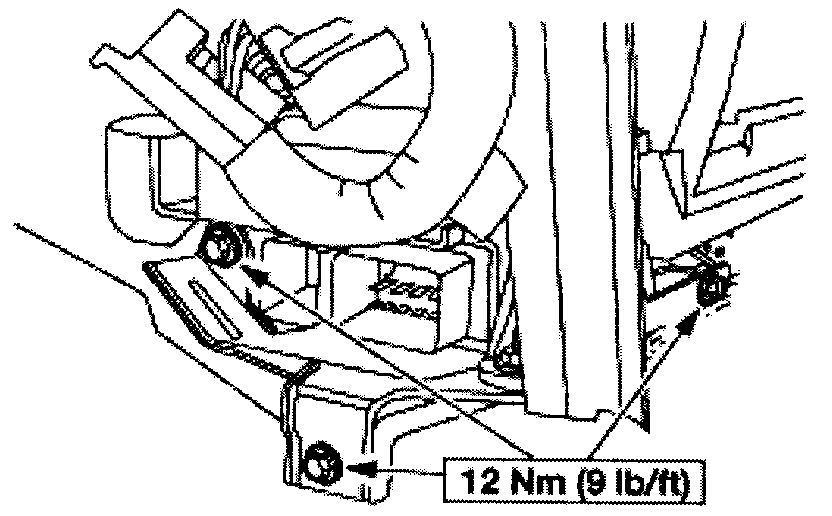
10. Remove the floor duct.
1. Remove the two screws (one each side).
2. Remove the floor duct.
pic 9
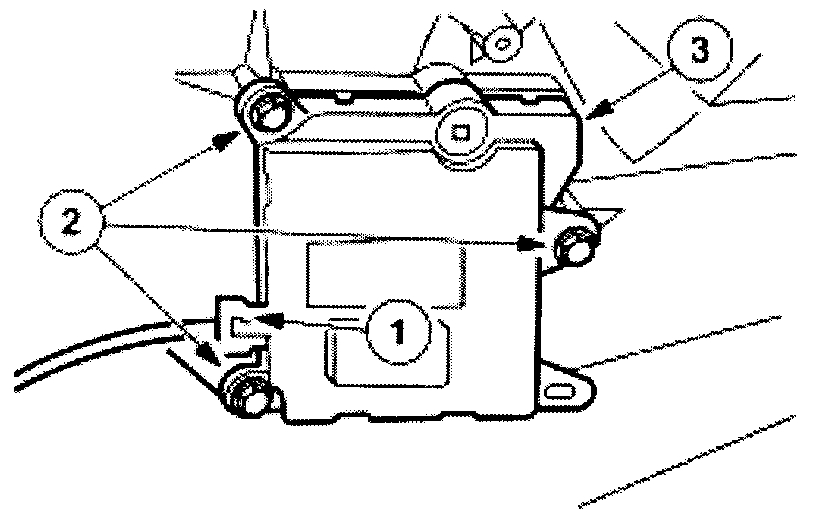
11. Remove the electronic blend door actuator.
1. Disconnect the connector.
2. Remove the screws.
3. Pull down to release the actuator shaft and remove the electronic blend door actuator.
Installation
pic 10
1. Install the electronic blend door actuator.
1. Connect the actuator shaft.
2. Install the screws.
3. Connect the connector.
pic 11
2. Install the floor duct.
1. Install the floor duct.
2. Install the two screws (one each side).
Vehicles equipped with rear airflow duct
pic 12
3. Zip-tie the rear airflow duct to floor duct.
4. Reposition the carpet.
All vehicles
pic 13
5. Install the RCM and bracket assembly.
pic 14
6. Connect the restraints control module (RCM) electrical connector.
pic 15
7. Install the LH instrument panel lower nut.
pic 16
8. Install the RH instrument panel brace.
- Install the brace.
- Install the nut.
- Install the bolt.
pic 17
9. Install the floor duct panel.
- Install the pin-type retainers and release the expander clip.
Vehicles equipped with floor console
10. Install the floor console.
All vehicles
11. Connect the battery ground cable.
_______________________________________________________
Let me know if this helps.
Take care,
Joe
Images (Click to enlarge)
Oct 26, 2019 at 11:52 PM