Okay, I misunderstood. He said he gets smoke from the exhaust so I figured it was getting into the combustion chamber.
Regardless, here are the directions for replacing the valve cover gaskets. There are three separate sets of directions. The first and second show how the valve cover and gaskets are removed. (left and right sides are separate) The third show how to take apart the valve cover and replace the spark plug port seal.
_________________________________
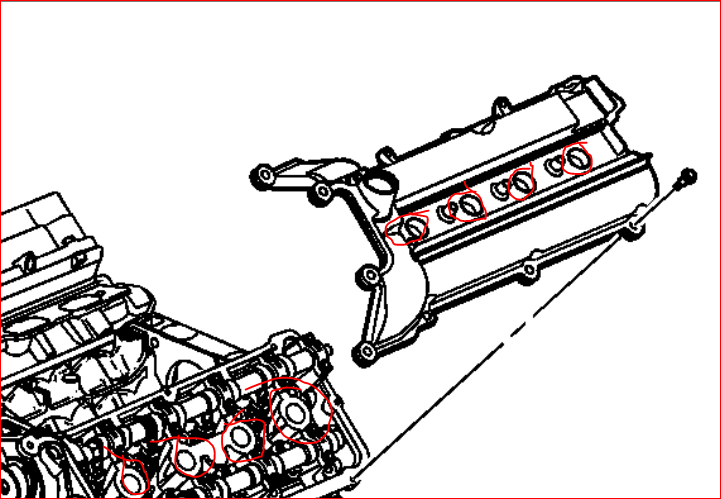
Camshaft Cover Replacement - Left Side The first 7 pictures correlate to these directions.
Removal Procedure
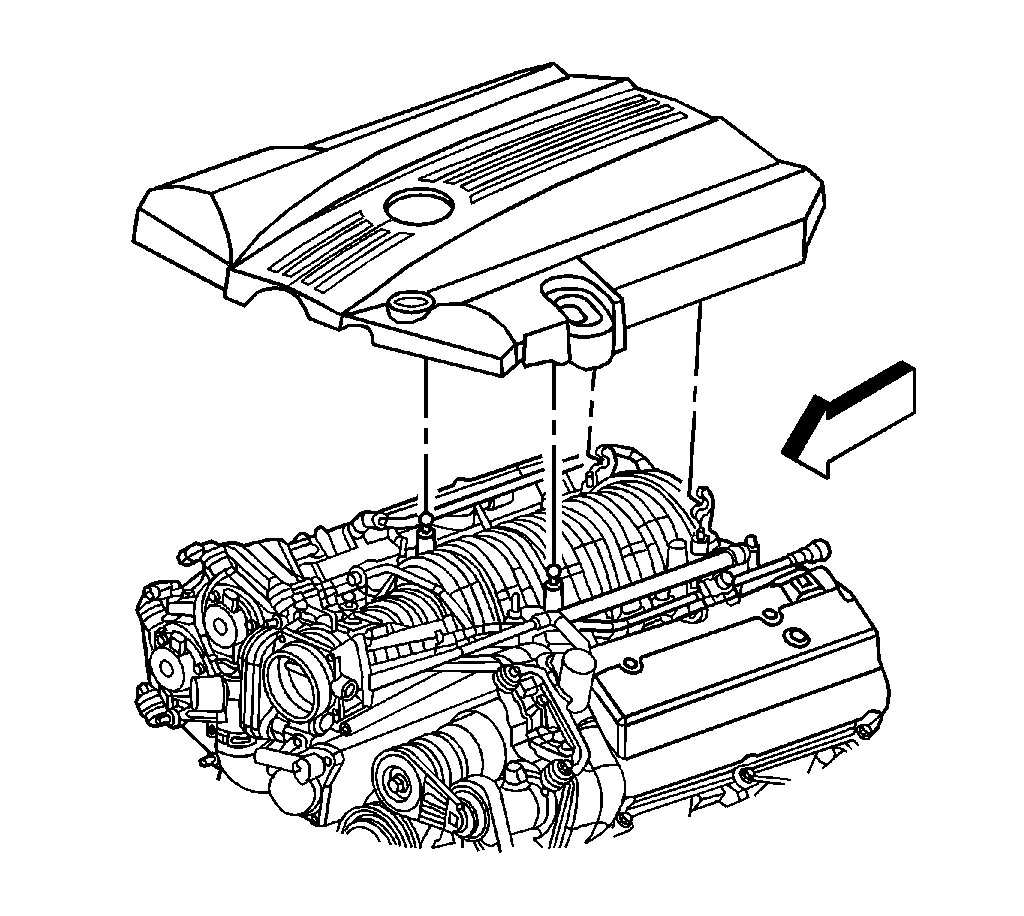
1. Remove the fuel injector sight shield. Refer to Fuel Injector Sight Shield Replacement (See: Fuel Injector > Removal and Replacement) .
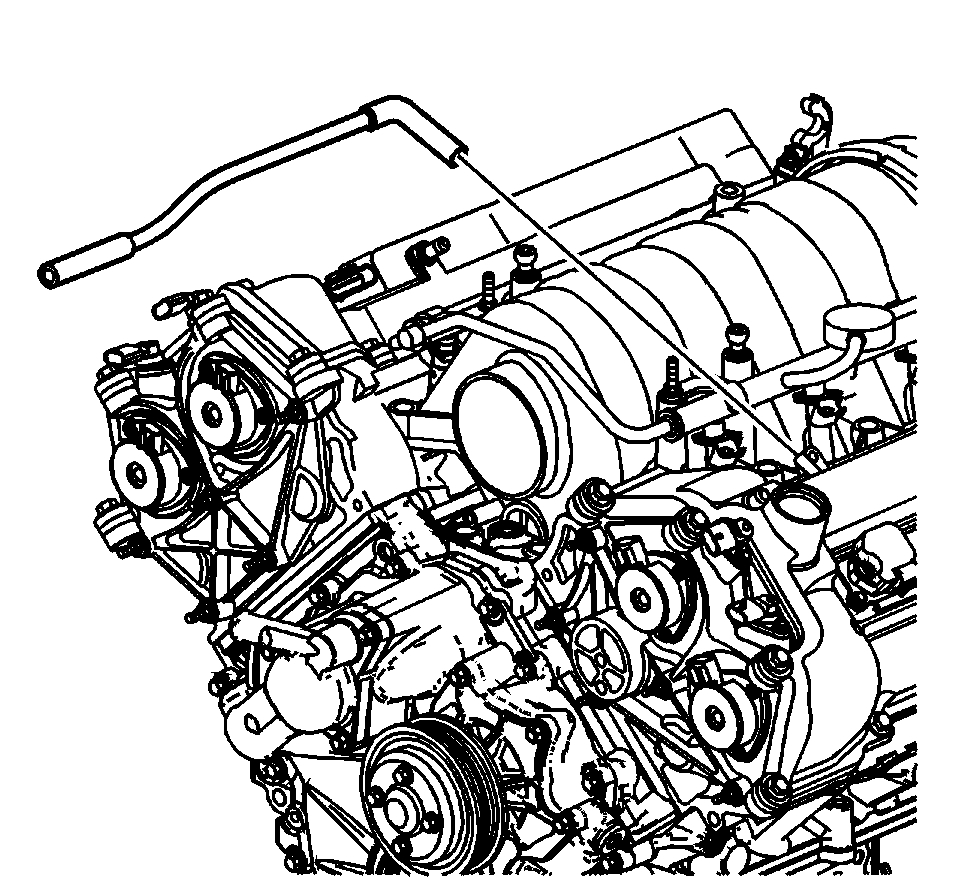
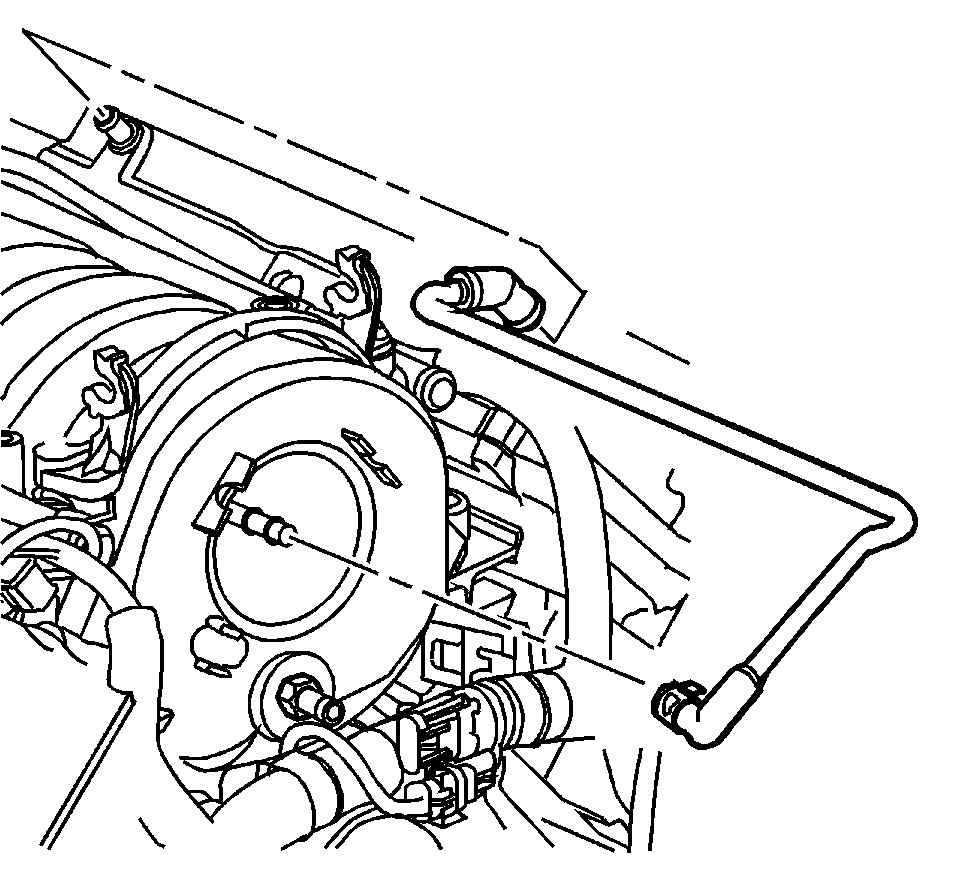
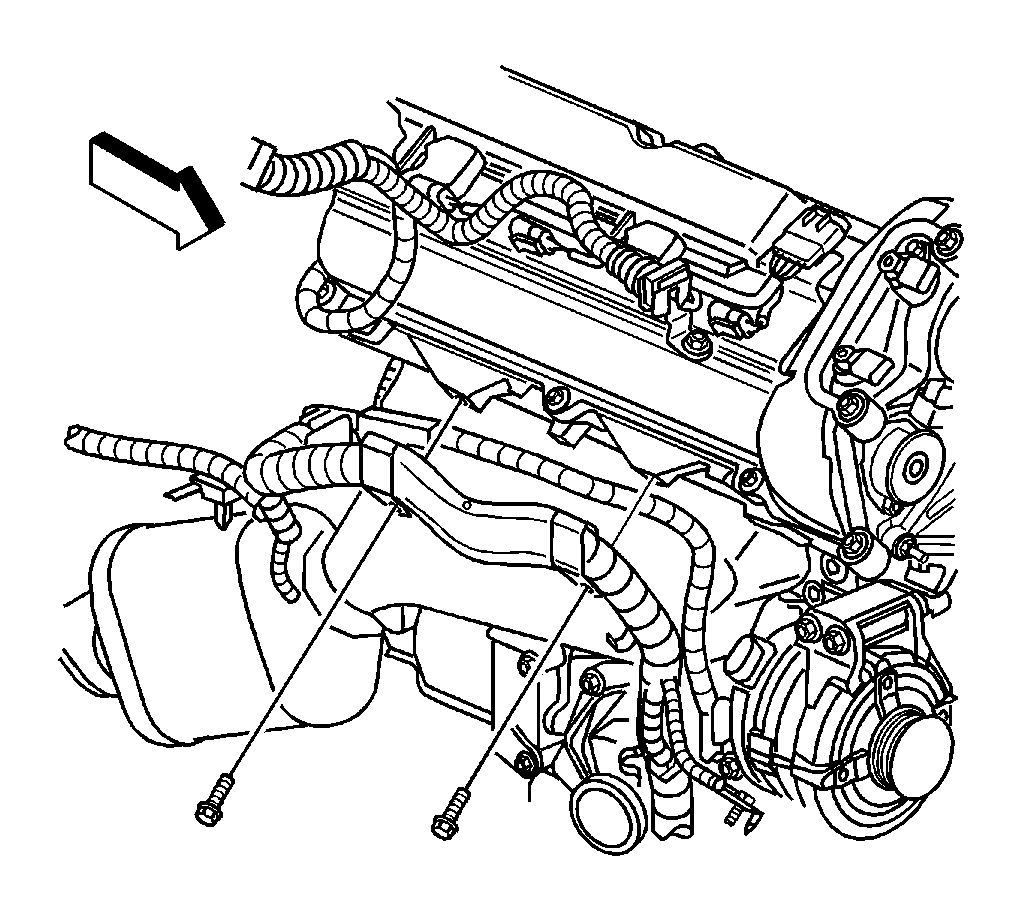
2. Disconnect the positive crankcase ventilation (PCV) fresh air tube from the left camshaft cover.
3. Remove the bank 2 ignition coils. Refer to Ignition Coil Replacement - Bank 2 (See: Ignition Coil > Removal and Replacement) .
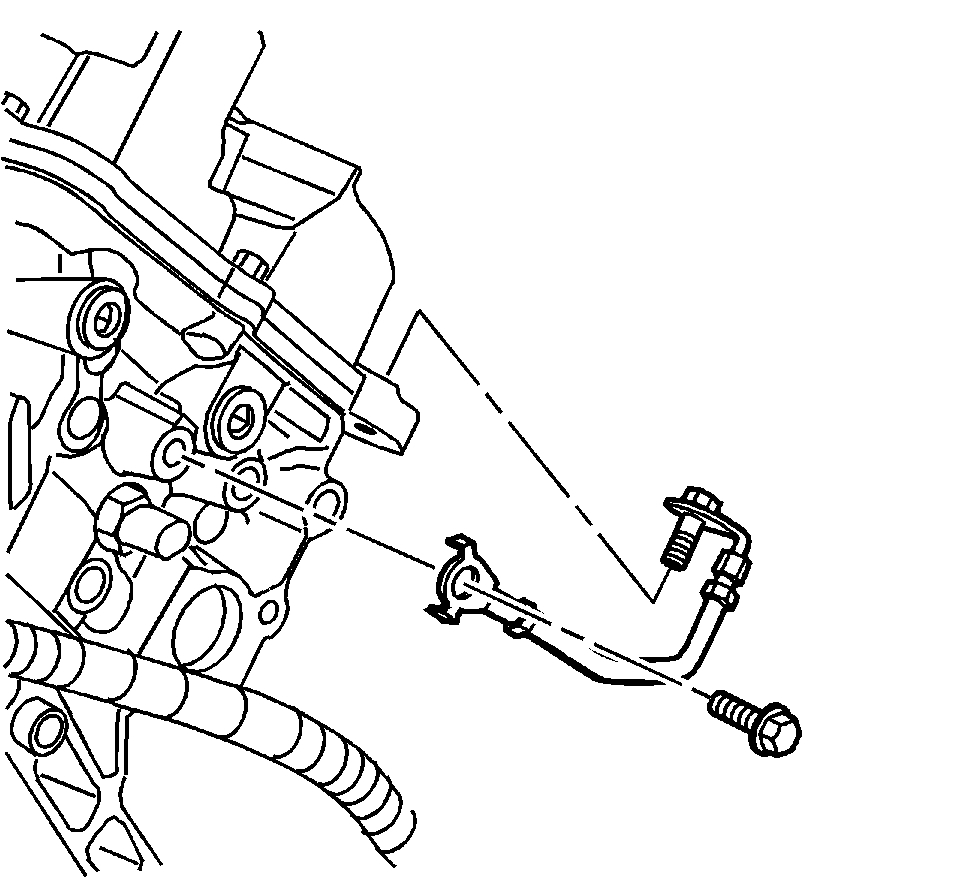
4. Remove the bolt connecting the ground strap to the left camshaft cover.
5. Remove the bolt securing the oil level indicator tube to the left cylinder head and reposition the tube away from the camshaft cover.
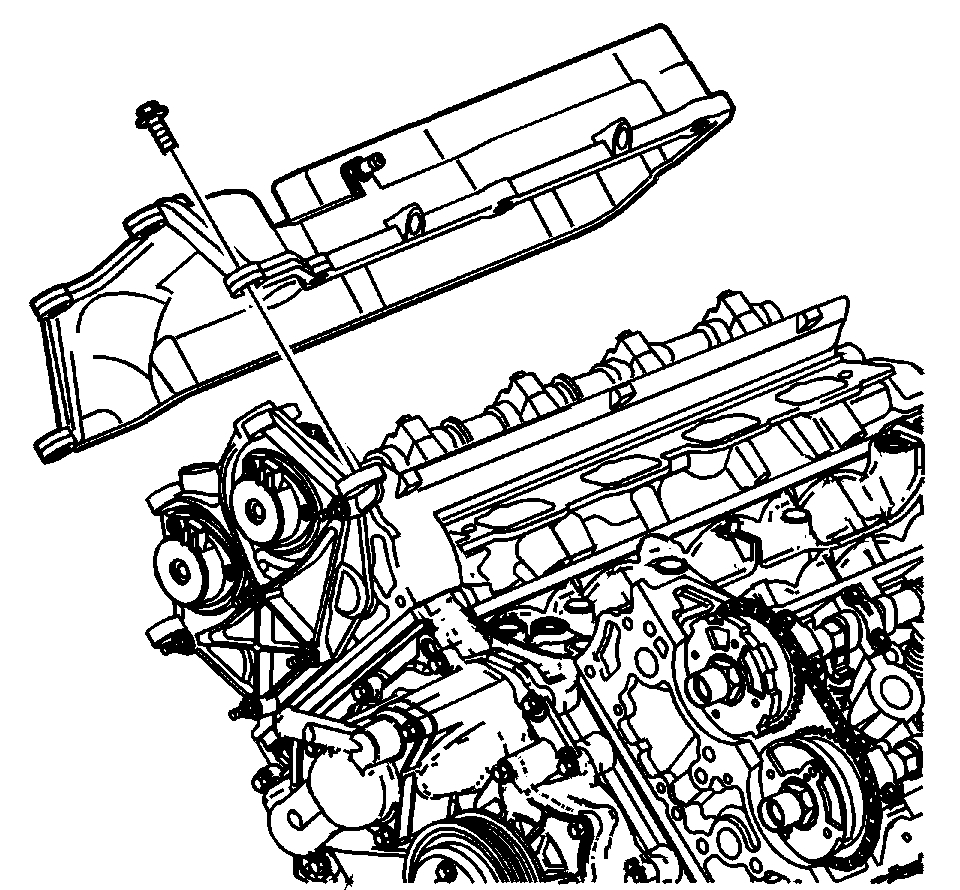
6. Remove the camshaft cover bolts.
7. Lift the camshaft drive end of the camshaft cover up.
8. Remove the camshaft cover.
9. Discard the camshaft cover gasket and spark plug port seals if there is any evidence of damage or if the seal comes out of the groove in the cover during removal.
10. Clean the gasket mating surface on the cylinder head.
11. Clean and inspect the camshaft cover.
Installation Procedure
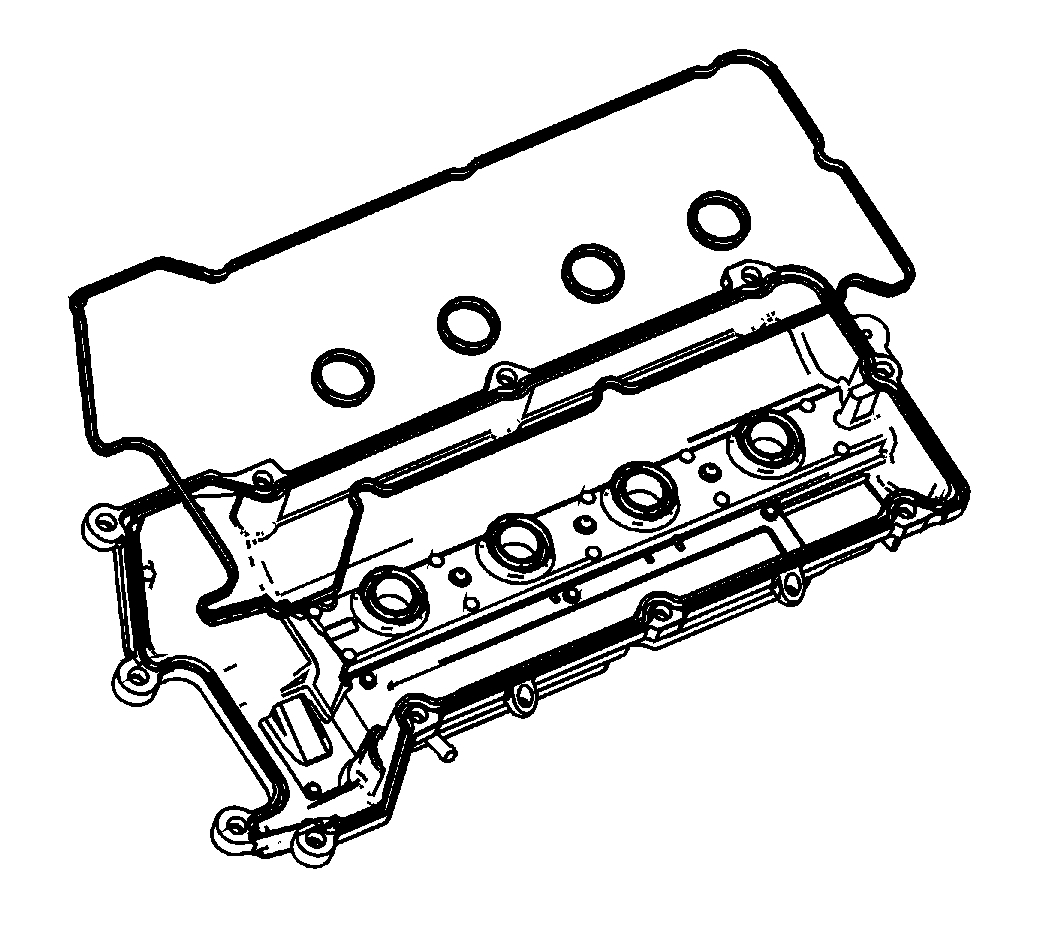
1. Install a new camshaft cover gasket to the camshaft cover if necessary.
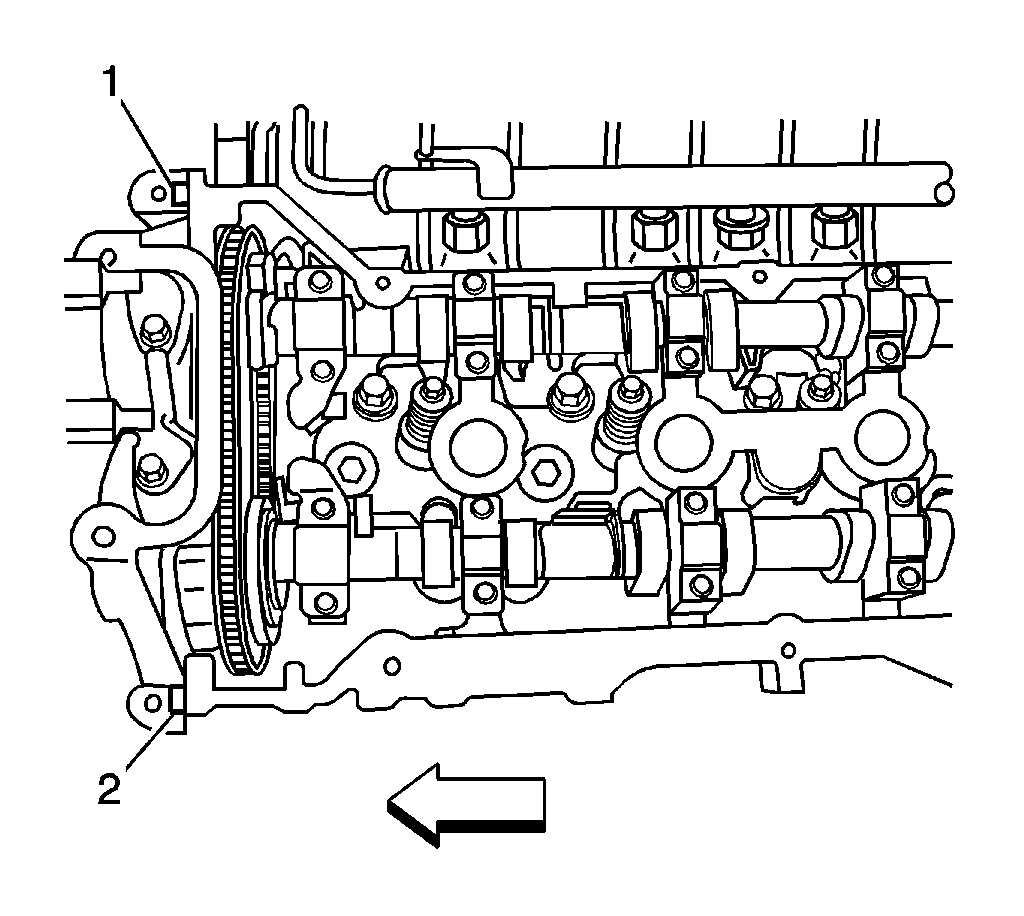
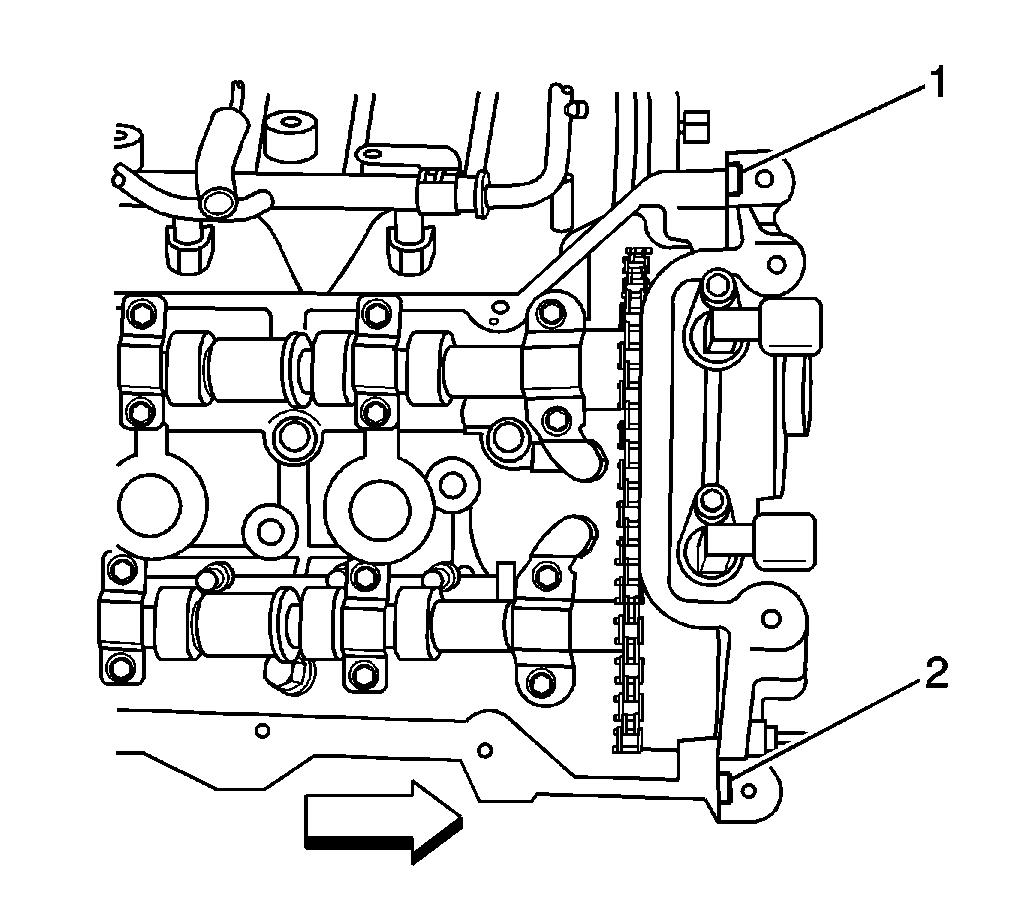
2. Place a small amount of sealant at the split line (1, 2) of the left cylinder head and the left camshaft position actuator housing. Refer to Adhesives, Fluids, Lubricants, and Sealers (See: Engine > Mechanical) .
Important: Be careful to prevent the exposed section of the camshaft cover gasket from being damaged by the edge of the cylinder head casting.
3. Work the camshaft cover into position by pivoting the cover down and aligning the bolt holes.
Notice: Refer to Fastener Notice (See: Vehicle > Vehicle Damage Warnings > Fastener Notice) .
4. Install the camshaft cover bolts.
Tighten the bolts to 10 N.m (89 lb in).
5. Install the bolt connecting the left camshaft cover ground strap to the left camshaft cover.
Tighten the bolt to 10 N.m (89 lb in).
6. Rotate the oil level indicator tube back into its original position and install the bolt securing the tube to the cylinder head.
Tighten the bolt to 10 N.m (89 lb in).
7. Install the bank 2 ignition coils. Refer to Ignition Coil Replacement - Bank 2 (See: Ignition Coil > Removal and Replacement) .
8. Connect the PCV fresh air tube to the left camshaft cover.
9. Install the fuel injector sight shield. Refer to Fuel Injector Sight Shield Replacement
________________________________________________________________________________________
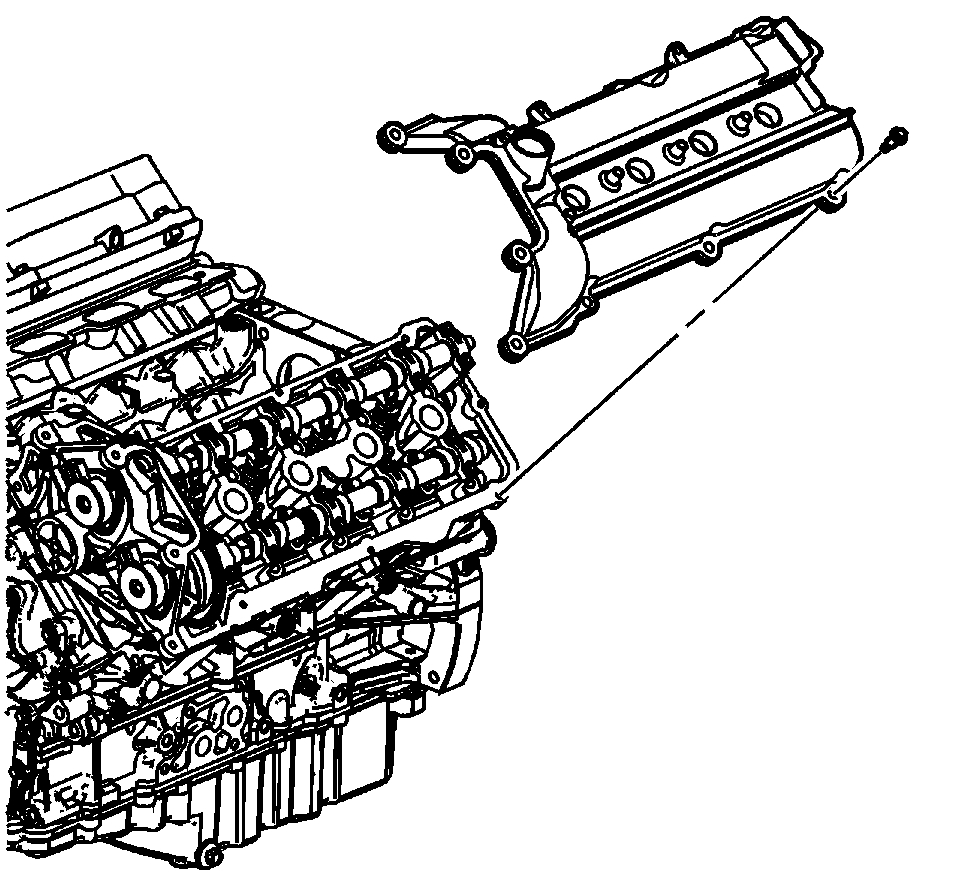
Right side (pictures 8 to 23 correlate with these directions)
Camshaft Cover Replacement - Right Side
Removal Procedure
1. Remove the fuel injector sight shield. Refer to Fuel Injector Sight Shield Replacement (See: Fuel Injector > Removal and Replacement) .
2. Disconnect the positive crankcase ventilation (PCV) dirty air tube from the camshaft cover.
3. Remove the front air inlet housing panel. Refer to Air Inlet Housing Front Panel Replacement (See: Air Duct > Removal and Replacement > Air Inlet Housing Front Panel Replacement) .
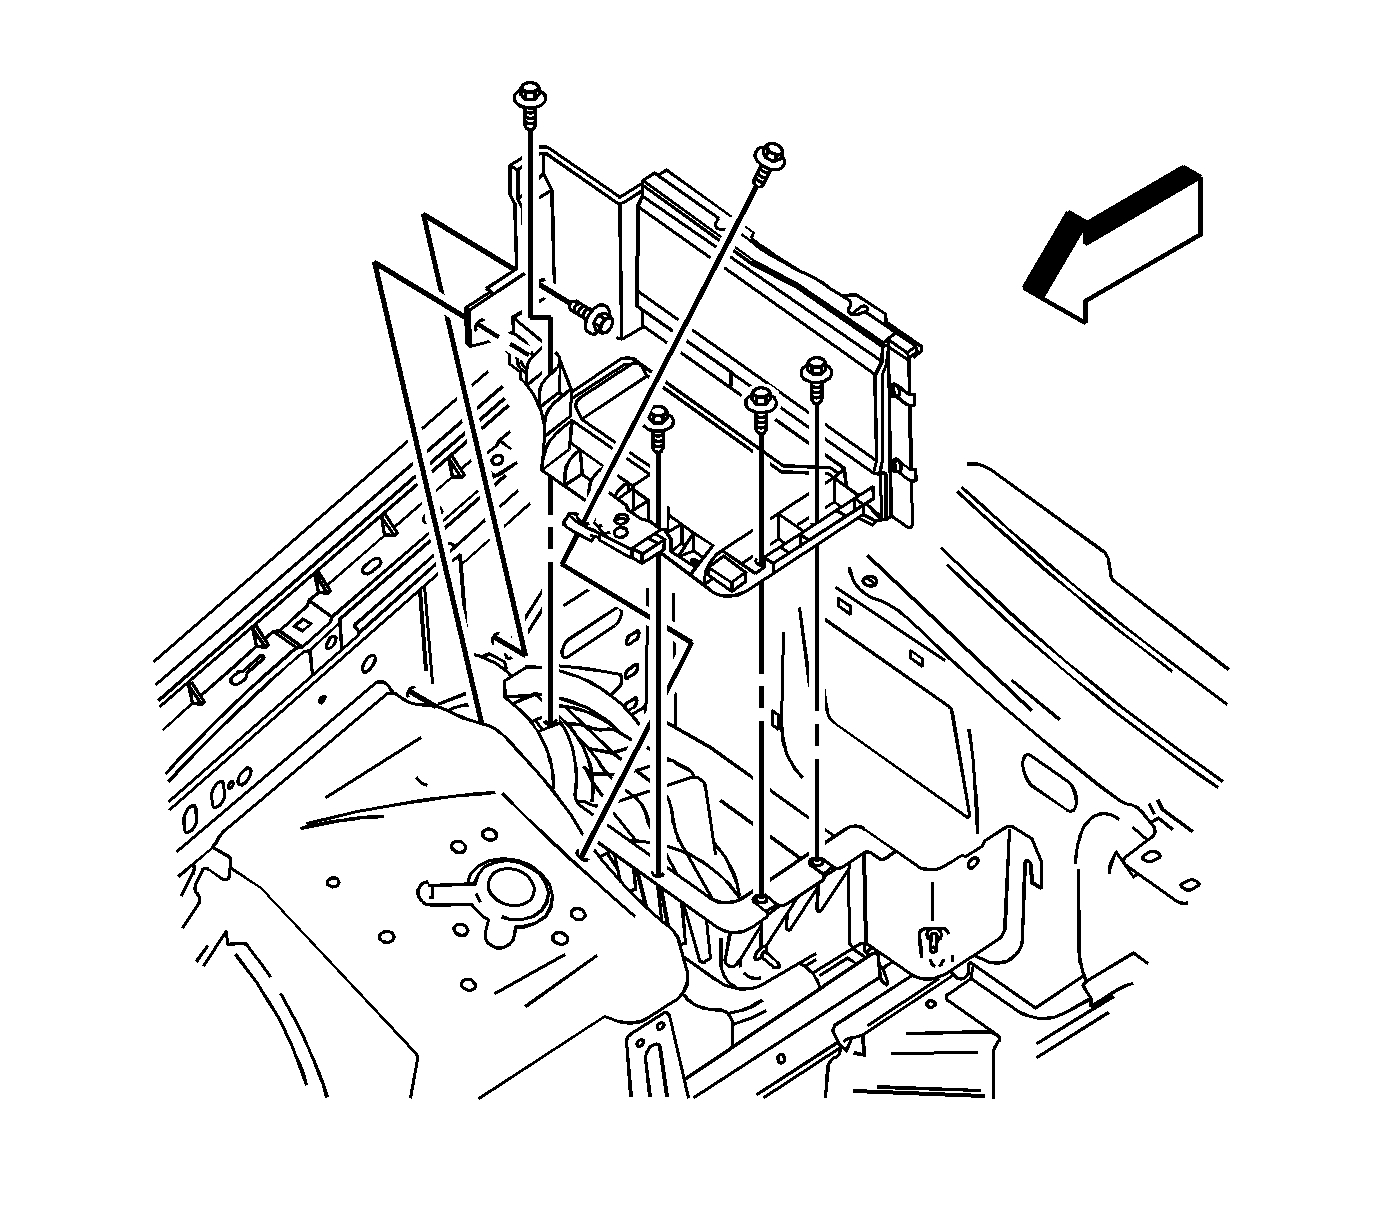
4. Remove the battery tray. Refer to Battery Tray Replacement (See: Battery Tray > Removal and Replacement > Battery Tray Replacement) .
5. Raise the vehicle. Refer to Lifting and Jacking the Vehicle (See: Maintenance > Service Intervals) .
6. Remove the front air deflector. Refer to Front Air Deflector Replacement (See: Air Dam > Removal and Replacement > Front Air Deflector Replacement) .
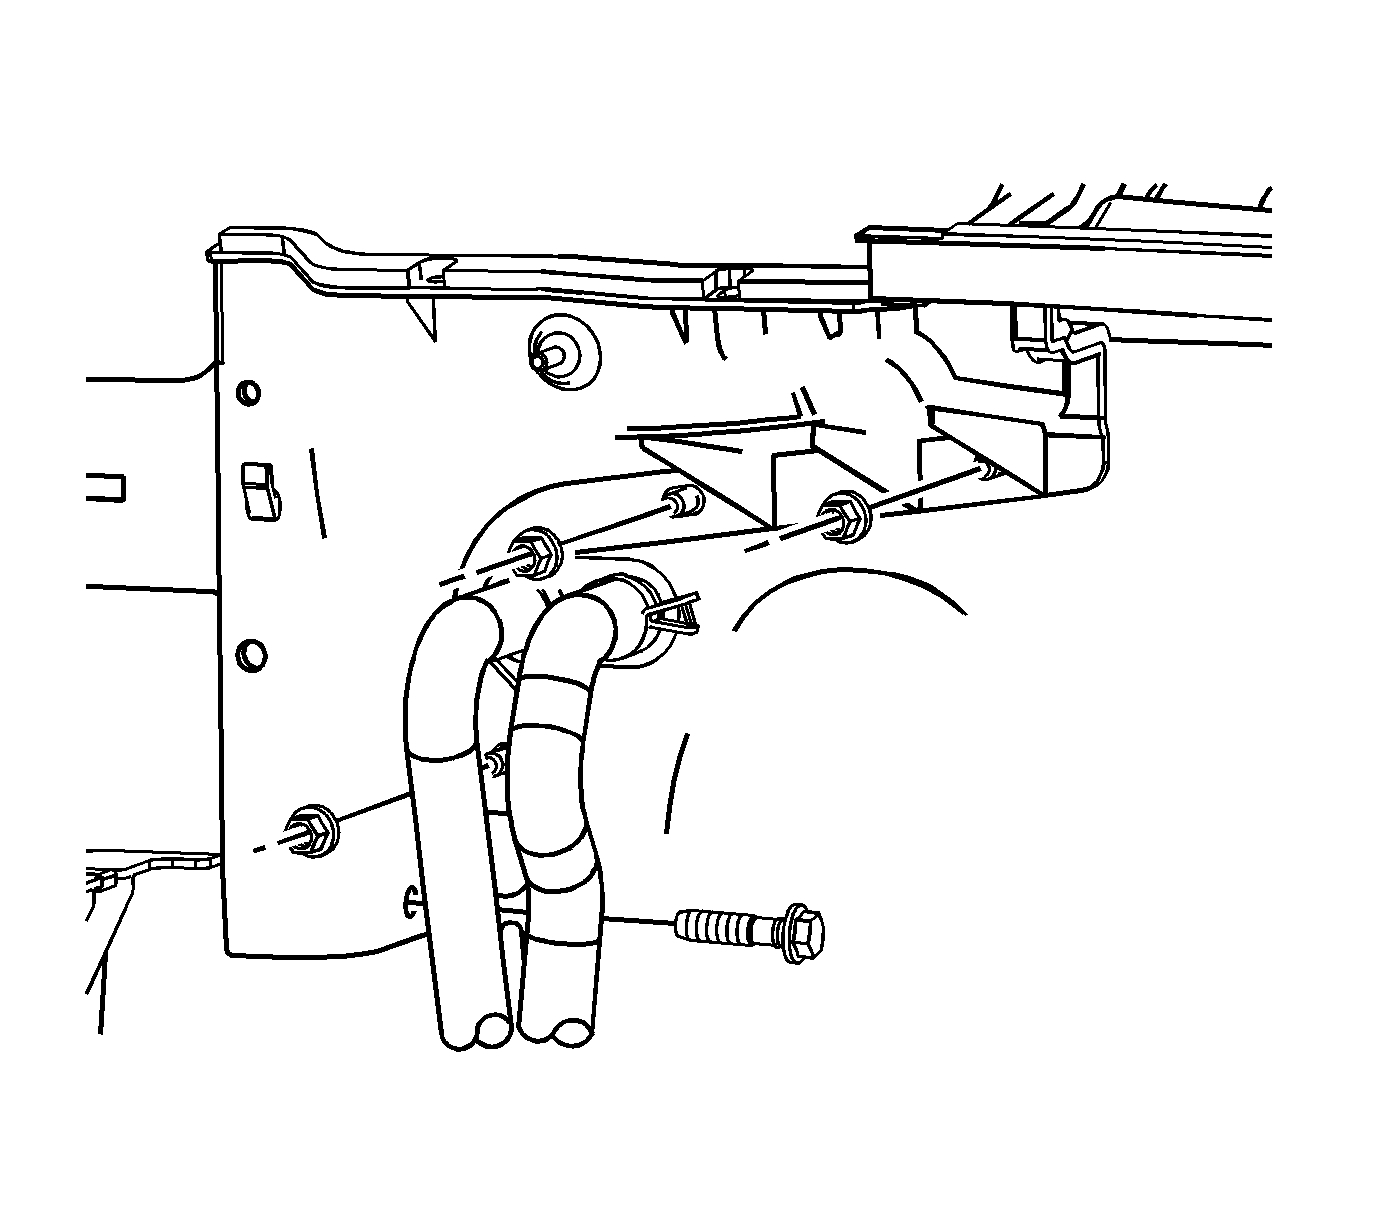
7. Remove the bolts securing the wire harness bracket to the cylinder head.
8. Lower the vehicle.
9. Remove the bank 1 ignition coils. Refer to Ignition Coil Replacement - Bank 1 (See: Ignition Coil > Removal and Replacement) .
10. Disconnect the cable harness clips at the front of the camshaft cover and position the cable harness aside.
11. Remove the bolt connecting the ground strap to the right camshaft cover.
12. Remove the camshaft cover bolts.
13. Remove the camshaft cover.
14. Discard the camshaft cover gasket and spark plug port seals if there is any evidence of damage or if the seal comes out of the groove in the cover during removal.
15. Clean and inspect the camshaft cover. Refer to Camshaft Cover Cleaning and Inspection () .
Installation Procedure
Important: Be careful to prevent the exposed section of the camshaft cover seal from being damaged by the edge of the cylinder head casting.
1. Install the camshaft cover gasket as required.
2. Place a small amount of sealant at the split line (1, 2) of the right cylinder head and the right camshaft position actuator housing. Refer to Adhesives, Fluids, Lubricants, and Sealers (See: Engine > Mechanical) .
3. Install the camshaft cover.
Notice: Refer to Fastener Notice (See: Vehicle > Vehicle Damage Warnings > Fastener Notice) .
4. Install the camshaft cover bolts installing the ground strap to the camshaft cover.
Tighten the bolts to 10 N.m (89 lb in).
5. Install the bank 1 ignition coils . Refer to Ignition Coil Replacement - Bank 1 (See: Ignition Coil > Removal and Replacement) .
6. Connect the cable harness clips to the front of the camshaft cover.
7. Raise the vehicle. Refer to Lifting and Jacking the Vehicle (See: Maintenance > Service Intervals) .
8. Install the bolts securing the wire harness bracket to the cylinder head.
Tighten the bolts to 45 N.m (33 lb ft).
9. Install the front air deflector. Refer to Front Air Deflector Replacement (See: Air Dam > Removal and Replacement > Front Air Deflector Replacement) .
10. Lower the vehicle.
11. Install the battery tray. Refer to Battery Tray Replacement (See: Battery Tray > Removal and Replacement > Battery Tray Replacement) .
12. Install the front air inlet housing panel. Refer to Air Inlet Housing Front Panel Replacement (See: Air Duct > Removal and Replacement > Air Inlet Housing Front Panel 13. Connect the PCV dirty air tube to the camshaft cover.
14. Install the fuel injector sight shield. Refer to Fuel Injector Sight Shield Replacement (See: Fuel Injector > Removal and Replacement) .
_______________________________________________________________________________________
Valve cover disassembly ( the last three pictures correlate with these directions)
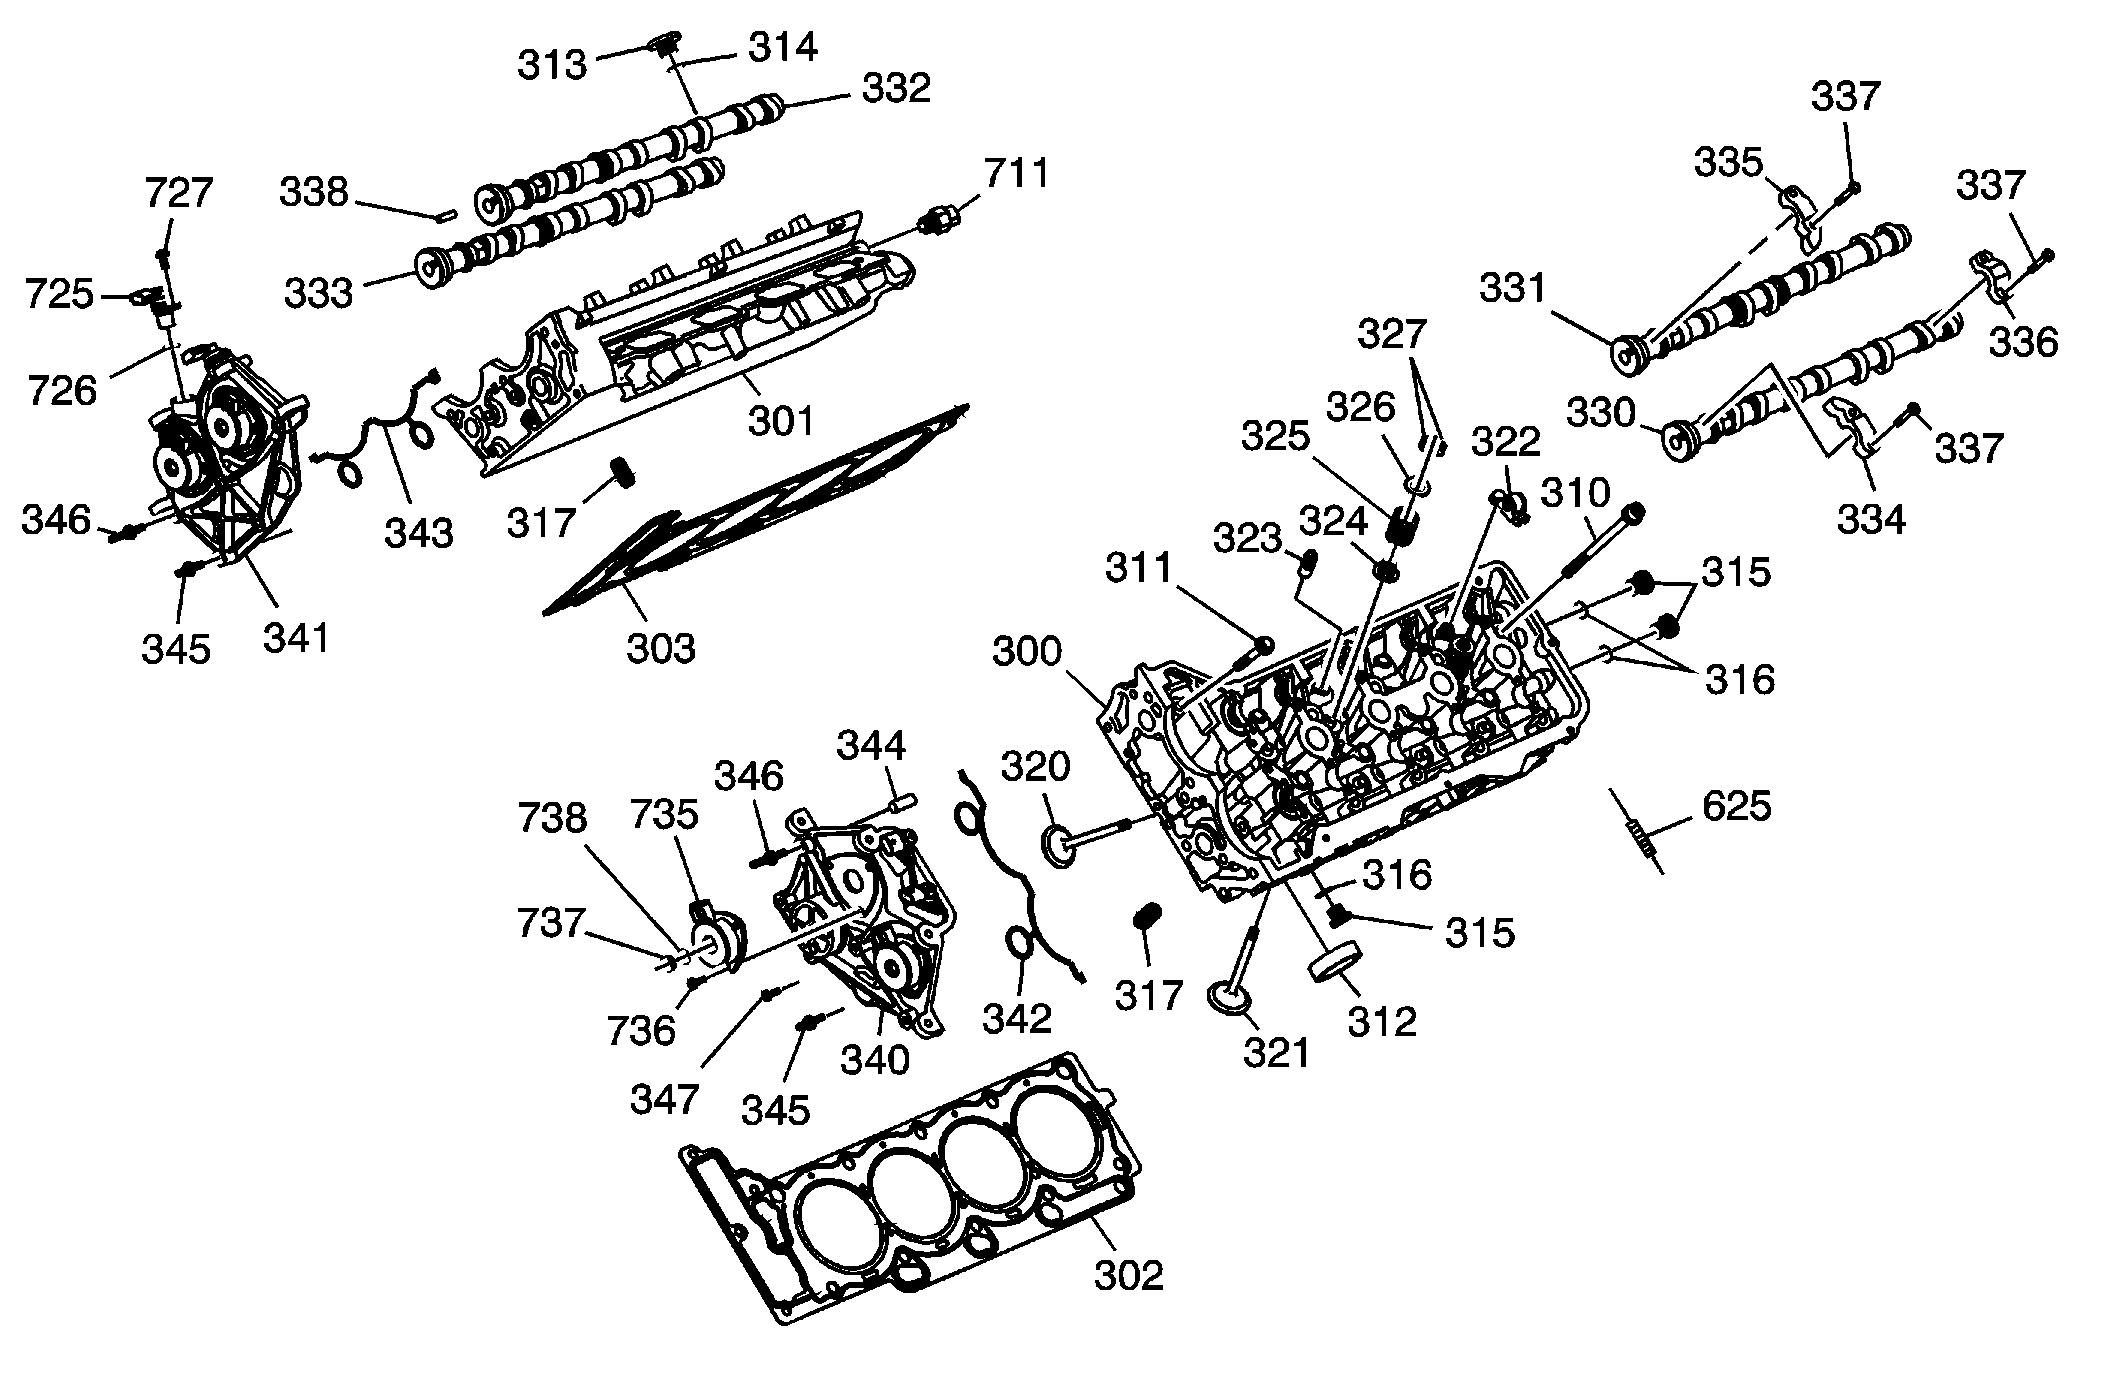
84. CAMSHAFT COVER DISASSEMBLE
Camshaft Cover Disassemble
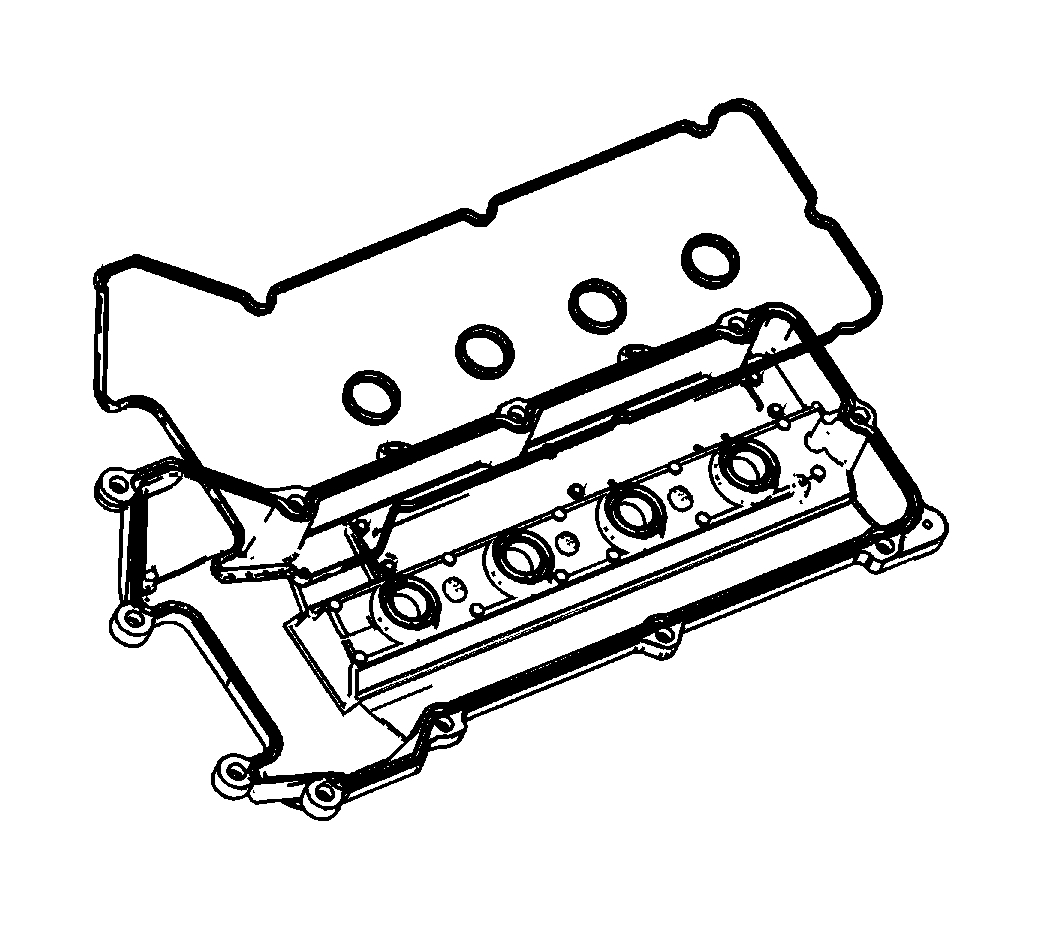
1. Remove the left camshaft cover gasket and discard.
2. Remove the left spark plug port seals and discard.
3. Remove the right camshaft cover gasket and discard.
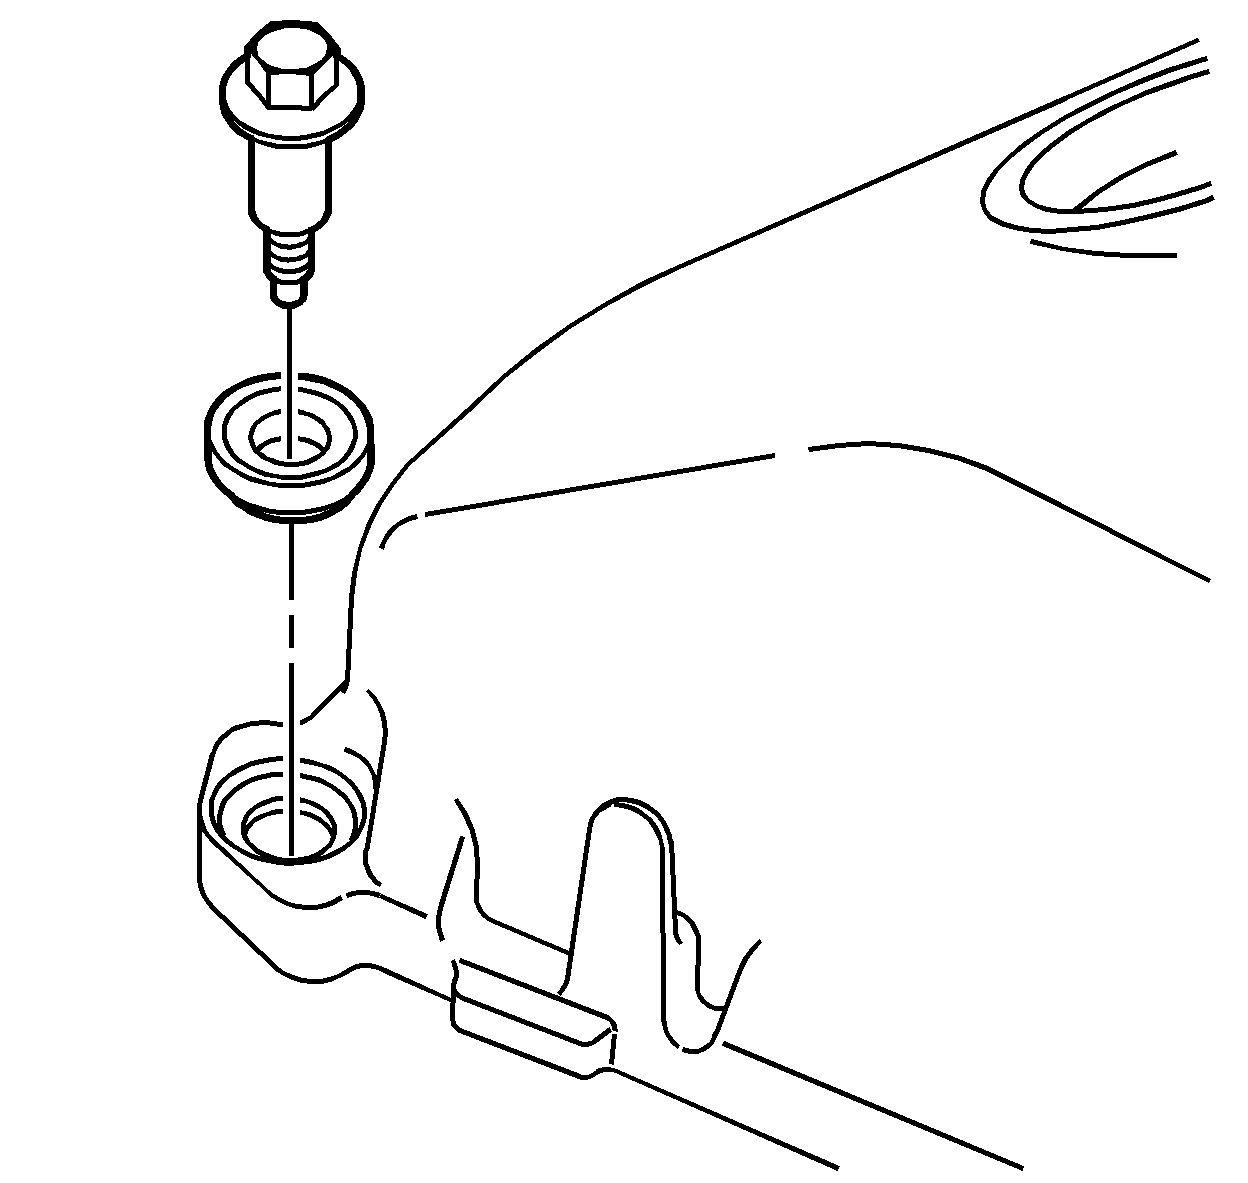
5. Remove the camshaft cover bolts.
6. Remove the camshaft cover bolt grommets.
_____________________________________________________________________________________
I hope this helps. Let us know if you have other questions.
Take care,
Joe
Images (Click to enlarge)
Aug 30, 2018 at 6:00 PM