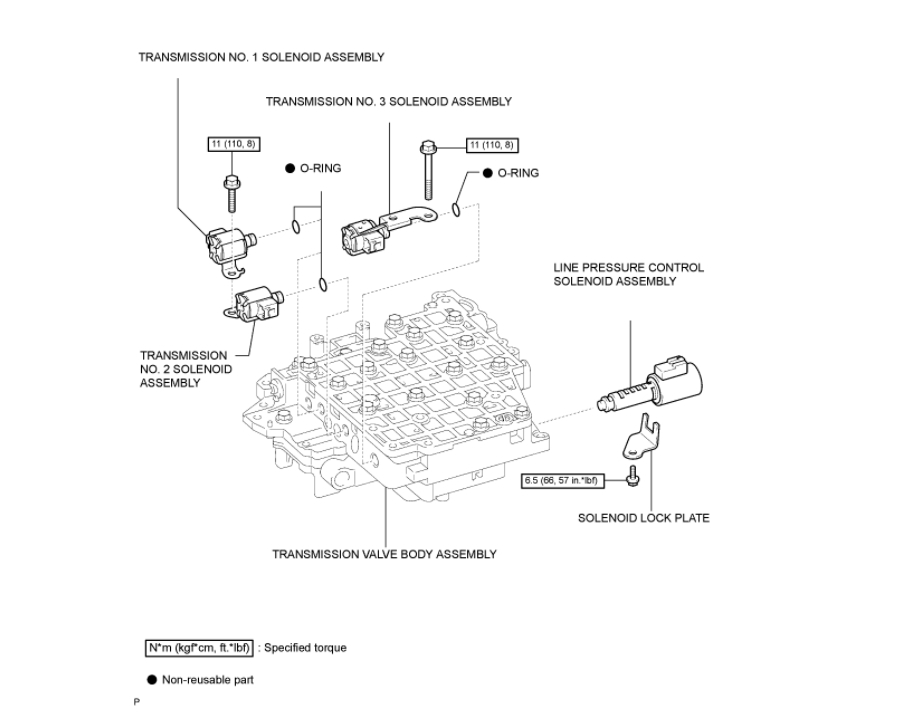
I attached the diagram of the valve body for you to view. There is no actual torque converter solenoid but there is a valve for it in the valve body. Check out the diagrams (Below).
REMOVAL
1. REMOVE ENGINE UNDER COVER LH
2. DRAIN AUTOMATIC TRANSAXLE FLUID
(a)Remove the drain plug, gasket and drain ATF.
(b)Install a new gasket and drain plug.
Torque: 18 Nm (180 kgf-cm, 13 ft-lbf)
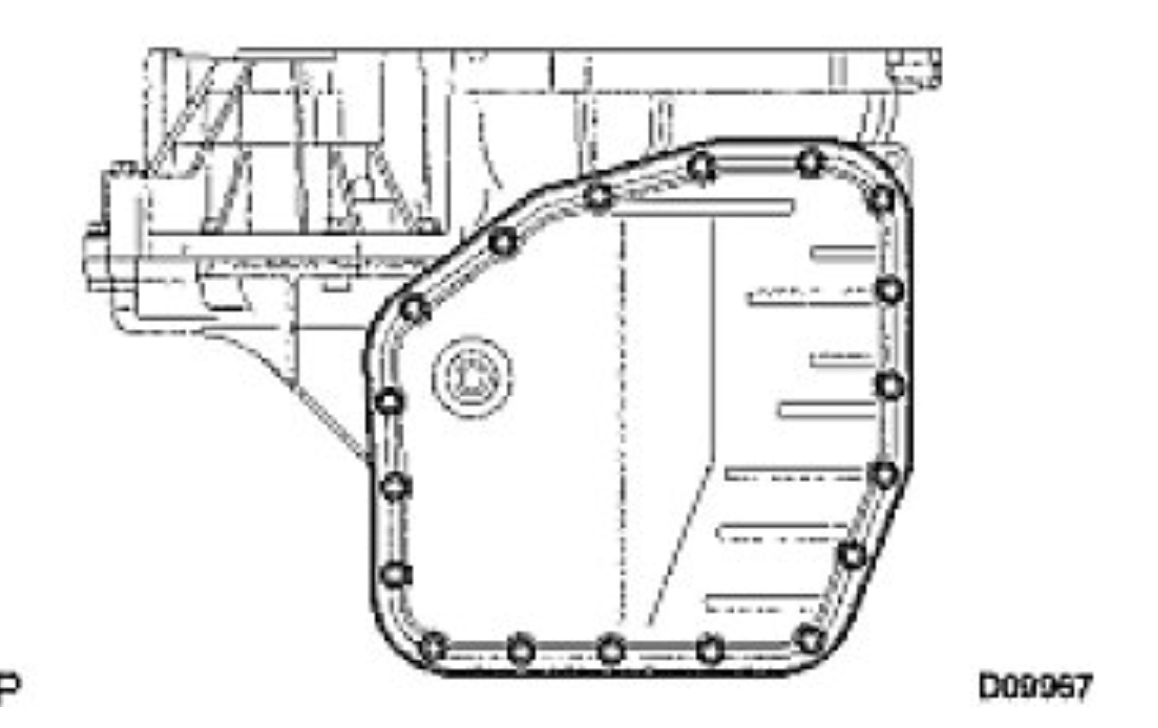
3. REMOVE AUTOMATIC TRANSAXLE OIL PAN SUB-ASSEMBLY
(a)Remove the 18 bolts, oil pan and gasket.
NOTE: Some fluid will remain in the oil pan. Remove all pan bolts, and carefully remove the oil pan assembly.
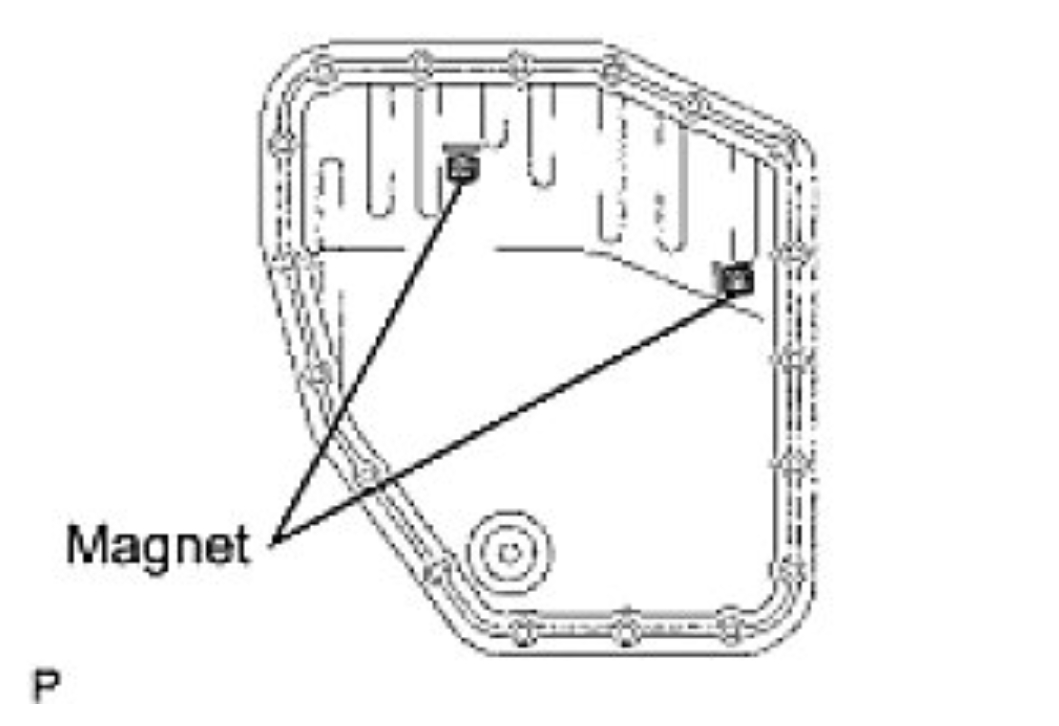
(b)Remove the 2 magnets from oil pan.
(c)Examine particles in pan.
(1)Remove the magnets and use them to collect any steel chips. Look carefully at the chips and particles in the pan and the magnet to anticipate what type of wear you will find in the transaxle.
Steel (magnetic): bearing, gear and plate wear
Brass (non-magnetic): bearing wear
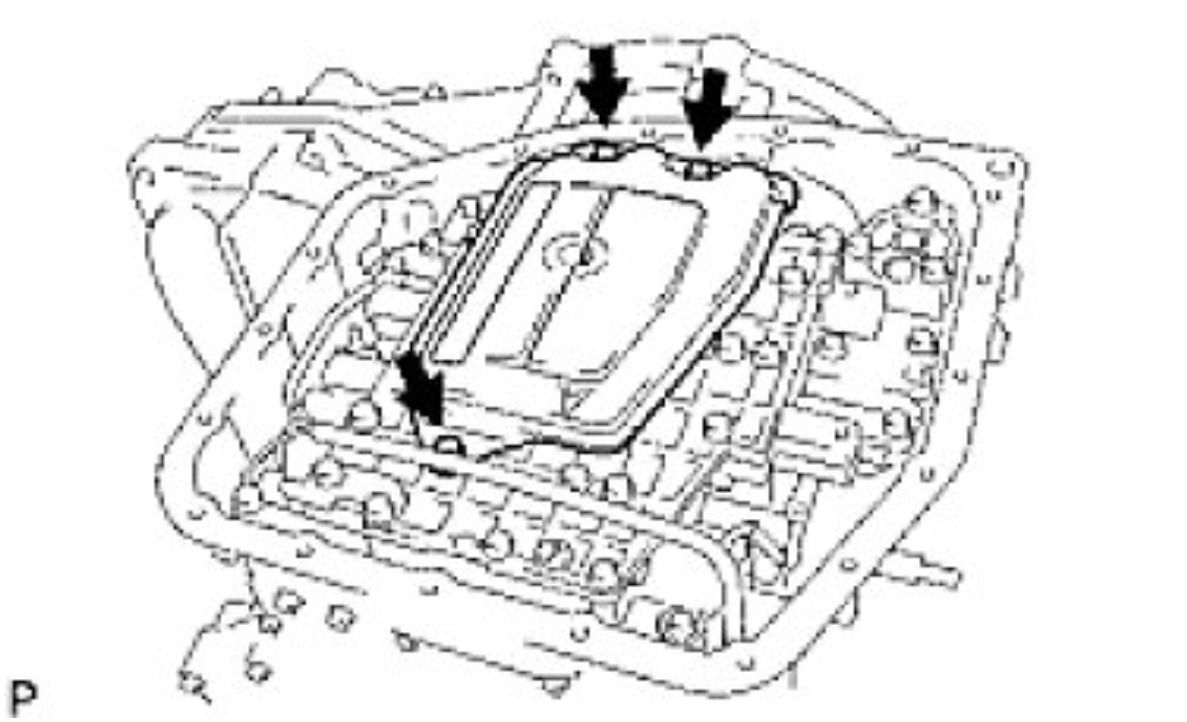
4. REMOVE VALVE BODY OIL STRAINER ASSEMBLY
(a)Remove the 3 bolts and oil strainer.
NOTE: Be careful as some fluid will come out with the oil strainer.
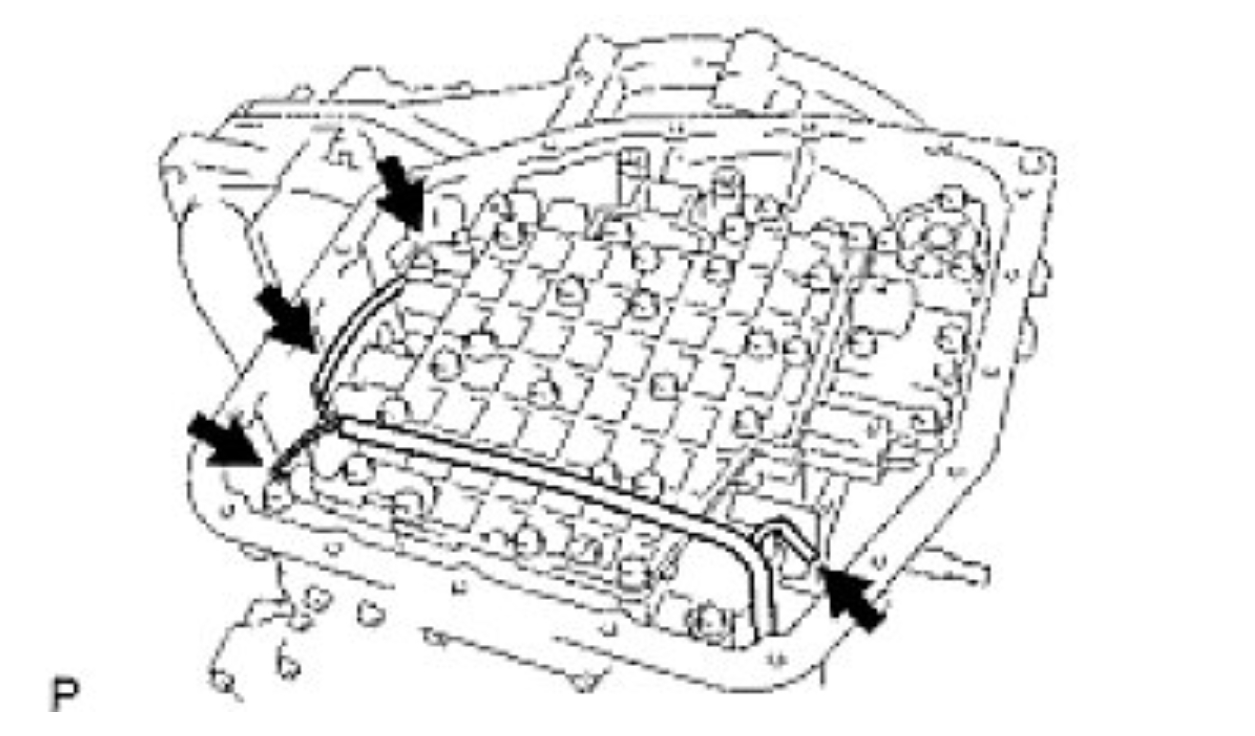
5. REMOVE TRANSMISSION VALVE BODY ASSEMBLY
(a)Disconnect the 4 solenoid connectors.
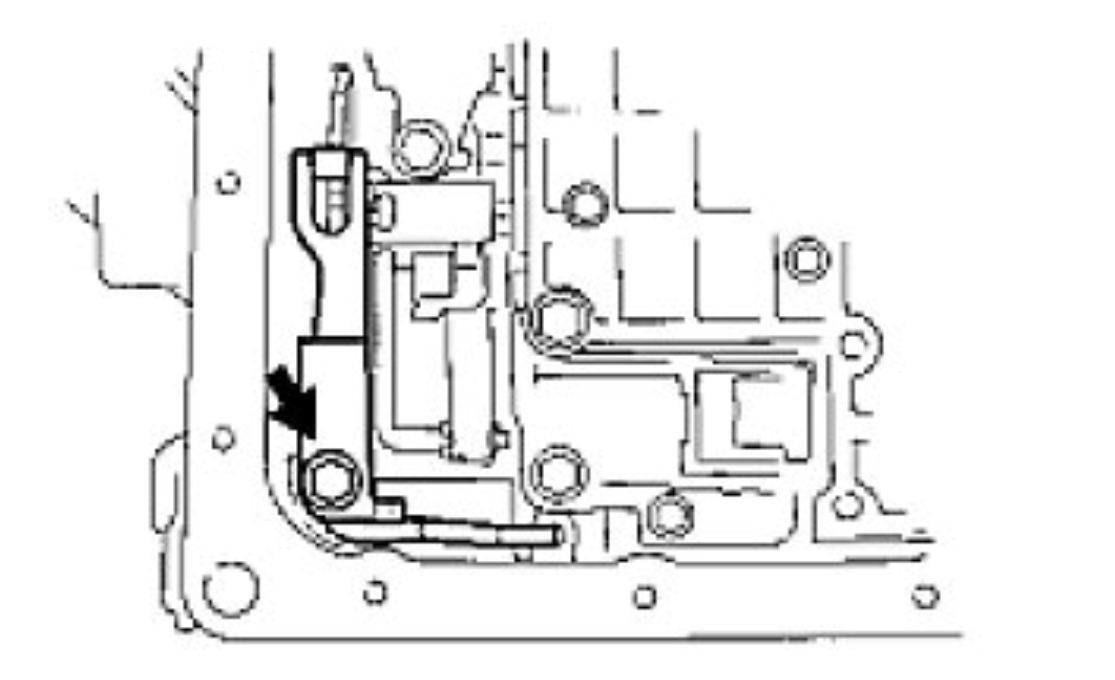
(b)Remove the bolt and manual detent spring.
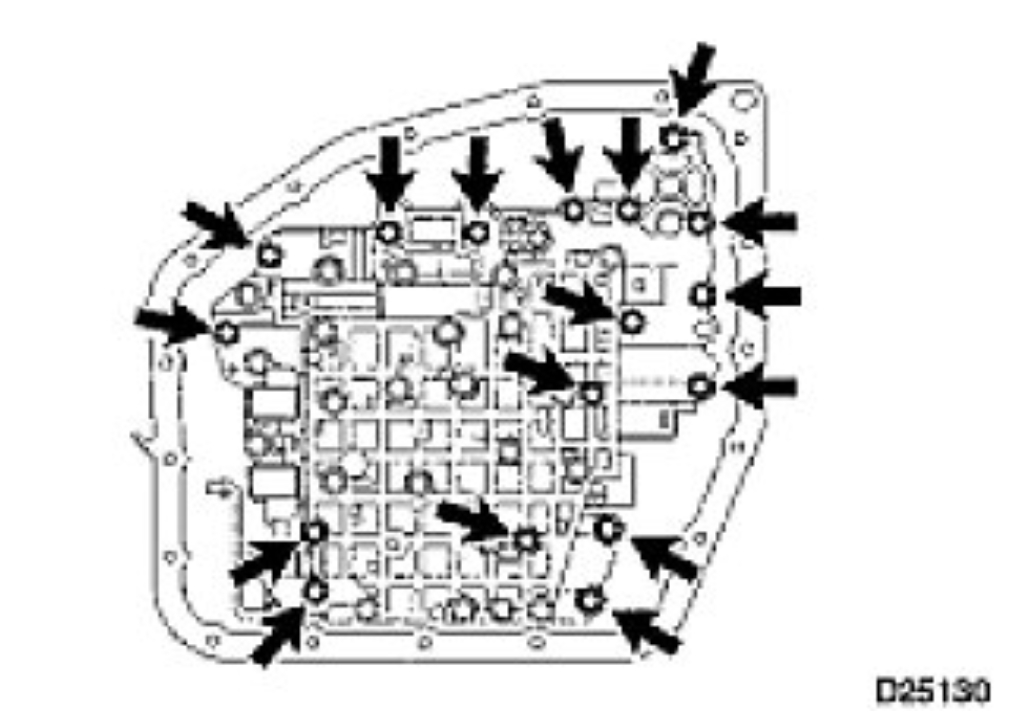
(c)Remove the 17 bolts.
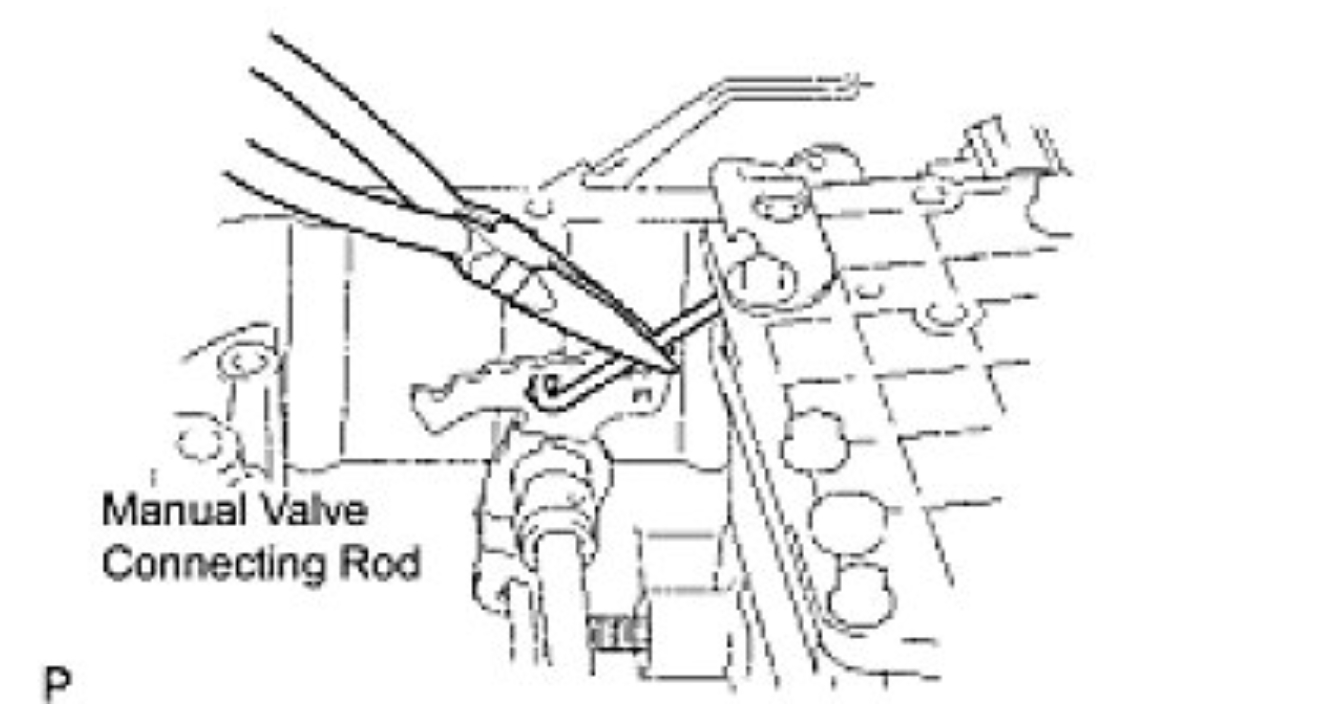
(d)Using needle-nose pliers, while disconnecting the manual valve connecting rod from the manual valve lever, remove the valve body with the manual valve together.
(e)Remove the 2 bolts (A and B bolts) and 3 solenoid valves.
(f)Remove the 3 O-rings from each of the solenoid valves.
(g)Remove the bolt (C bolt), lock plate and line pressure control valve.
Check out the diagrams (Below).
Images (Click to make bigger)
Wednesday, May 26th, 2021 AT 6:41 PM
(Merged)