Hi,
Replacing a power brake booster takes a little time, but really isn't too hard to do. I recommend getting a lifetime replacement part so you never have to pay for a new one in the future.
Here are the directions specific to your vehicle. The pics attached below correlate with the directions.
____________________________
2003 Toyota Camry Sedan L4-2.4L (2AZ-FE)
Procedures
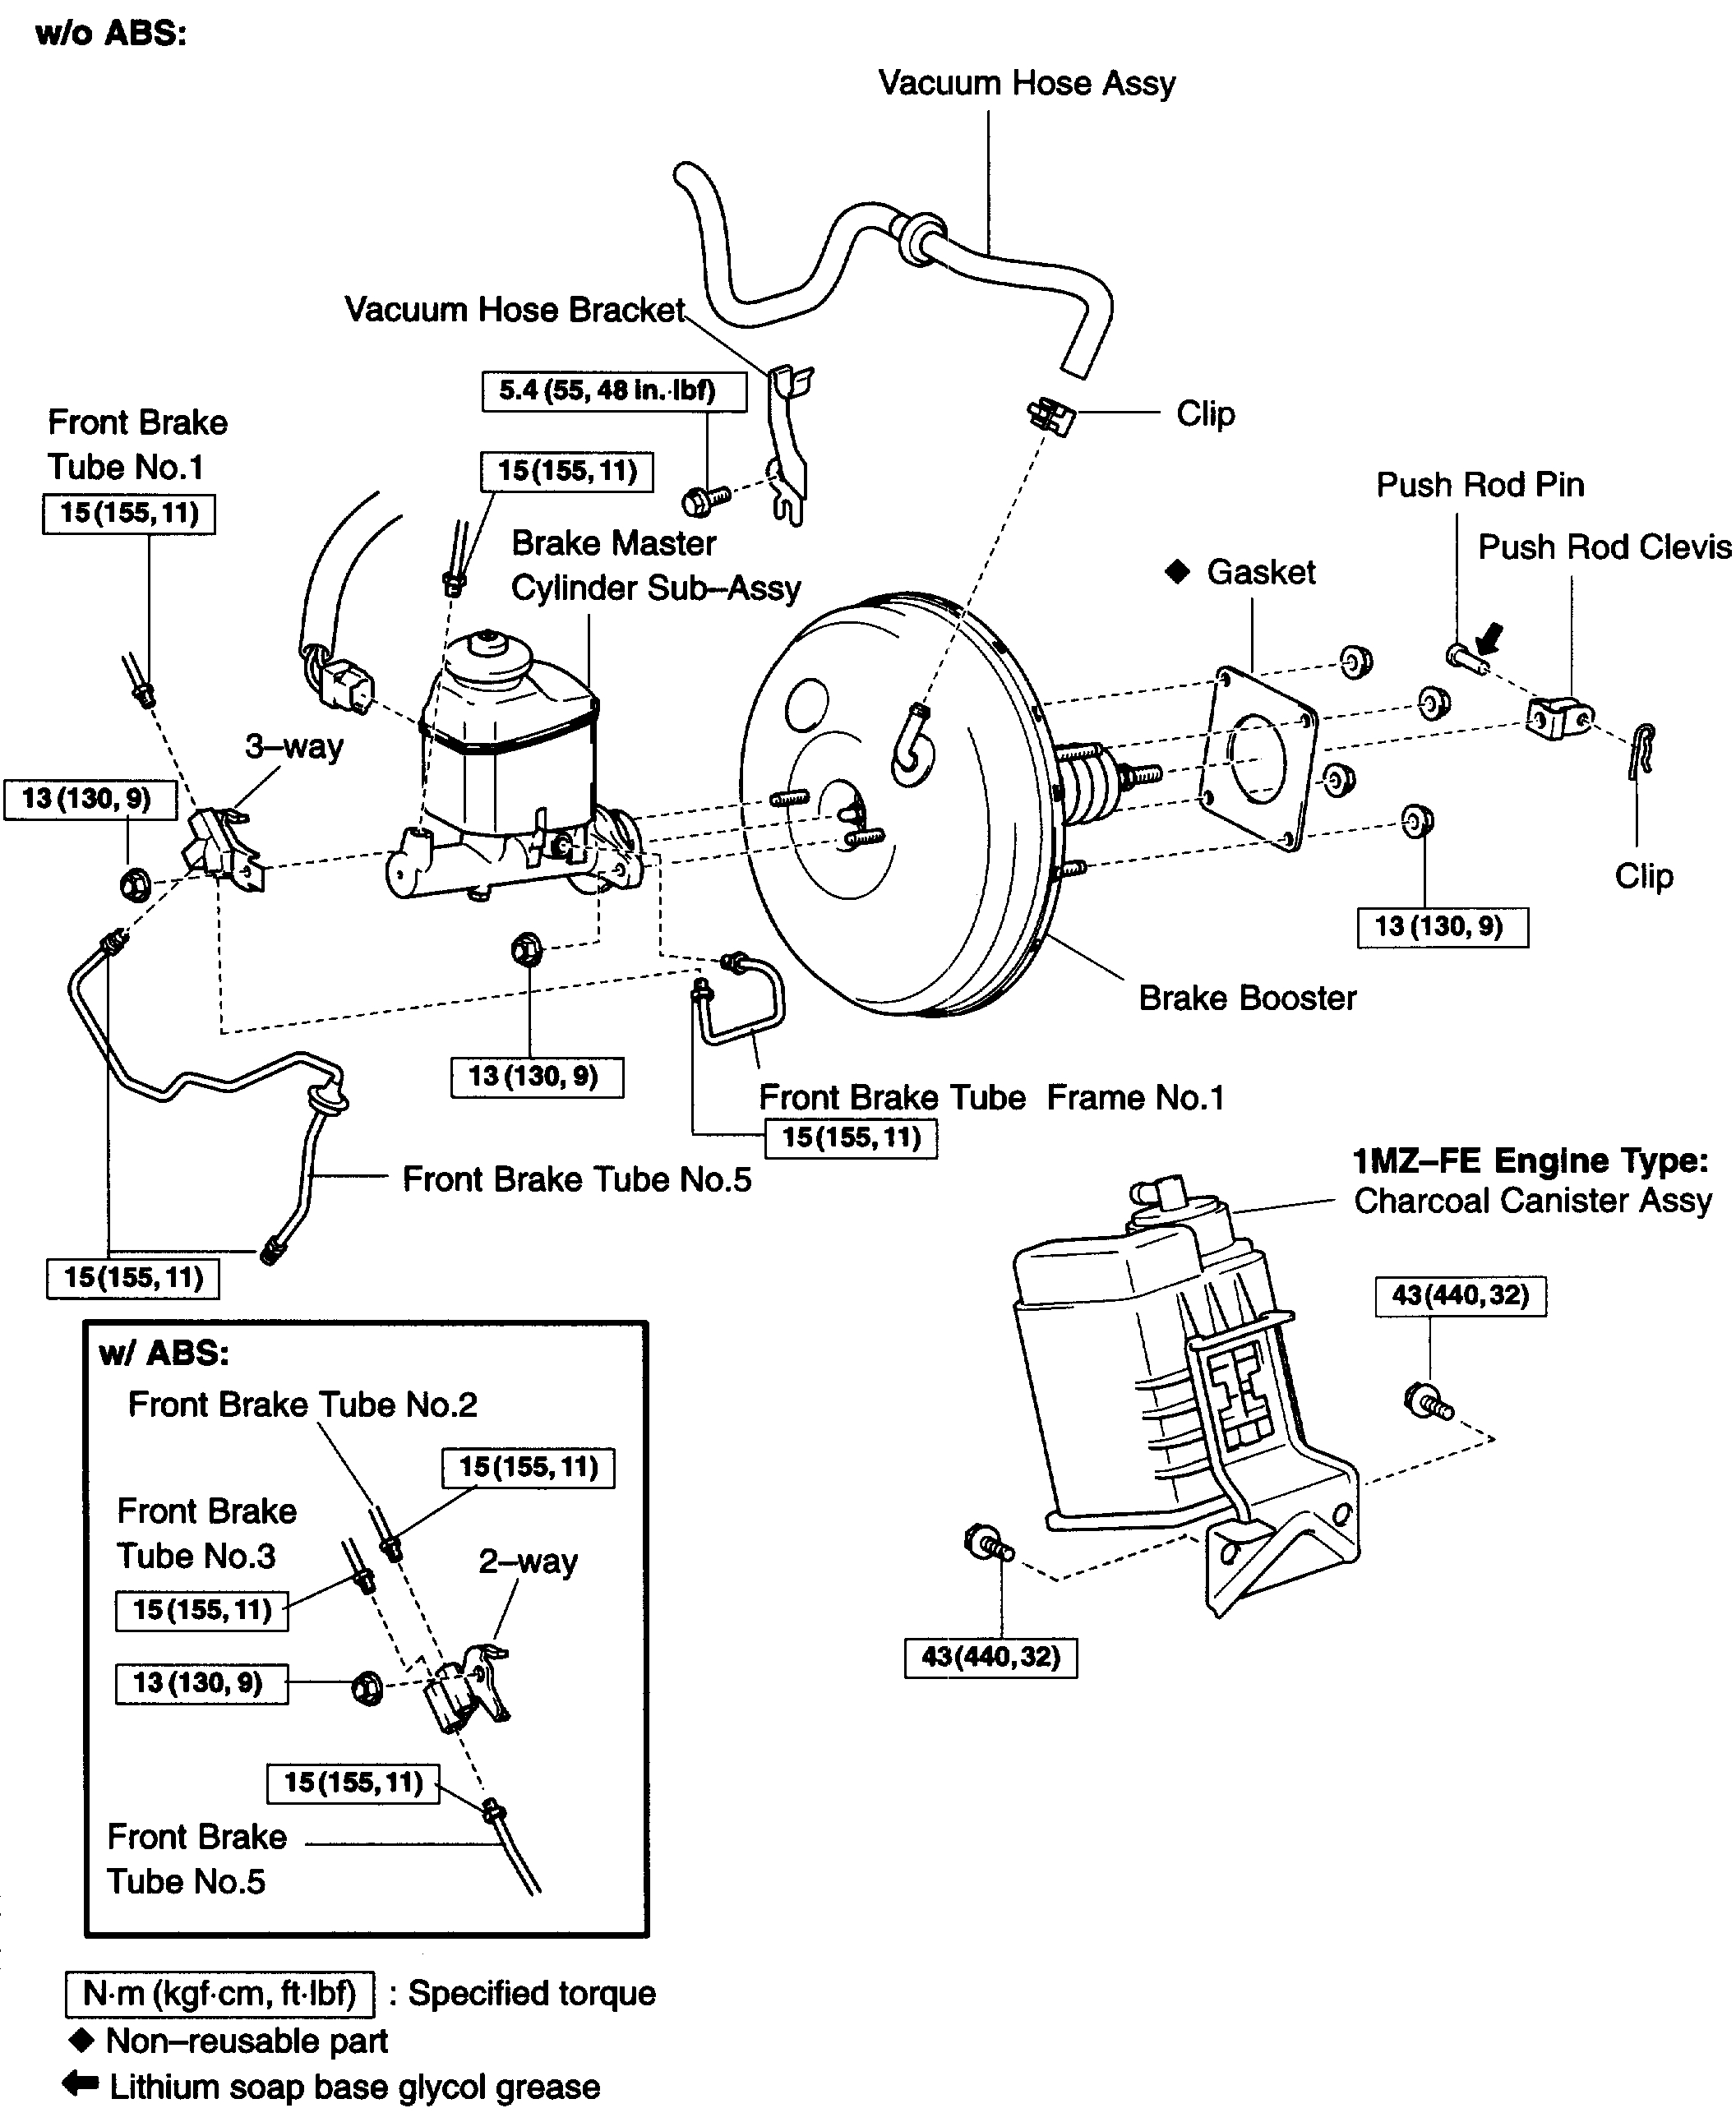
Vehicle Brakes and Traction Control Power Brake Assist Vacuum Brake Booster Service and Repair Procedures
PROCEDURES
pic 1
REPLACEMENT
1. DRAIN BRAKE FLUID
NOTICE: Wash off the brake fluid immediately if it comes into contact with a painted surface.
2. REMOVE AIR CLEANER ASSY
3. REMOVE BRAKE MASTER CYLINDER SUB-ASSY
SST 09023-00100
pic 2
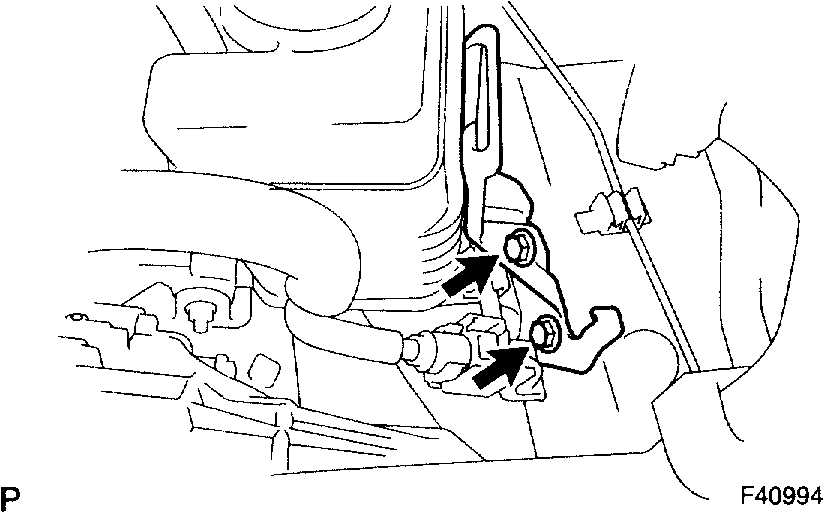
4. SEPARATE CHARCOAL CANISTER ASSY (1MZ-FE ENGINE TYPE)
a. Remove the 2 bolts and separate the charcoal canister from the body.
pic 3
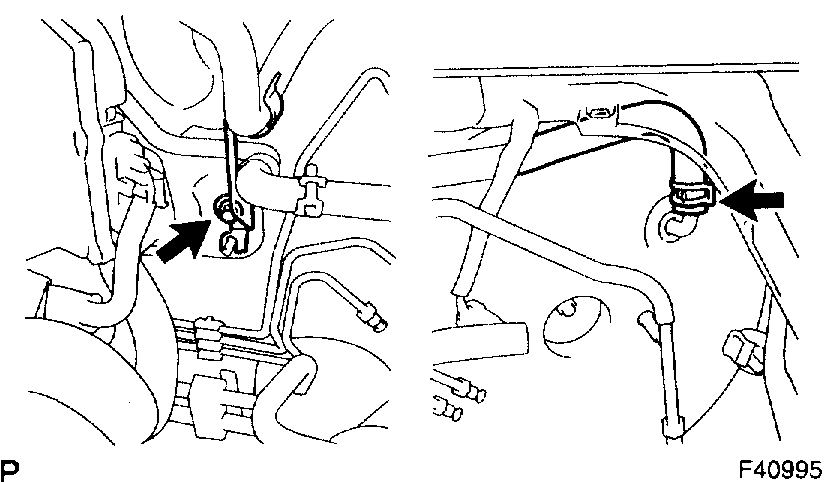
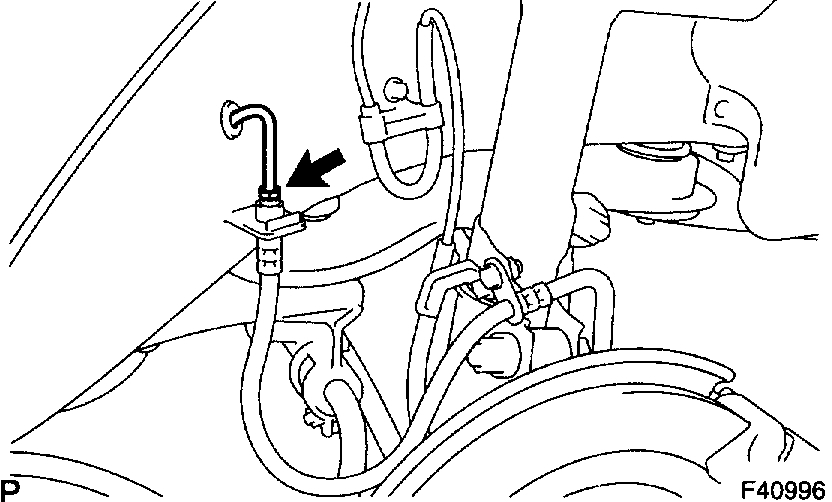
5. DISCONNECT VACUUM HOSE ASSY
a. Remove the bolt and separate the vacuum hose from the vacuum hose bracket.
b. Slide the clip and disconnect the vacuum hose from the brake booster.
6. REMOVE FRONT DOOR SCUFF PLATE LH
7. REMOVE COWL SIDE TRIM SUB-ASSY LH
8. REMOVE INSTRUMENT PANEL SUB-ASSY UPPER
9. REMOVE INSTRUMENT PNL INSERT SUB-ASSY LWR LH
10. REMOVE PUSH ROD PIN
a. Remove the clip and push rod pin.
11. REMOVE BRAKE MASTER CYLINDER PUSH ROD CLEVIS
a. Loosen the lock nut and remove the push rod clevis.
pic 4
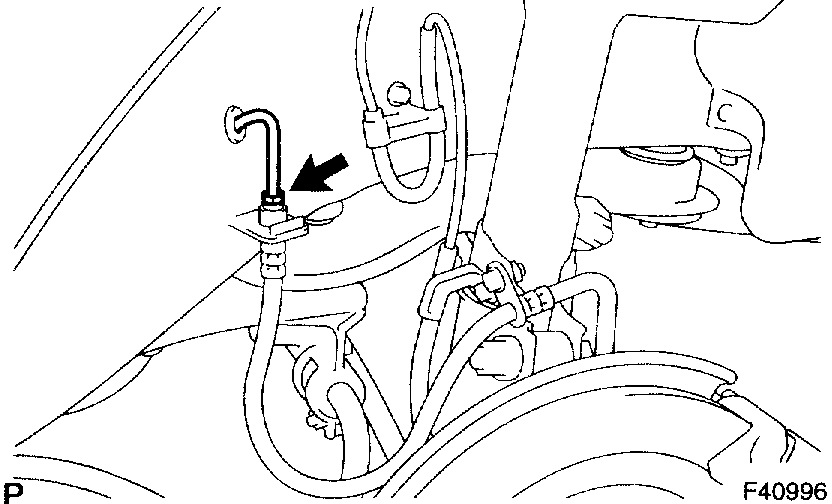
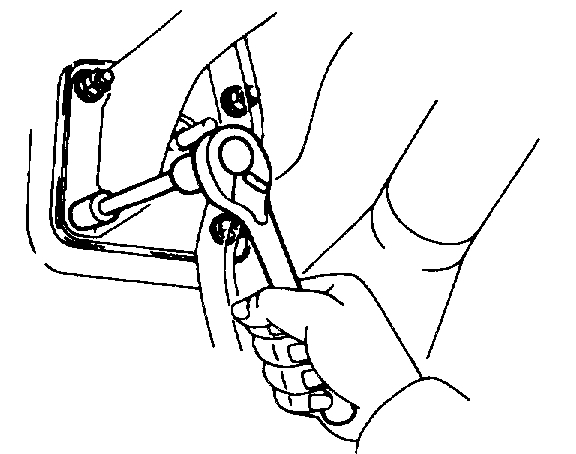
12. REMOVE FRONT BRAKE TUBE NO. 5
a. Using SST and remove the front brake tube No. 5.
SST 09023-00100
pic 5
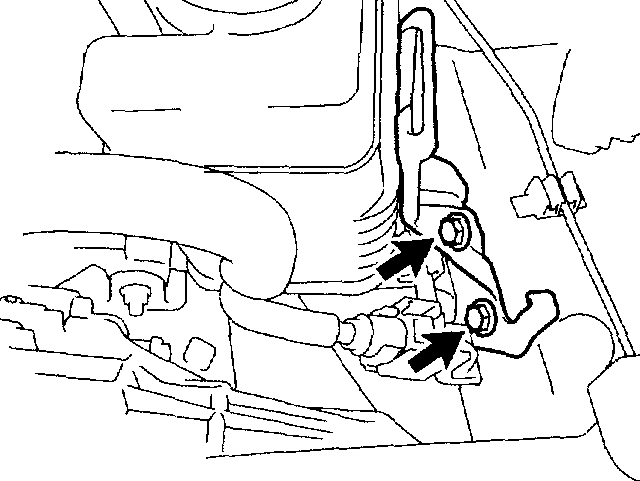
13. REMOVE BRAKE BOOSTER ASSY
a. Remove the 4 nuts.
b. Pull out: the brake booster assy.
14. REMOVE BRAKE BOOSTER GASKET
15. INSTALL BRAKE BOOSTER GASKET
a. Install a new brake booster gasket to the brake booster.
pic 6
16. INSTALL BRAKE BOOSTER ASSY
a. Install the brake booster with the 4 nuts.
Torque: 13 Nm (130 kgf-cm, 9 ft. lbs.)
pic 7
17. INSTALL FRONT BRAKE TUBE NO. 5
a. Using SST and install the front brake tube No. 5.
Torque: 15 Nm (155 kgf-cm, 11 ft. lbs.)
SST 09023-00100
18. INSTALL BRAKE MASTER CYLINDER PUSH ROD CLEVIS
a. Install the push rod clevis and lock nut.
19. INSTALL PUSH ROD PIN
a. Install the push rod pin and clip.
HINT: Apply the lithium soap base glycol grease to the part indicate by arrow.
20. INSTALL INSTRUMENT PNL INSERT SUB-ASSY LWR LH
21. INSTALL INSTRUMENT PANEL SUB-ASSY UPPER
22. INSTALL COWL SIDE TRIM SUB-ASSY LH
23. INSTALL FRONT DOOR SCUFF PLATE LH
pic 8
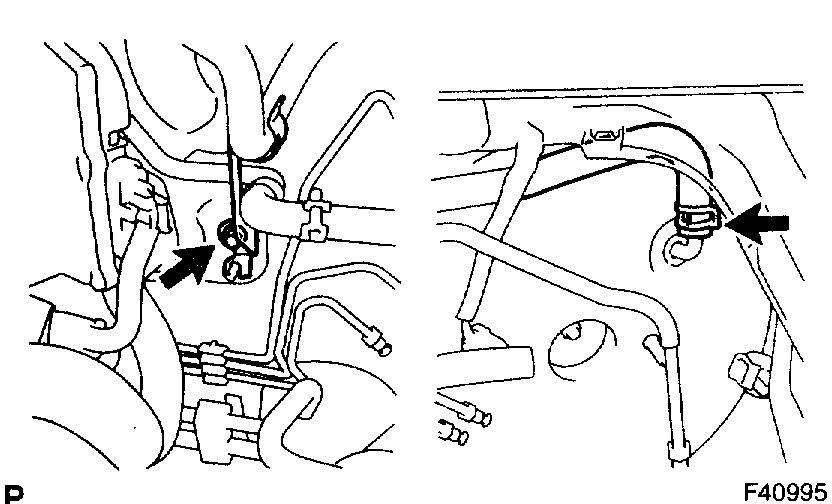
24. INSTALL VACUUM HOSE ASSY
a. Install the vacuum hose and vacuum hose bracket to the body with a bolt.
Torque: 5.4 Nm (55 kgf-cm, 48 inch lbs.)
b. Connect the vacuum hose to the brake booster with the clip.
pic 9
25. CONNECT CHARCOAL CANISTER ASSY (1MZ-FE ENGINE TYPE)
a. Install the charcoal canister with the 2 bolts.
Torque: 43 Nm (440 kgf-cm, 32 inch lbs.)
26. INSPECT AND ADJUST BRAKE BOOSTER PUSH ROD
SST 09737-00012, 09737-00020
27. INSTALL BRAKE MASTER CYLINDER SUB-ASSY
SST 09023-00100
28. INSTALL AIR CLEANER ASSY
29. FILL RESERVOIR WITH BRAKE FLUID
30. BLEED MASTER CYLINDER
SST 09023-00100
31. BLEED BRAKE LINE
32. CHECK FLUID LEVEL IN RESERVOIR
33. CHECK BRAKE FLUID LEAKAGE
34. CHECK AND ADJUST BRAKE PEDAL HEIGHT
_____________________________
I hope this helps. Let me know if you have other questions.
Take care and God Bless,
Joe
Images (Click to enlarge)
Mar 5, 2021 at 11:03 PM