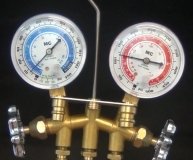
Here is the removal and install
Evaporator Core, Expansion Valve and Thermistor
REMOVAL & INSTALLATION
The interior air conditioning components are all contained in a single cooling unit adjacent to the heater case. This is removed as a unit and carefully disassembled on the workbench, giving access to the evaporator, expansion valve, thermostat (thermistor), and on some vehicles, the pressure switch and signal amplifier.
Anytime an air conditioning line is loosened or disconnected, the O-ring must be replaced. Make certain the ring is correctly installed before reassembly.
CAUTION
Please refer to before discharging the compressor or disconnecting air conditioning lines. Damage to the air conditioning system or personal injury could result. Consult your local laws concerning refrigerant discharge and recycling. In many areas it may be illegal for anyone but a certified technician to service the A/C system. Always use an approved recovery station when discharging the air conditioning.
Disconnect the negative battery cable.
Safely discharge the air conditioning system, this must be performed by a properly trained and certified mechanic in a facility equipped with refrigerant recovery/recycling equipment that meets SAE standards.
Disconnect the suction hose (large hose) at the cooling unit outlet at the firewall. Use two wrenches to counterhold the fitting while loosening. Cap the hose to keep out dirt and moisture.
Disconnect the liquid line (small tube) at the cooling unit inlet fitting at the firewall. Use two wrenches to counterhold the fitting while loosening. Cap the hose to keep out dirt and moisture.
Remove the grommet(s) from around the fittings.
Inside the vehicle, remove the glove box.
Unplug the electrical connectors.
Remove the hardware holding the cooling unit. Pay attention to which nut, bolt or screw came out of each location; exact reinstallation is required. Pull the case back from the firewall and then lower it. Place the unit upright on a workbench.
Remove or disconnect any external wiring on the case of the unit. On 4WD trucks with 3VZ-E and automatic transmission, remove the cut-off relay from the bottom of the cooling unit case.
Remove the clips holding the two halves together. Remove the screws.
Carefully lift the upper half of the case off the unit.
Carefully unplug and remove the thermistor from the unit.
Remove the lower case.
If desired, disconnect the liquid tube from the inlet fitting of the expansion valve. Remove the insulation and heat sensing tube from the suction tube.
Disconnect the expansion valve. Use two wrenches and don't bend the pipes.
Inspect the evaporator core, looking for bent fins. If the core is clogged, clean it with compressed air or a soft, dry brush. Never use water to clean the core. Closely inspect the threaded fittings for any sign of cracking or deformation.
To install:
Assemble the unit as follows:
For Land Cruiser and pick-ups, connect the expansion valve to the inlet fitting of the evaporator. Make certain a new O-ring (lubed) is placed on the tube fitting, then tighten the nut. Connect the liquid tube to the inlet fitting of the expansion valve; tighten the nut. For Land Cruiser, install the thermistor onto the evaporator.
For 4Runner, install the expansion valve, suction and liquid tubes to the evaporator, using new O-rings. Tighten the fittings. Install the holder to the tubes with the heat sensing tube.
Install the lower unit case onto the evaporator.
Install the thermistor.
Install the upper case on the unit. Install the clips and hardware in their exact original locations.
Install the wiring harness. Double check the connectors for correct placement and secure fit.
Lift the cooling unit into place and secure the retaining nuts, bolts and screws. On Land Cruiser, its easier to connect the wire harness before lifting the unit into place. Make certain the harness is not pinched during installation.
Connect the wiring harness.
Install the glove box.
Under the hood, install the grommet(s) on the cooling unit fittings. Make certain the grommet(s) fit correctly.
Connect the liquid tube to the cooling unit inlet and tighten the fitting.
Connect the suction hose to the outlet fitting and tighten the fitting.
Connect the negative battery cable.
Evacuate the air conditioning system.
Have an authorized service station recharge the system, operate it and check for leaks.
Wednesday, January 28th, 2009 AT 8:41 PM


