Hi,
Please understand that our manuals don't provide the bolt size. However, I believe they are a 10mm bolt. I'm not sure if you are removing it to replace the belt or not, but here are the directions if that is the case. Note that the cover removal is included in these directions, and all attached pics correlate.
_______________________________
1998 Kia Sephia LS Sedan L4-1.8L
Timing Belt Removal and Installation
Vehicle Engine, Cooling and Exhaust Engine Timing Components Timing Belt Service and Repair Procedures Timing Belt Removal and Installation
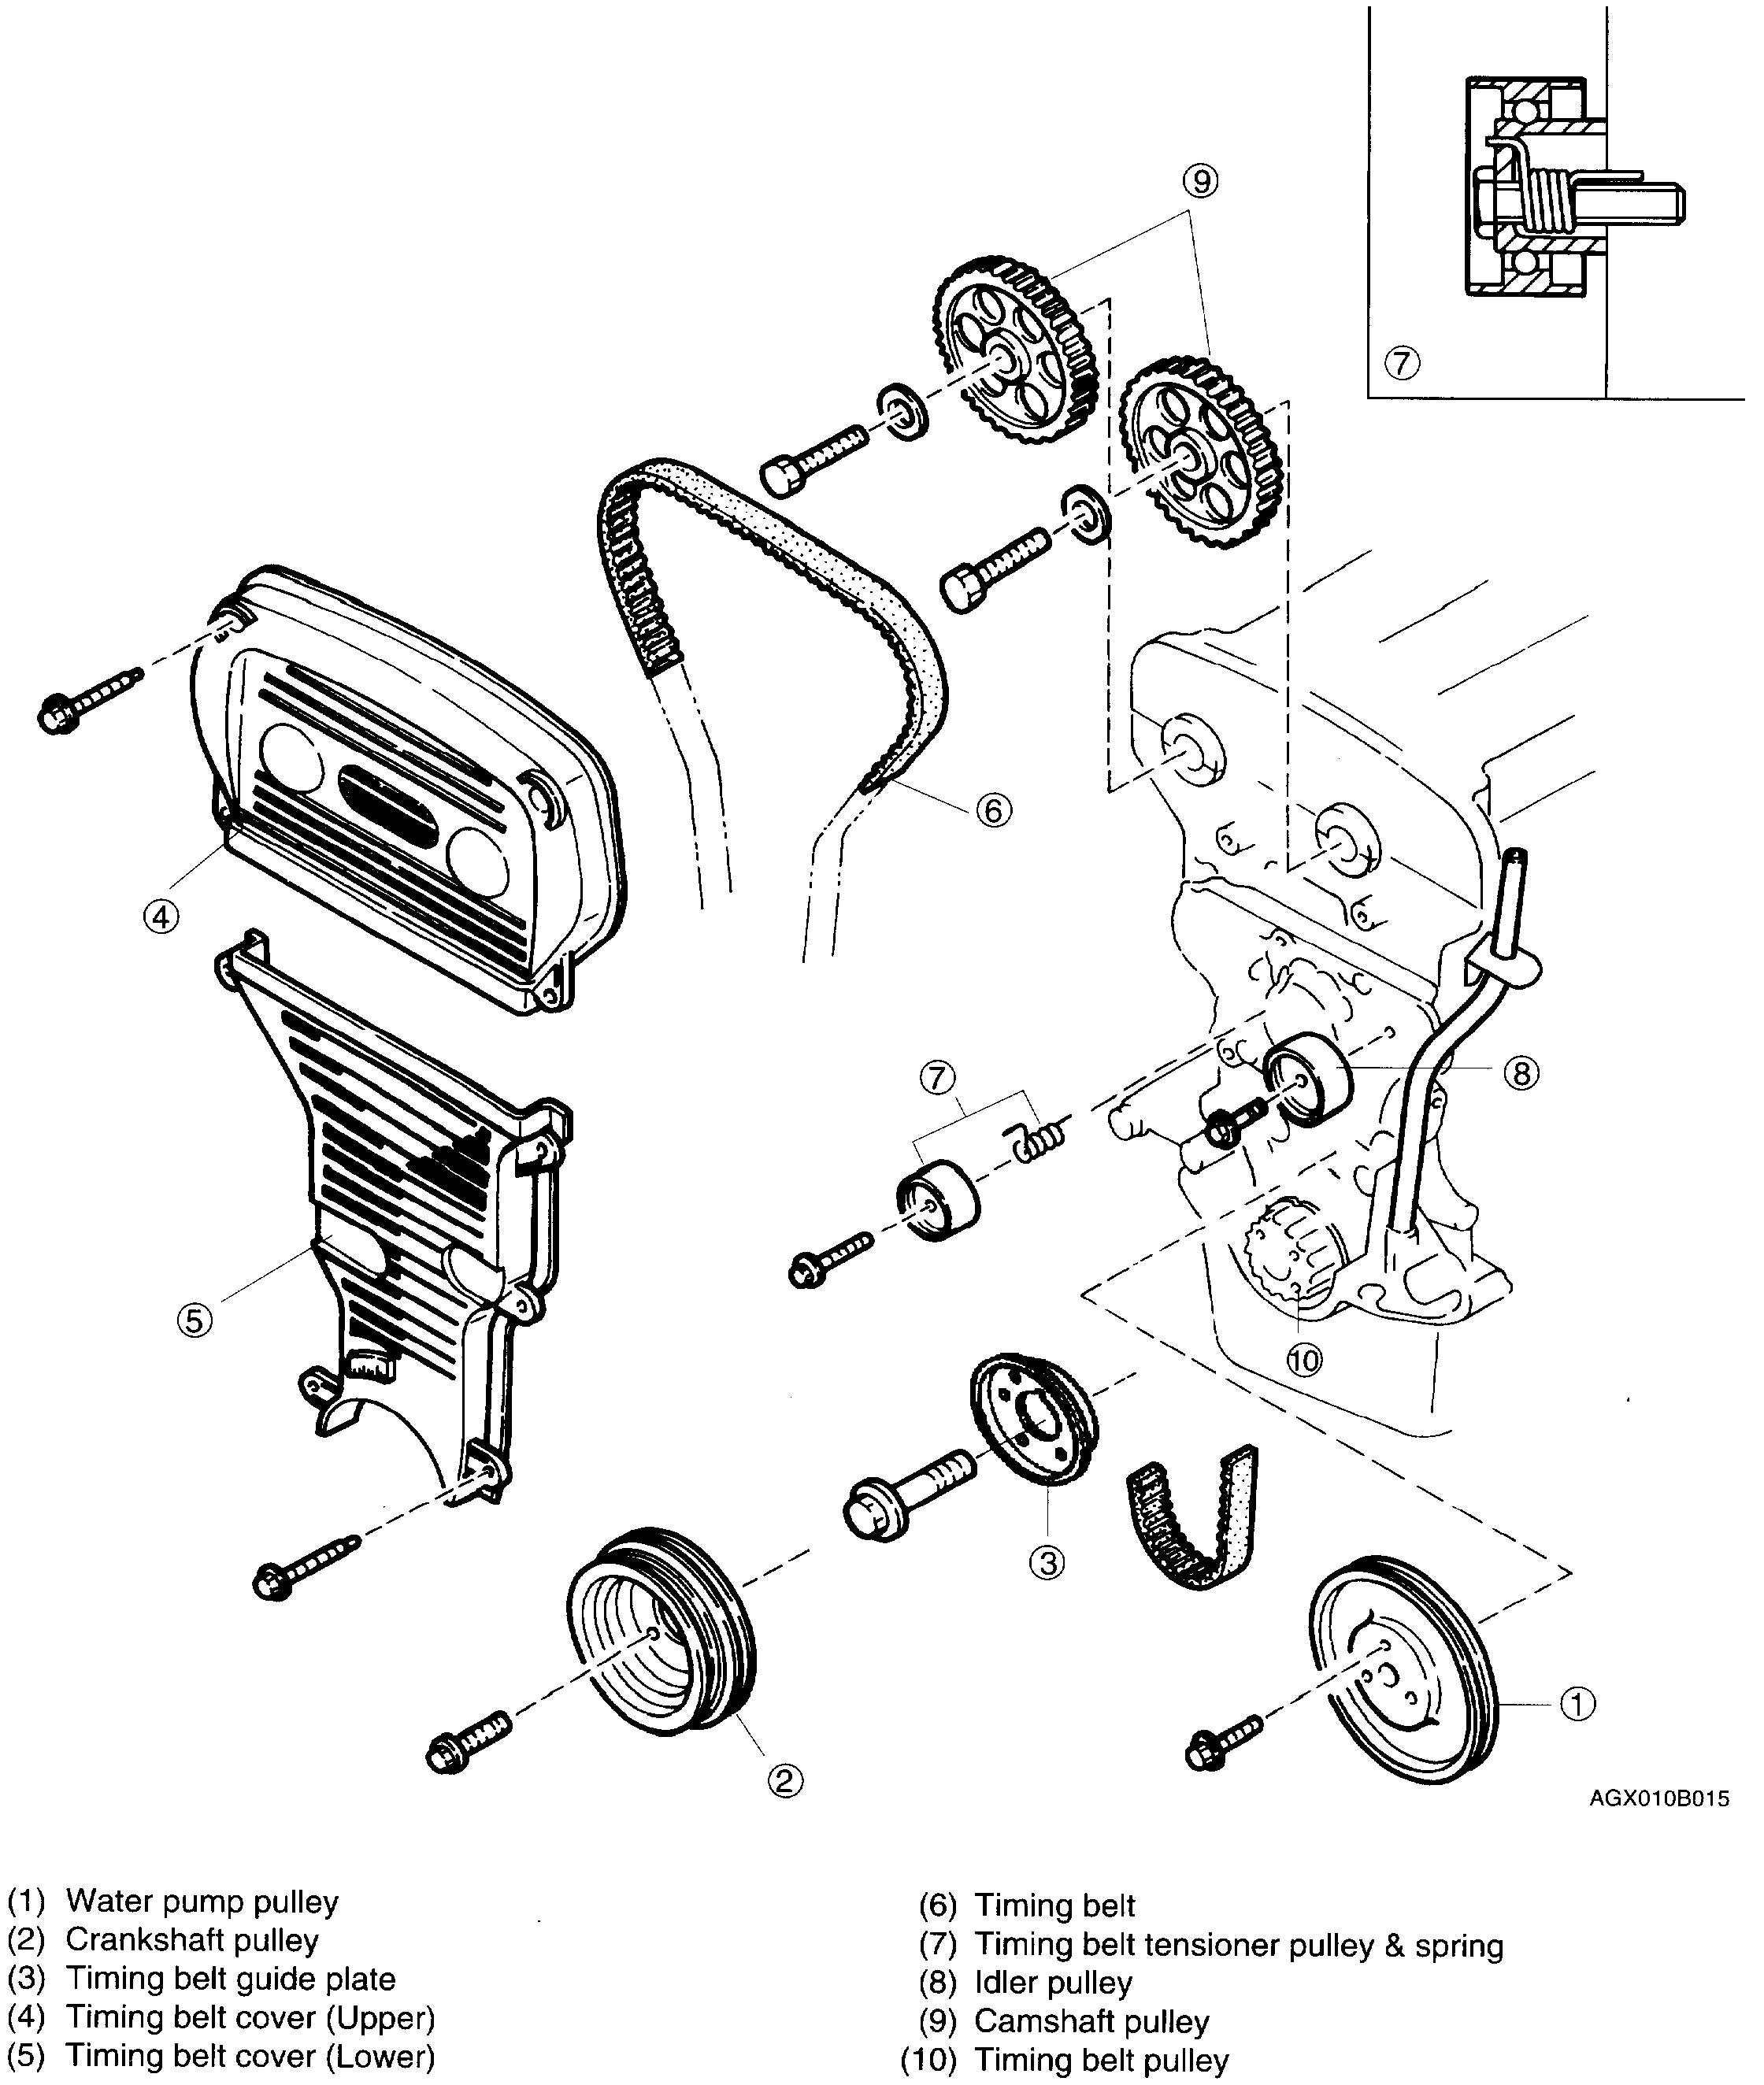
TIMING BELT REMOVAL AND INSTALLATION
pic 1
REMOVAL
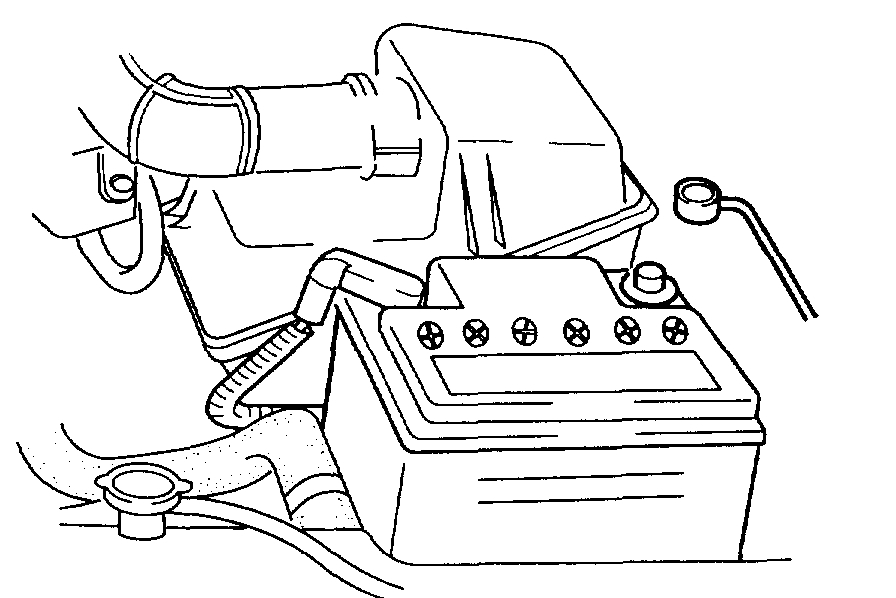
1. Disconnect negative battery cable.
pic 2
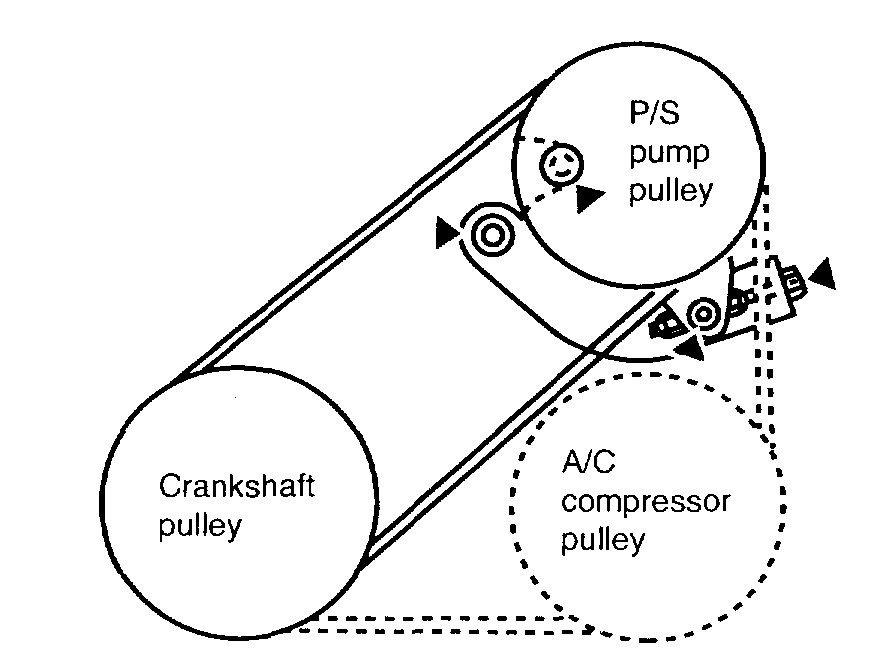
2. Loosen power steering lock bolts and nuts accordingly and remove tension from power steering (P/S) and/or air conditioning (A/C) compressor drive belt.
3. Remove P/S and/or A/C drive belt.
pic 3
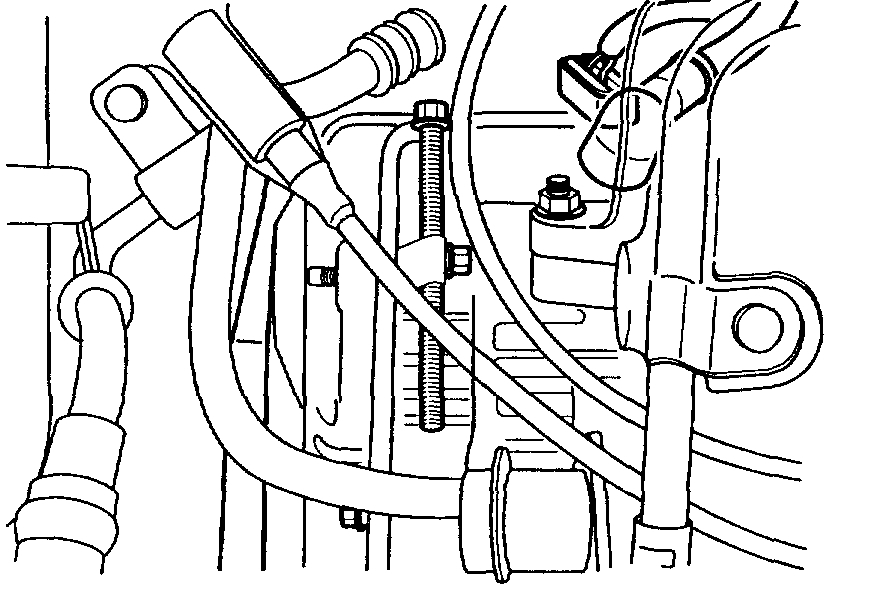
4. Loosen generator mounting bolts and adjusting bolt.
pic 4
5. Remove generator bolts.
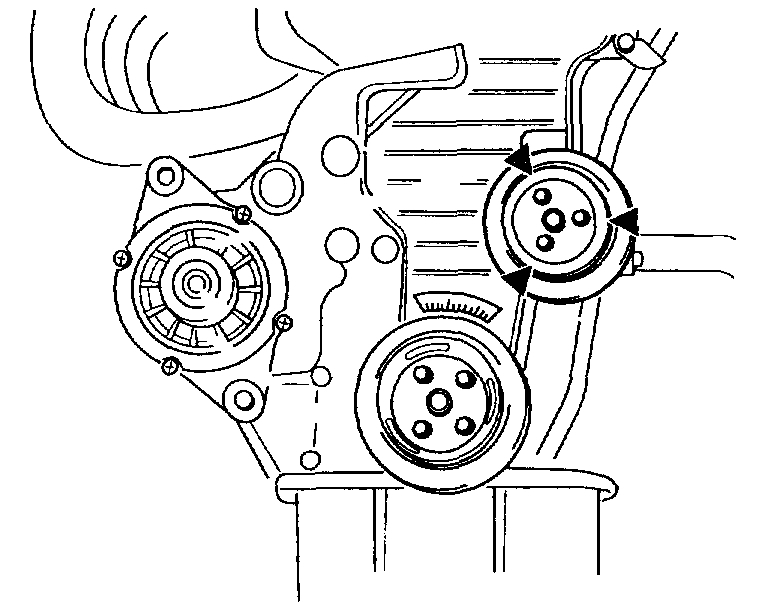
pic 5
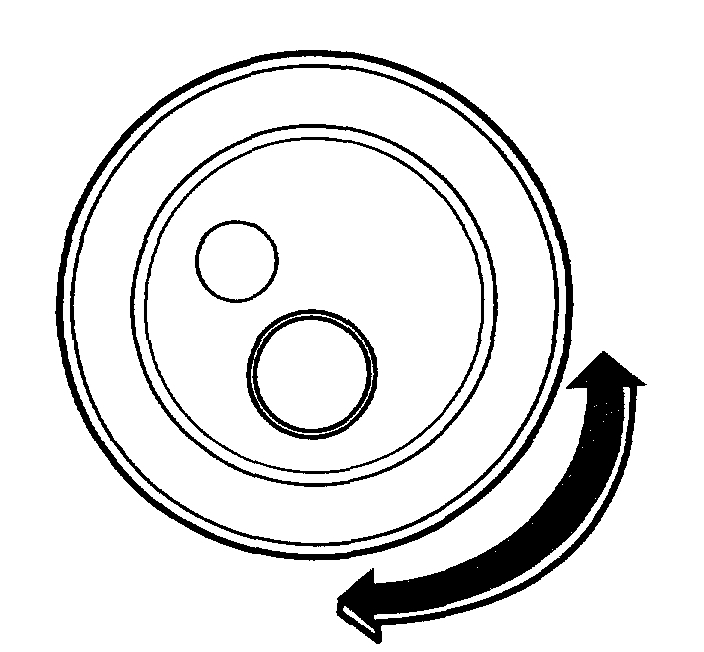
6. Remove water pump pulley.
pic 6
7. Remove crankshaft pulley and timing belt guide plate.
pic 7
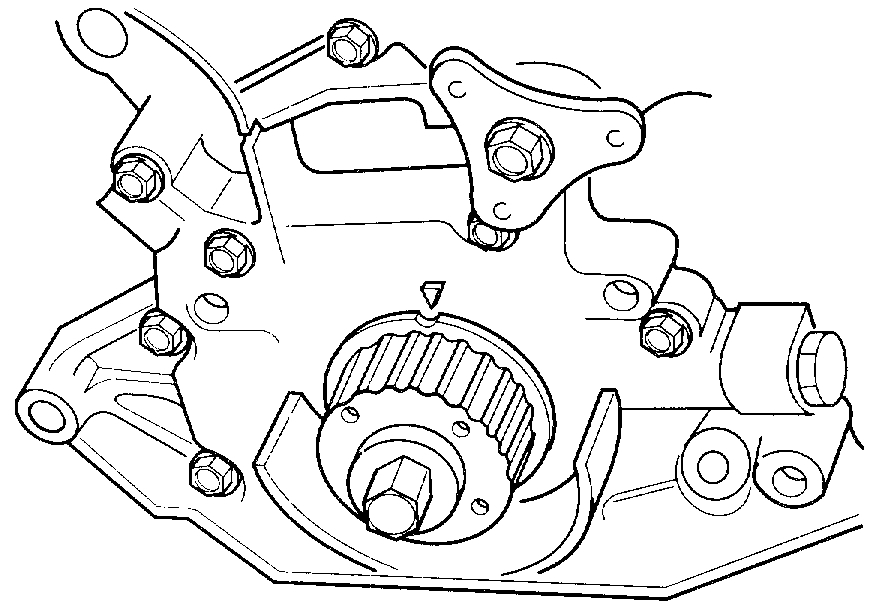
8. Remove upper and lower timing belt covers.
pic 8
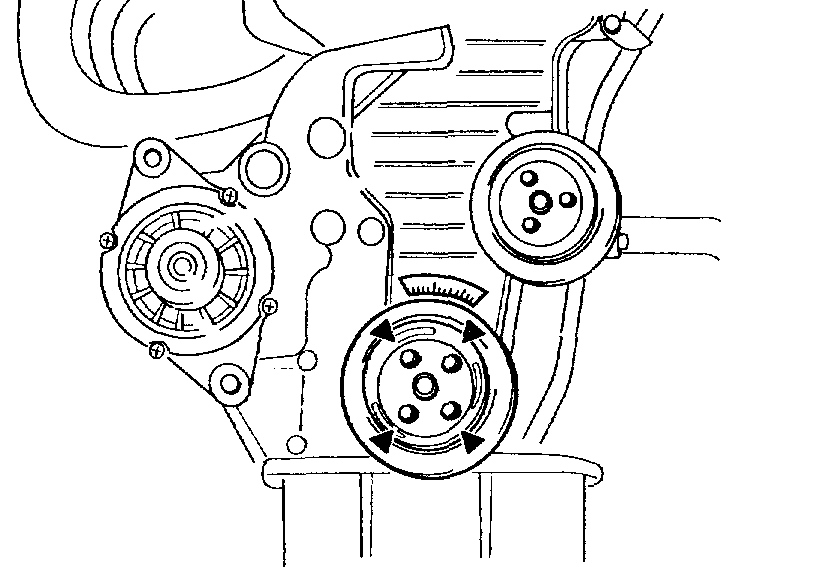
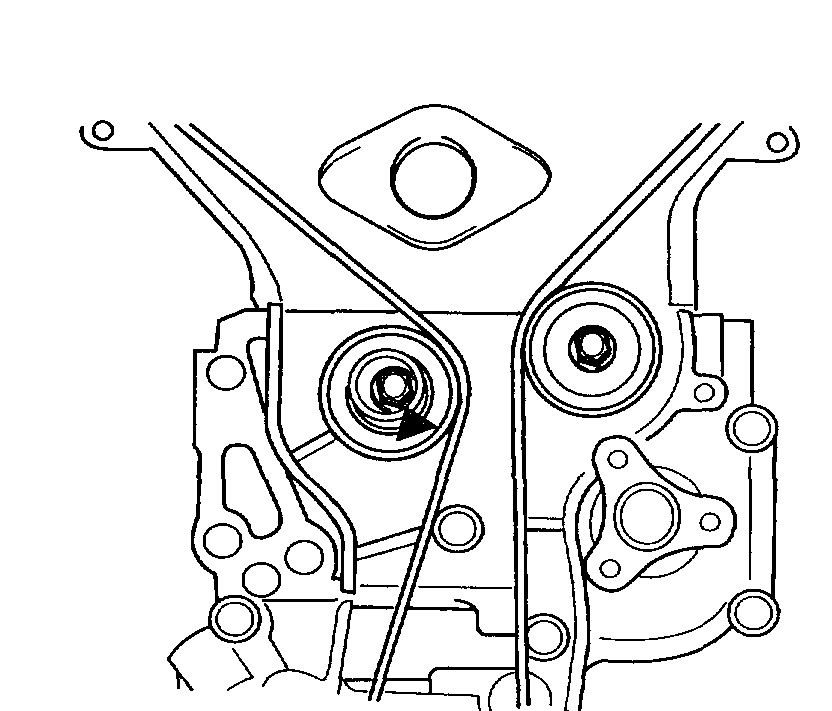
9. Turn crankshaft so that timing mark on timing belt pulley is aligned with timing mark on engine.
pic 9
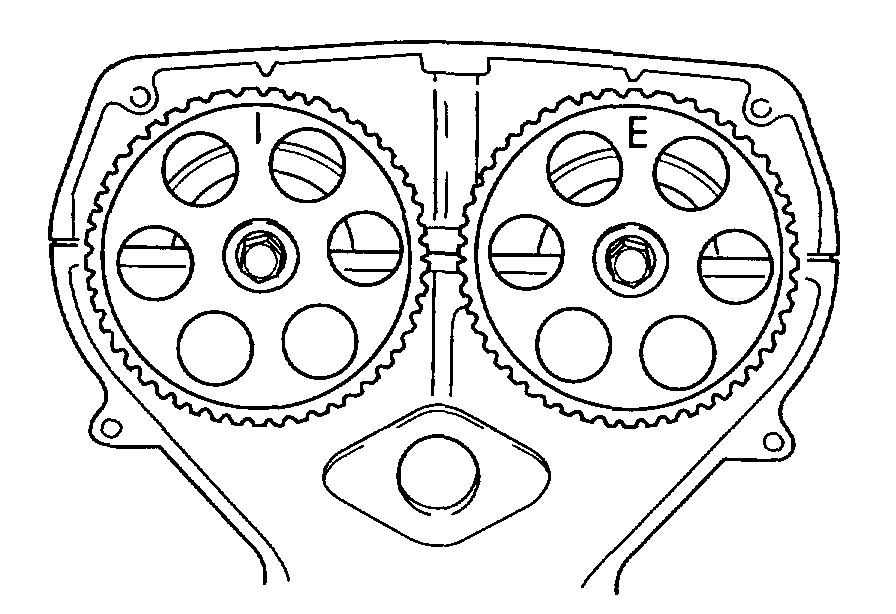
10. Check that "1" mark on intake camshaft pulley is aligned with mark on cylinder head cover and "E" mark on exhaust camshaft pulley is aligned with mark on cylinder head cover.
NOTICE: Do not move camshaft or crankshaft once timing marks have been correctly positioned.
pic 10
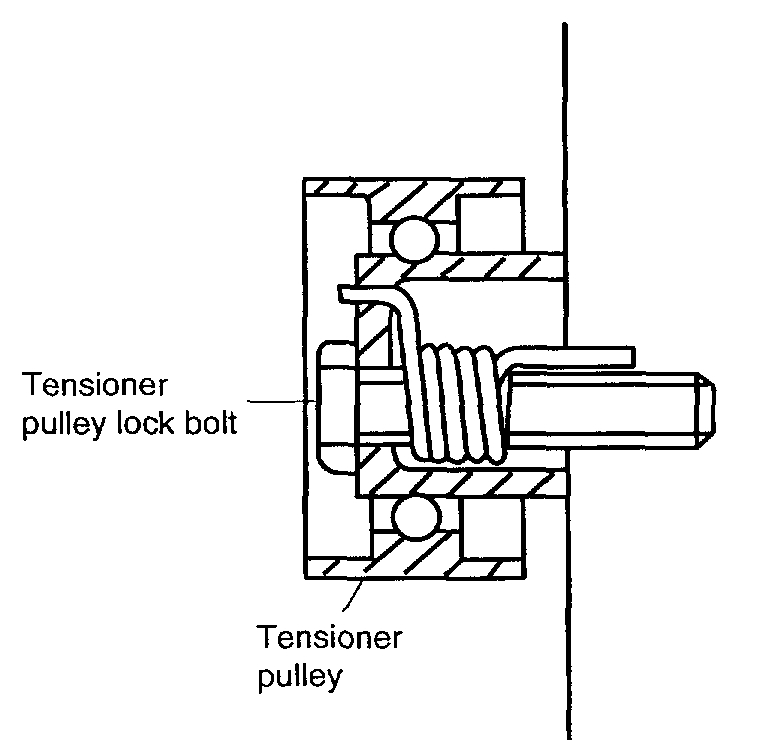
11. Loosen tensioner pulley lock bolt.
12. Protect timing belt with a rag.
13. Remove tensioner pulley.
14. Remove timing belt.
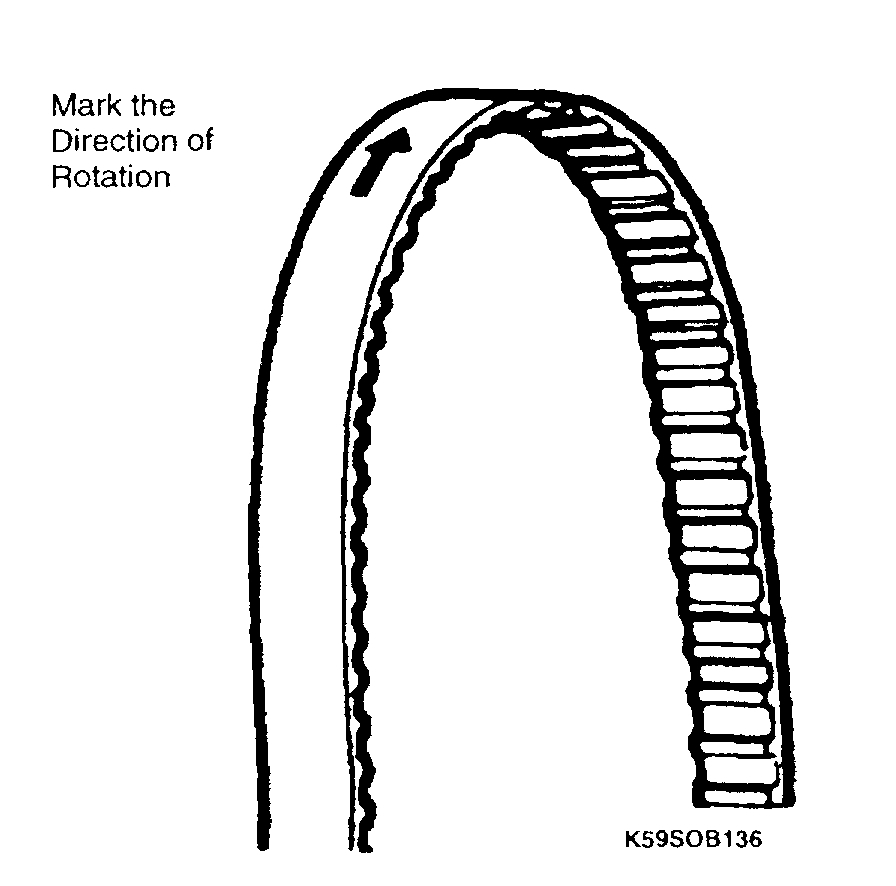
NOTICE: Mark the direction of timing belt rotation (on the timing belt) for proper reinstallation.
INSPECTION
NOTICE: Never forcefully twist, turn inside out or bend timing belt. Do not allow oil or grease to come in contact with timing belt.
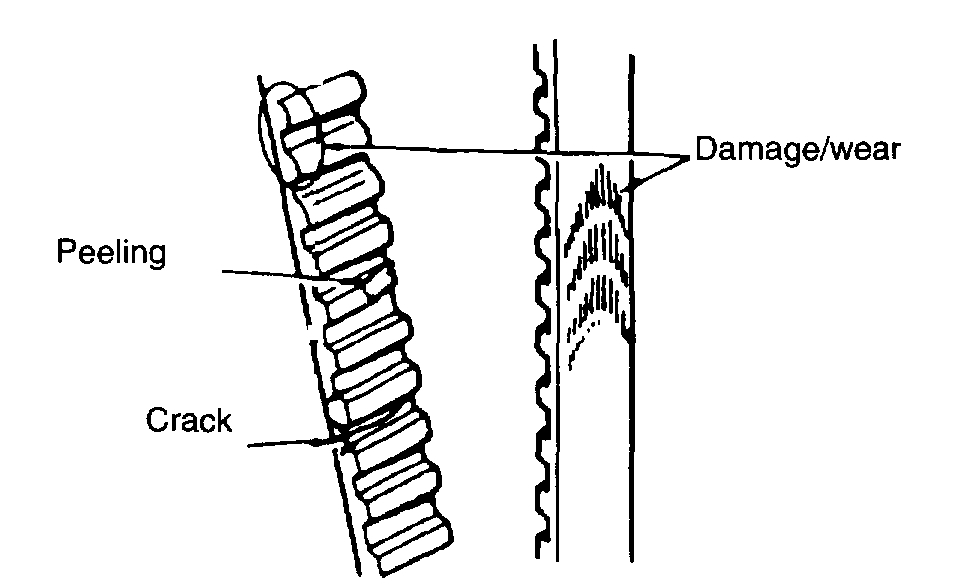
1. Replace timing belt if it is contaminated with oil or grease.
pic 11
2. Check timing belt for uneven wear, fraying, peeling, cracking and hardening. Replace timing belt as necessary.
pic 12
3. Bend timing belt into a "U" shape as shown in figure. Distance A must be at least 1.0 in (25 mm)
pic 13
4. Inspect both idler pulley and tensioner pulley for uneven wear and smooth bearing operation.
pic 14
5. Inspect camshaft pulleys and timing belt pulley for broken teeth or damage.
NOTICE: Replace any component that shows damage, excessive wear, or that appears prone to a possible failure.
INSTALLATION
pic 15
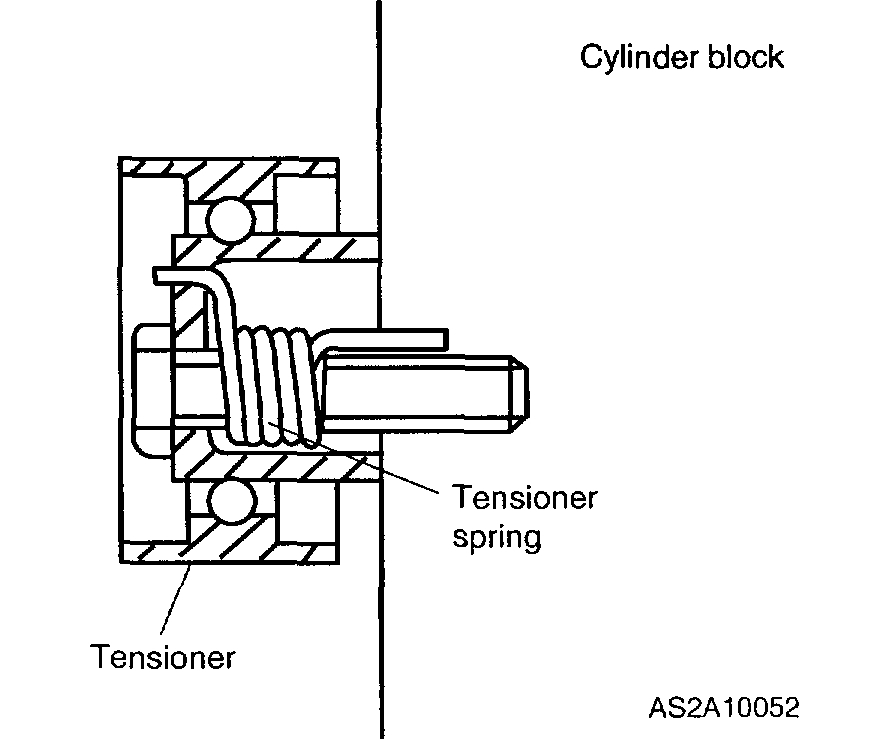
1. Install tensioner pulley.
NOTICE: Replace tensioner spring whenever timing belt is replaced.
2. Pull tensioner pulley to its furthest point and tighten lock bolt.
pic 16
3. Check that timing mark on timing belt pulley is aligned with timing mark on engine.
pic 17
4. Check that "I" mark on intake camshaft pulley is aligned with mark on cylinder head cover and "E" mark on exhaust camshaft pulley is aligned with mark on cylinder head cover.
pic 18
NOTICE: If existing timing belt is being reused, install belt in proper rotation direction marked prior to removal.
5. Install timing belt onto timing belt pulley first, then idler pulley, exhaust camshaft pulley, intake camshaft pulley, and tensioner pulley in that order.
pic 19
6. Check that there is no looseness in belt between idler pulley and exhaust camshaft pulley or between intake and exhaust camshaft pulleys.
7. Loosen tensioner pulley lock bolt and allow tensioner spring to apply tension to timing belt.
NOTICE: Do not add additional tension.
pic 20
8. Tighten tensioner pulley lock bolt to specified torque.
Tightening torque: 28 - 38 ft. lbs. (38 - 51 Nm, 3.9 - 5.2 kg-m)
pic 21
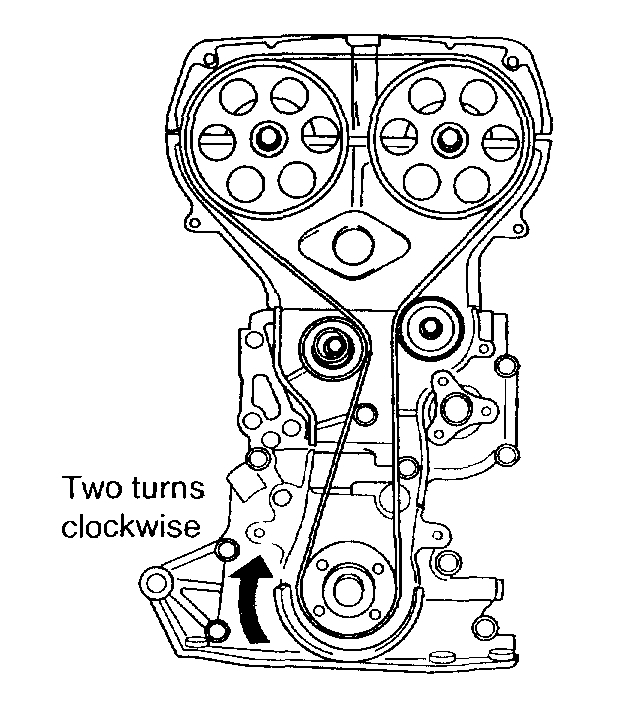
9. Rotate crankshaft two full revolutions (clockwise only) and align timing mark on timing belt pulley with timing mark on engine block.
pic 22
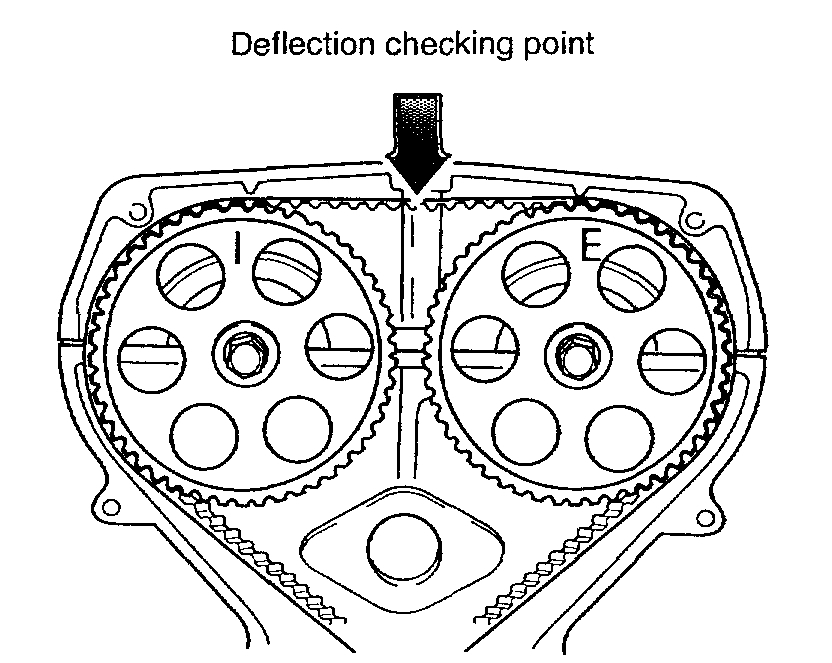
10. Check that "I" mark on intake camshaft pulley "E" mark on exhaust camshaft pulley are aligned with marks on cylinder head cover.
11. If they are not aligned, remove timing belt and start process from tensioner installation.
pic 23
12. Measure timing belt deflection by applying moderate pressure midway between camshaft pulleys. If deflection is not correct, repeat from tensioner installation.
Deflection pressure: 22 lbs. (98 N. 10 kg)
Deflection: 0.36 - 0.45 (9.0 - 11.0 mm)
pic 24
13. Install lower and upper timing belt covers in that order.
Tightening torque: 70 - 96 in. lbs. (7.9 - 10.7 Nm, 0.8 - 1.1 kg-m)
pic 25
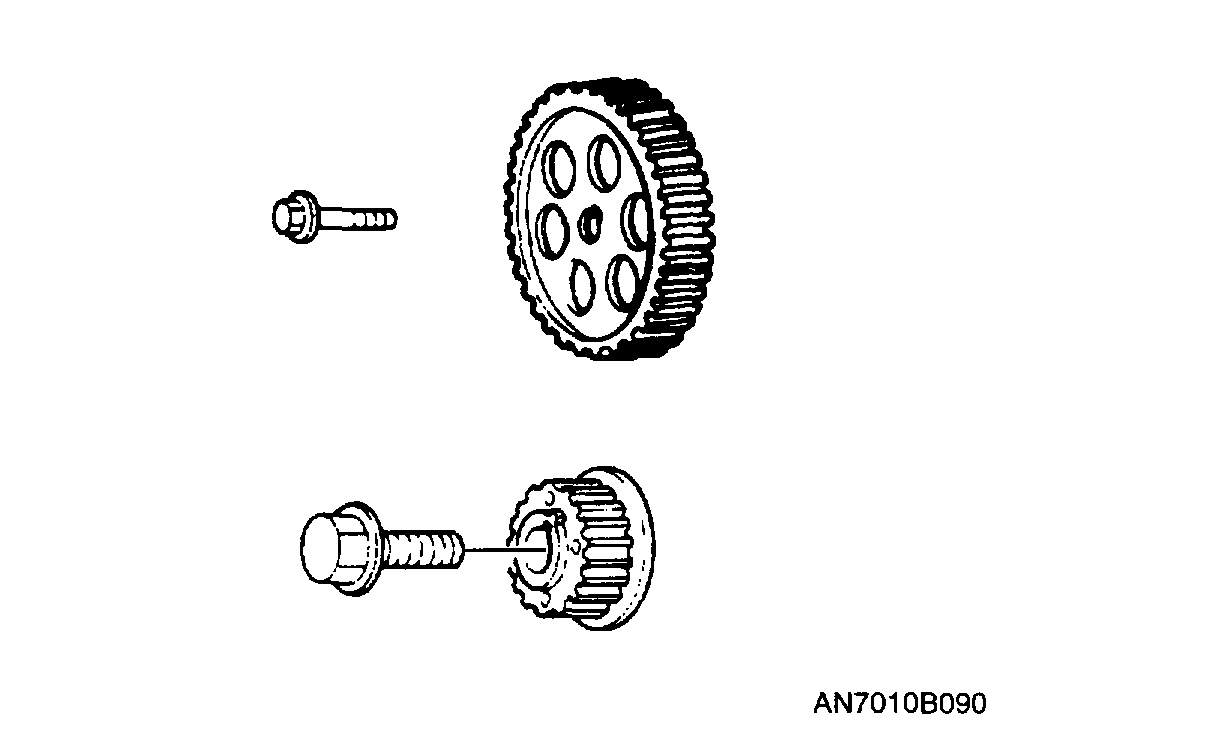
14. Install timing belt guide plate and crankshaft pulley.
Tightening torque: 9.0 - 12.6 ft. lbs. (12.3 - 17.2 Nm, 1.3 - 1.8 kg-m)
pic 26
15. Install water pump pulley.
Tightening torque: 9.0 - 12.6 ft. lbs. (12.3 - 17.2 Nm, 1.3 - 1.8 kg-m)
16. Install generator belt and adjust the tension.
17. Install P/S and/or A/C drive belt and adjust the tension.
pic 27
18. Connect negative battery cable.
__________________________________
I hope this helps. Please feel free to let me know if you have other questions.
Take care,
Joe
Images (Click to enlarge)
Mar 5, 2020 at 3:30 PM