Welcome back:
There is a hydraulic adjuster that can be adjusted on the lifters. Here are the directions:
REMOVAL
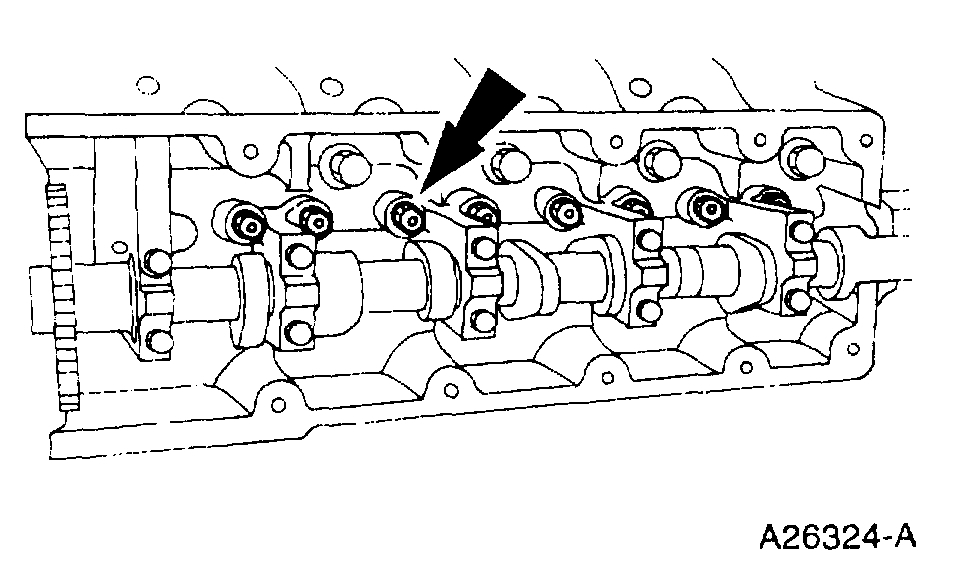
1. Remove the camshaft roller followers.
2. Remove the hydraulic lash adjusters (HLA).
INSTALLATION
1. Install the hydraulic lash adjusters.
2. Install the camshaft roller followers.
________________________
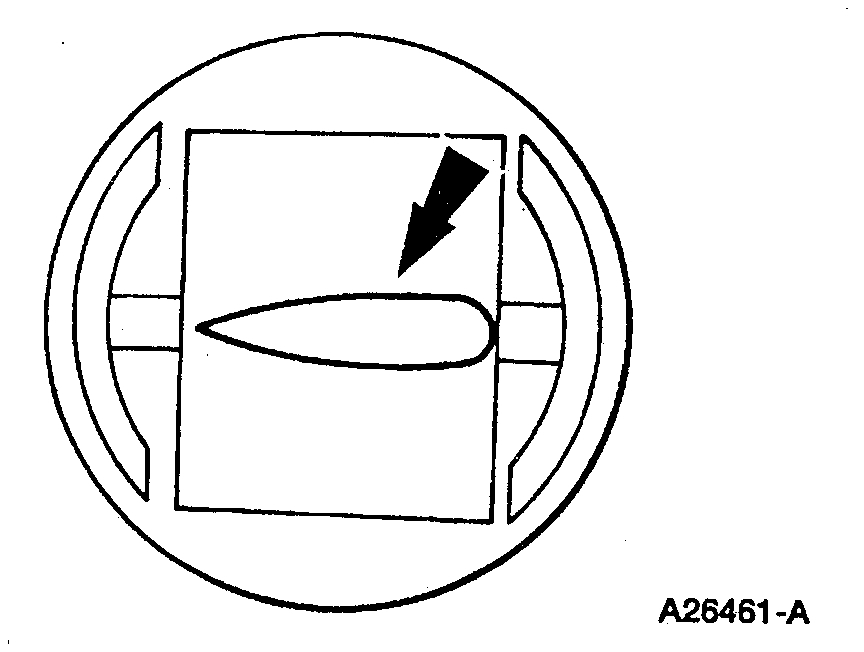
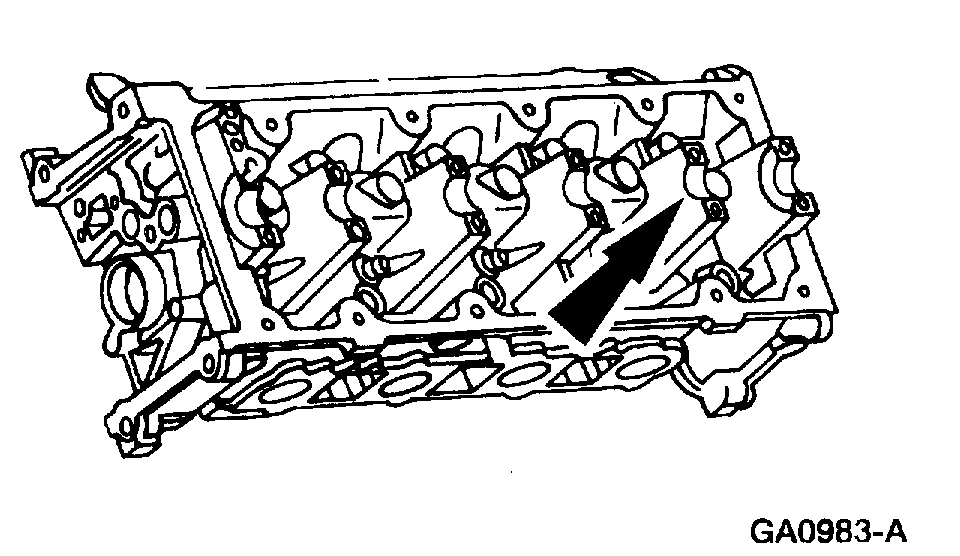
Also, you can inspect the rollers under the cam for flat spots. See picture 2
_______________________
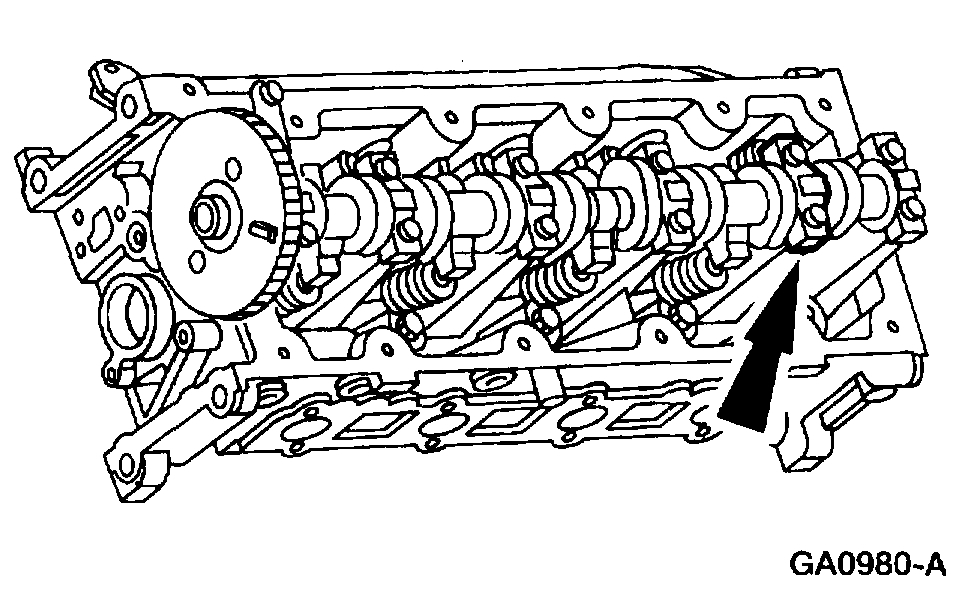
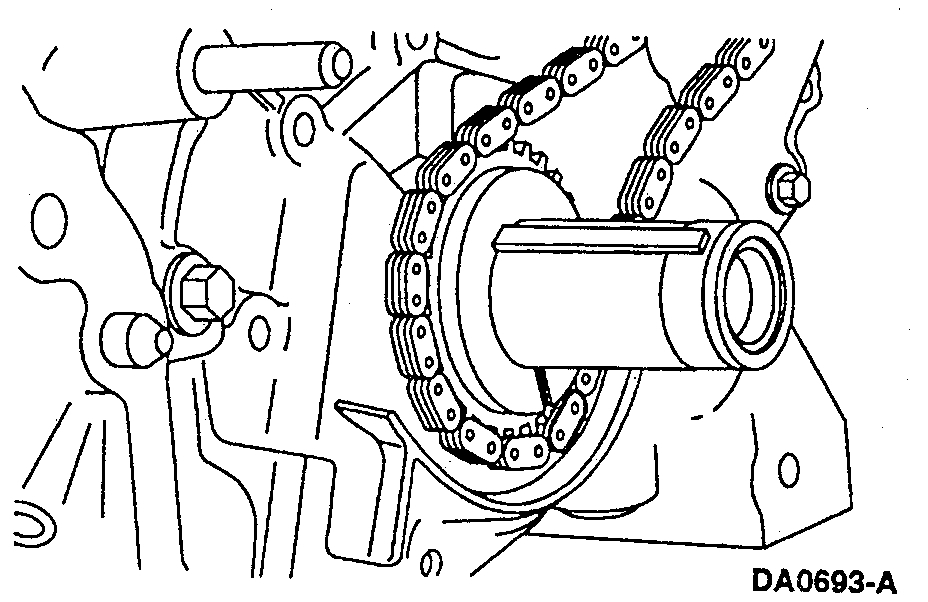
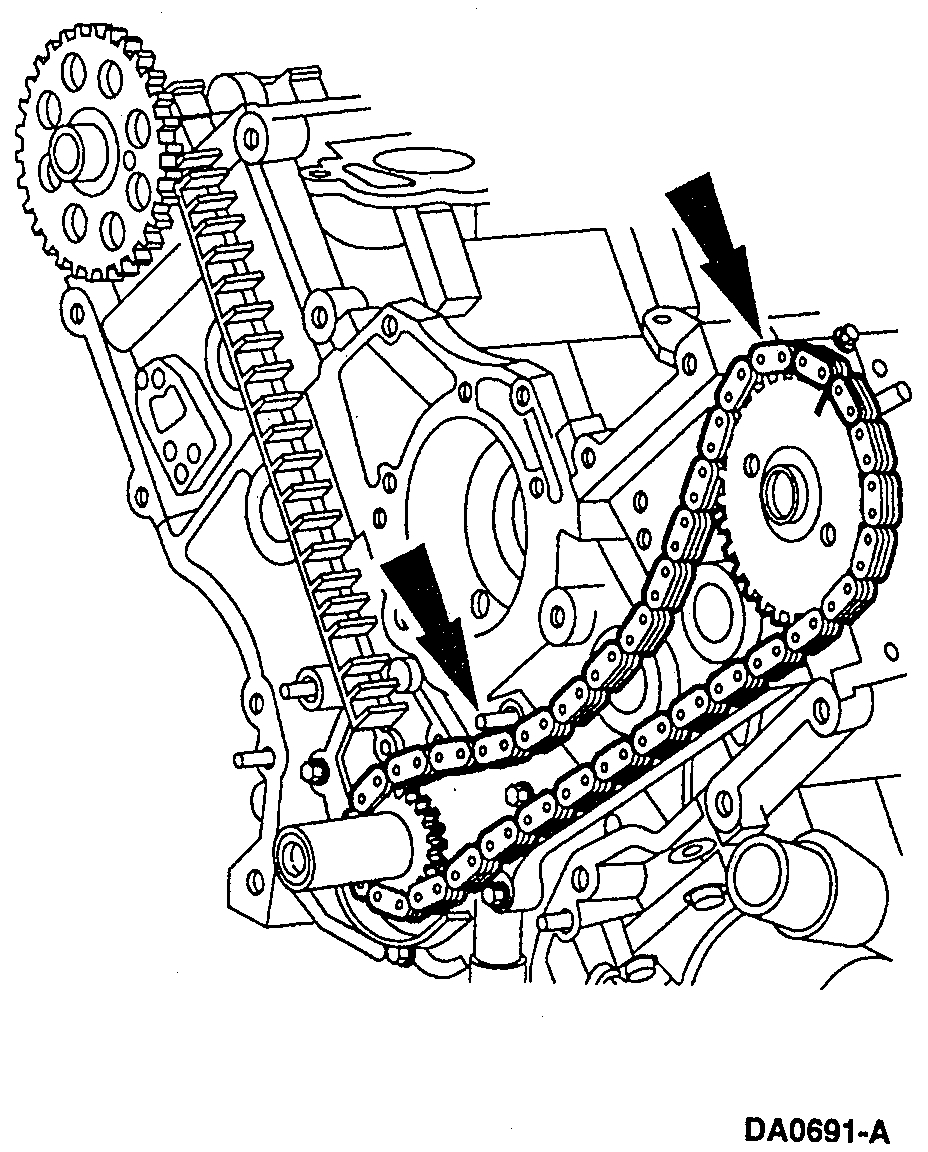
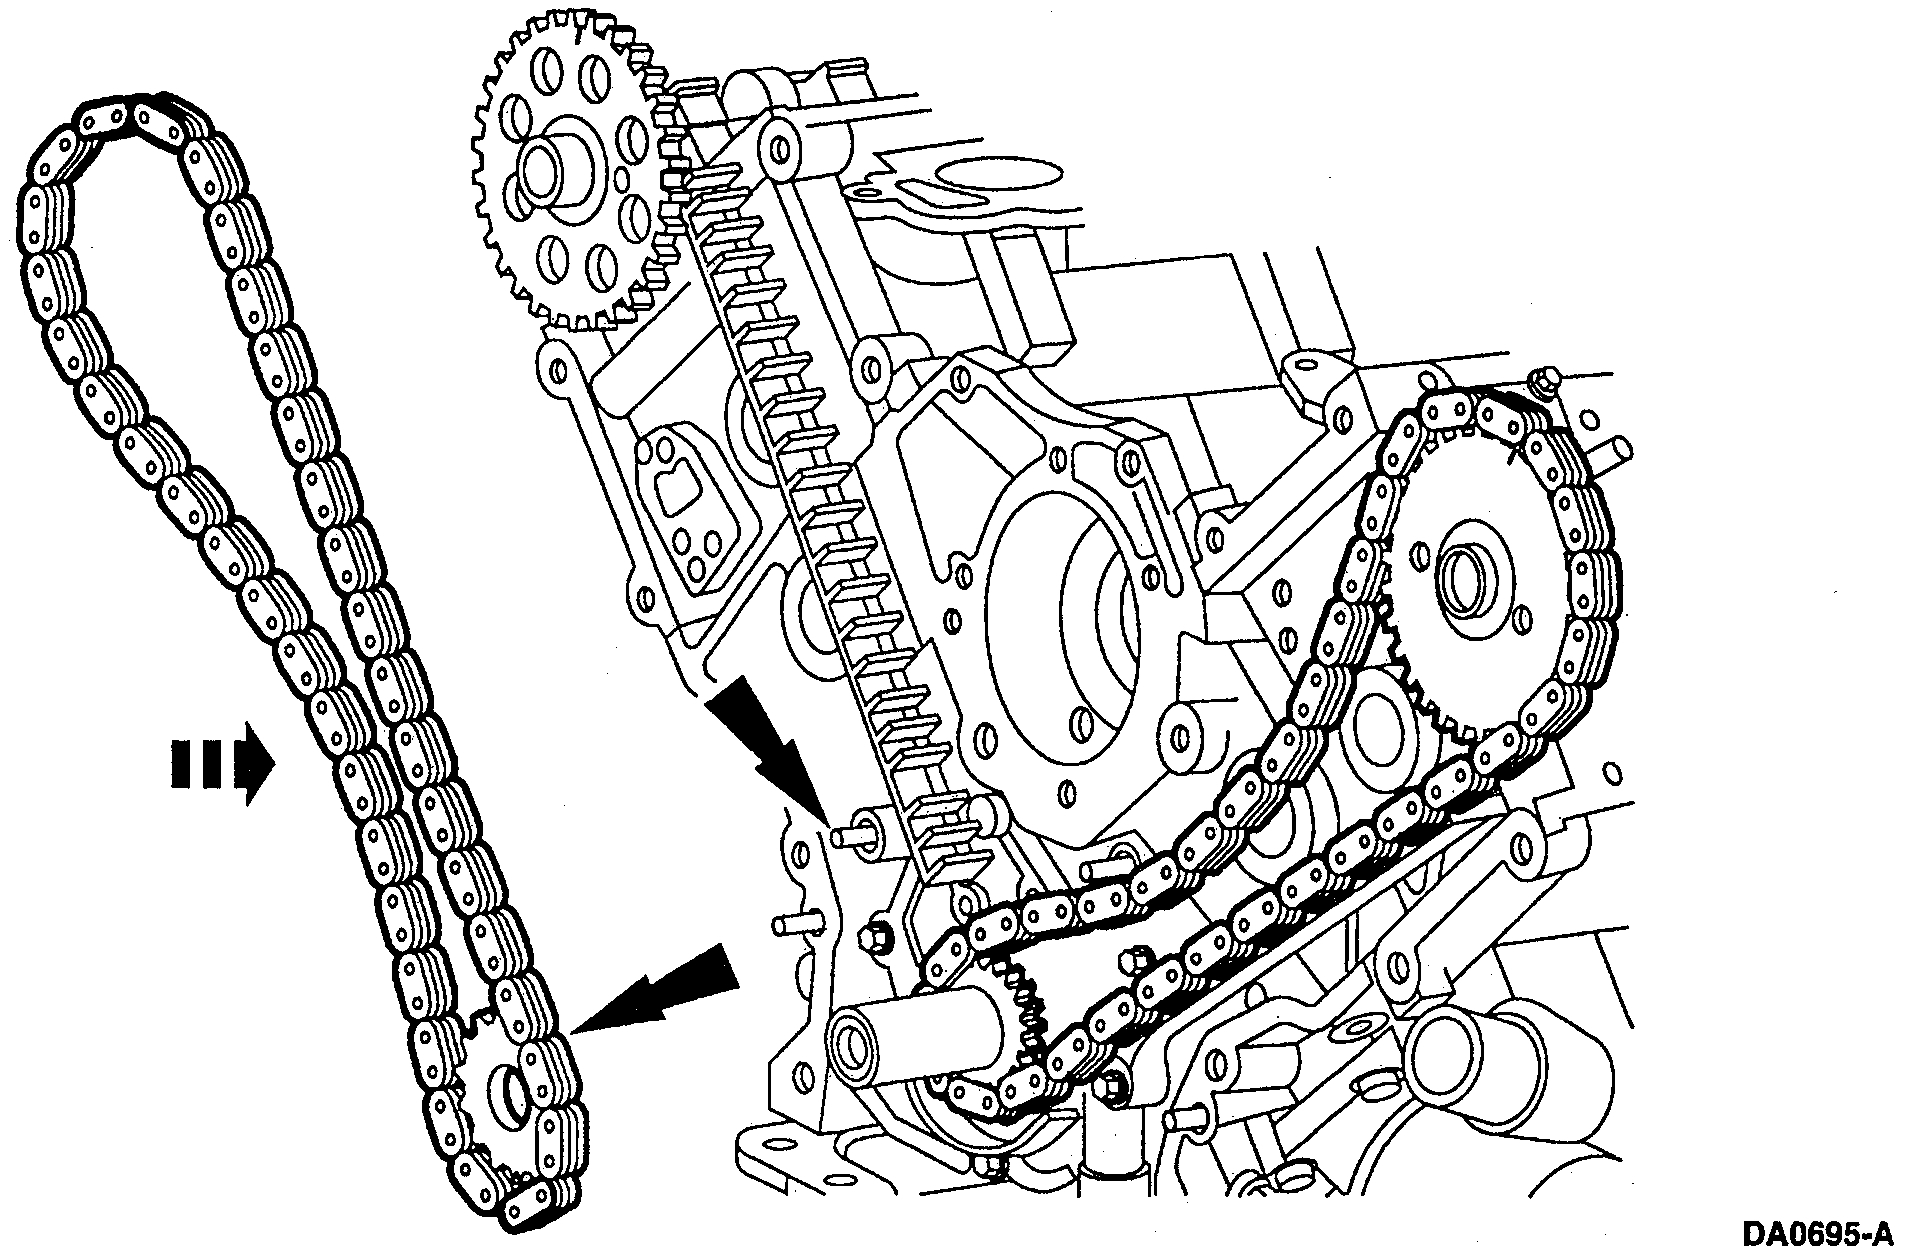
Now to check or replace parts, you really need to determine if the problem is a cam roller or the cam itself. Here are directions for replacing the cam. It requires removal of the timing chain which I will add after these directions. Pictures 3 - 10 correlate with these directions.
______________________
CAUTION: Do not remove the camshaft before the roller followers. The cam will bend and be damaged from side loading. At no time, when the timing chains are removed and the cylinder heads are installed may the crankshaft or camshaft be rotated. Severe piston and valve damage will occur.
REMOVAL
1. Remove the cam cover.
2. Remove the timing chains.
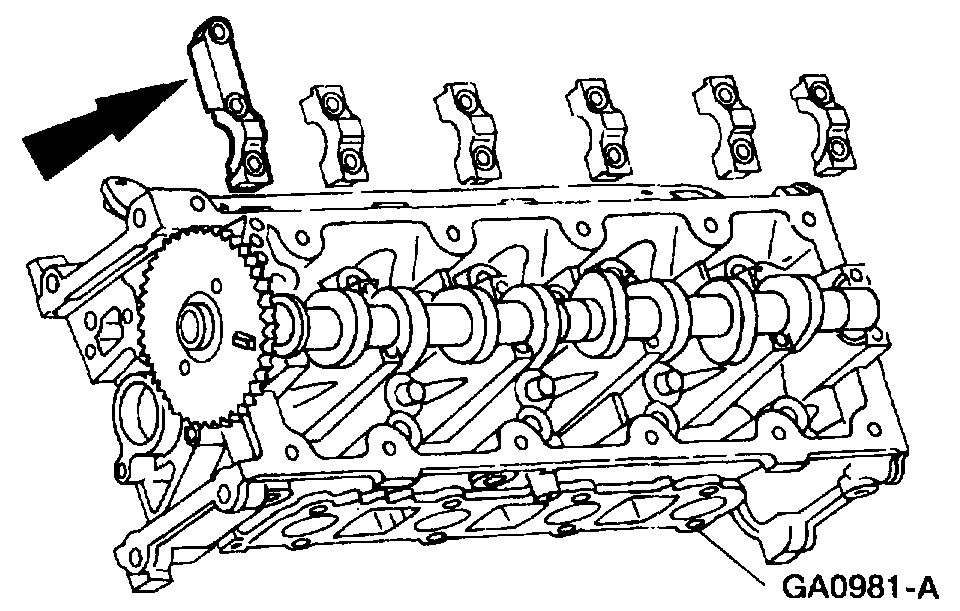
3. Remove the camshaft roller followers.
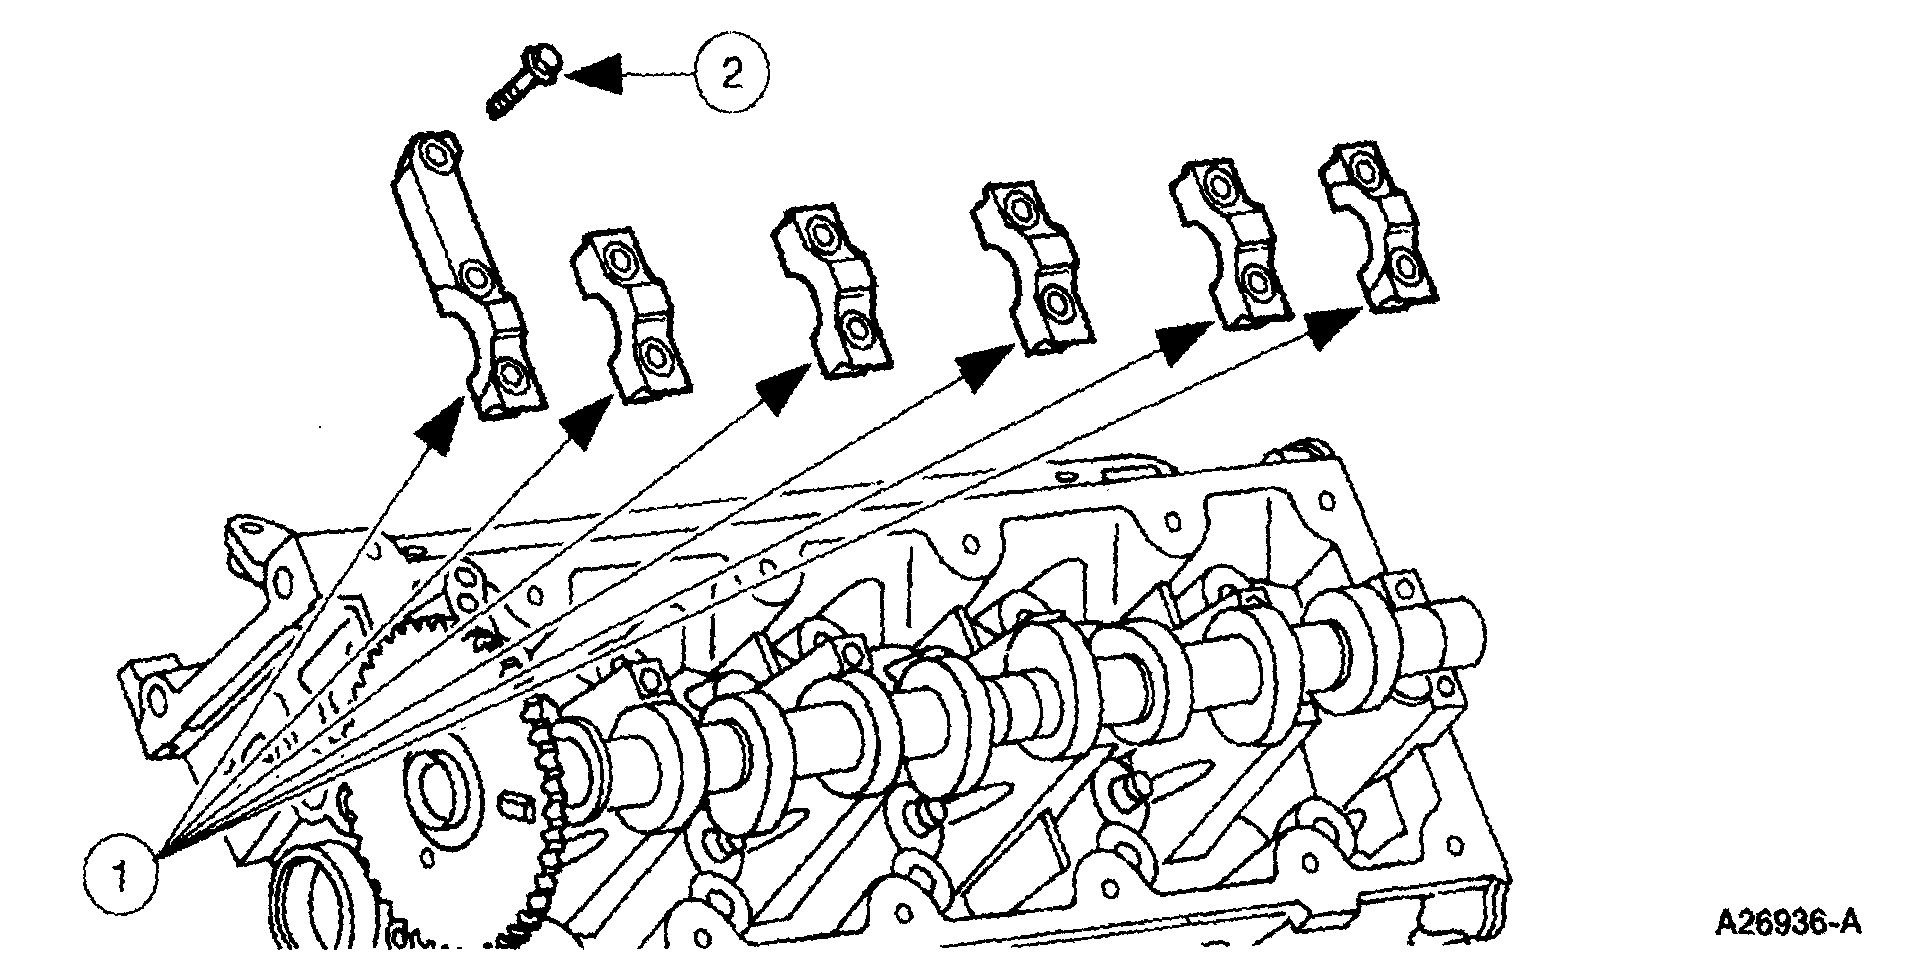
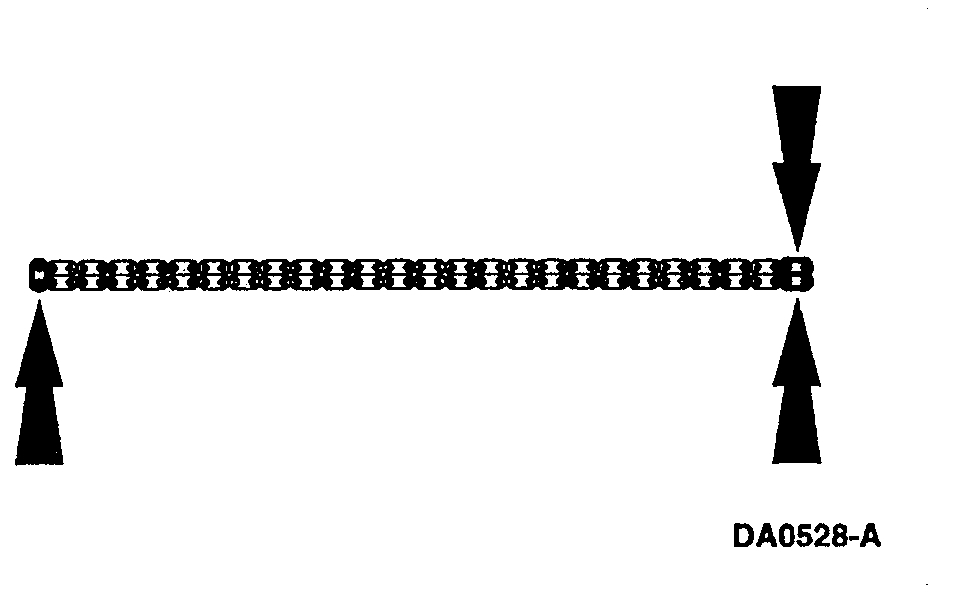
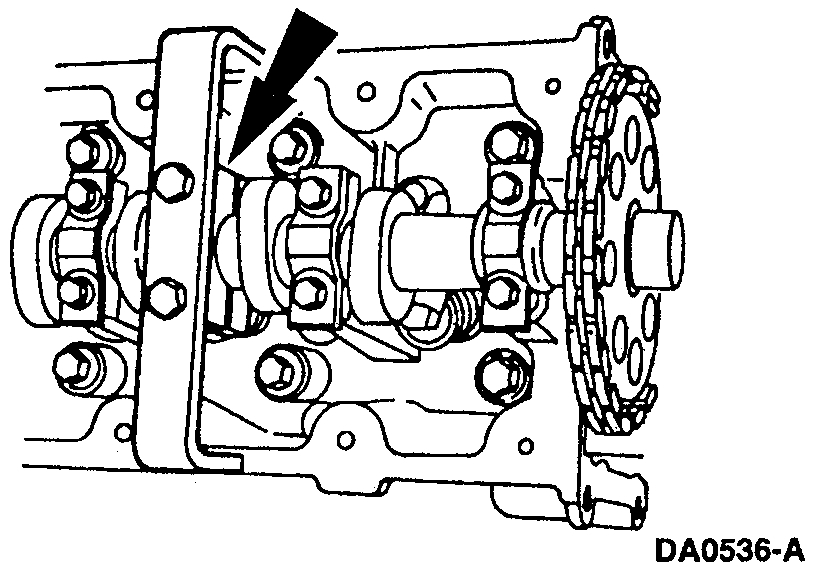
4. Remove the thirteen camshaft bearing cap bolts.
5. Remove the camshaft bearing caps.
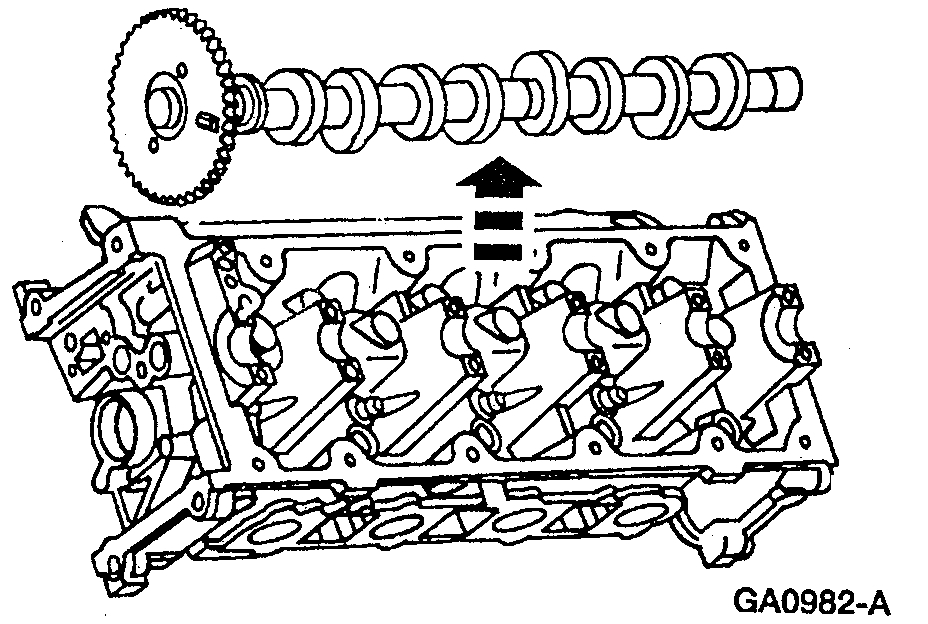
6. Remove the camshaft from the cylinder head.
INSTALLATION
1. Lubricate the camshaft journals.
^ Use SAE 5OW motor oil or equivalent meeting Ford specification WSE-M2C908-A1.
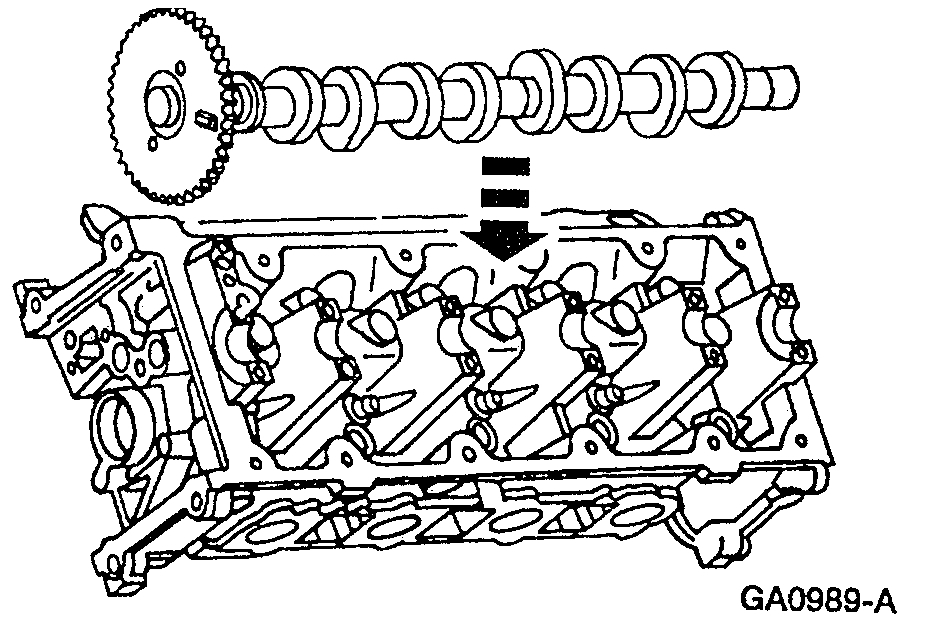
2. Install the camshaft onto the cylinder head.
3. Lubricate the camshaft bearing caps.
^ Use SAE 5OW motor oil or equivalent meeting Ford specification WSE-M2C908-A1.
4. Install the camshaft bearing caps.
1. Position the camshaft bearing caps.
2. Loosely install the camshaft bearing cap bolts.
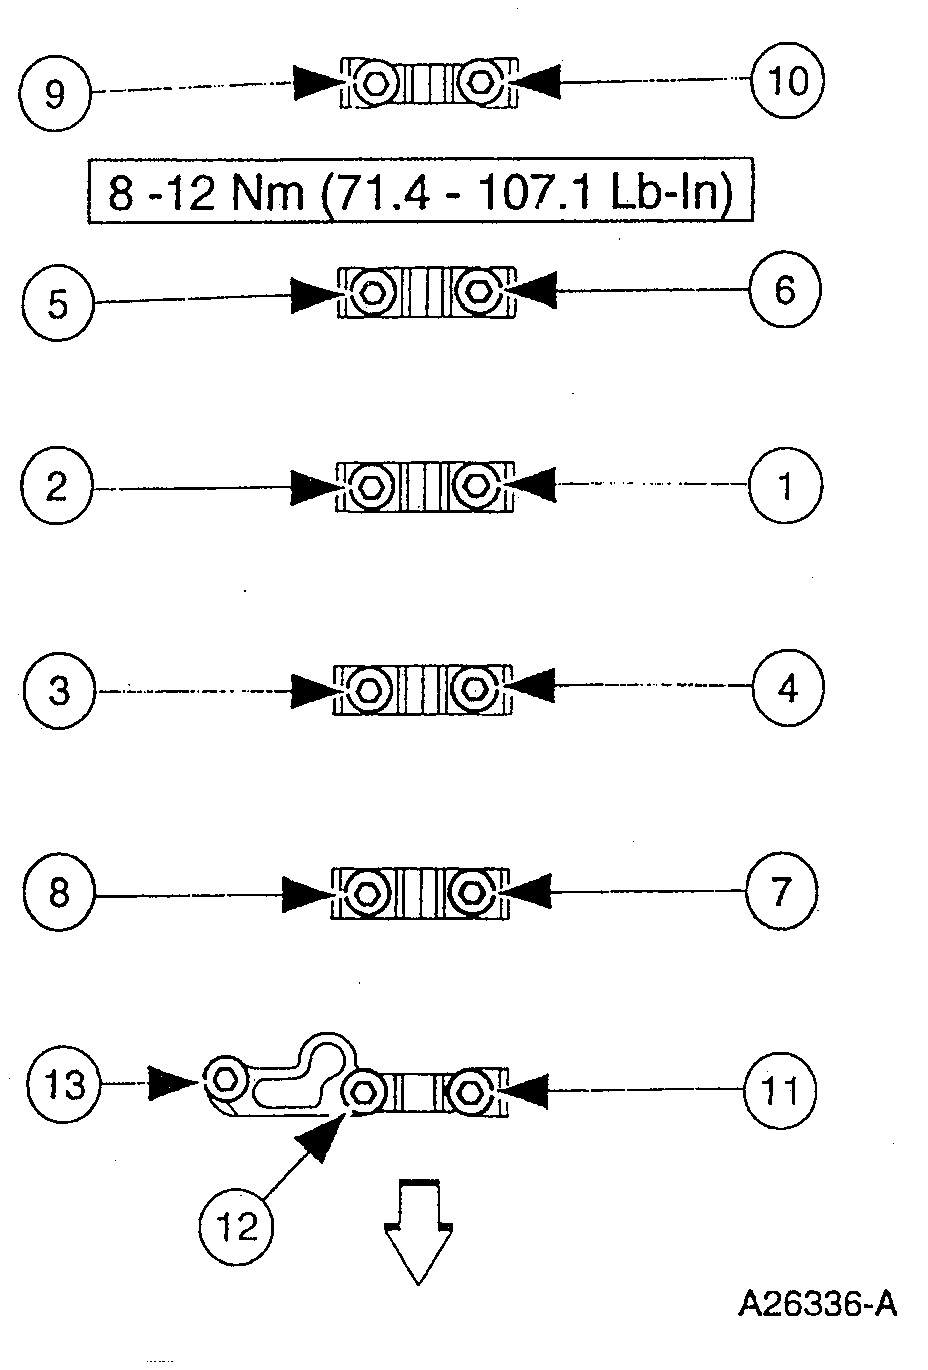
5. Tighten the camshaft bearing cap bolts in the sequence shown.
6. Install the camshaft roller followers.
7. Install the timing chain.
8. Install the cam cover.
___________________________________
Removal
REMOVAL
NOTE: Ford does not provide a procedure to align the timing components without the OE tools specified.
1. Remove the engine front cover.
NOTE: Do not turn the crankshaft until instructed to do so.
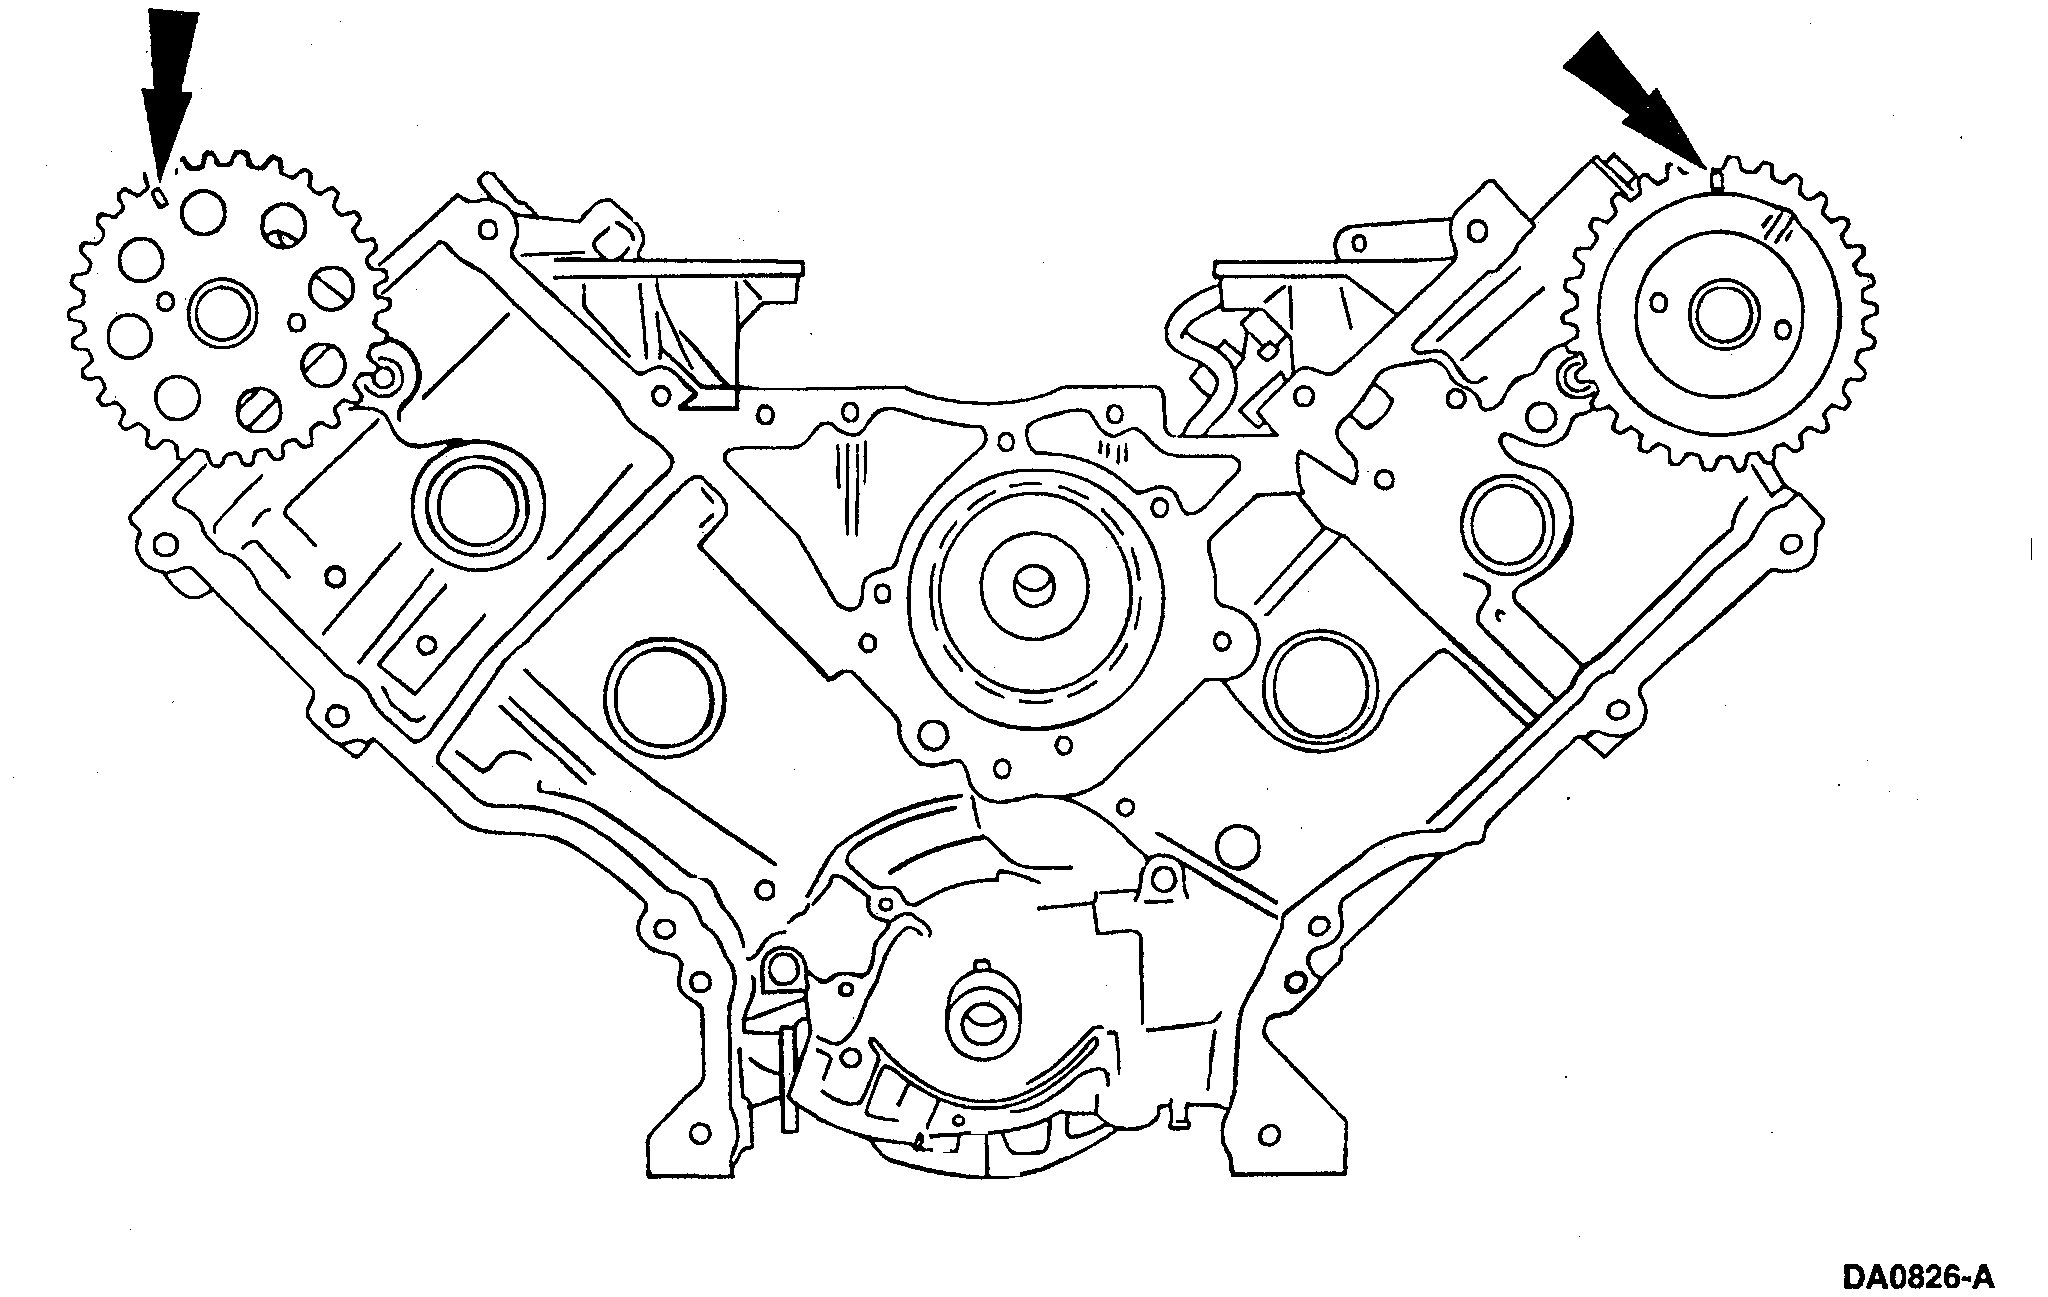
2. Remove the (A) crankshaft sensor ring from the (B) crankshaft.
3. Rotate crankshaft until the crankshaft keyway points toward the top of the engine (12 o'clock).
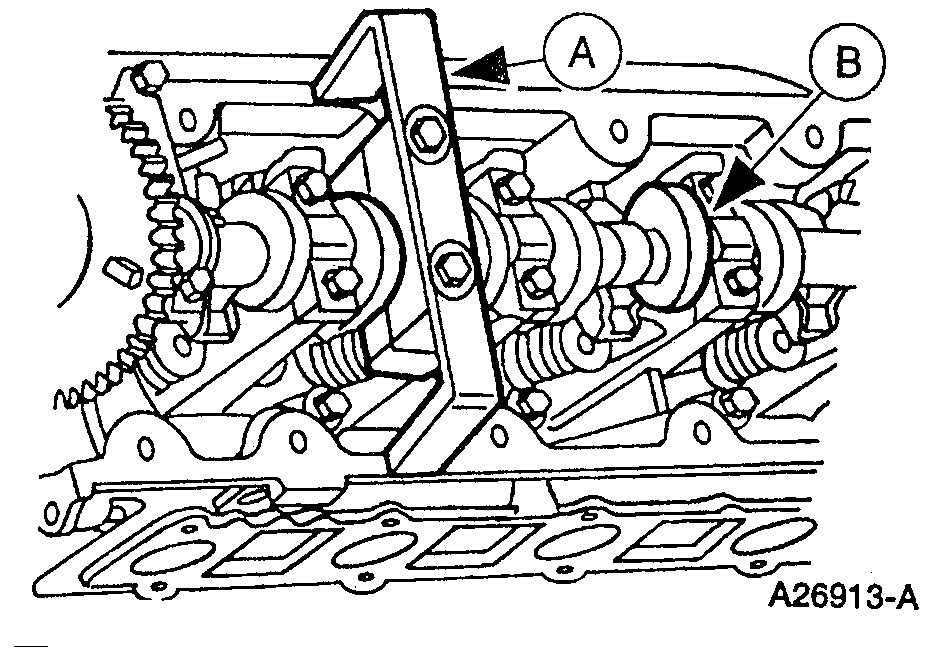
4. Install the (A) Camshaft Holding Tools on the (B) LH and RH camshafts.
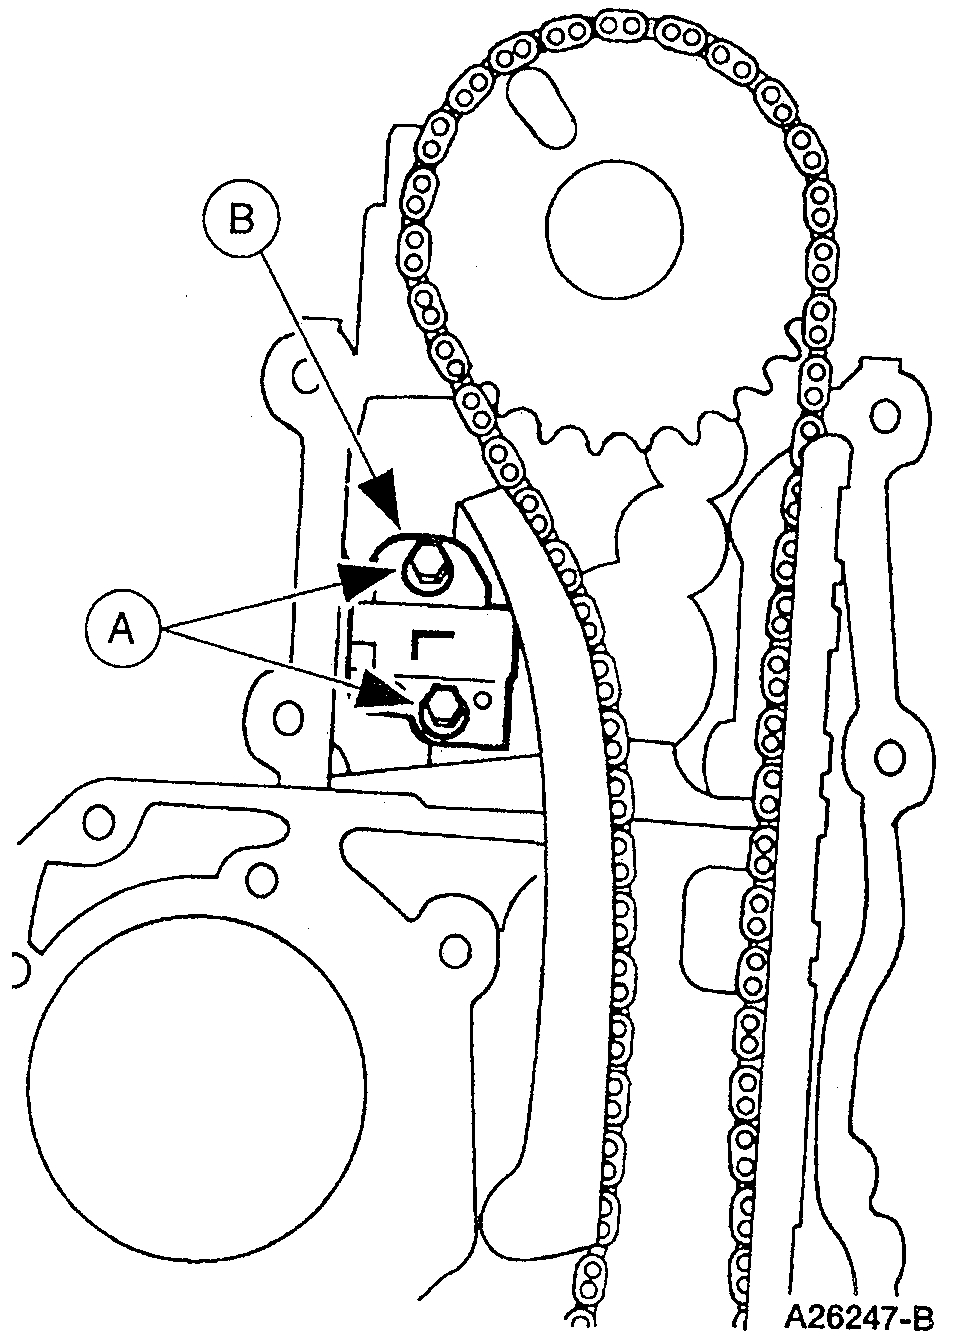
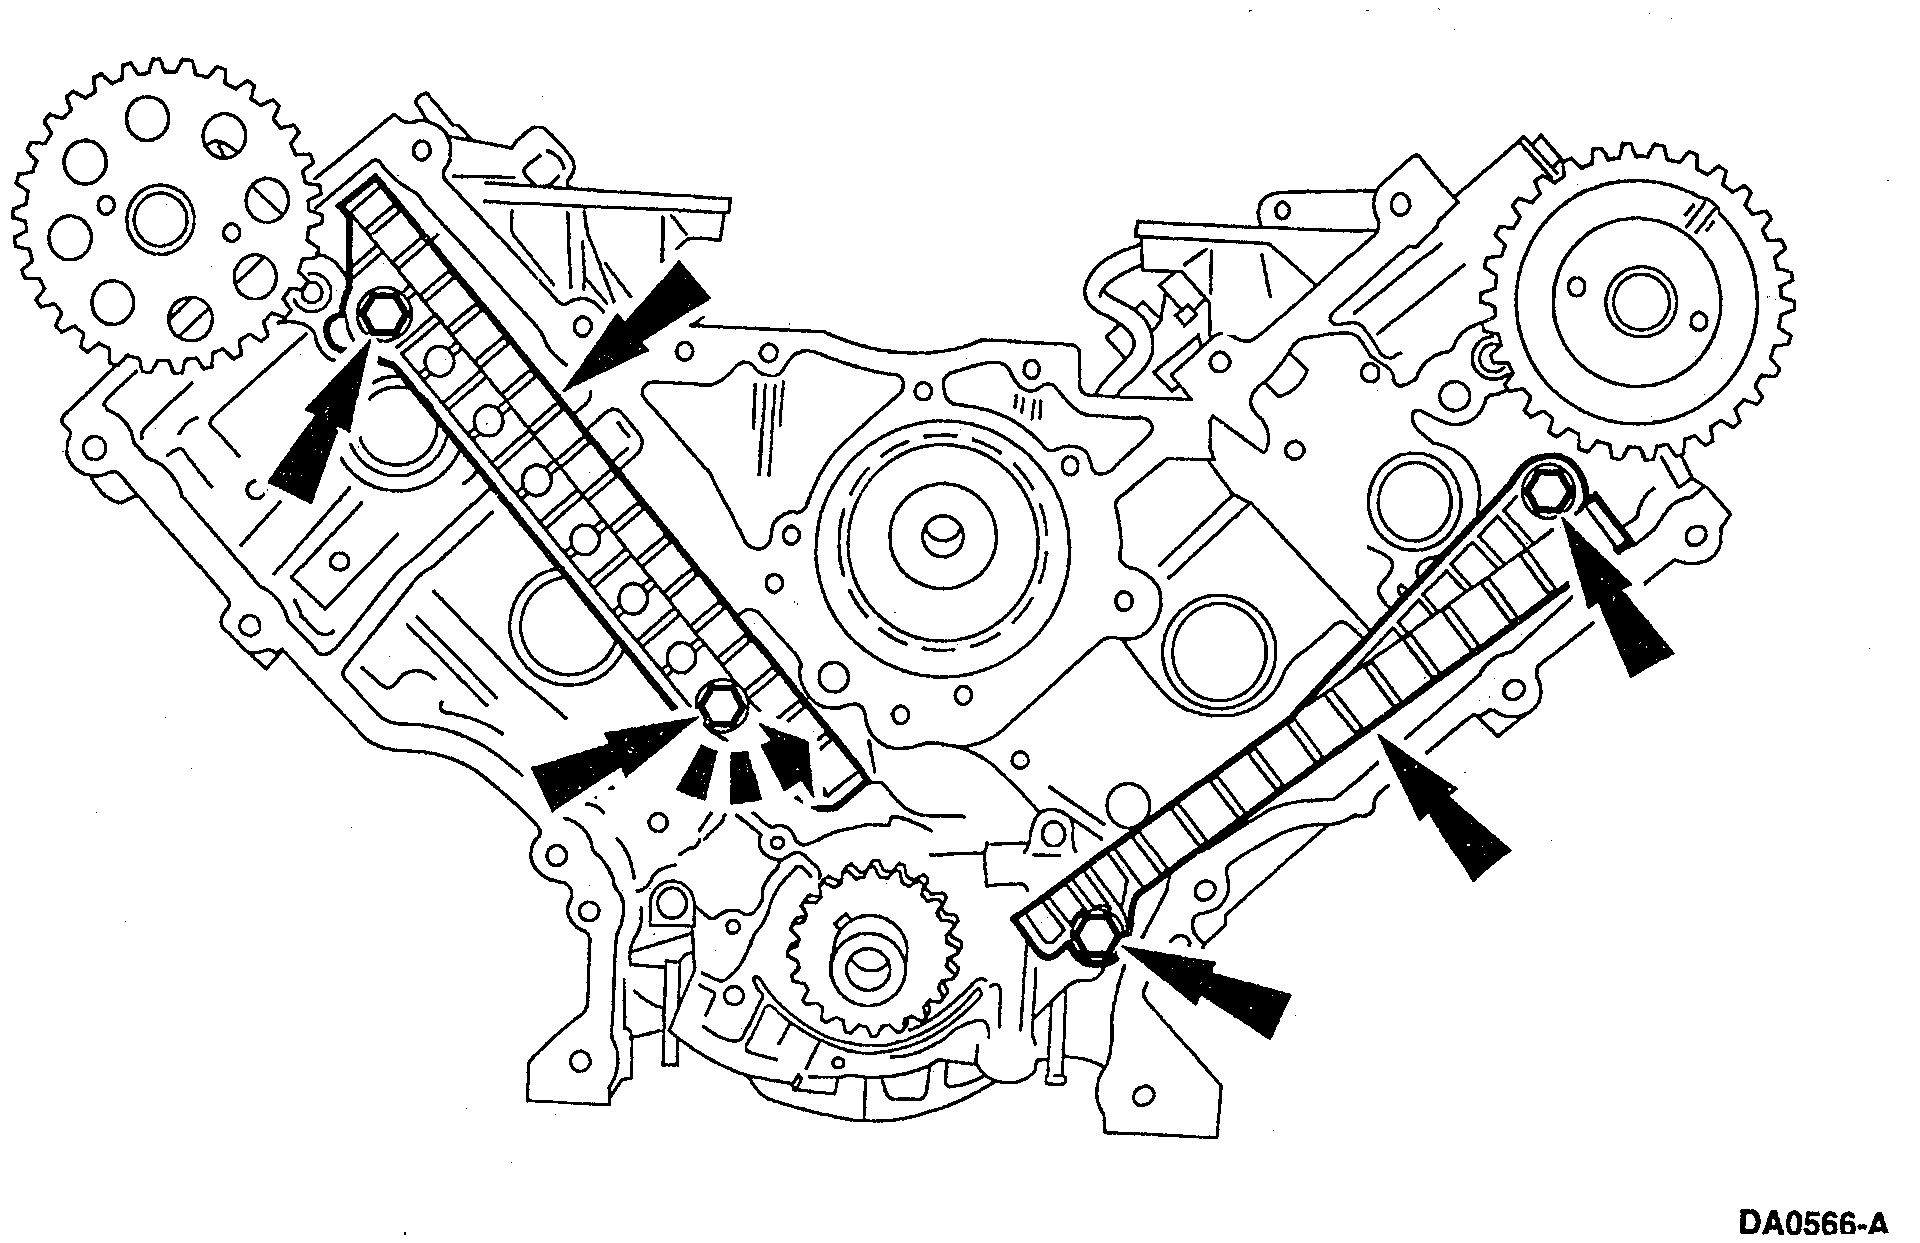
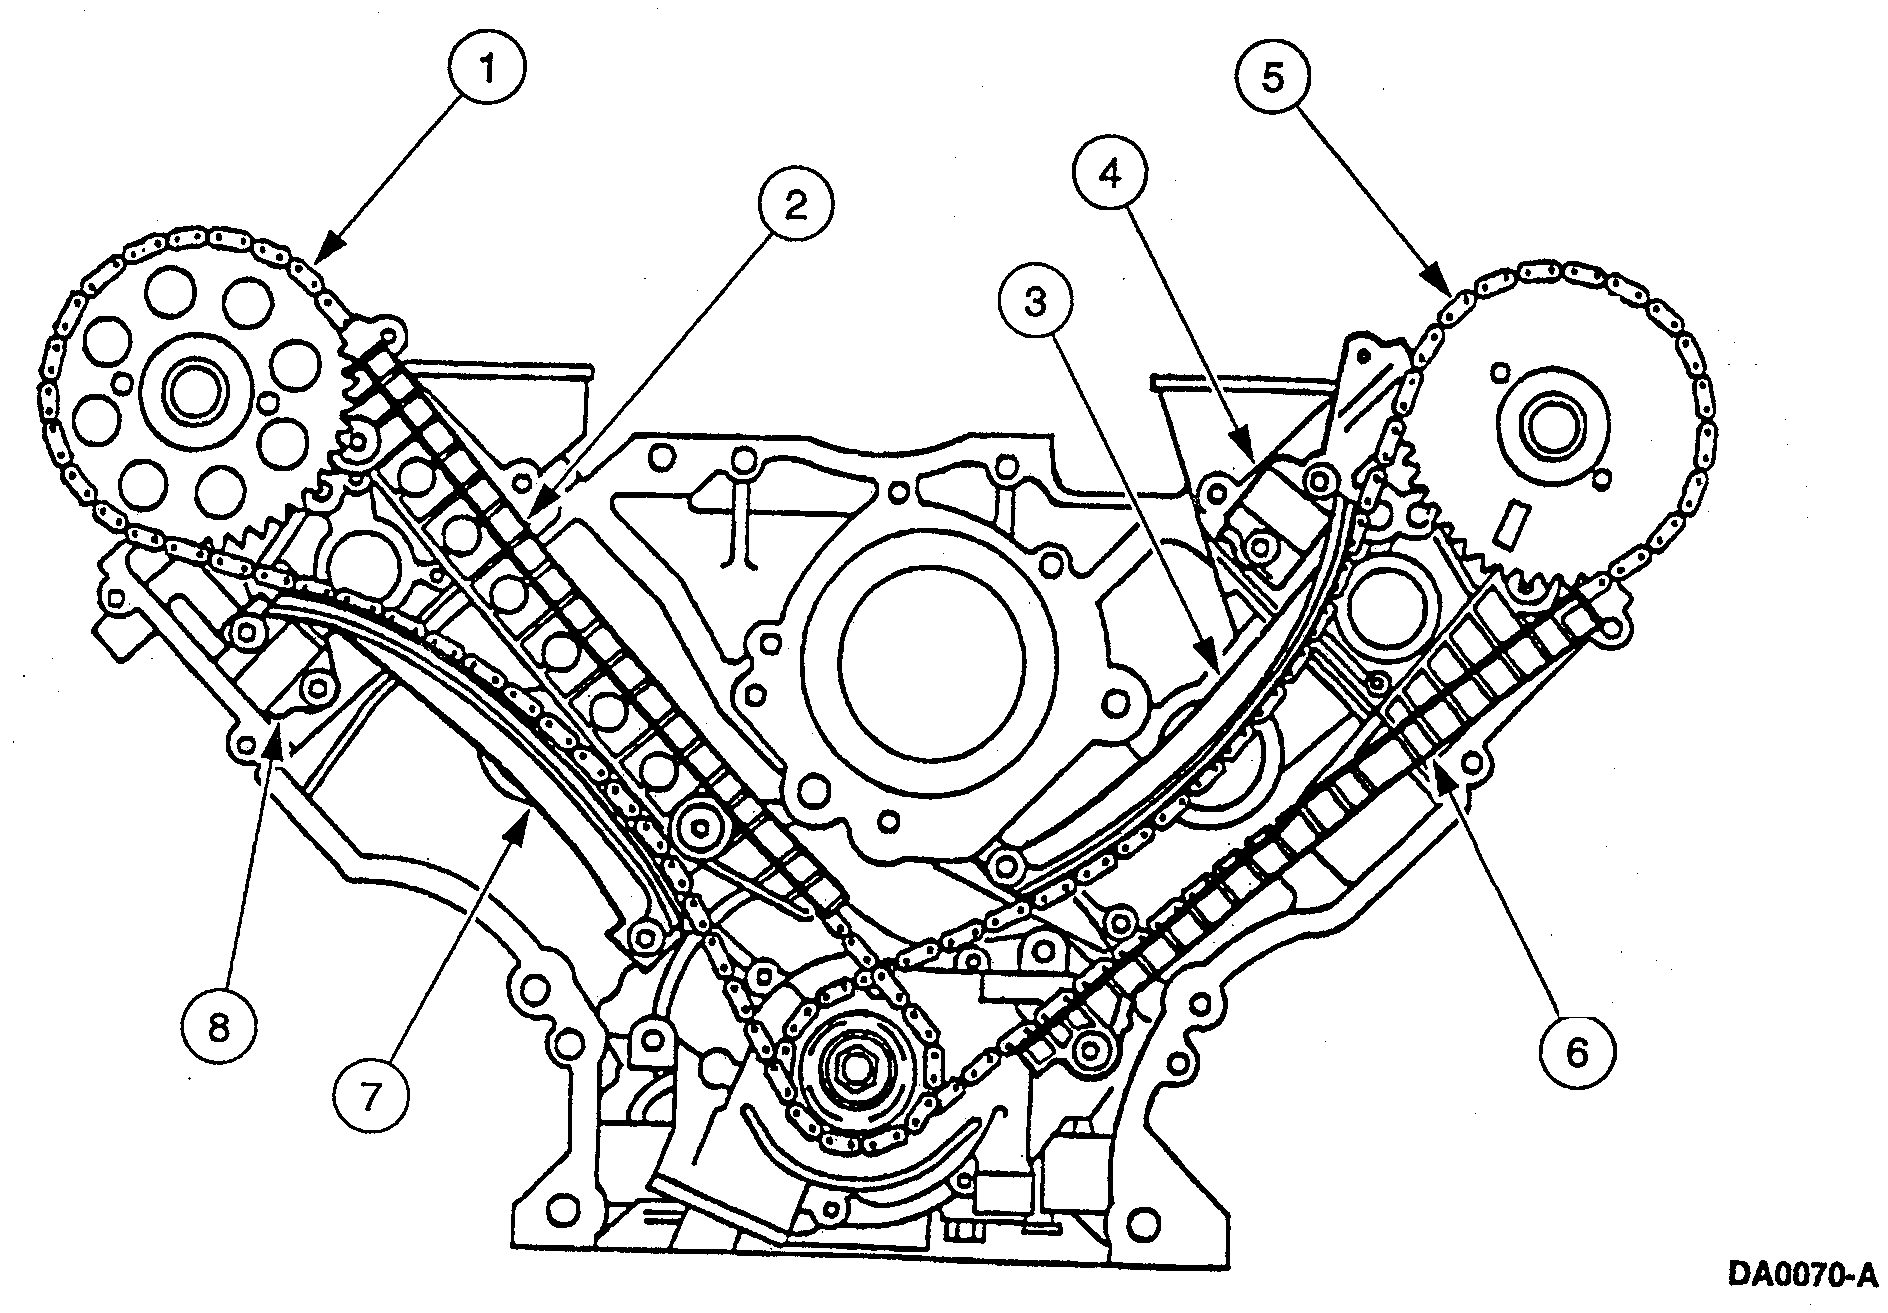
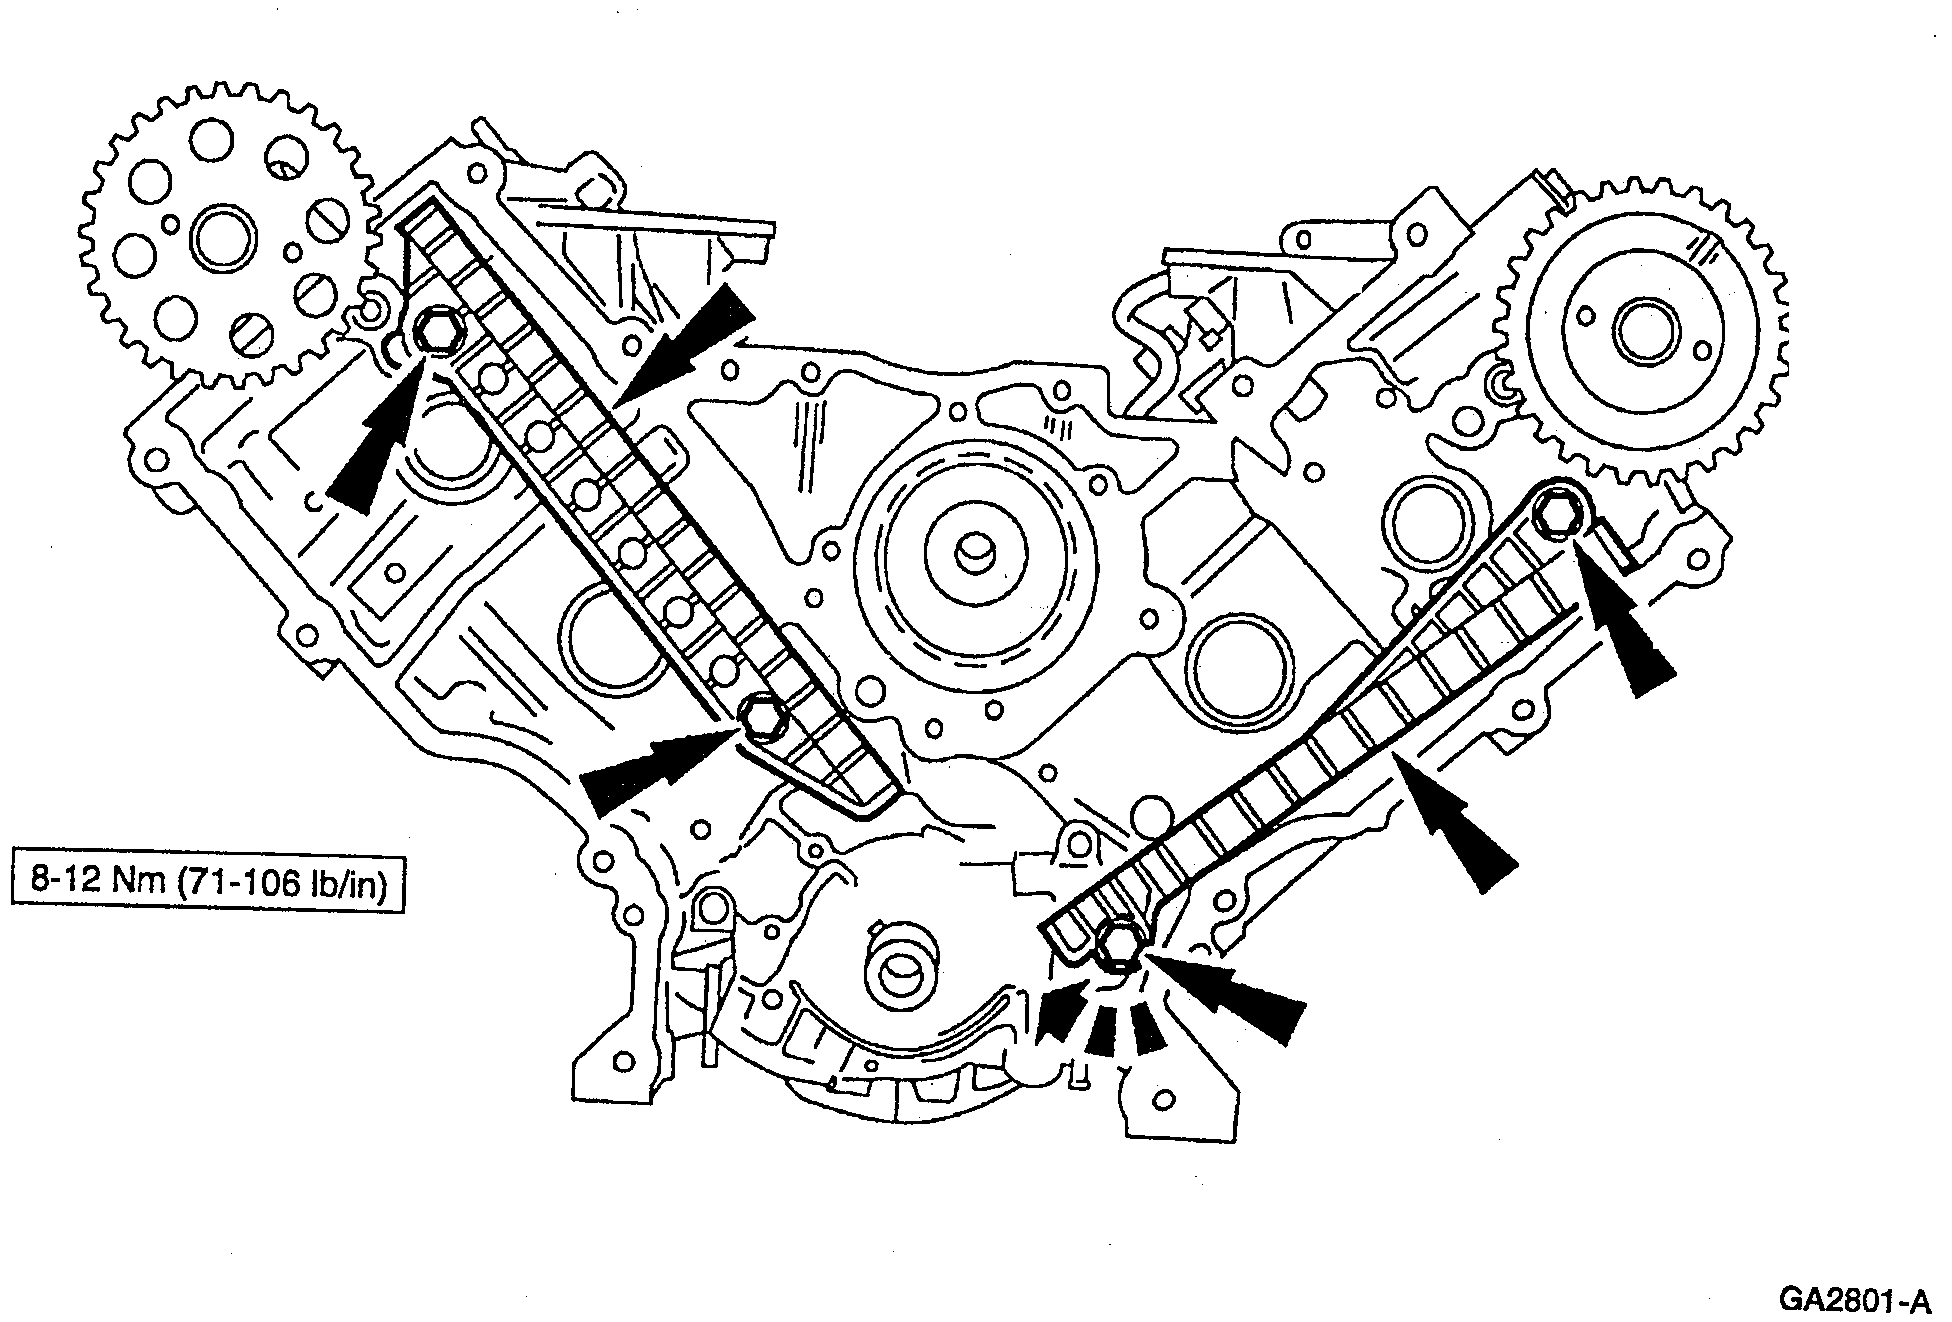
5. Remove the (A) LH timing chain tensioner bolts and the (B) LH timing chain tensioner.
6. Remove the (A) RH timing chain tensioner bolts and the (B) RH timing chain tensioner.
7. Remove the LH and RH timing chain tensioner guides from the dowel pins.
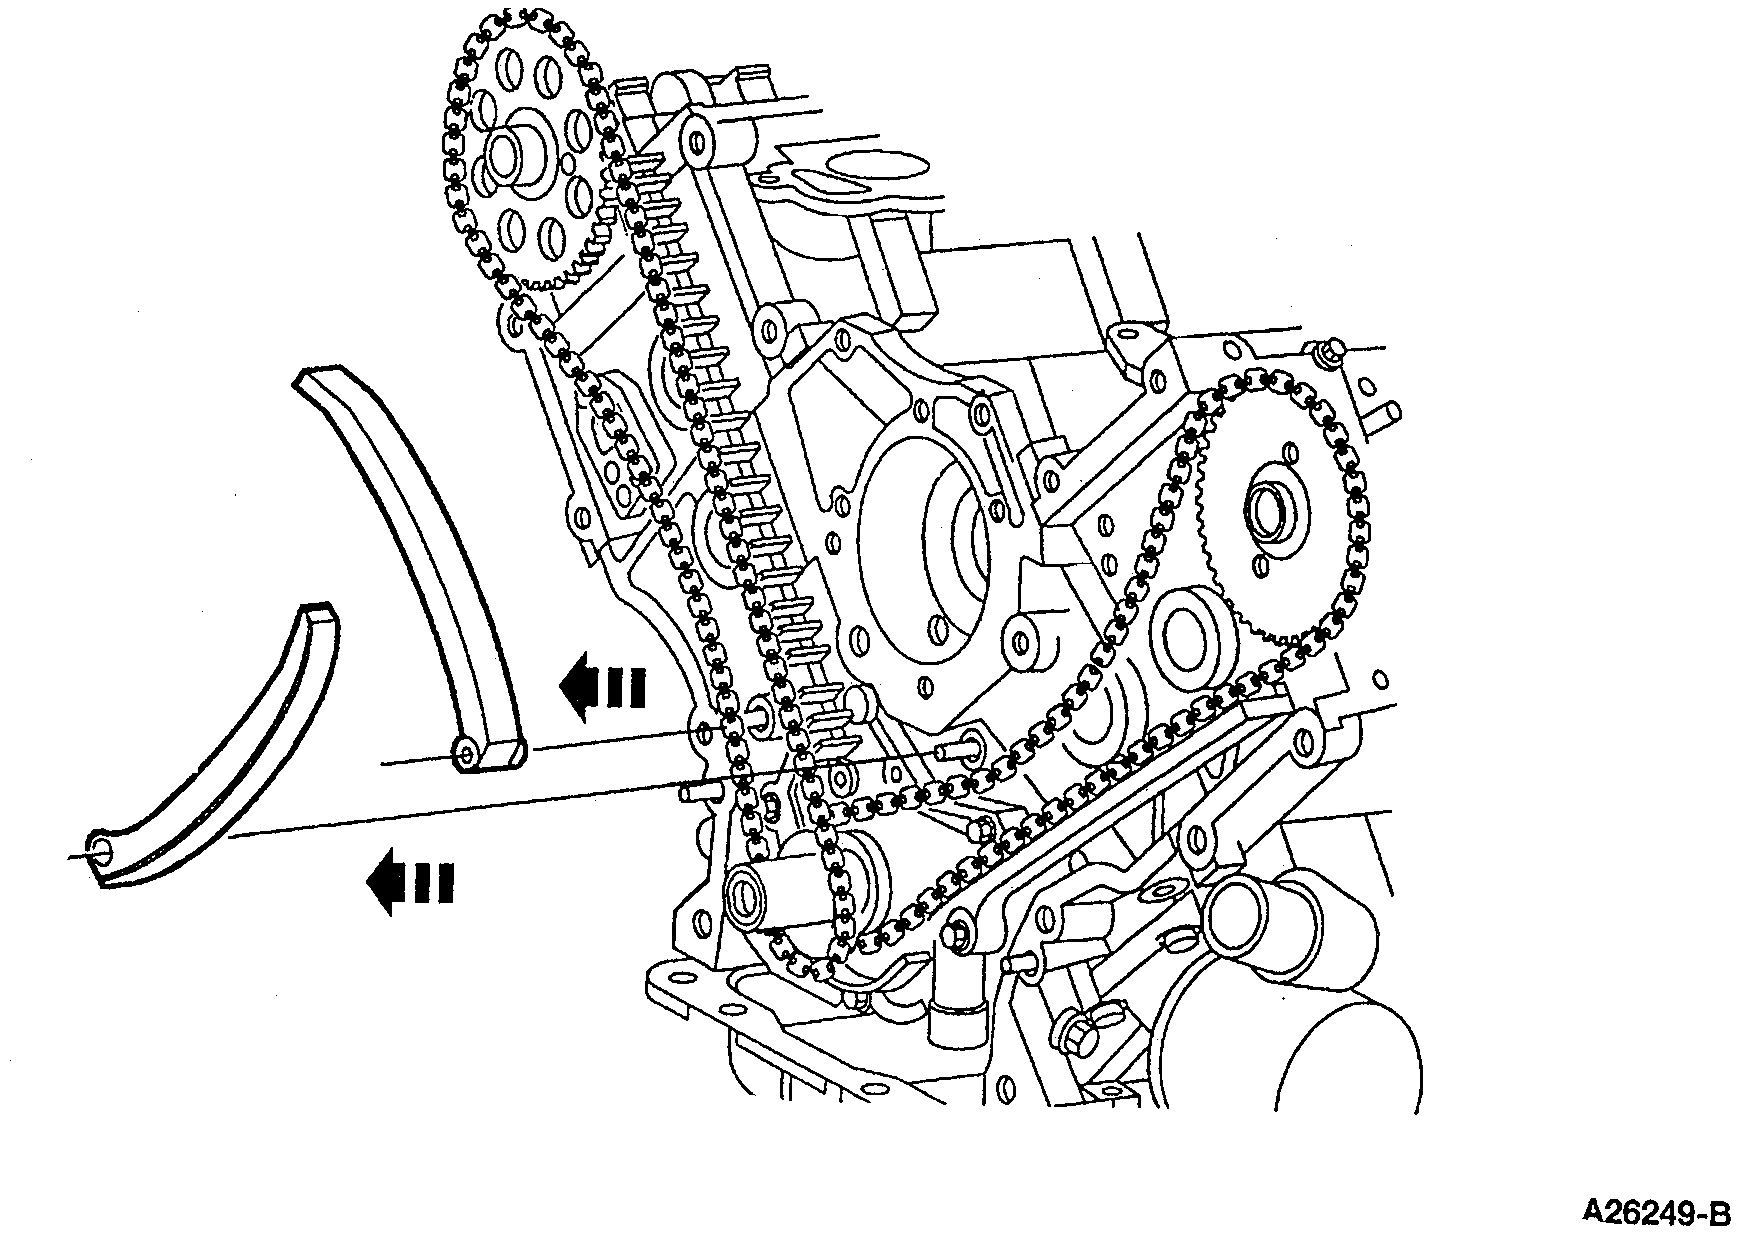
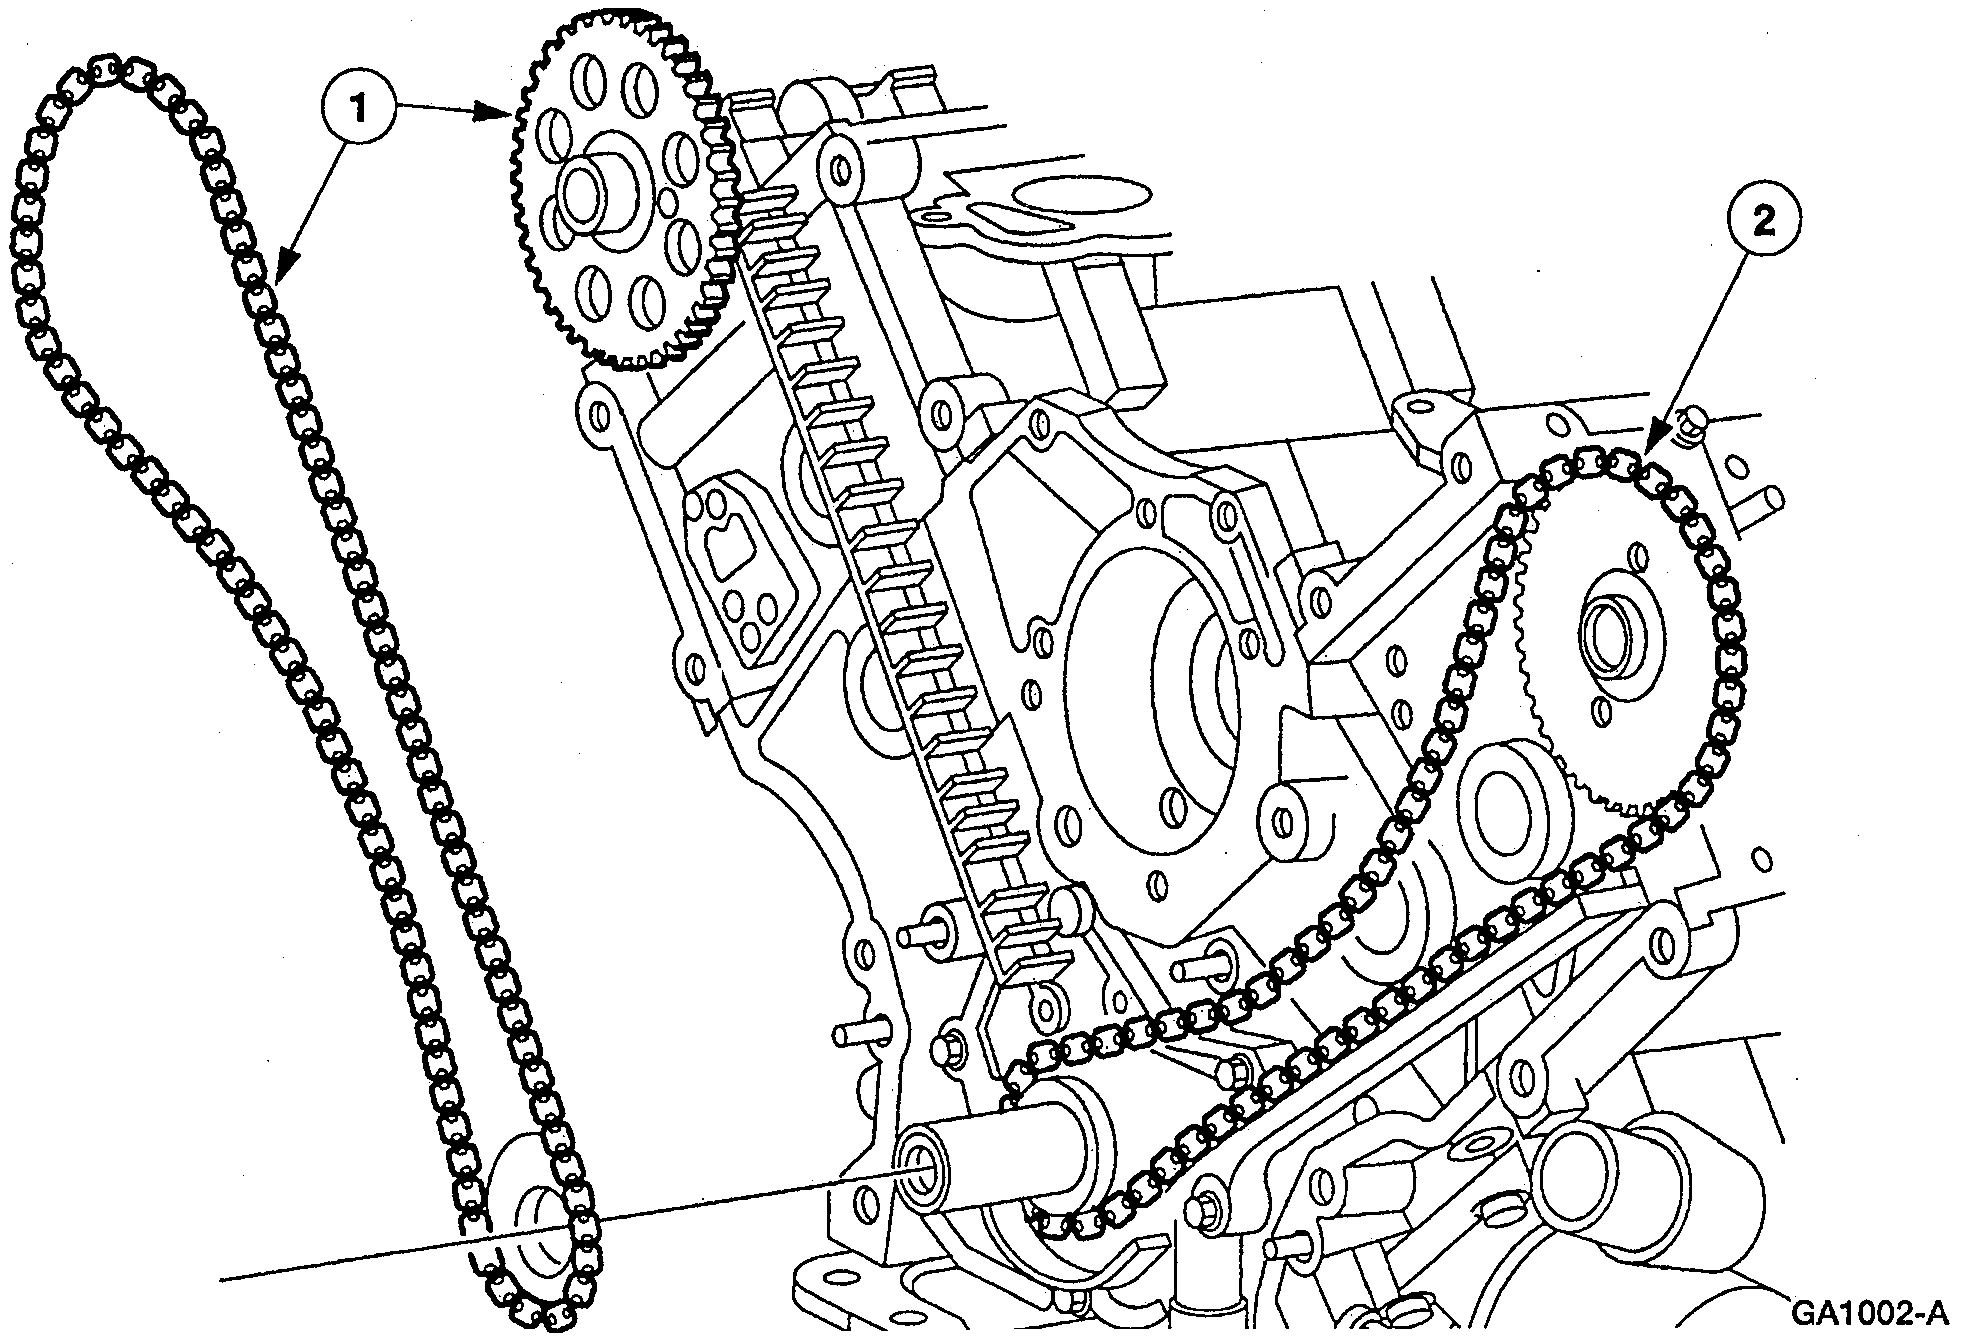
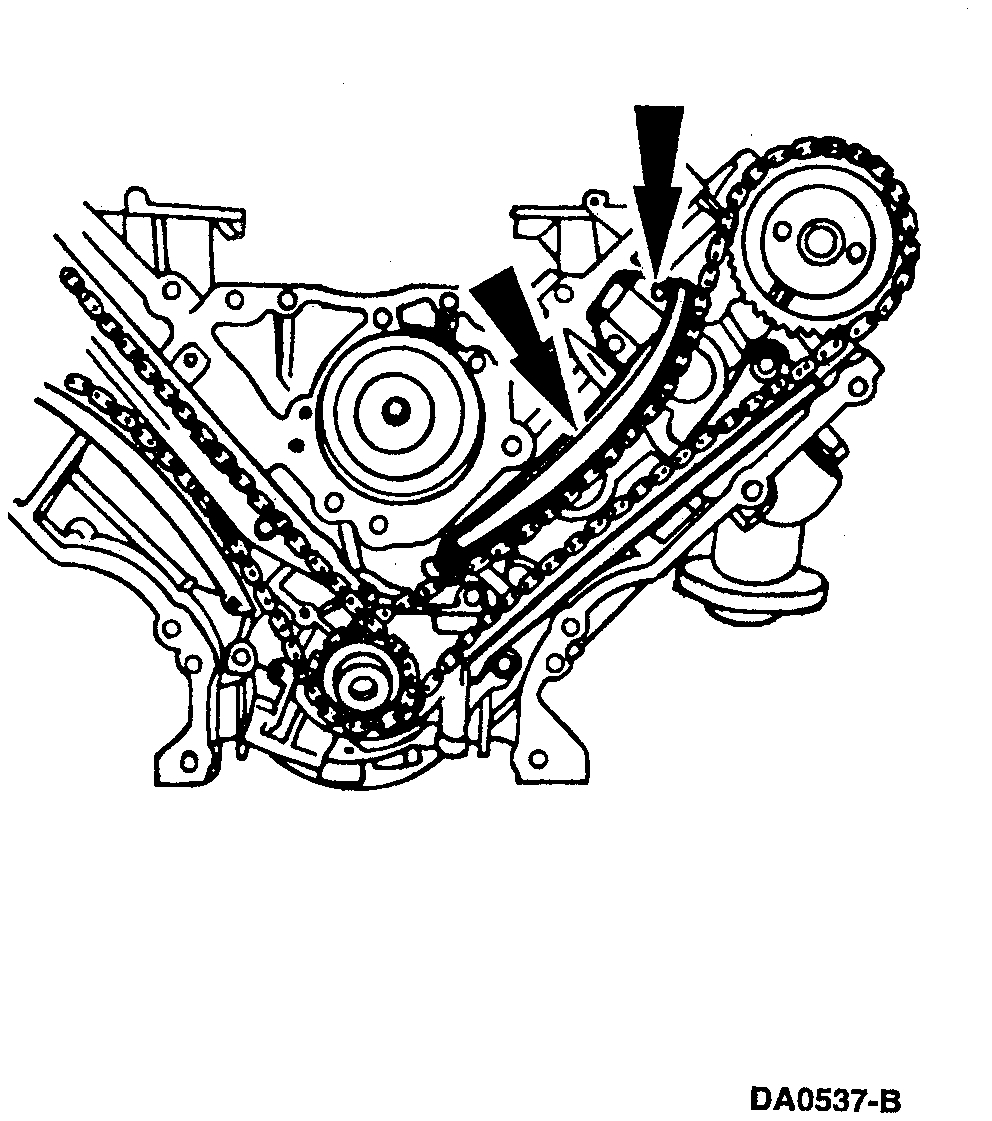
8. Remove the RH and LH timing chains and crankshaft sprockets.
a. Lift the RH timing chain off the camshaft sprocket and slide the timing chain and crankshaft sprocket off the crankshaft.
b. Lift the LH timing chain off the camshaft sprocket and slide the timing chain and the crankshaft sprocket off the crankshaft.
CAUTION: Unless otherwise instructed, at no time, when the timing chains are removed and the cylinder heads are installed may the crankshaft or camshaft be rotated. Severe piston and valve damage will occur.
9. Remove the timing chain guide bolts; remove the timing chain guides.
____________________
Installation
INSTALLATION
NOTE: Ford does not provide a procedure to align the timing components without the OE tools specified.
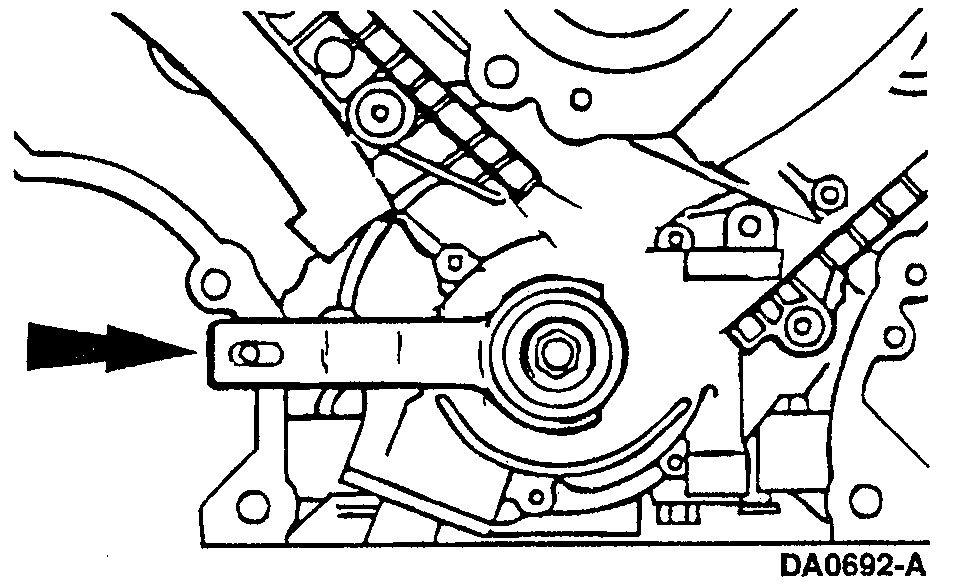
1. Compress the tensioner plunger, using an edge of a vise.
CAUTION: Timing chain procedures must be followed exactly or damage to valves and pistons will result. Do not compress the ratchet assembly. This will damage the ratchet assembly.
2. Use a small screwdriver or pick to push back and hold the ratchet mechanism.
3. While holding the ratchet mechanism, push the ratchet arm back into the tensioner housing.
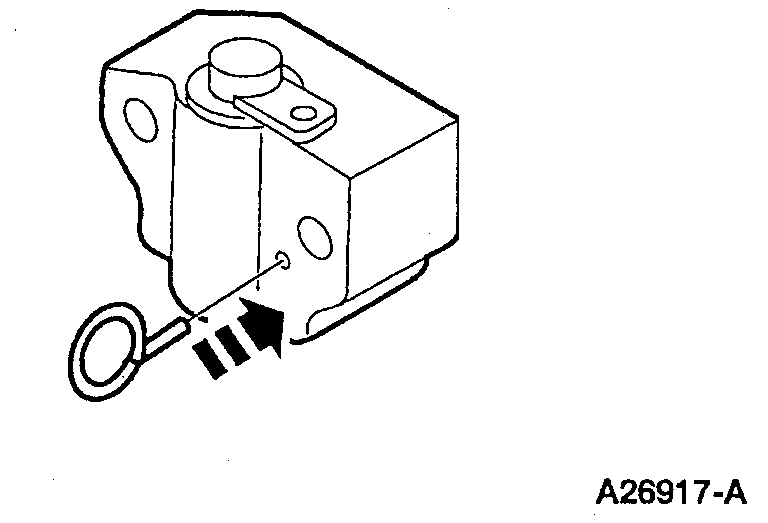
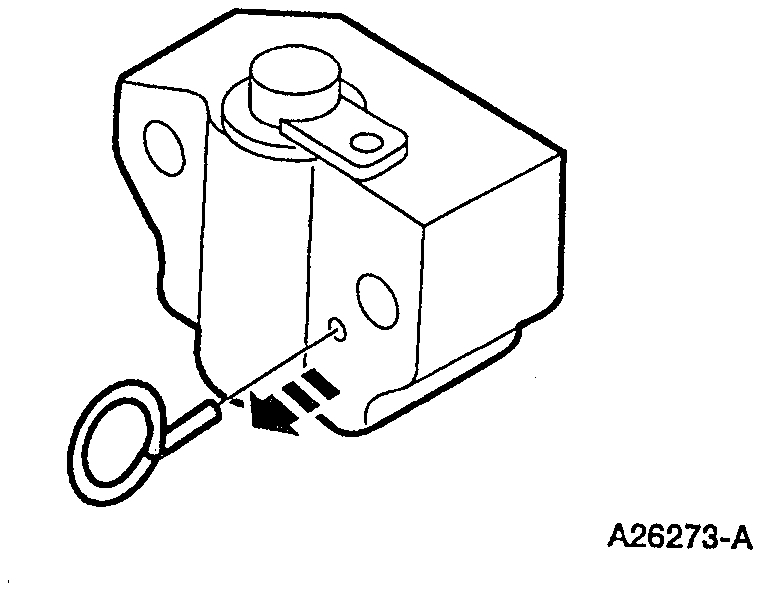
4. Install a paper clip into the hole in the tensioner housing to hold the ratchet assembly and plunger in during installation.
5. Remove the tensioner from the vise.
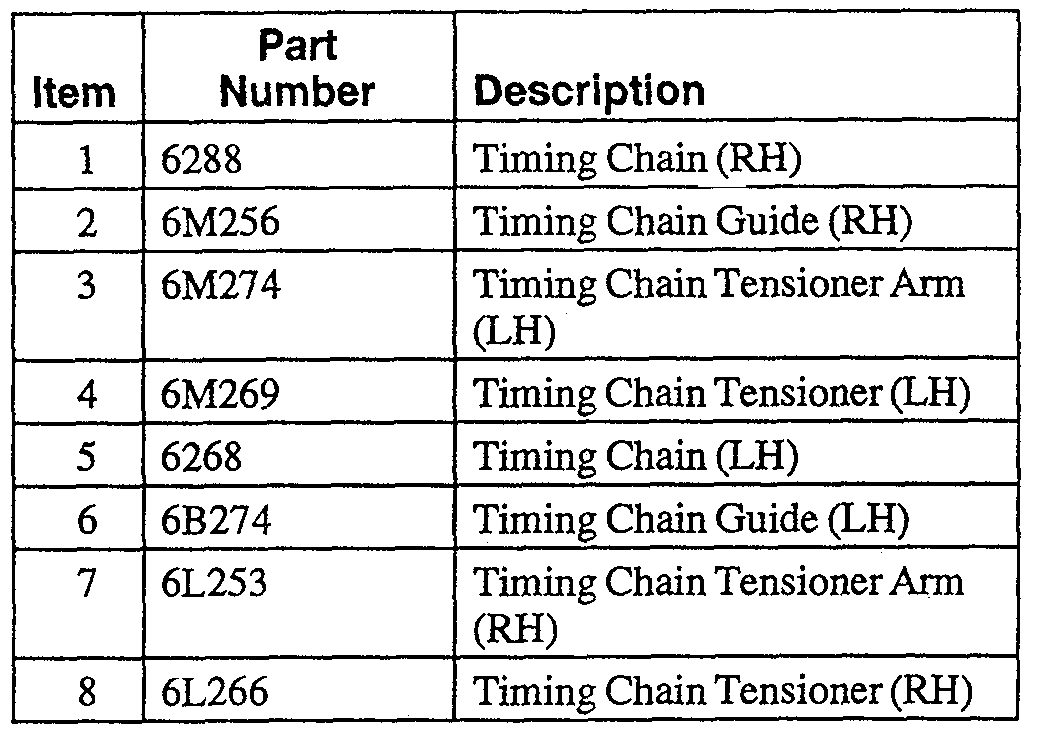
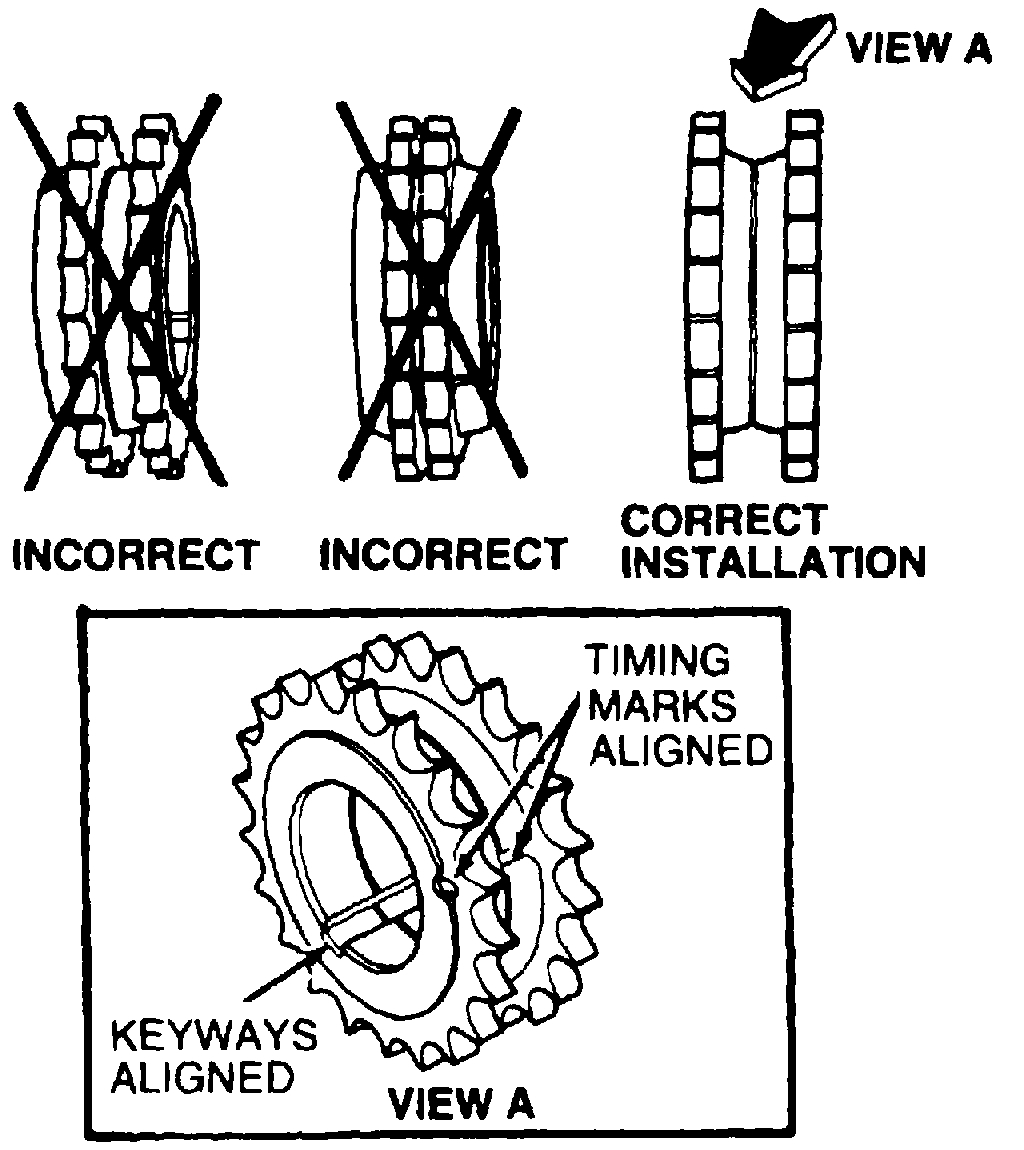
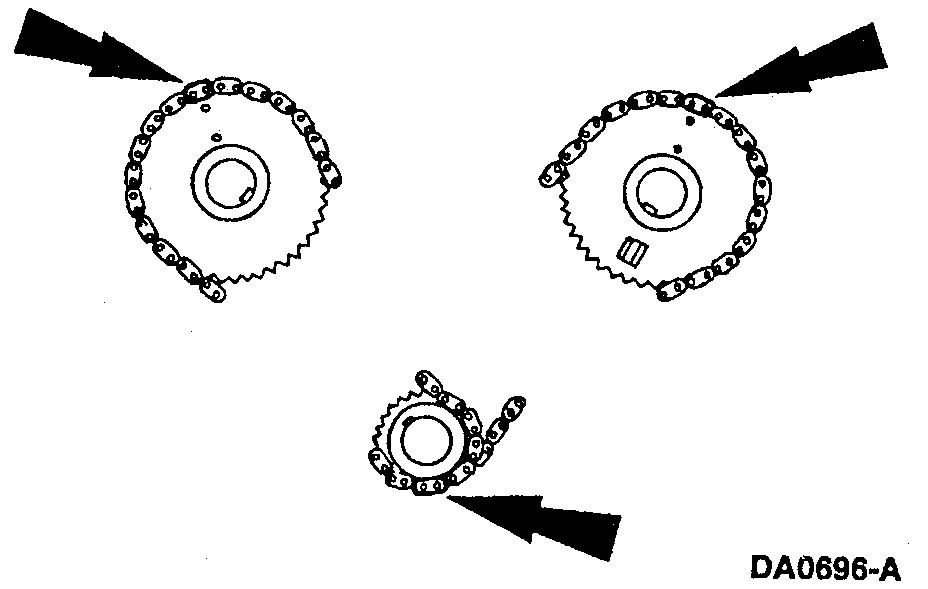
6. Check the illustrated components for part number orientation.
7. If the copper links are not visible, mark two links on one end and one link on the other end, and use as timing marks.
8. Loosely install the Camshaft Holding Tools on both camshafts.
9. Install the timing chain guides.
10.Rotate the LH camshaft with the Camshaft Positioning Tool until the timing mark is approximately at 12 o'clock.
Rotate the RH camshaft with the Camshaft Positioning Tool until the timing mark is approximately at 11 o'clock. Tighten the Camshaft Holding Tools to maintain camshaft pre-positioning.
11.Position the crankshaft with the Crankshaft Holding Tool.
CAUTION: Unless otherwise instructed, at no time when the timing chains are removed and the cylinder heads are installed is the crankshaft or camshaft to be rotated. Severe piston and valve damage will occur. Rotate the crankshaft counterclockwise only. Do not rotate past position shown or severe piston and/or valve damage can occur.
12.Remove the Crankshaft Holding Tool.
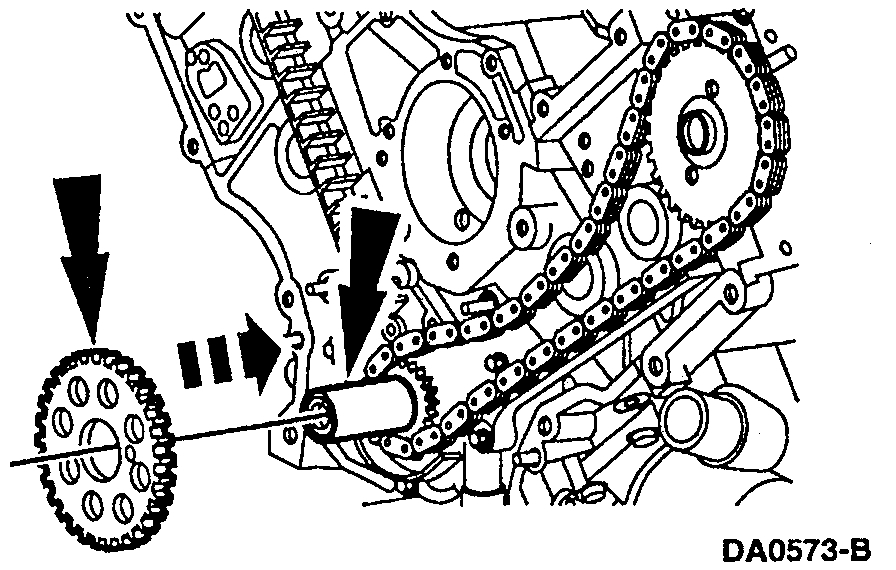
13.Position the inner crankshaft sprocket with the long hub facing outward.
14.Install the LH timing chain onto the crankshaft sprocket, aligning the one copper link on the timing chain with the slot on the crankshaft sprocket.
15.Position the timing chain on the camshaft sprocket with the two copper chain links and the camshaft sprocket timing mark aligned.
NOTE: Make sure the upper half of the chain is below the tensioner guide dowel. If necessary, use the Camshaft Positioning Tool to adjust. If necessary, adjust the camshaft sprocket slightly to obtain timing mark alignment.
16.Position the outer camshaft sprocket and the RH timing chain with the long hub of the sprocket facing inward.
CAUTION: The camshaft sprocket can jump time if the Camshaft Holding Tool is not secured.
NOTE: Be sure the copper chain link and crankshaft sprocket timing mark are aligned. The lower half of the timing chain must be positioned above the dowel.
17.Position the RH timing chain on the camshaft sprocket. Make sure the two copper-colored links align with the camshaft sprocket timing mark.
NOTE: If necessary, adjust the camshaft sprocket slightly to obtain timing mark alignment.
18.As a post-check, verify proper alignment of all timing marks.
19.Position the LH and RH timing chain tensioner guides on the dowel pins. Position the timing chain tensioner assemblies, and install the timing chain tensioner bolts.
20.Remove both the RH and LH retaining pins from the timing chain tensioner assembly.
21.Remove the Camshaft Holding Tools from the camshafts.
22.Position the crankshaft sensor ring on the crankshaft.
23.Install the engine front cover.
_______________________________________________
Let me know if this helps or if you have other questions. To be honest, if you go to this extent, you may want to just replace the cam, lifters.
Let me know if you have other questions or need help.
Take care,
Joe
Images (Click to enlarge)
Jan 7, 2019 at 5:59 AM