Good afternoon,
The heater housing has to be removed. This is a very involved job for someone who has not done this before.
It pays over 7 hours in a shop and if you are doing it at home, it will take you at least double if not more than that to do it.
I attached a YouTube video as well for you.
https://www.youtube.com/watch?v=myHtwzUoOQ8
Roy
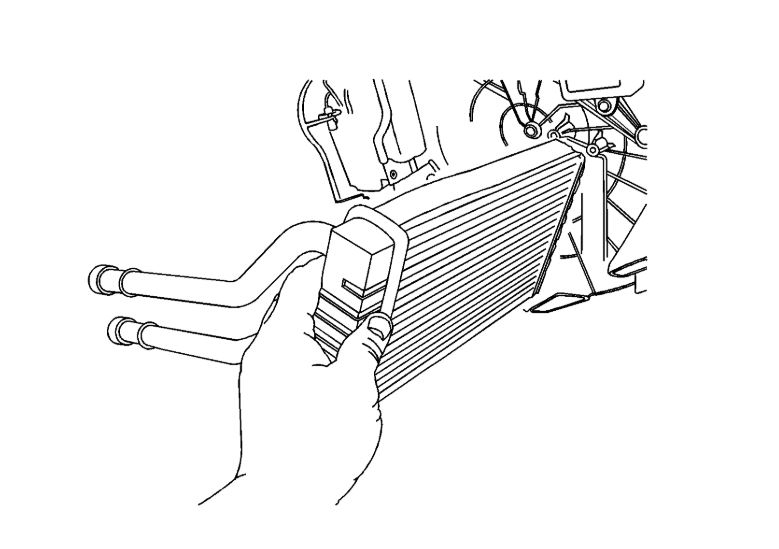
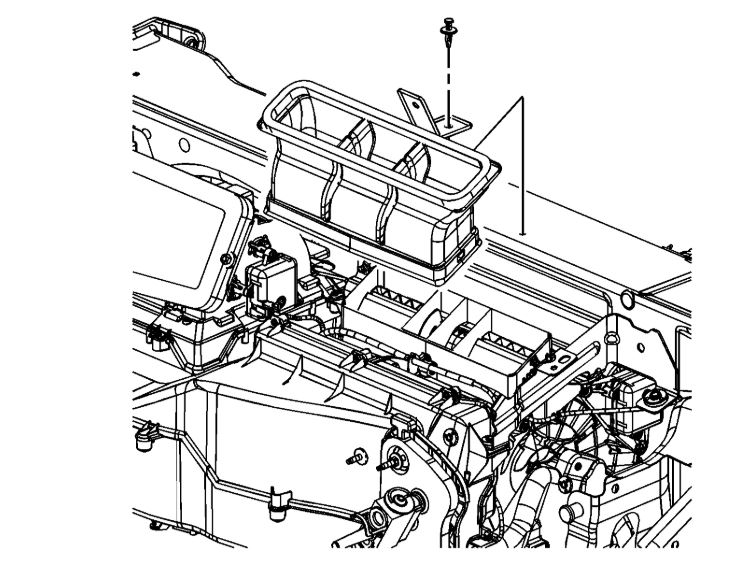
1. Remove the HVAC module from the vehicle.
2. Remove the heater core cover screws from the HVAC module.
3. Remove the heater core cover from the HVAC module.
imageOpen In New TabZoom/Print
4. Remove the heater core from the HVAC module.
Housing removal.
Tools Required
J 39400-A Halogen Leak Detector
1. Disable the frontal and curtain air bags.
2. Recover the refrigerant. Refer to Refrigerant Recovery and Recharging. See: Heating and Air Conditioning > Procedures > Refrigerant Recovery and Recharging
3. Drain the engine coolant. Refer to Draining and Filling Cooling System (Static Fill) Draining and Filling Cooling System (GE 47716 Fill).
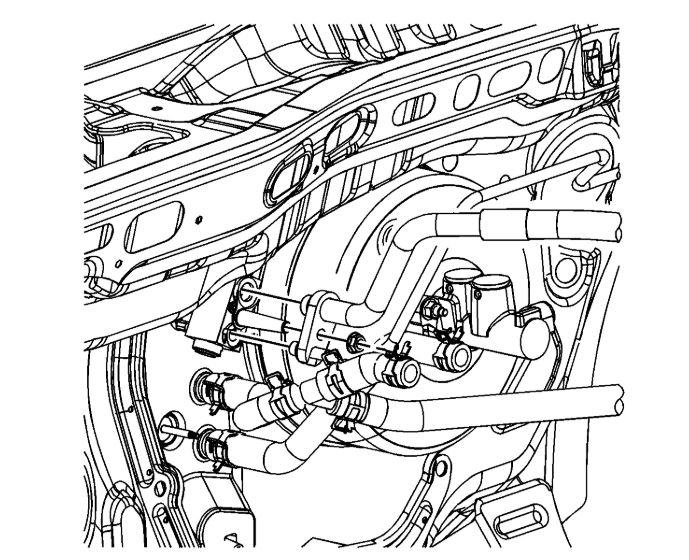
imageOpen In New TabZoom/Print
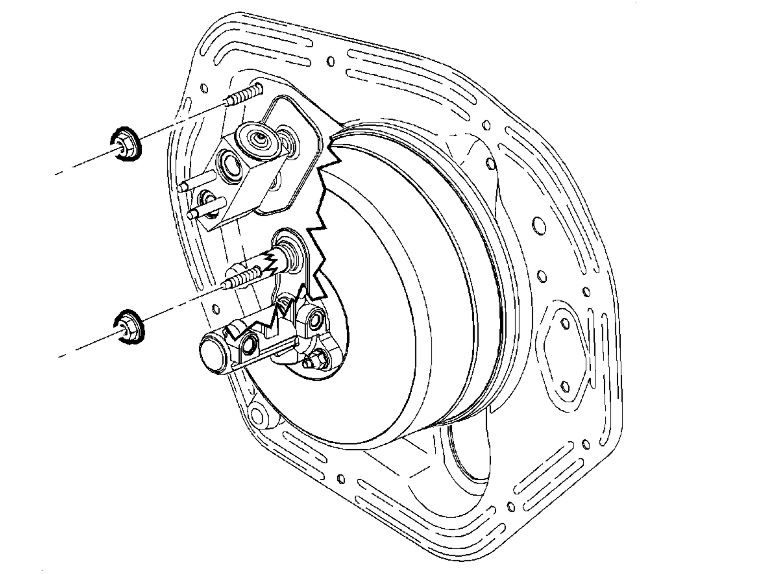
4. Remove the evaporator outlet hose and liquid line nut from the thermal expansion valve (TXV).
5. Remove the evaporator outlet hose from the TXV.
6. Remove and discard the sealing washer from the evaporator outlet hose.
7. Remove the evaporator outlet hose and liquid line from the TXV.
8. Remove and discard the sealing washer from the liquid line.
9. Install a protective caps to the evaporator outlet hose and the liquid line to prevent contamination and desiccant saturation.
imageOpen In New TabZoom/Print
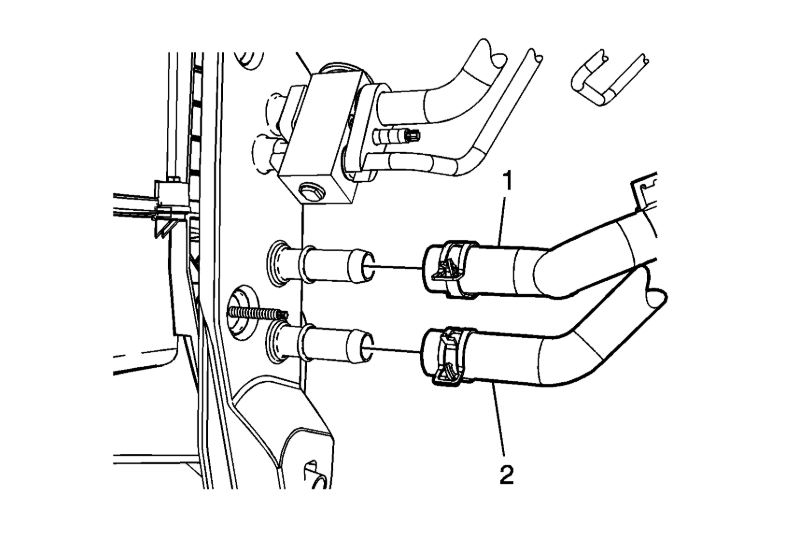
10. Reposition the heater outlet hose clamp at the heater core.
11. Remove the heater outlet hose from the heater core.
12. Reposition the heater inlet hose clamp at the heater core.
13. Remove the heater inlet hose at the heater core.
14. Plug the heater core and the evaporator core with clean towels to prevent spillage when the HVAC module is removed.
imageOpen In New TabZoom/Print
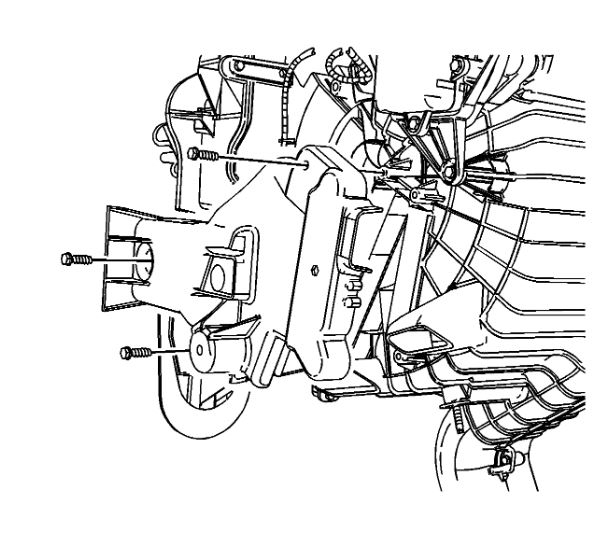
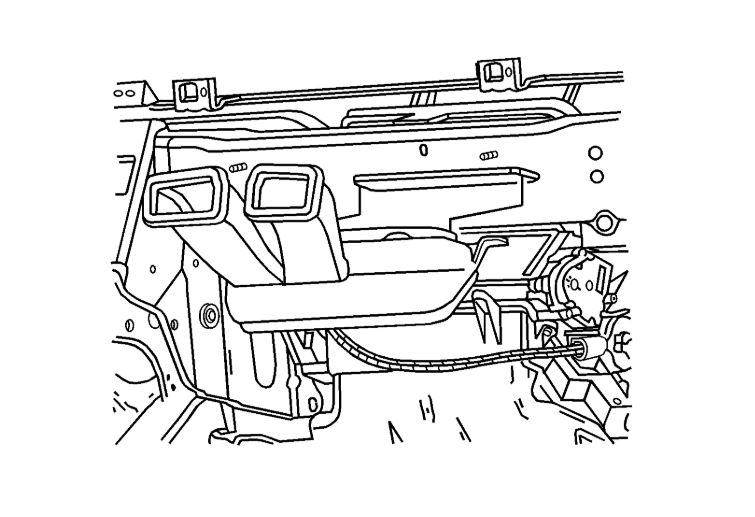
15. Remove the HVAC module seal nuts from the front of dash.
16. Remove the instrument panel (I/P) retainer.
17. Remove the shift control bracket.
imageOpen In New TabZoom/Print
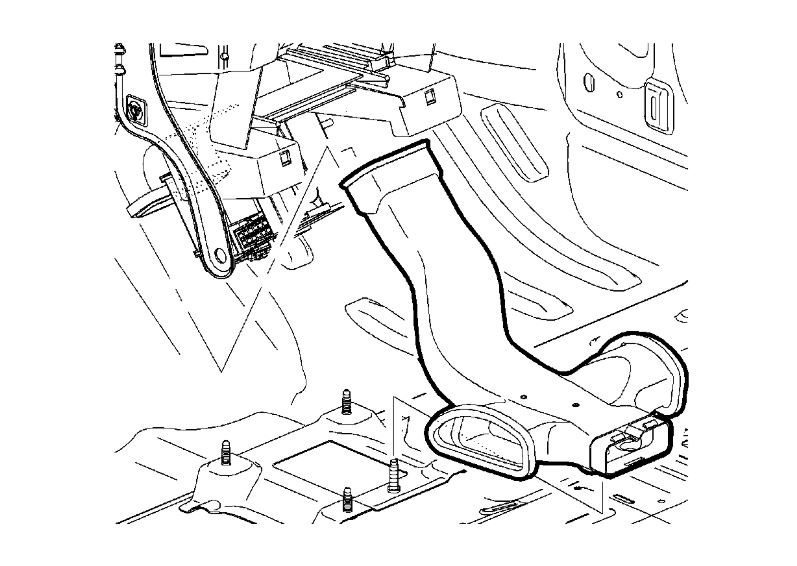
18. Remove the center floor air outlet duct by sliding the duct forward then up at the rear.
imageOpen In New TabZoom/Print
19. Remove the center I/P air outlet duct retainers from the instrument panel tie bar.
20. Remove the center I/P air outlet duct from the instrument panel tie bar.
21. Remove the instrument panel tie bar.
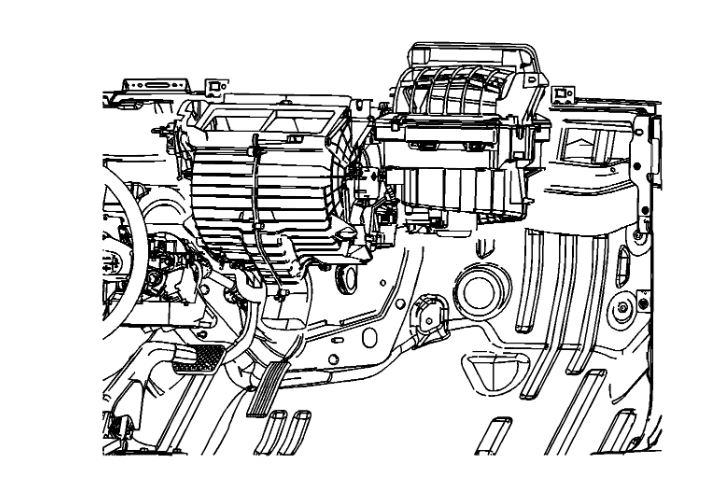
22. Disconnect the blower motor electrical connector from the I/P wire harness.
23. Disconnect the blower motor control module electrical connector from the I/P wire harness.
24. Disconnect the HVAC module electrical connector from the I/P wire harness.
imageOpen In New TabZoom/Print
25. Remove the defroster duct retainer from the instrument panel tie bar.
26. Remove the defroster duct from the HVAC module.
27. Disconnect the I/P wire harness clips from the HVAC module.
imageOpen In New TabZoom/Print
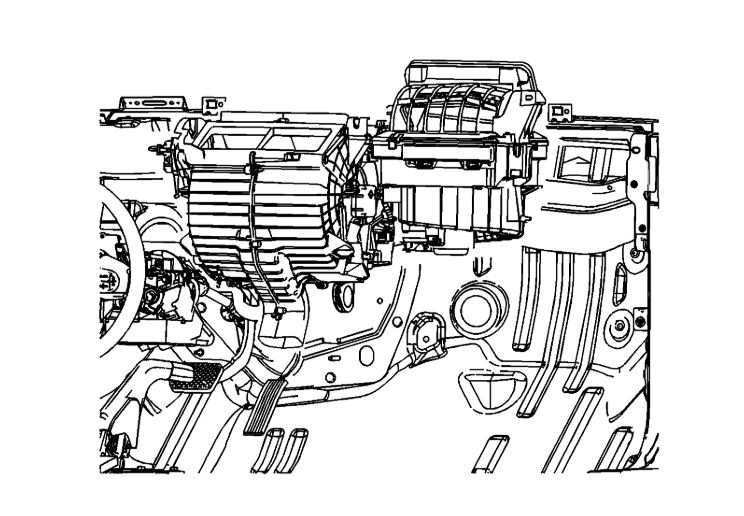
28. Remove the HVAC module from the vehicle.
Images (Click to enlarge)
Jan 25, 2020 at 11:43 AM