Temperatures gauge fluctuations

Tiny
SCOTTDQ001
  • MEMBER
  • 1998 PLYMOUTH NEON
  • 2.0L
  • 4 CYL
  • 2WD
  • AUTOMATIC
  • 117,000 MILES
The temperature gauge reads normal most the time, but sometimes goes up to the H mark. Then it quickly goes back down to it's normal range.
Wednesday, September 11th, 2019 AT 2:56 PM

8 Replies

Tiny
SCOTTDQ001
  • MEMBER
  • 15 POSTS
Also, I forgot to add that the car isn't losing coolant.
Was this
answer
helpful?
Yes
No
Wednesday, September 11th, 2019 AT 3:06 PM
Tiny
JACOBANDNICKOLAS
  • MECHANIC
  • 108,269 POSTS
Welcome to 2CarPros.

Have you checked the thermostat? It could be sticking.

https://www.2carpros.com/articles/how-an-engine-thermostat-works

https://www.2carpros.com/articles/replace-thermostat

That is my first suspect. However, if you choose to replace it, I also recommend flushing the system when it is out of the engine to eliminate that as an issue.

https://www.2carpros.com/articles/coolant-flush-and-refill-all-cars

Here are the directions specific to your vehicle. I don't know if you have the SOHC or DOHC engine, so I will provide directions for both. The attached pics correlate with the directions.

______________________________

1998 Dodge Neon L4-122 2.0L DOHC VIN Y SFI
Procedures
Vehicle Engine, Cooling and Exhaust Cooling System Thermostat Service and Repair Procedures
PROCEDURES
REMOVAL
1. Drain cooling system to the thermostat level or below.

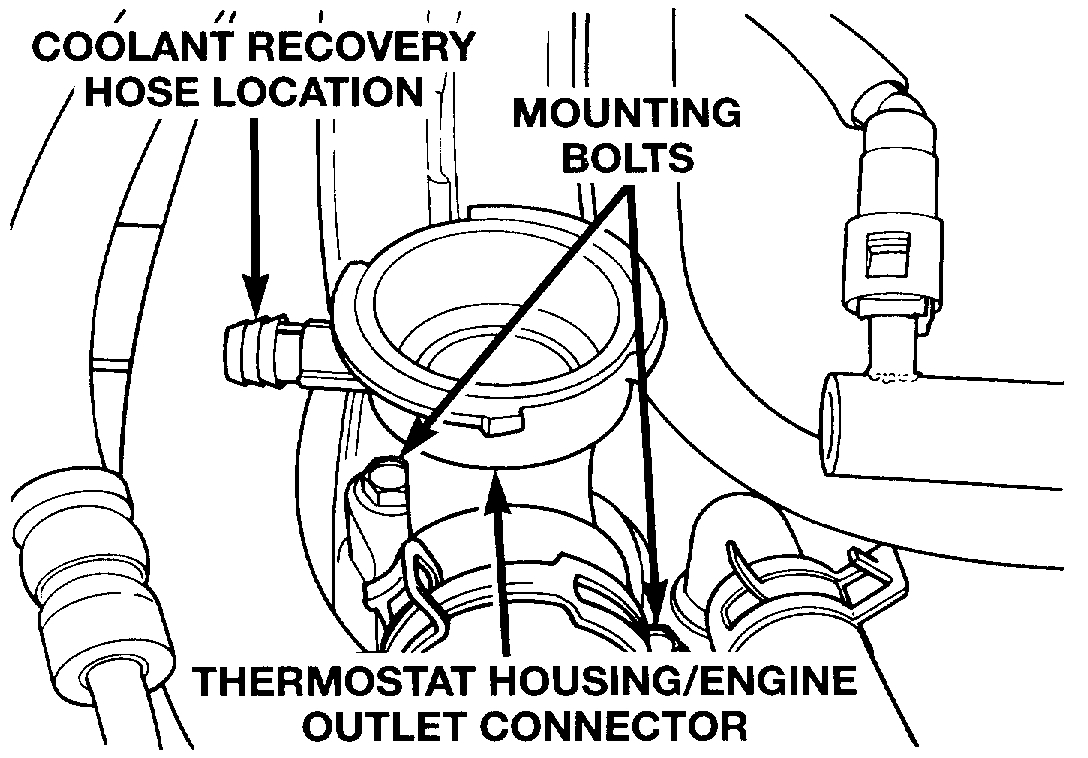
Thermostat/Engine Outlet Connector-DOHC

Pic 1

2. Remove Coolant Recovery System (CRS) hose and thermostat/engine outlet connector bolts.
3. Remove thermostat an O-ring assembly, and clean sealing surfaces.

INSTALLATION
1. Place the new thermostat assembly into the thermostat housing/outlet connector. Align vent with notch in cylinder head.
2. Install thermostat housing/outlet connector onto cylinder head and tighten bolts to 12.5 Nm (110 inch lbs.). Connect the Coolant Recovery System (CRS) hose.
3. Refill cooling system (see Refilling System).

________________________________

1998 Dodge Neon L4-2.0L VIN C
Procedures
Vehicle Engine, Cooling and Exhaust Cooling System Thermostat Service and Repair Procedures
PROCEDURES
Removal
1. Drain cooling system to the thermostat level or below.

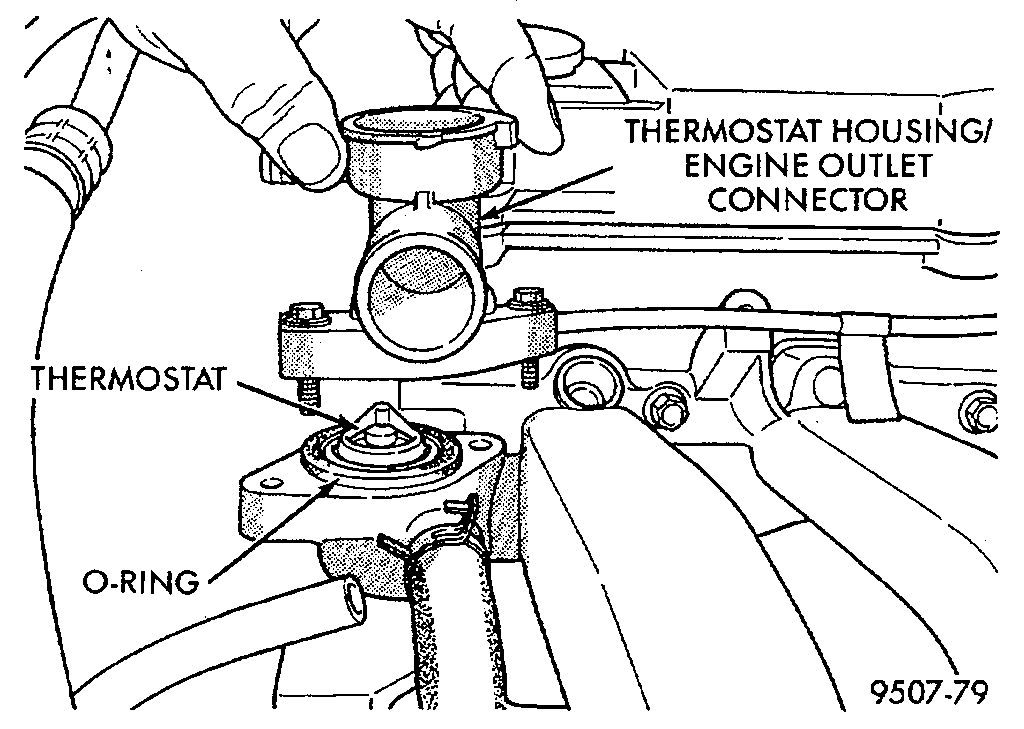
Thermostat/Engine Outlet Connector - 2.0L Engine

Pic 2

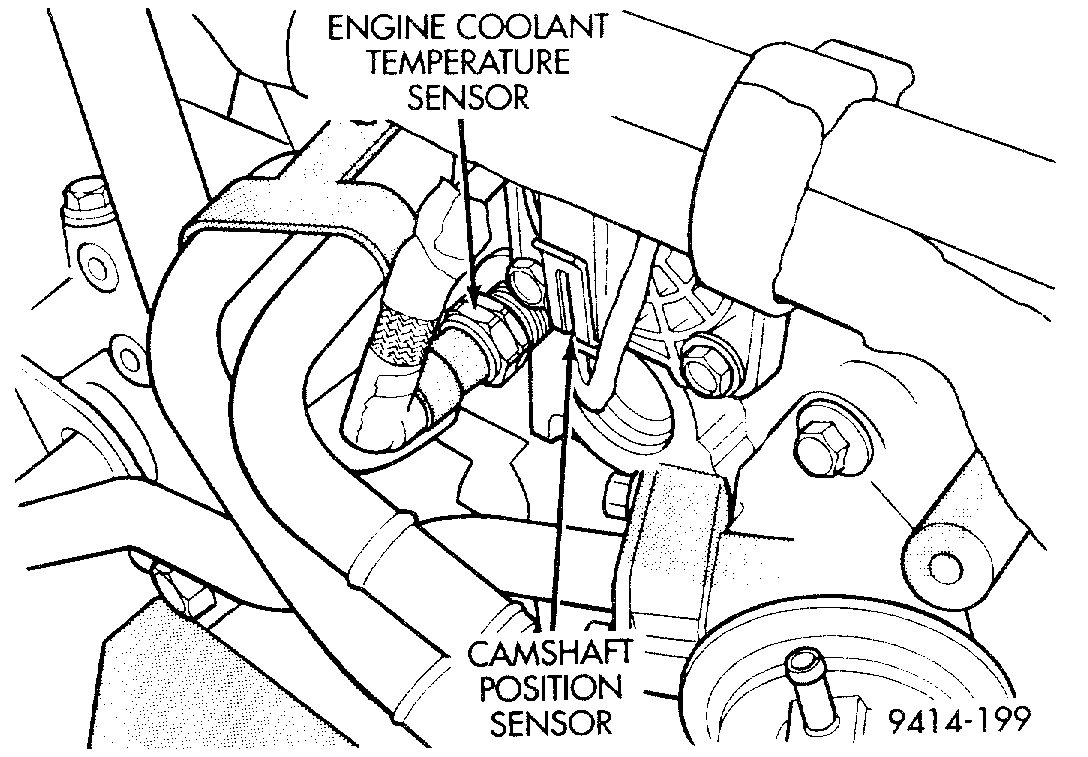
Thermostat And Engine Outlet Connector - 2.4L Engine

Pic 3

2. Remove Coolant Recovery System (CRS) hose and thermostat engine outlet connector bolts.
3. Remove thermostat assembly, and clean sealing surfaces.

Installation
1. Place the new thermostat assembly into the engine outlet connector. Align air bleed with notch on the cylinder head.
2. Install engine outlet connector onto cylinder head and tighten bolts to 12.5 Nm (110 inch lbs.). Connect the coolant recovery system (CRS) hose.
3. Fill cooling system.

_______________________________________

Let me know if this helps.

Take care,
Joe
Was this
answer
helpful?
Yes
No
Wednesday, September 11th, 2019 AT 7:10 PM
Tiny
SCOTTDQ001
  • MEMBER
  • 15 POSTS
Okay, thanks. It's a SOHC.
Was this
answer
helpful?
Yes
No
Thursday, September 12th, 2019 AT 1:46 AM
Tiny
SCOTTDQ001
  • MEMBER
  • 15 POSTS
My guess was the thermostat or the coolant sender switch.
Was this
answer
helpful?
Yes
No
Thursday, September 12th, 2019 AT 1:49 AM
Tiny
JACOBANDNICKOLAS
  • MECHANIC
  • 108,269 POSTS
Welcome back:

It could be either. However, more commonly it would be a thermostat. There isn't any evidence of a head gasket problem, correct?

As far as the sensor, you can remove it and inspect it's operation by checking the ohms of resistance based on temperature. If you want to just replace it, here are the directions and the attached pic correlates with the directions.

_________________________-

1998 Plymouth Neon L4-2.0L VIN C
Coolant Temperature Sensor Removal and Installation
COOLANT TEMPERATURE SENSOR REMOVAL AND INSTALLATION
Fig. 107 Engine Coolant Temperature Sensor-SOHC

Pic 1

NOTE: The engine coolant temperature sensor threads into the rear of the cylinder head (Fig. 107).

REMOVAL
1. With the engine cold, drain coolant until level drops below sensor.
2. Disconnect coolant sensor electrical connector.
3. Remove coolant sensor.

INSTALLATION
1. Install coolant sensor.
- Tighten to 18 Nm (165 in lb) torque.
2. Attach electrical connector to sensor.
3. Fill cooling system.

______________________________________

Let me know if any of this helps or if you have other questions.

Take care,
Joe
Was this
answer
helpful?
Yes
No
Thursday, September 12th, 2019 AT 5:33 PM
Tiny
SCOTTDQ001
  • MEMBER
  • 15 POSTS
Okay, thanks. There doesn't seem to be any evidence of a head gasket problem.
Was this
answer
helpful?
Yes
No
Friday, September 13th, 2019 AT 1:30 AM
Tiny
SCOTTDQ001
  • MEMBER
  • 15 POSTS
What makes me think that it's the sending unit, is the problem is intermittent. It doesn't happen too often.
Was this
answer
helpful?
Yes
No
Friday, September 13th, 2019 AT 2:05 AM
Tiny
JACOBANDNICKOLAS
  • MECHANIC
  • 108,269 POSTS
Welcome back:

That makes sense. Before you replace it, make sure the connector is tight and free of corrosion. Also, make sure the wire to it isn't damaged.

Let me know what you find or if you have other questions.

Take care,
Joe
Was this
answer
helpful?
Yes
No
Friday, September 13th, 2019 AT 5:41 PM

Please login or register to post a reply.

Sponsored links