If you are getting movement, it sounds like the bushings need replaced. I'm not sure on this vehicle, but you may have to replace the entire control arm. A parts store can tell you if just the bushings are available
___________________
Here are the directions for replacing the upper. The attached pics correlate with the directions.
Upper Link
Vehicle Steering and Suspension Suspension Control Arm Service and Repair Procedures Front Suspension Upper Link
UPPER LINK
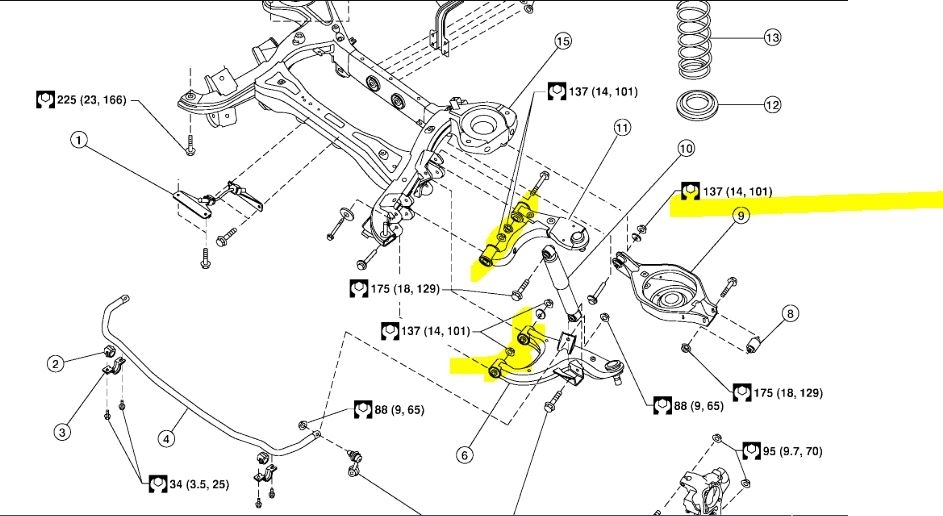
Components
Pic 1
Removal and Installation
REMOVAL
1. Remove the wheel and tire using power tool.
2. Remove the fender protector to access upper link.
3. Remove cotter pin and nut from upper link ball joint and discard the cotter pin.
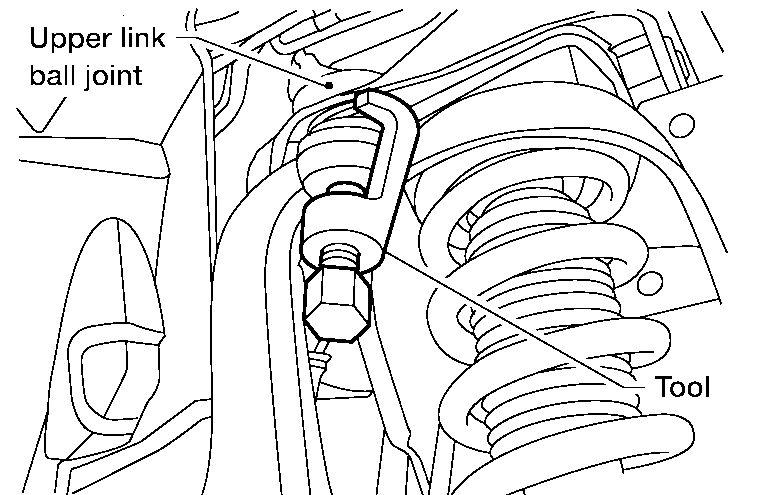
pic 2
4. Separate upper link ball joint stud from steering knuckle using Tool.
Support lower link with jack.
Tool number: ST29020001 (J-24319-01)
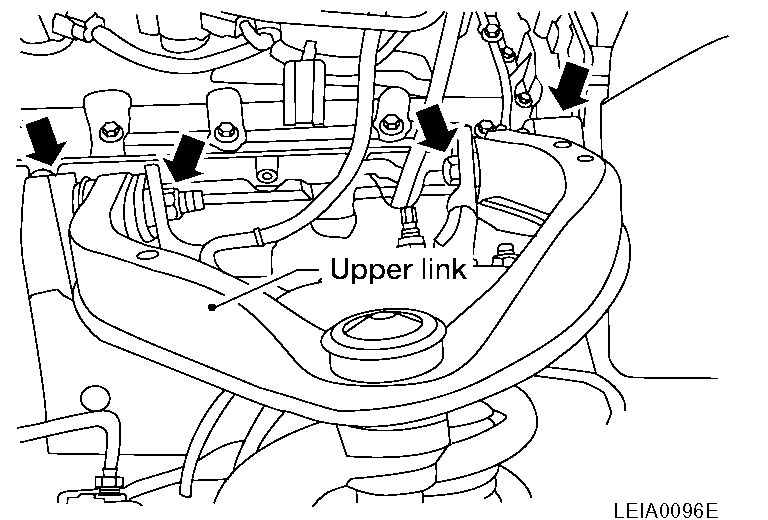
pic 3
5. Remove upper link bolts and nuts, then remove upper link.
INSPECTION AFTER REMOVAL
Upper Link
Check for deformation and cracks. Replace if necessary.
Upper Link Ball Joint
Check for distortion and damage. Replace if necessary.
INSTALLATION
Installation is in the reverse order of removal.
^ Tighten all nuts and bolts to specification. Refer to Components.
CAUTION: Use a new cotter pin for installation of upper link ball joint nut.
^ When installing wheel and tire, refer to Rotation.
^ After installation, check that the front wheel alignment is within specification.
_____________________________________
Here are the directions for the lower.
2006 Nissan-Datsun Truck Armada 2WD V8-5.6L (VK56DE)
Lower Link
Vehicle Steering and Suspension Suspension Control Arm Service and Repair Procedures Front Suspension Lower Link
LOWER LINK
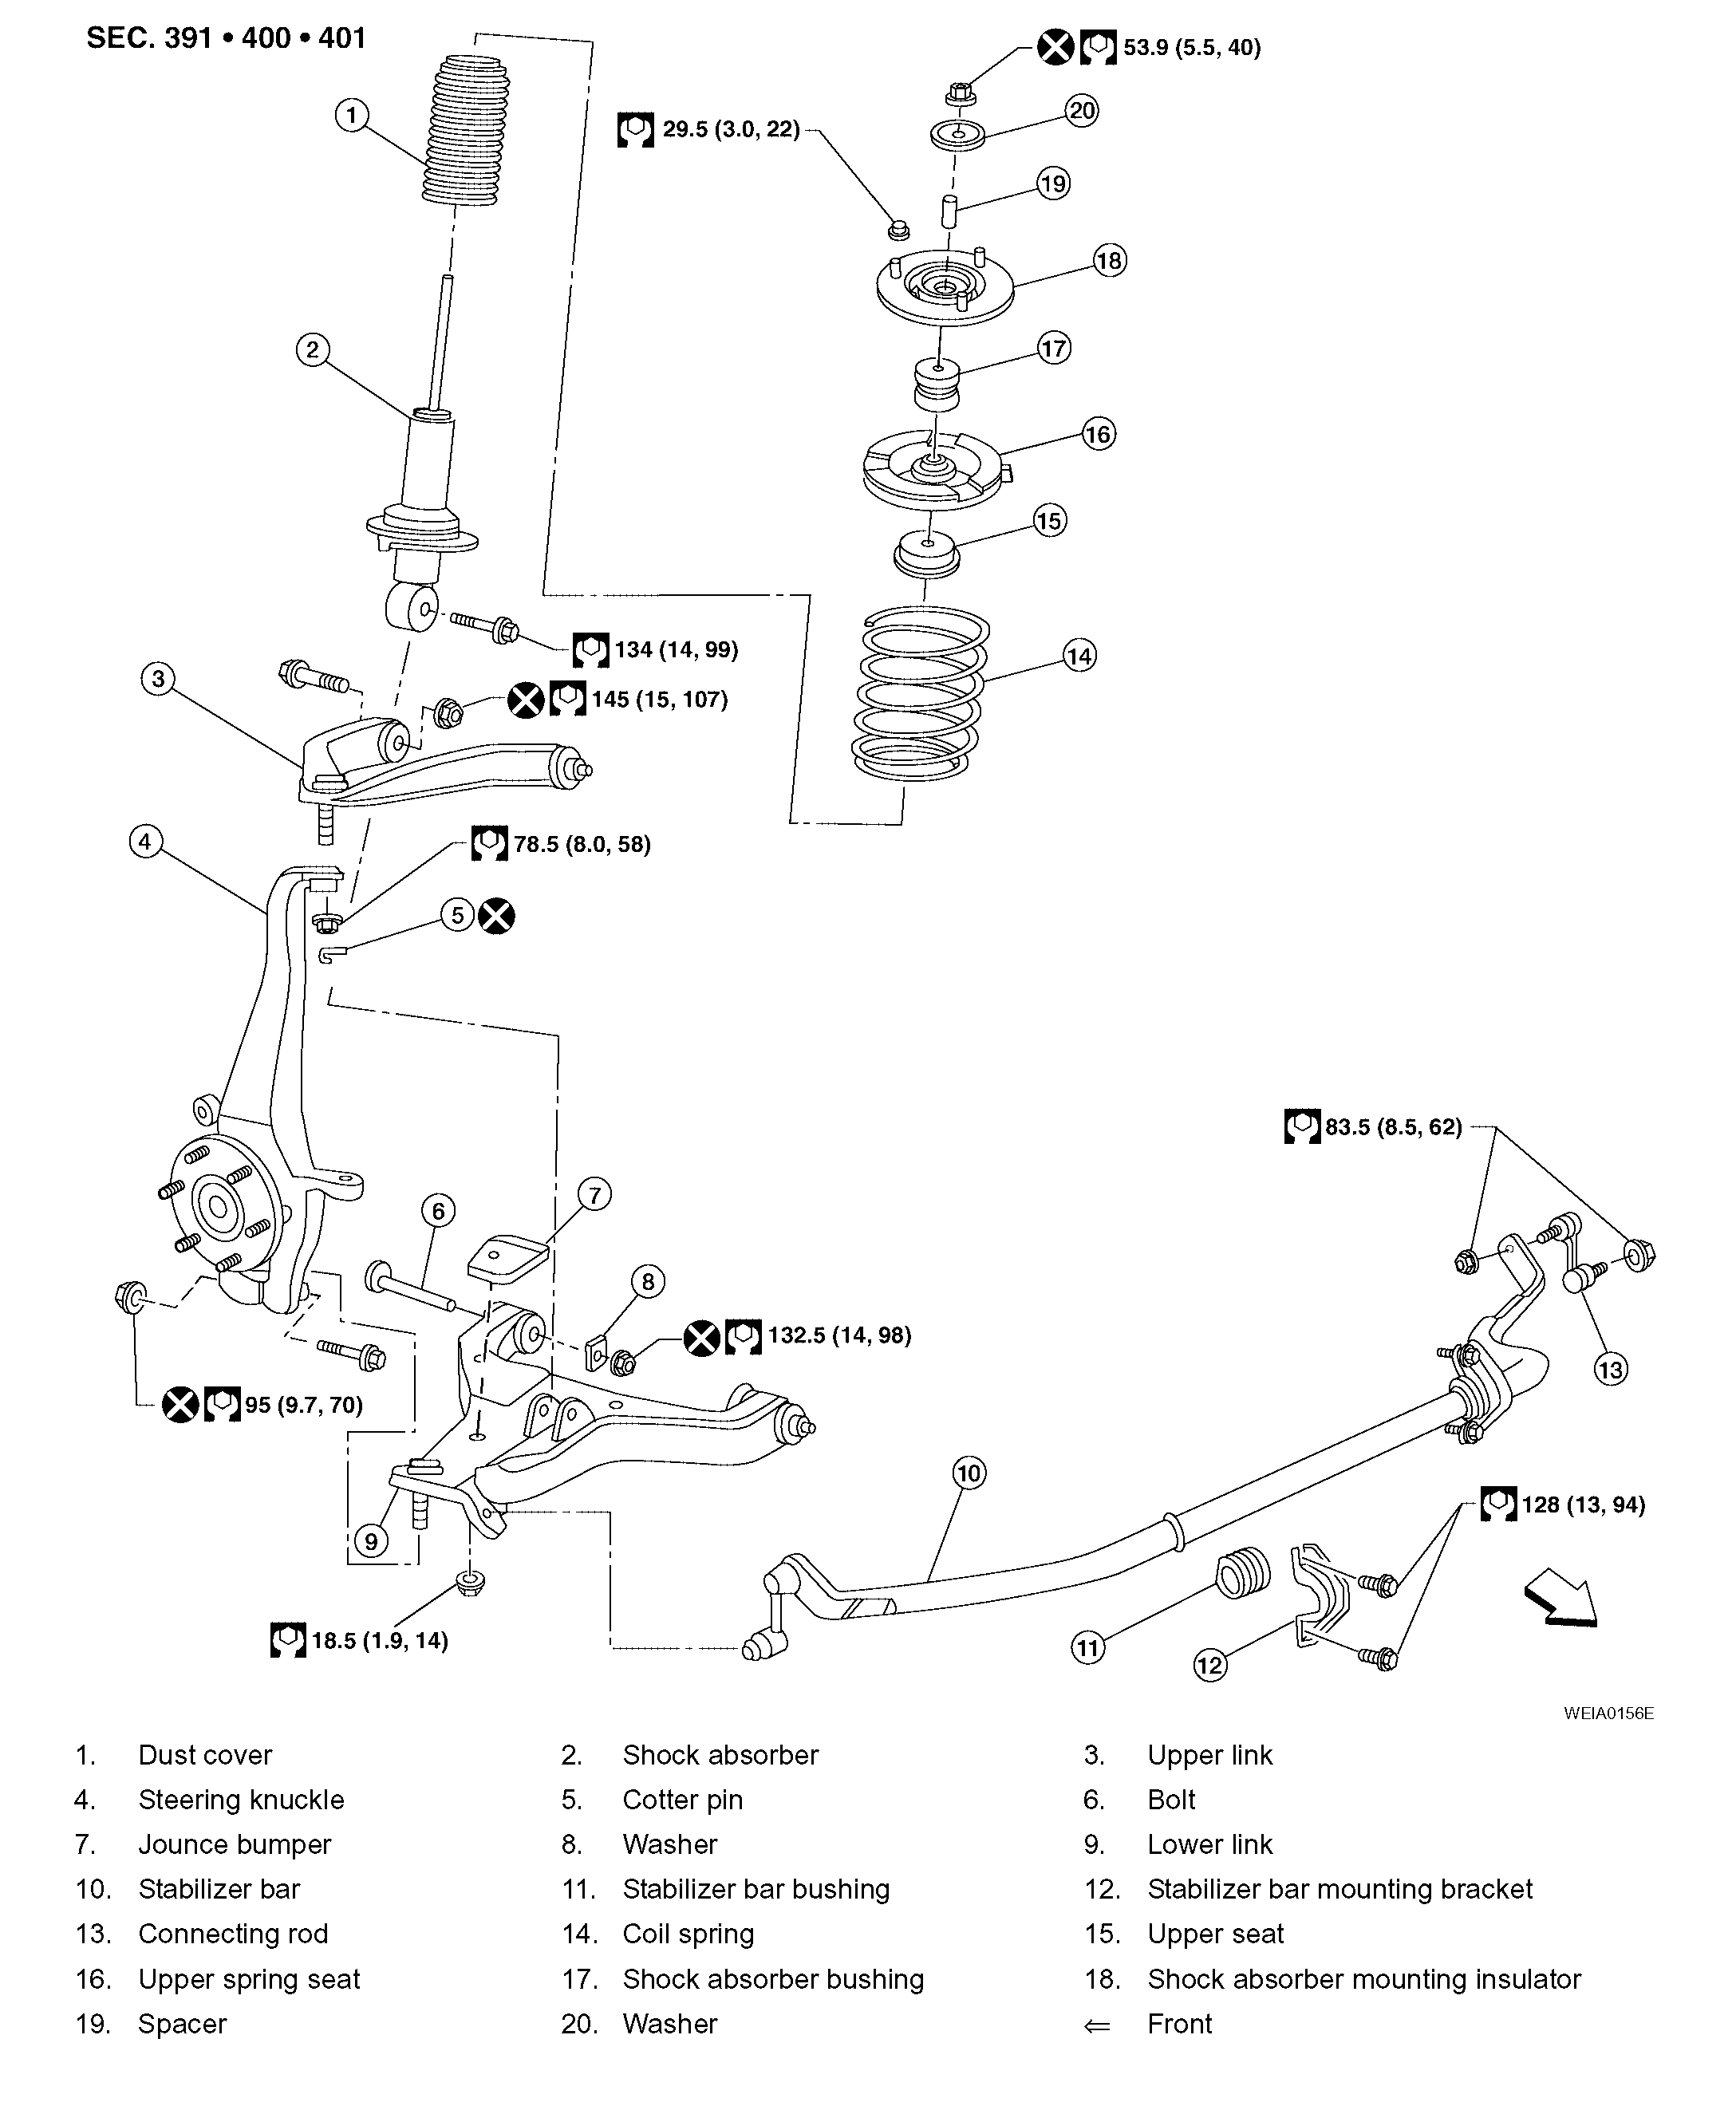
Components
Pic 4
Removal and Installation
REMOVAL
1. Remove the wheel and tire using power tool.
2. Remove lower shock absorber bolt.
3. Remove stabilizer bar connecting rod lower nut using power tool, then separate connecting rod from lower link.
4. Remove drive shaft nut, if equipped.
pic 5
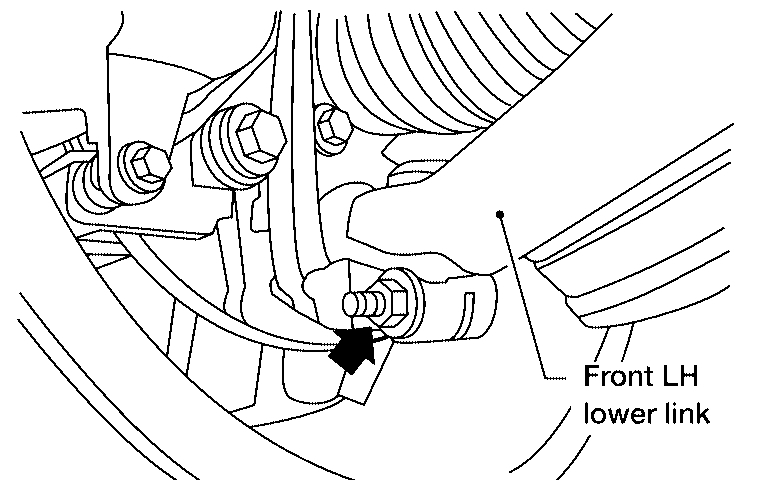
5. Remove pinch bolt from steering knuckle using power tool, then separate lower link ball joint from steering knuckle.
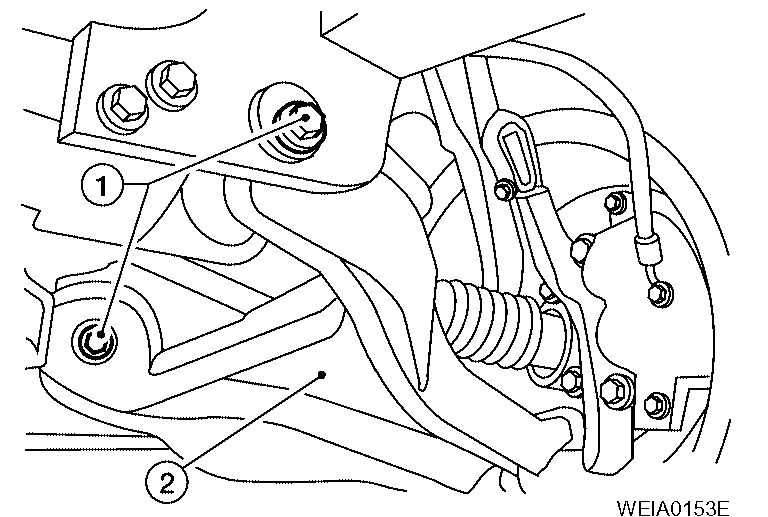
pic 6
6. Remove lower link cam bolts (1) and nuts, then the lower link (2).
NOTE: Some vehicles may be equipped with straight (non-adjustable) lover link bolts and washers. In order to adjust camber and caster on these vehicles, first replace the lower link bolts and washers with adjustable (cam) bolts and washers.
INSPECTION AFTER REMOVAL
Lower Link
Check for deformation and cracks. Replace if necessary.
Lower Link Bushing
Check for distortion and damage. Replace if necessary
INSTALLATION
Installation is in the reverse order of removal.
^ Tighten all nuts and bolts to specification. Refer to Components.
^ When installing wheel and tire, refer to Rotation.
^ After installation, check that the front wheel alignment is within specification.
_________________________________
Let me know if this helps. Also, the vehicle will need an alignment when this is done. There are eccentric bolts on the lower arm. You can mark them to get it close when you put it back together, but it really should be aligned.
Take care,
Joe
Images (Click to enlarge)
Aug 30, 2019 at 9:03 PM