1. Before servicing the vehicle, refer to the precautions in the beginning of this section.
2. Remove or disconnect the following:
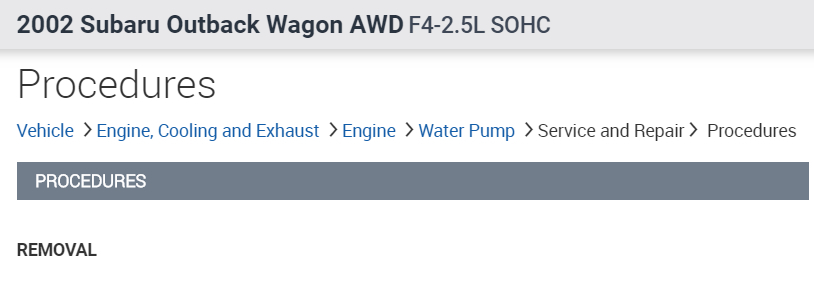
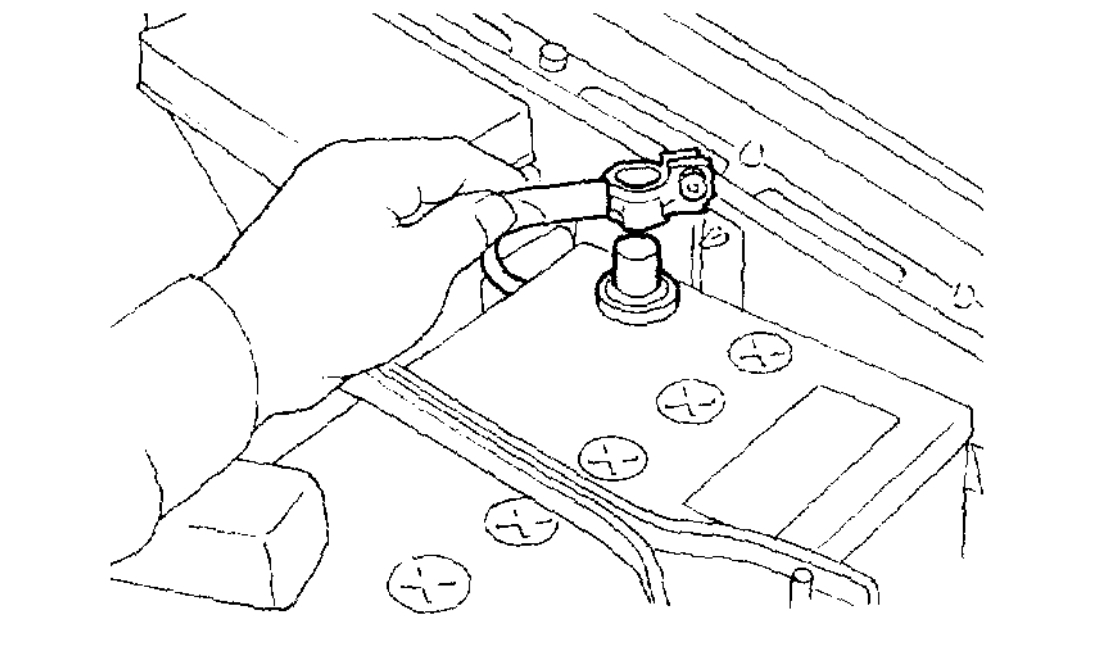
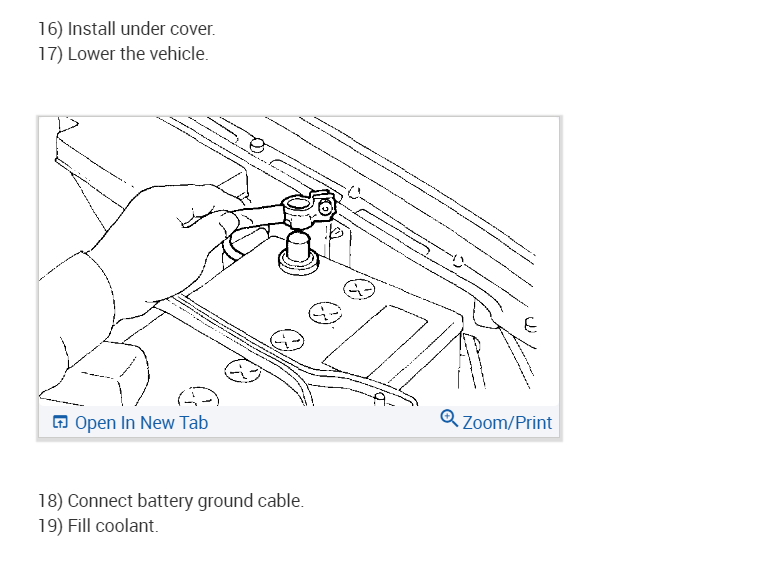
Negative battery cable
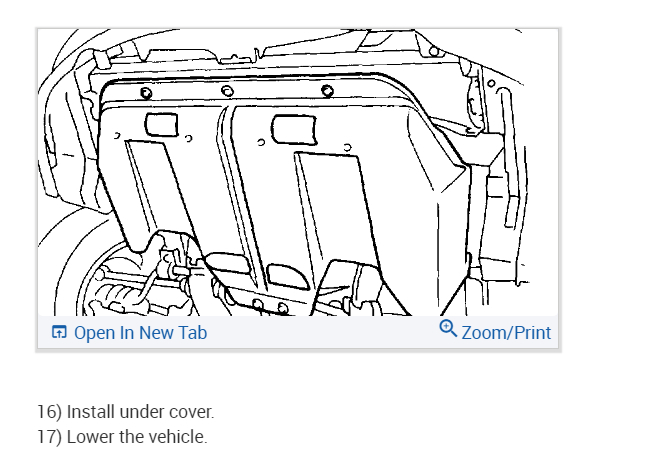
Engine undercover, if equipped
3. Drain the coolant into a suitable container.
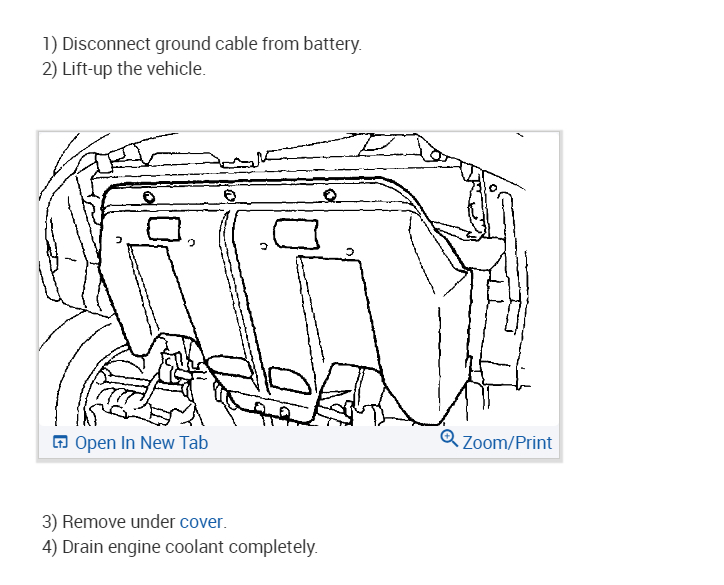
4. Remove or disconnect the following:
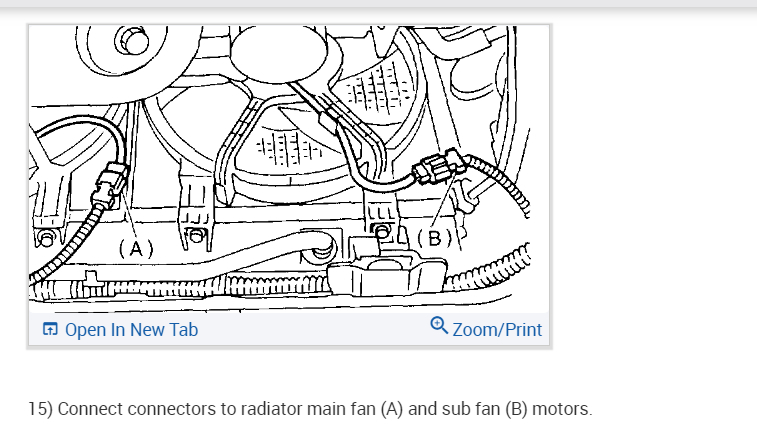
Radiator fan connector(s)
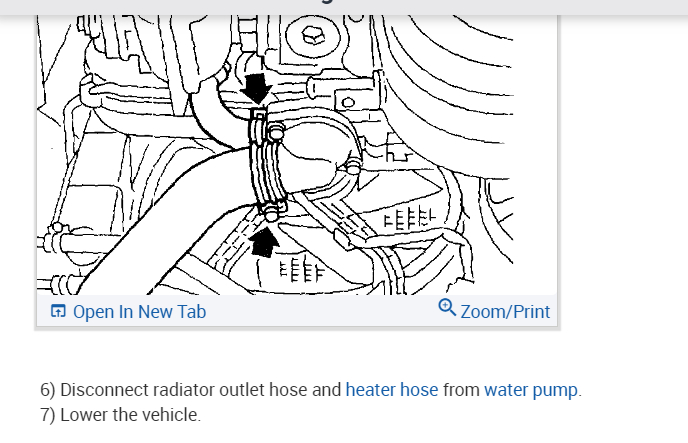
Radiator outlet and heater hoses
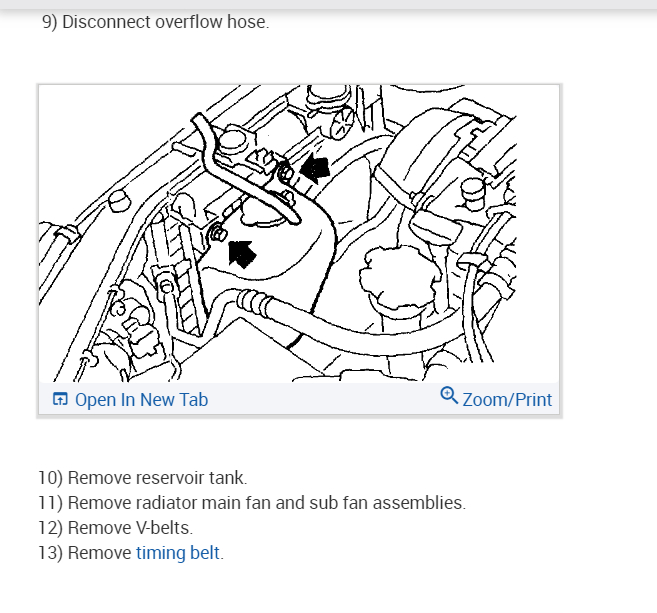
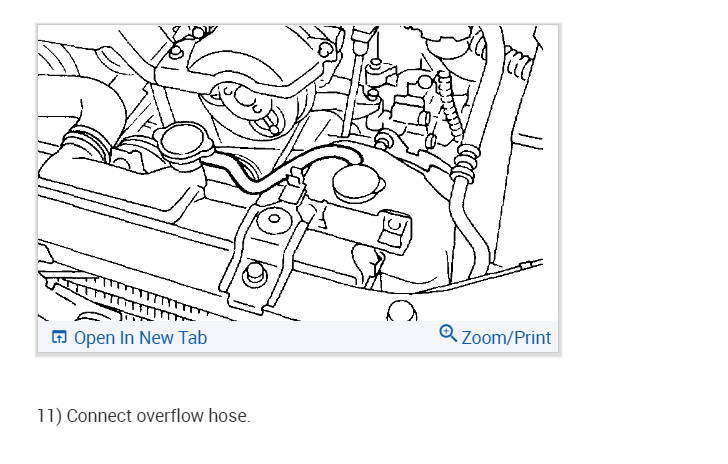
Heater bypass hose or overflow hose, if equipped
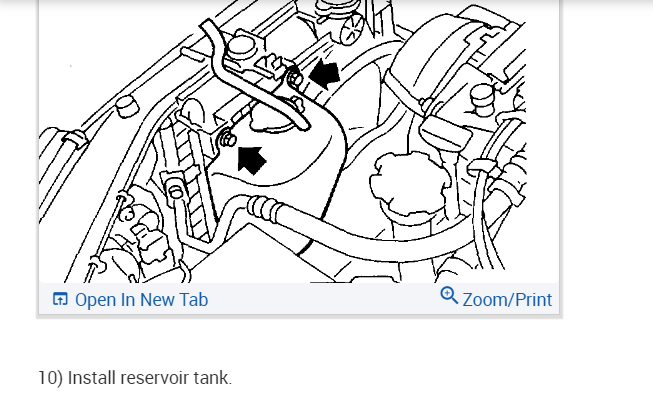
Reservoir tank, on Legacy models
Radiator fan motor assembly(ies)
Accessory drive belts
Timing belt
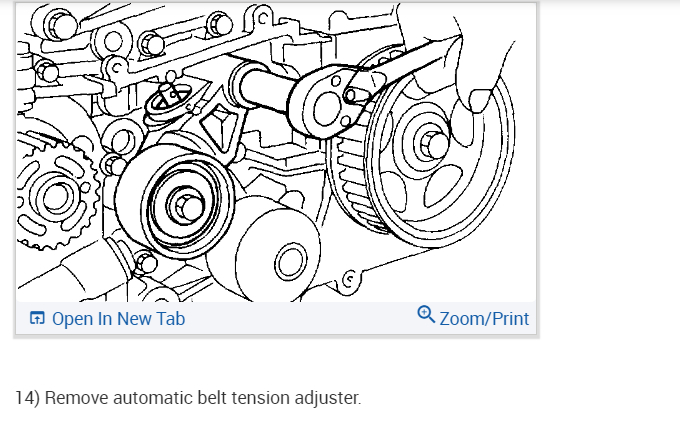
Belt tension adjuster
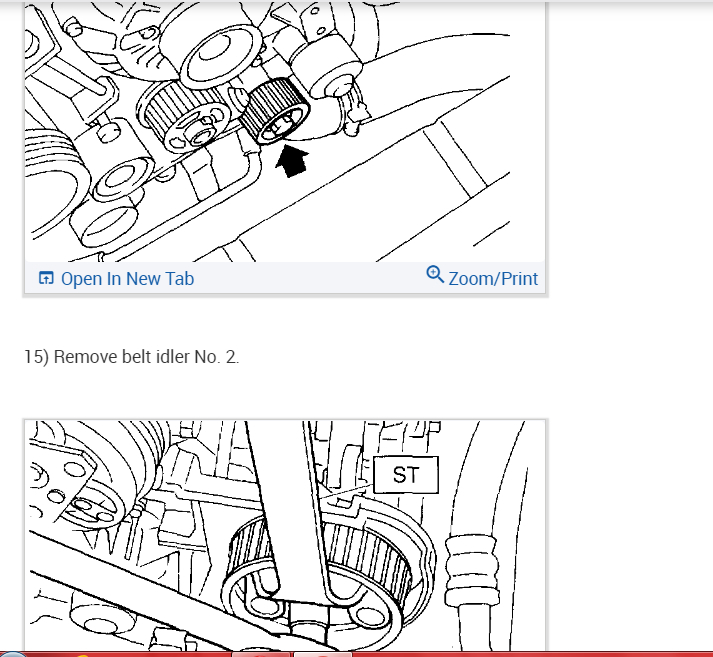
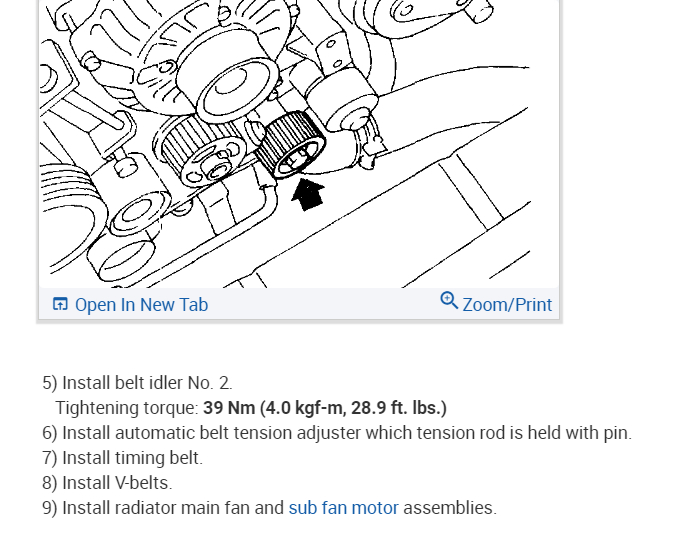
Belt idler No. 2
Camshaft Position (CMP) sensor
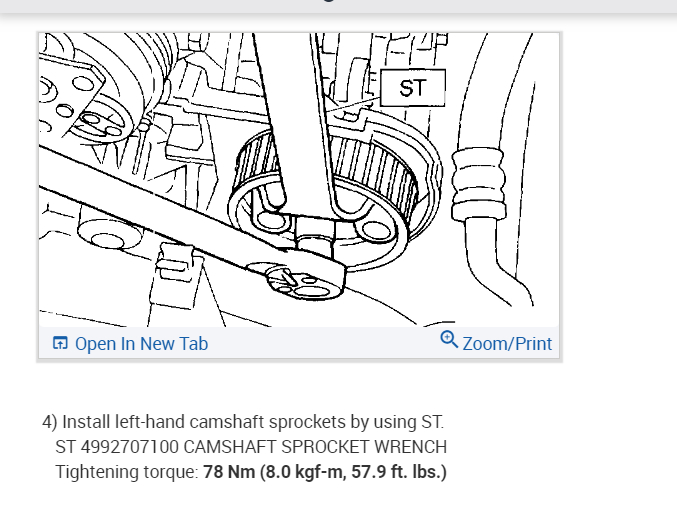
Left side camshaft pulley(s)
Left side rear timing belt cover
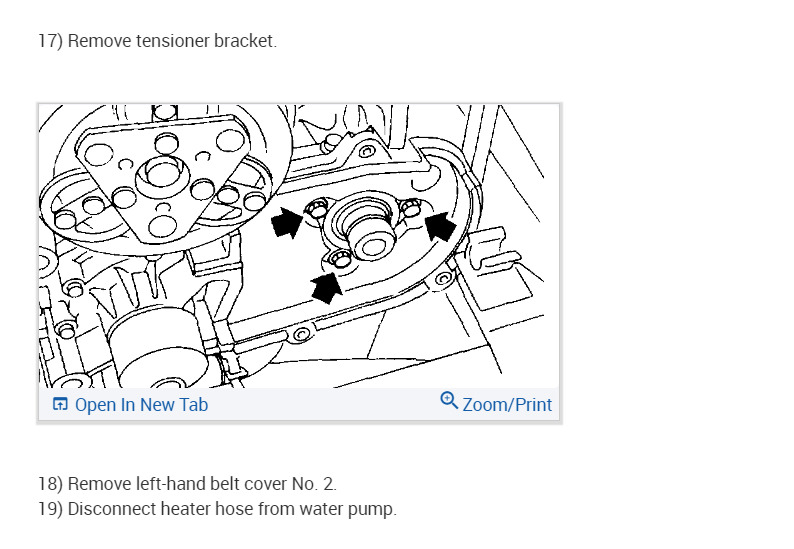
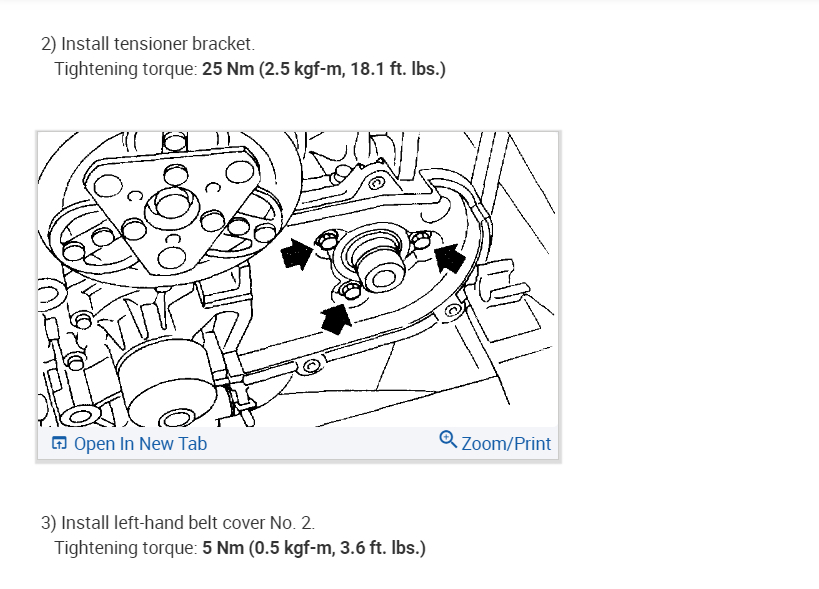
Tensioner bracket
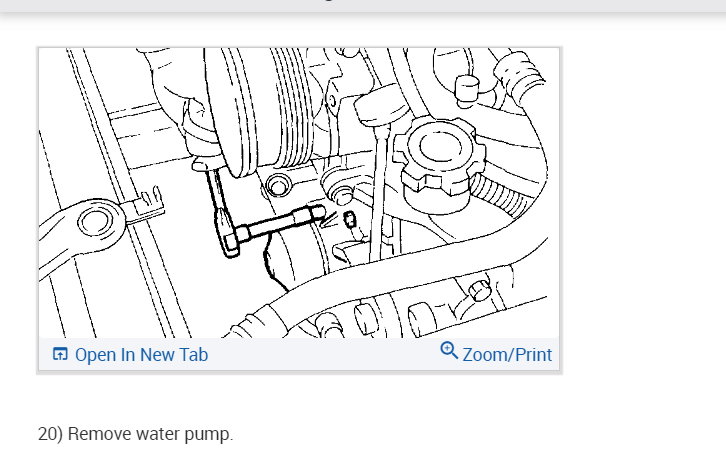
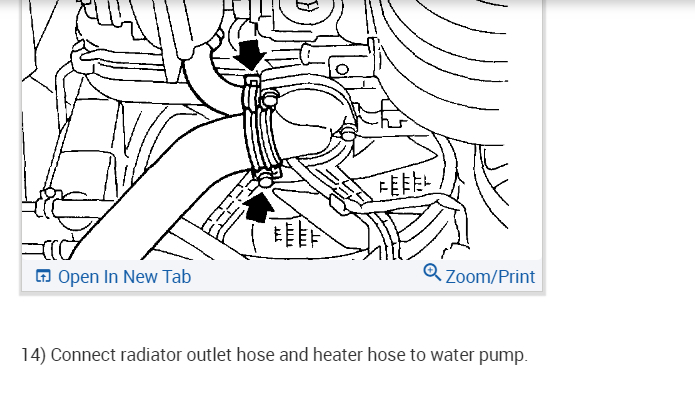
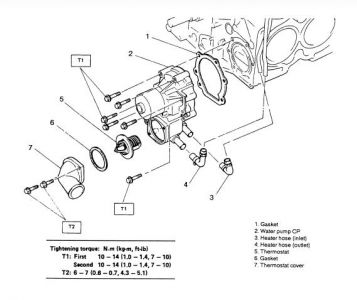
Radiator and heater hoses from water pump
Water pump retainer bolts
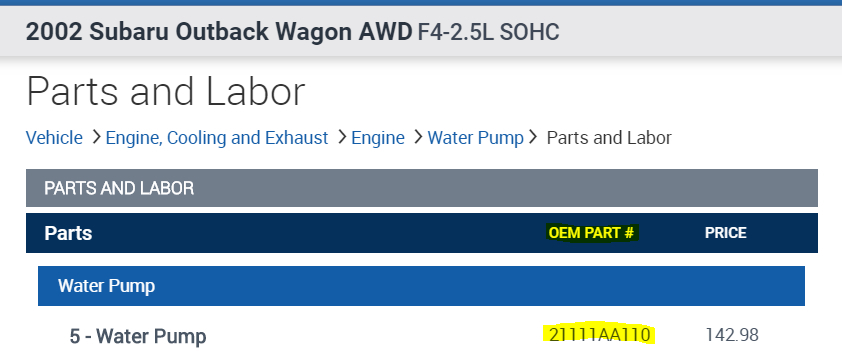
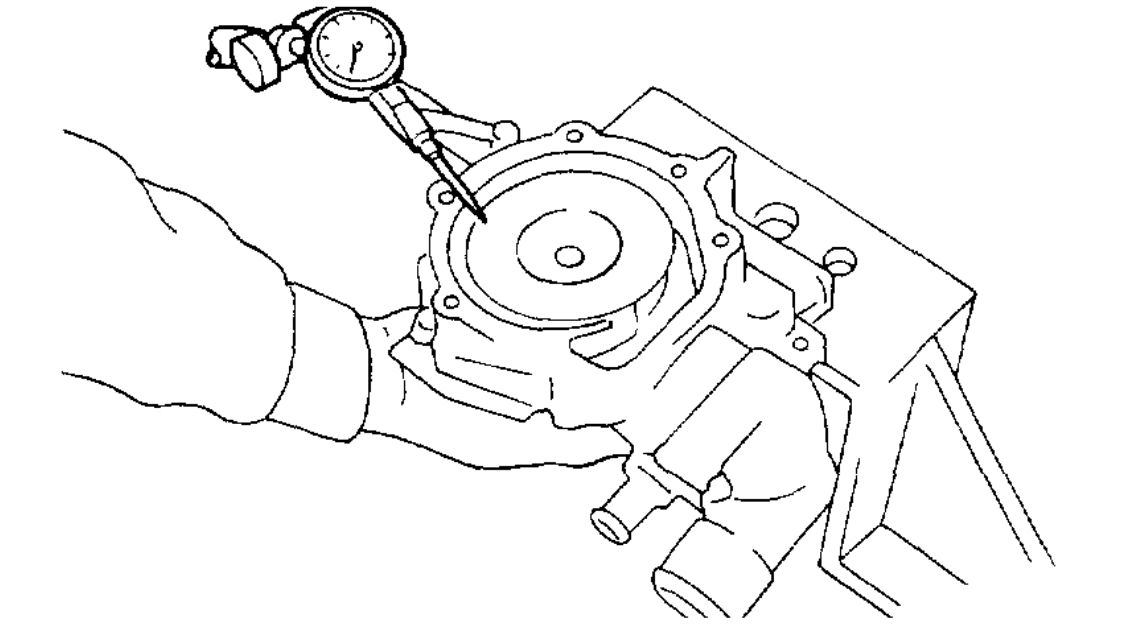
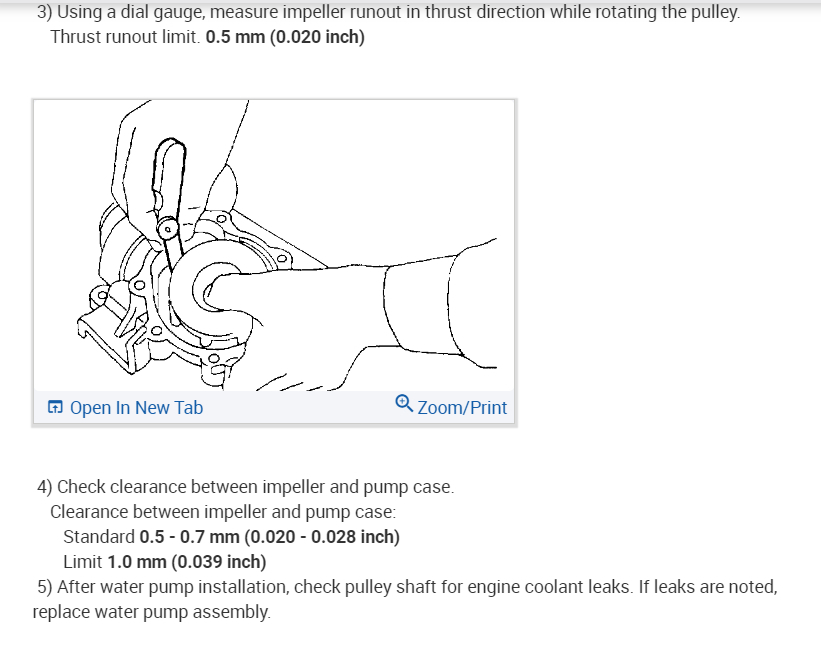
Water pump
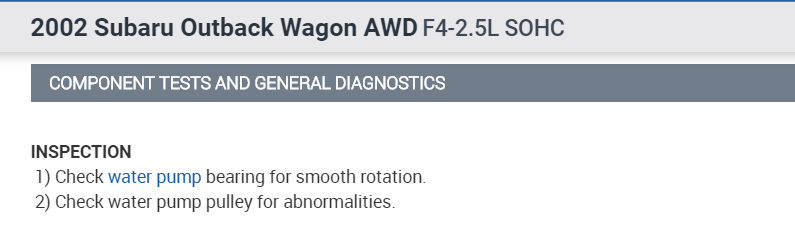
5. Inspect the radiator hoses for deterioration and replace as necessary.
To install:
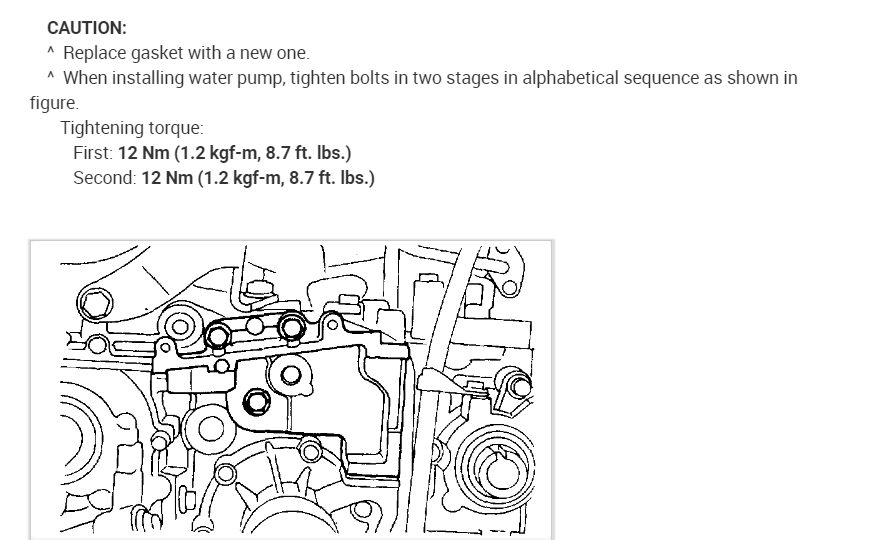
1. Clean the gasket mating surfaces thoroughly. Always use new gaskets during installation.
2. Install or connect the following:
Water pump, tighten the bolts in sequence to 10 ft. lbs. (13 Nm). After tightening the bolts once, retighten to the same specification again.
Radiator heater hoses to water pump
Tensioner bracket
Left side rear timing belt cover
Left side camshaft pulley(s)
CMP sensor
Belt idler No. 2
Belt tension adjuster
Timing belt
Accessory drive belts
Radiator fan assembly(ies)
Reservoir tank, if removed
Heater bypass hose or overflow hose, if equipped
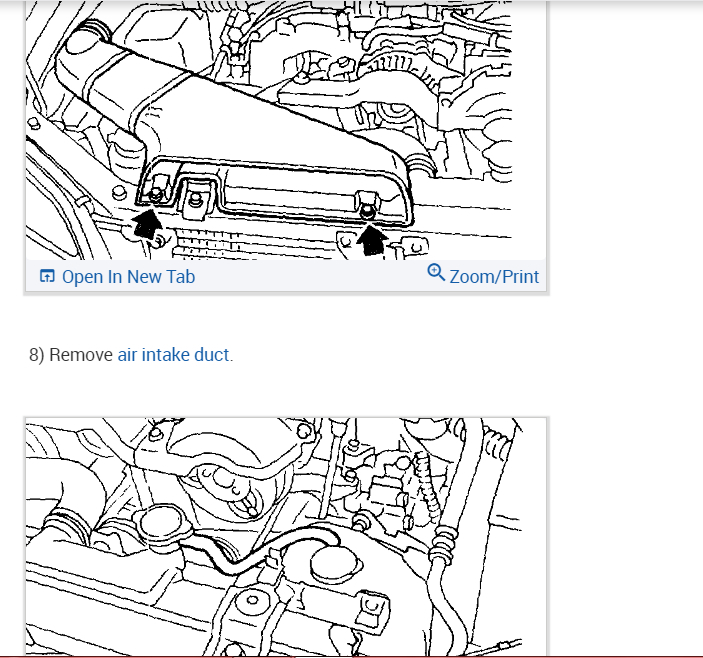
Air intake duct
Radiator outlet and heater hoses
Radiator fan connector(s)
Engine undercover, if removed
3. Fill the system with coolant and connect the negative battery cable.
4. Start the engine and allow it to reach operating temperature.
5. Check for leaks.
Thursday, March 11th, 2021 AT 5:58 PM
(Merged)