Hi,
Honestly, I would recommend installing the correct one. I believe the angling of the mounts are different which can cause alignment issues and failure. Also, there is a chance that the differences can allow the tire to rub the coil spring. I have to be honest, I'm impressed you got it together.
_______________________________
Here are the directions specific to removal and replacement. I'm adding them since you indicated this is the first time doing it. Check through to make sure nothing was missed. The attached pictures correlate with the directions.
_______________________________
2004 Mini Cooper (R50) L4-1.6L (W10)
Removing and Installing Front Left or Right Spring Strut
Vehicle Steering and Suspension Suspension Suspension Strut / Shock Absorber Service and Repair Removal and Replacement Front Axle Mini Removing and Installing Front Left or Right Spring Strut
REMOVING AND INSTALLING FRONT LEFT OR RIGHT SPRING STRUT
Removing and Installing Front Left or Right Spring Strut
Special Tools Required:
- 32 1 190
- 31 3 090
NOTE:
The check of whether the spring strut has to be replaced can be carried out in two ways:
- When installed: shock tester
- When removed: shock absorber tester
Installation Note:
1. All screws, nuts, bolts and hose clamps removed during the repair must be replaced.
2. Retaining elements on chassis and suspension and steering parts must be replaced.
Necessary Preliminary Tasks:
- Remove wheel.
- Remove brake caliper from brake anchor plate.
pic 1
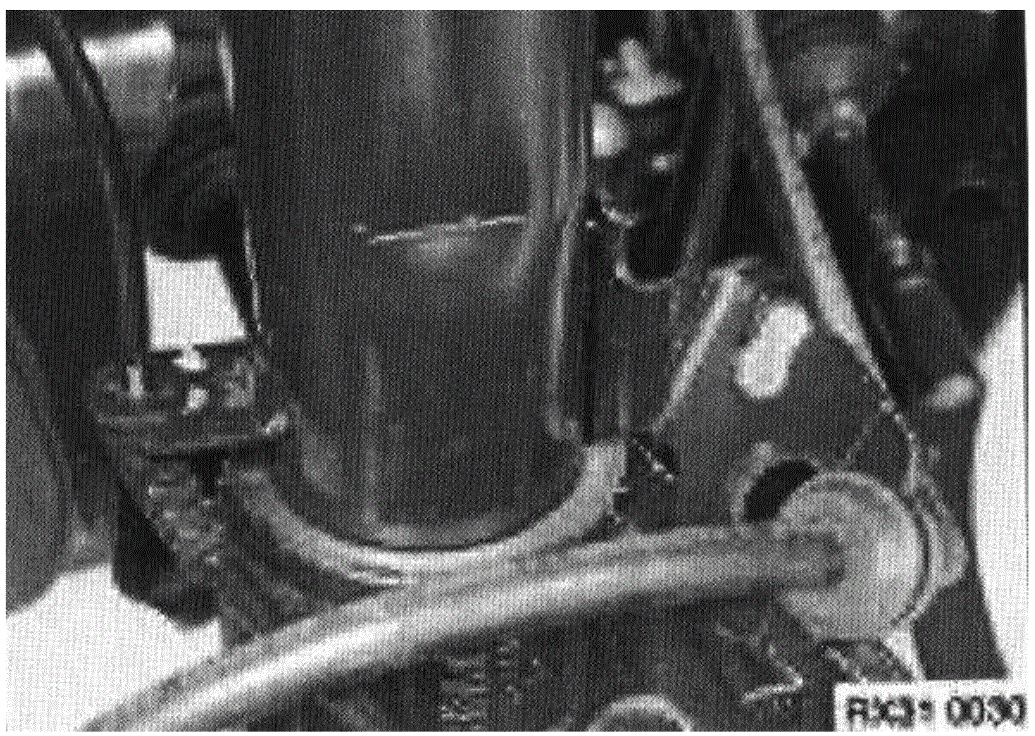
Release wheel speed sensor and brake hose from the holders.
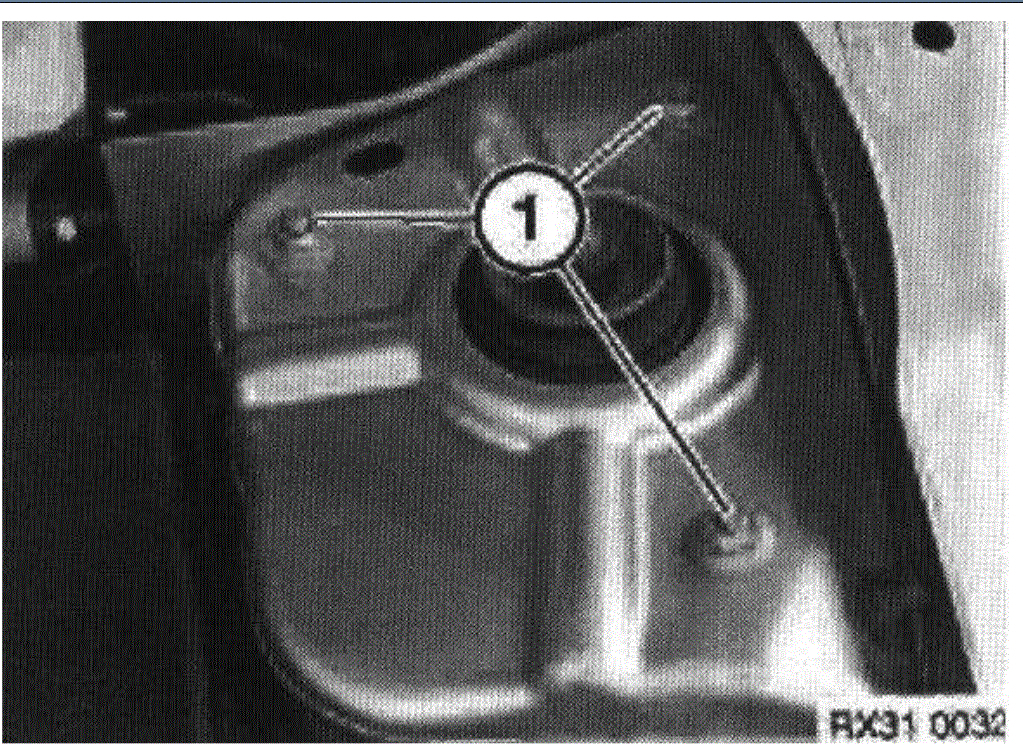
Vehicles with automatic headlight beam throw adjustment:
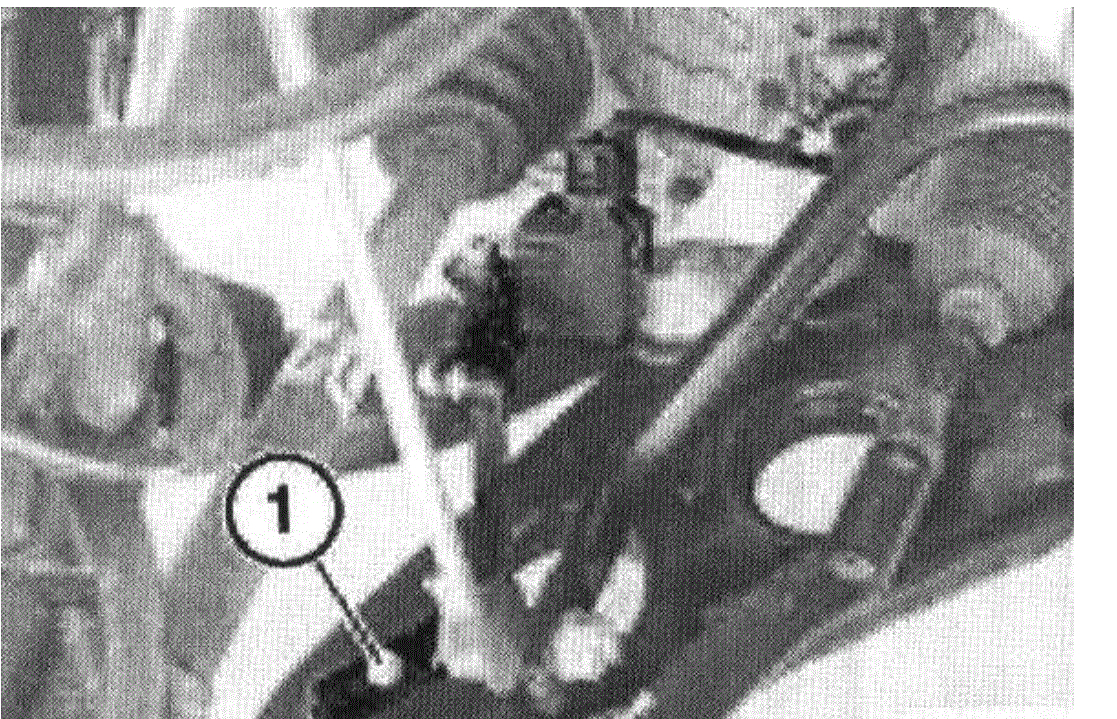
pic 2
Release screw (1) and remove bracket.
Installation Note:
- It must be ensured that the bracket is re-installed in the correct position.
Vehicles Up to 03/2002:
pic 3
Release nut (1) using a hexagon socket wrench or open-end spanner for counter support.
Installation Note:
- Replace self-locking nut.
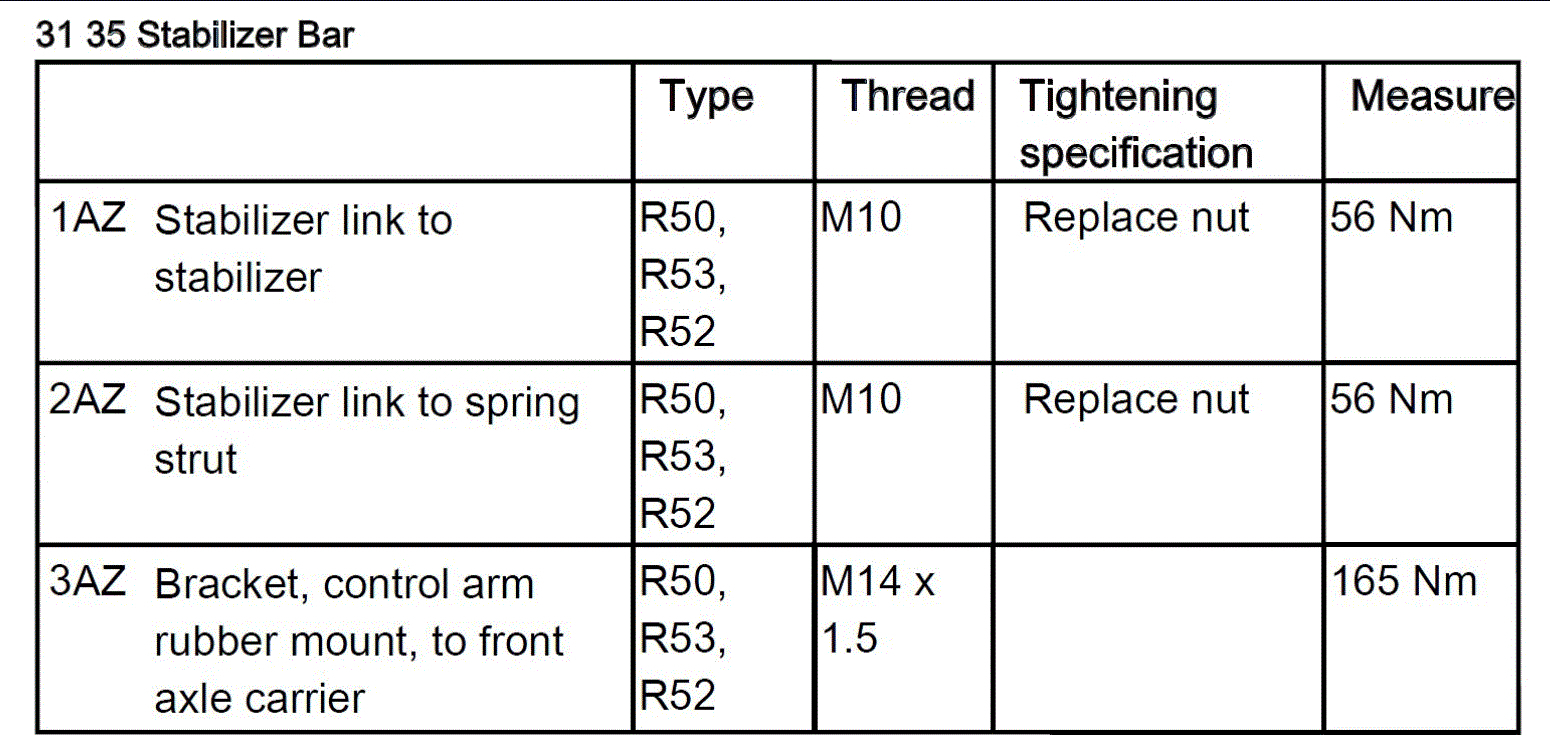
pic 4
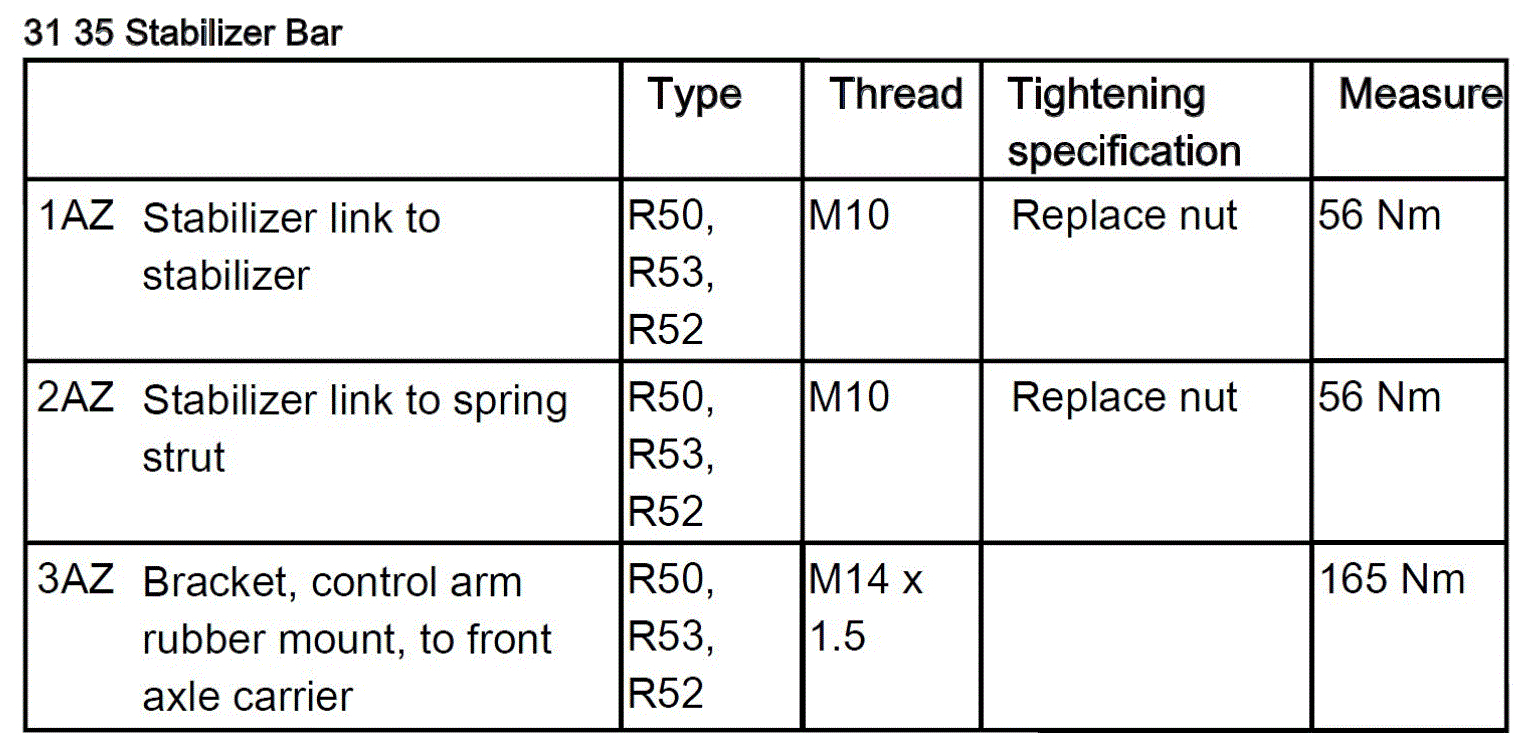
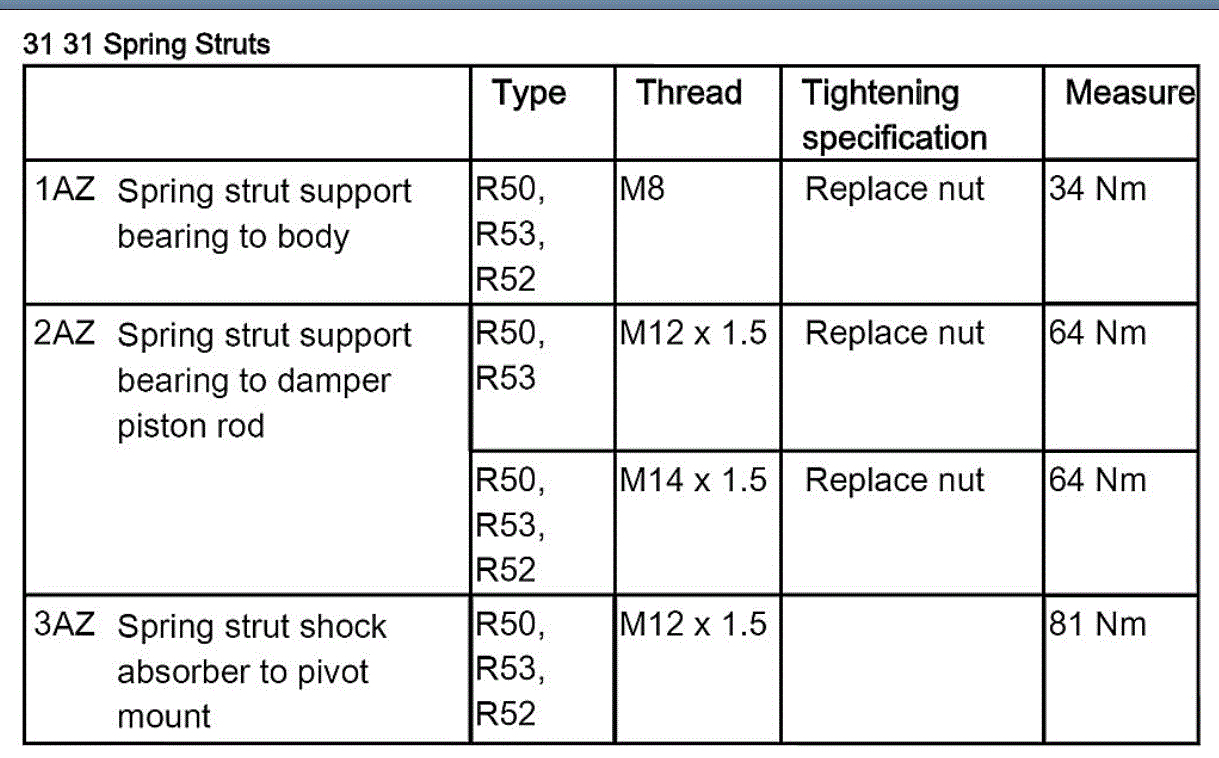
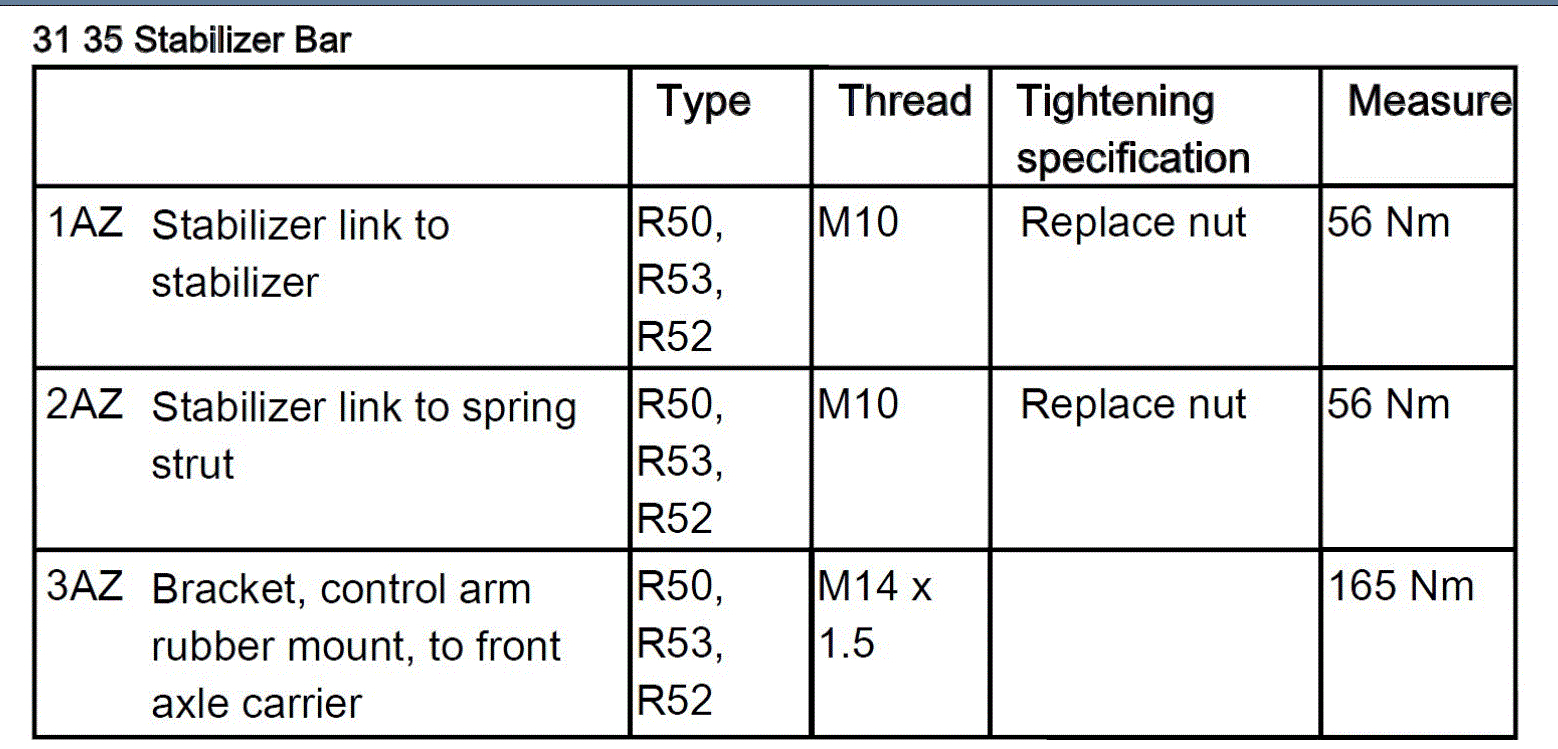
- Tightening Torque, 31 35 1AZ.
Vehicles from 03/2002:
pic 5
Release nut (1) using a hexagon socket wrench or open-end spanner for counter support.
Installation Note:
- Replace self-locking nut.
pic 6
- Tightening Torque, 31 35 2AZ.
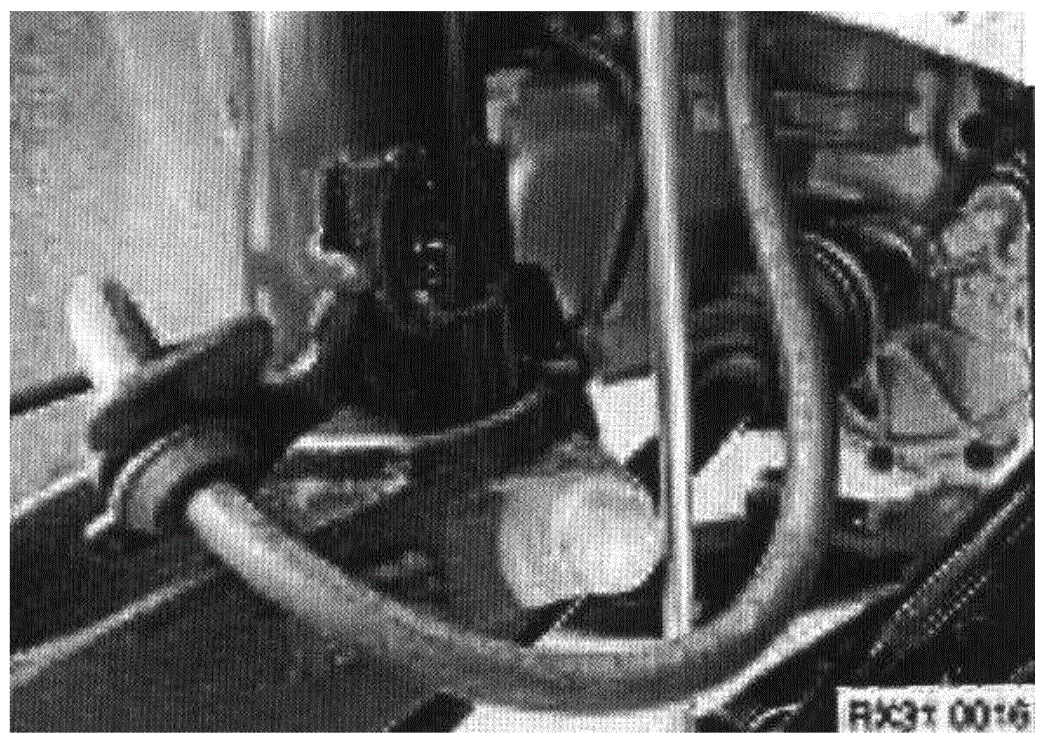
pic 7
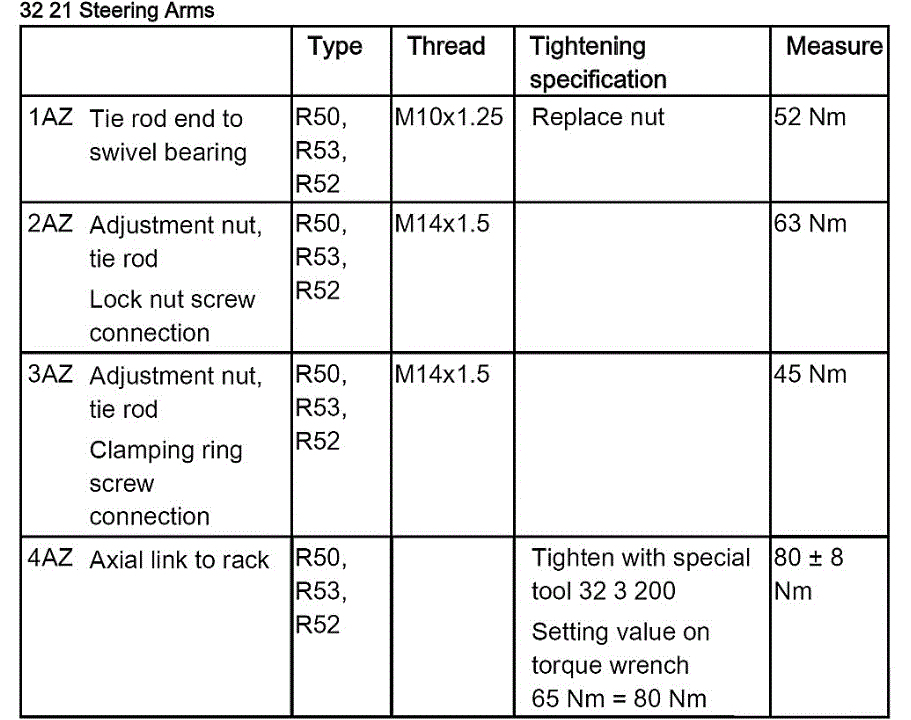
Release nut and press out track rod from the steering stub with special tool 32 3 090 (1).
Installation Note:
- Replace self-locking nut.
pic 8
- Tightening Torque, 32 21 1AZ.
pic 9
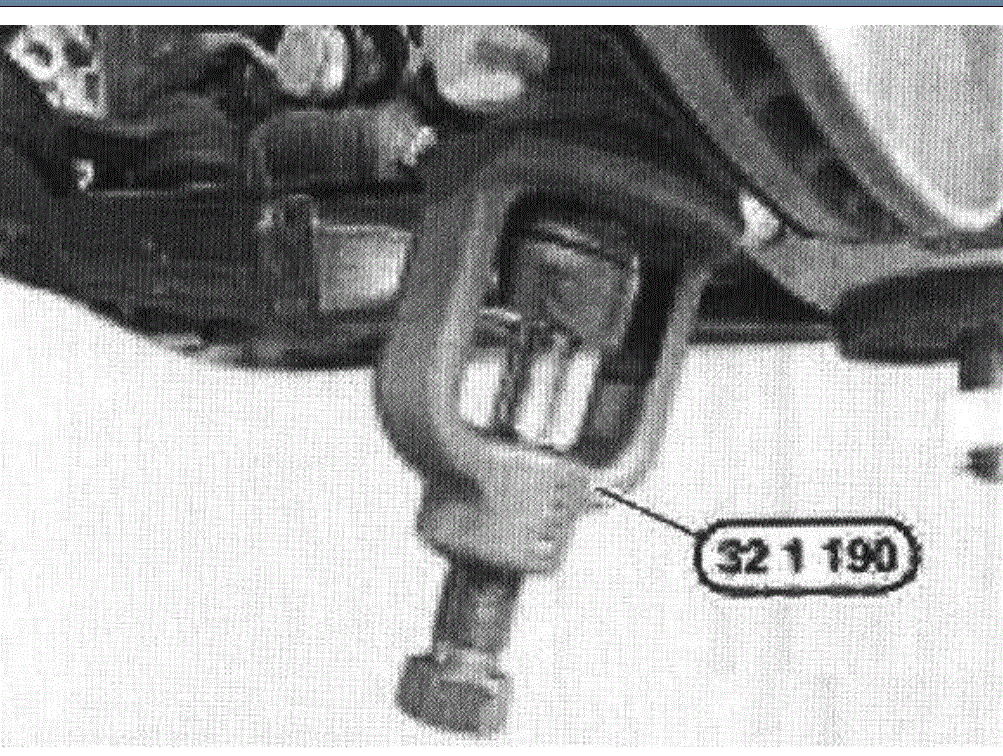
Release nut and press out wishbone from the steering stub with special tool 32 1 190.
Installation Note:
- Replace self-locking nut.
pic 10
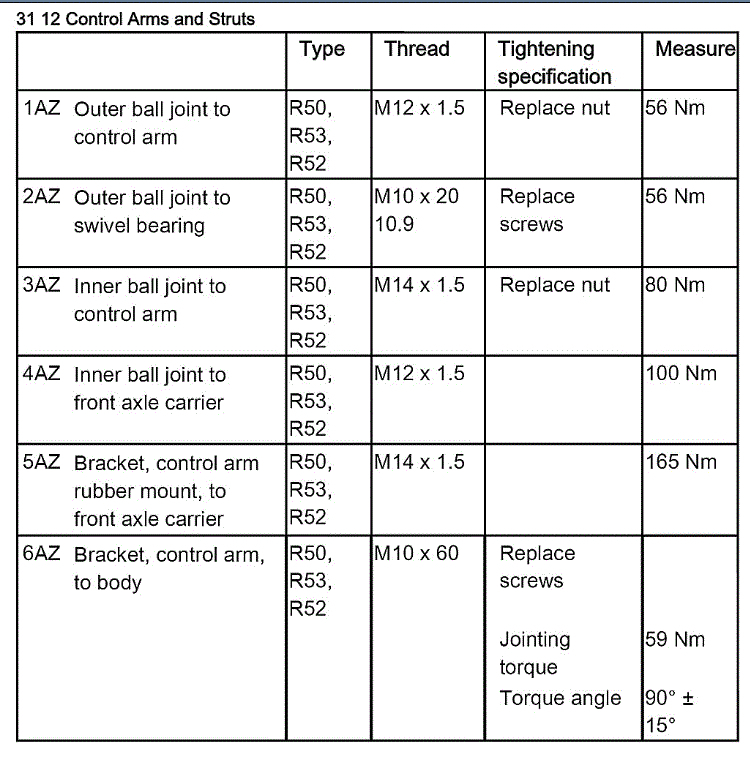
- Tightening torque, 31 12 1AZ.
pic 11
Important!
Support steering stub.
Release clamping bolt on steering stub and feed out steering stub of the spring strut.
Installation Note:
- Feed in spring strut and push steering stub upwards until it reaches the limit position.
- Insert bolt.
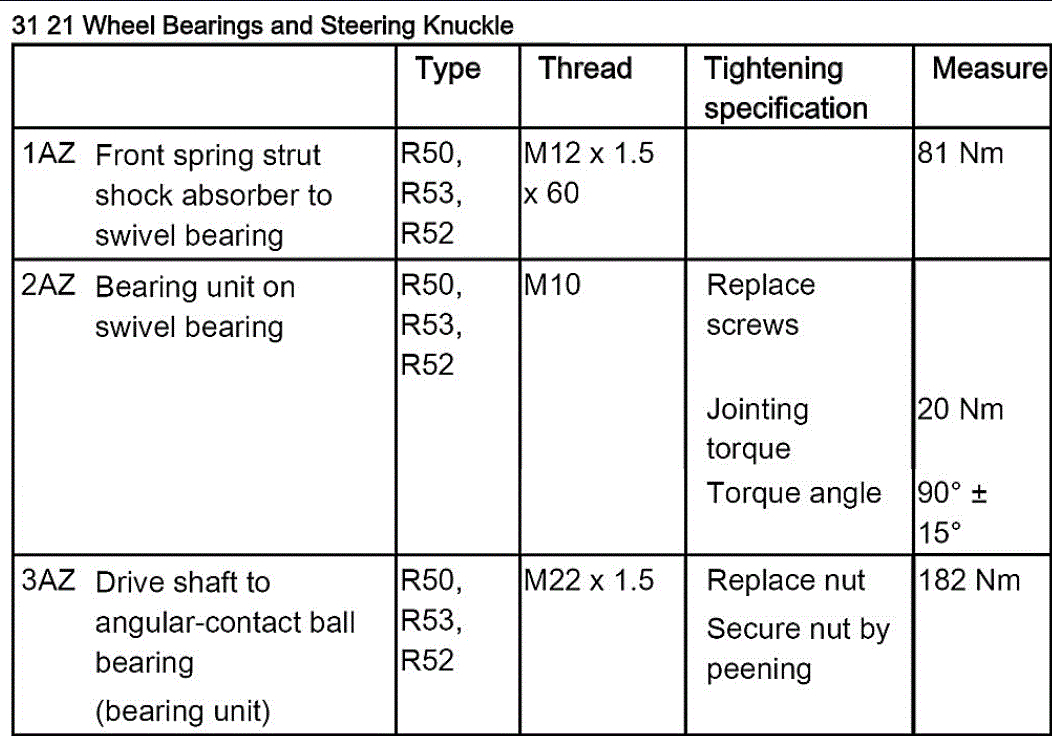
pic 12
- Tightening Torque 31 21 1AZ.
pic 13
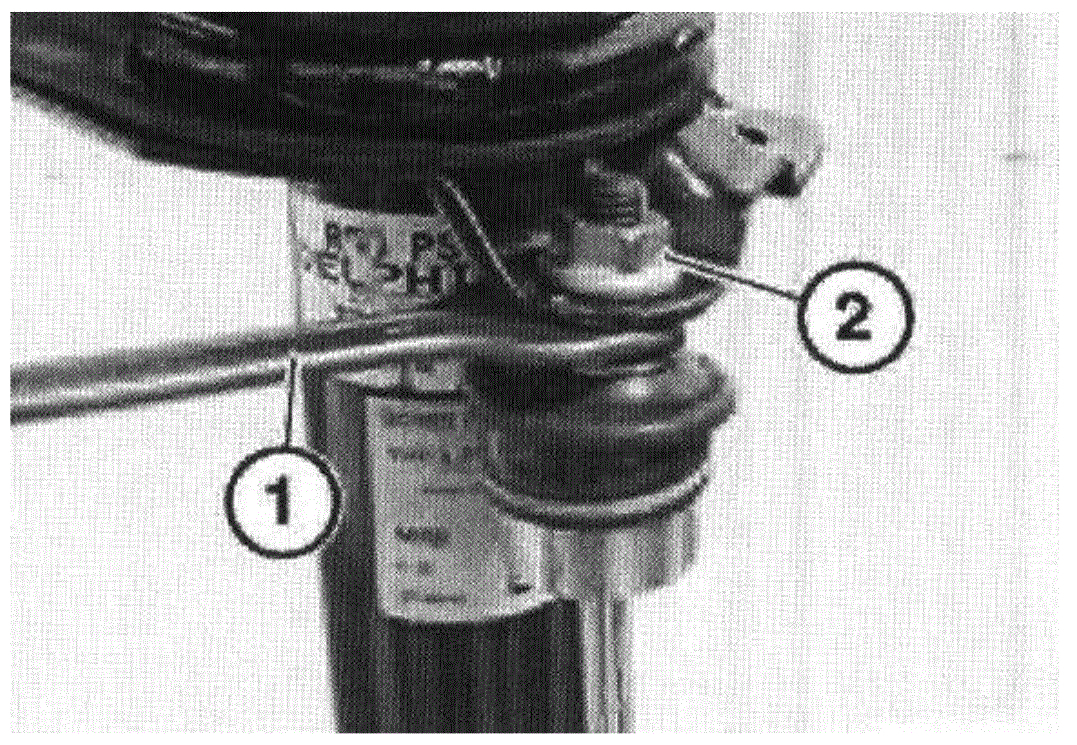
Release nut (1) while supporting the spring strut and then remove the spring strut.
Installation Note:
- Replace self-locking nuts.
pic 14
- Tightening Torque, 31 31 1AZ.
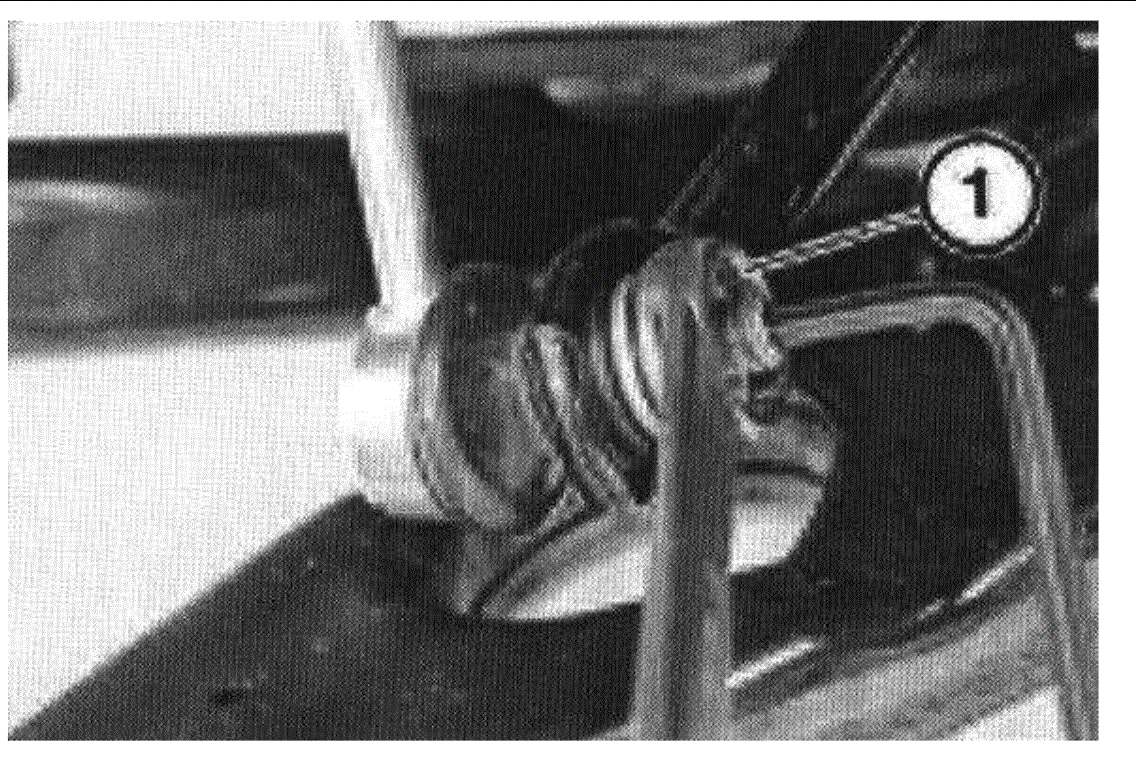
Vehicles up to 03/2002:
pic 15
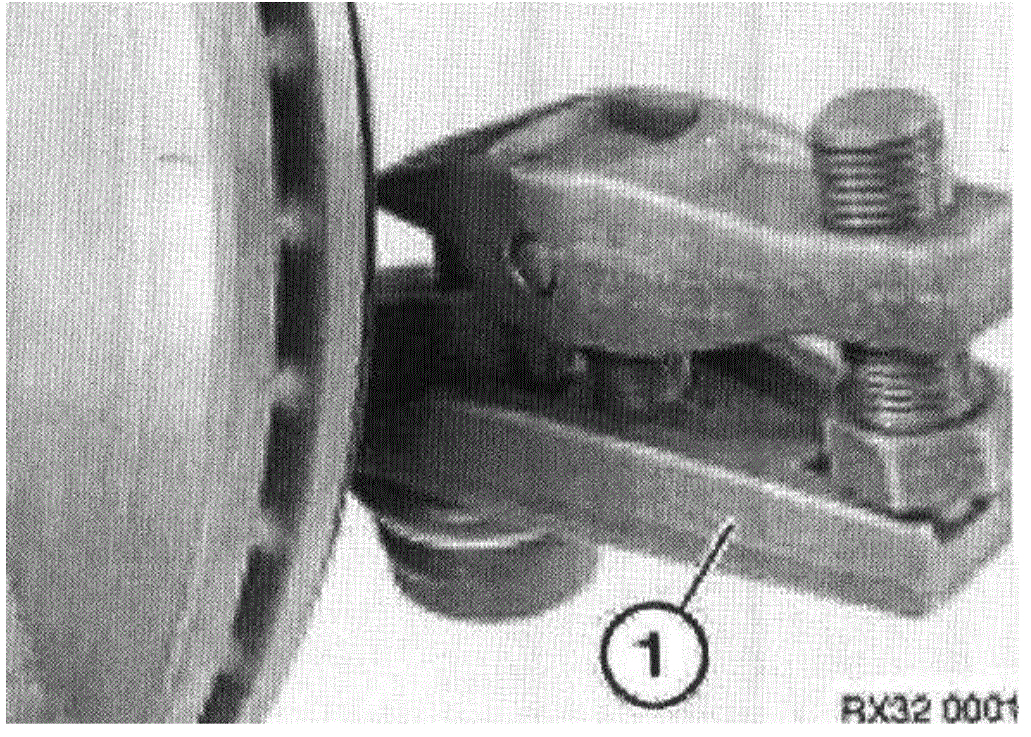
Release nut (2) using an open-end spanner (1) as counter support.
Remove anti-roll bar link from the spring strut.
Installation Note:
pic 16
- Tightening Torque, 31 35 2AZ.
_____________________________
Let me know if this helps or if you have other questions.
Take care,
Joe
Images (Click to enlarge)
Feb 7, 2020 at 2:13 PM