Hi,
If the brake pedal goes to the floor, first make sure there are no hydraulic leaks in the brake system. Make sure the brake fluid reservoir is full. If it is, chances are the brake master cylinder is bad.
Take a look through this link:
https://www.2carpros.com/articles/brake-pedal-goes-to-the-floor
If you find the master cylinder is bad, replacing it isn't too hard of a job. When you get the replacement part, make sure it has a lifetime warranty. That way, you'll never have to pay for it again.
First, here is a link that shows how in general one is replaced. You can use this as a guide.
https://www.2carpros.com/articles/how-to-replace-a-brake-master-cylinder
The new brake master cylinder will need bench bled before install. Here is a video that shows how that is done:
https://youtu.be/WDxvEQrMkBg
Here are directions specific to your vehicle. The attached pics below correlate with the directions.
_______________________________
2012 Nissan-Datsun Altima L4-2.5L (QR25DE)
Replacement
Vehicle Brakes and Traction Control Hydraulic System Brake Master Cylinder Service and Repair Removal and Replacement Replacement
REPLACEMENT
BRAKE MASTER CYLINDER
Removal and Installation
CAUTION:
- Be careful not to splash brake fluid on painted areas; it may cause paint damage. If brake fluid is splashed on painted areas, wash it away with water immediately.
- Never scratch the piston of master cylinder when installing/removing because the piston is exposed.
Check for any dust on the piston, and wash with brake fluid if needed.
- Hold the master cylinder body when handing the master cylinder assembly. Never hold the piston because the piston might become detached if pulled strongly.
- Refill the reservoir tank with new brake fluid "DOT 3".
- Never reuse drained brake fluid.
- Do not reuse master cylinder O-ring.
NOTE:
When removing hoses or tubes, cap or plug openings to prevent fluid from spilling.
REMOVAL
1.Drain the brake fluid. See: Brake Fluid > Removal and Replacement > Drain and Refill.
2.Remove air cleaner assembly and air ducts. See: Air Cleaner Housing > Removal and Replacement > Removal And Installation (QR25DE) or
(VQ35DE).
3.Disconnect the brake fluid level switch harness connector.
4.Disconnect the clutch fluid hose (if equipped).
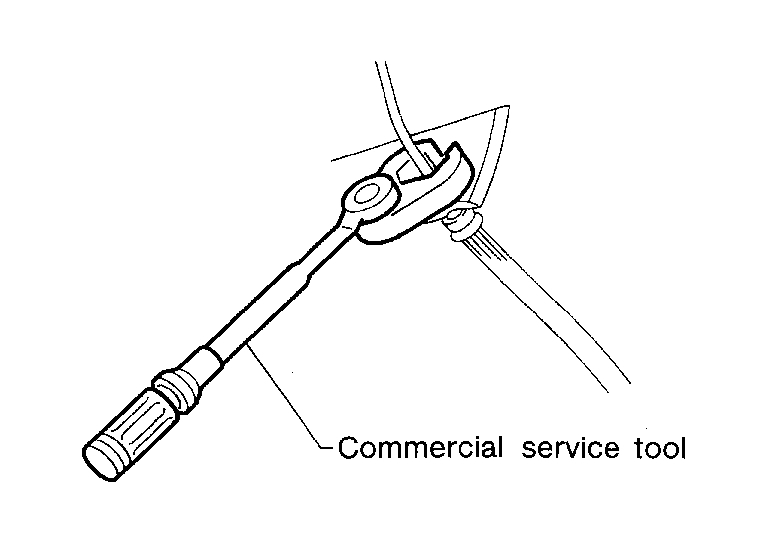
pic 1
5.Disconnect the master cylinder brake tubes using a suitable tool.
6.Remove the master cylinder nuts and remove the master cylinder assembly.
INSTALLATION
Installation is in the reverse order of removal.
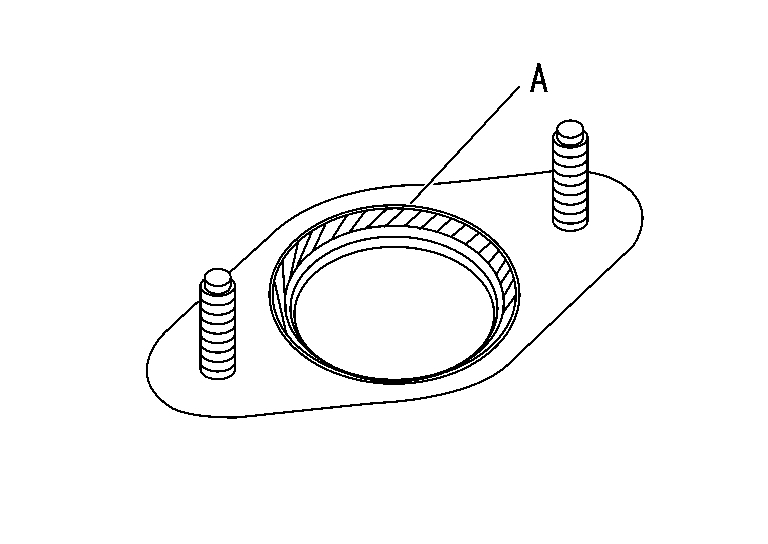
pic 2
- Apply PBC (Poly Butyl Cuprysil) grease or silicone-based grease to brake booster at (A) position as shown. Be sure the O-ring is in the proper position before installing the master cylinder to the brake booster.
BR
CAUTION:
Do not reuse master cylinder O-ring.
- Tighten brake tube flare nut to the specified torque using a suitable tool. See: Hydraulic System, Brakes > Fluid.
- Refill with new brake fluid and bleed air. See: Brake Bleeding > Procedures > Bleeding Brake System.
- Bleed clutch fluid if equipped with a manual transmission. Refer to
See: Clutch Fluid > Procedures > Air Bleeding Procedure.
___________________________________
I hope this helps. Let me know if you have other questions.
Take care and God Bless,
Joe
Images (Click to enlarge)
Mar 12, 2021 at 10:40 PM