Welcome to 2CarPros.
I am going to provide directions for replacing the timing chain. It will include the directions for setting the timing. All attached pics will correlate with the directions.
_________________________________________________
1998 GMC Truck S15/T15 Sonoma P/U 4WD V6-4.3L VIN X
Timing Chain and Sprockets Replacement
Vehicle Engine, Cooling and Exhaust Engine Timing Components Timing Chain Service and Repair Procedures Timing Chain and Sprockets Replacement
TIMING CHAIN AND SPROCKETS REPLACEMENT
REMOVAL PROCEDURE
^ Tools Required
- J 23523-F Balancer Remover and Installer
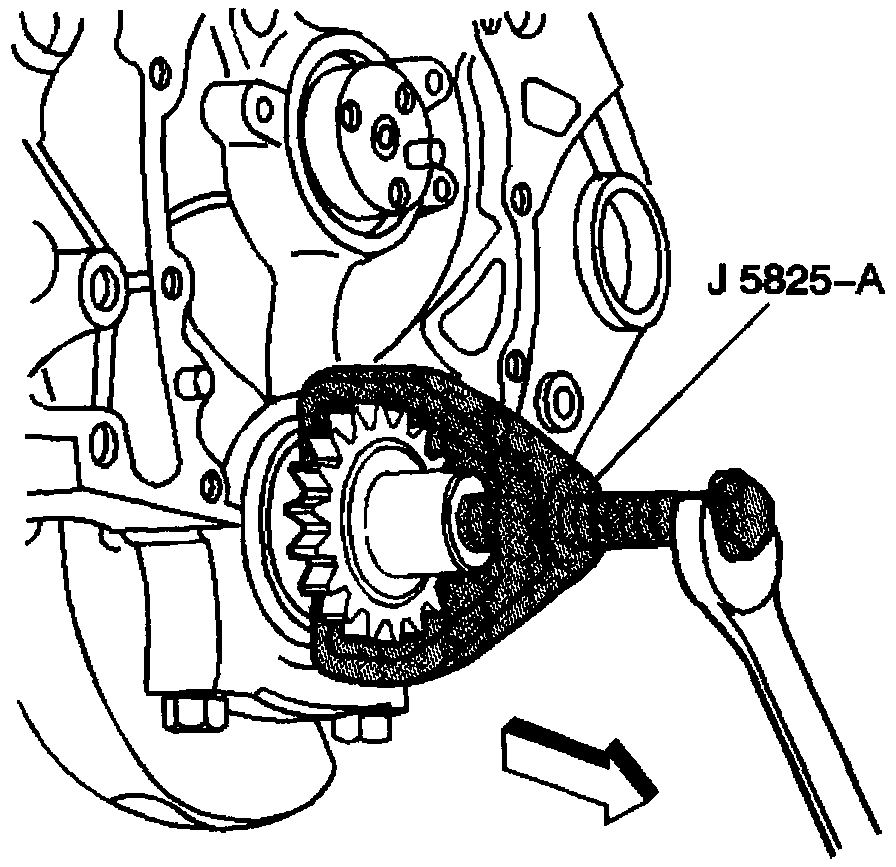
- J 5825-A Crankshaft Gear Remover
IMPORTANT: Once the composite engine front cover is removed, DO NOT reinstall the engine front cover. Always install a NEW engine front cover.
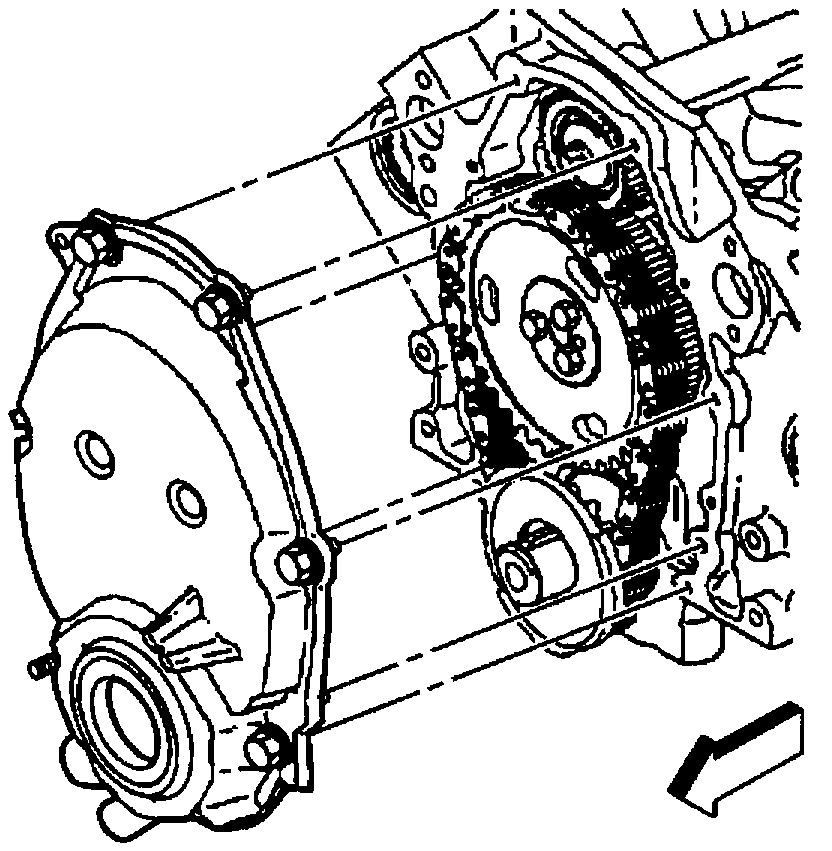
pic 1
1. Remove the engine front cover.
2. Remove the crankshaft position sensor reluctor ring.
pic 2
NOTICE: In order to rotate the crankshaft, in the end of the crankshaft install a short bolt with the same threads or use the crankshaft balancer bolt with sufficient spacers to keep from damaging the threads of the bolt.
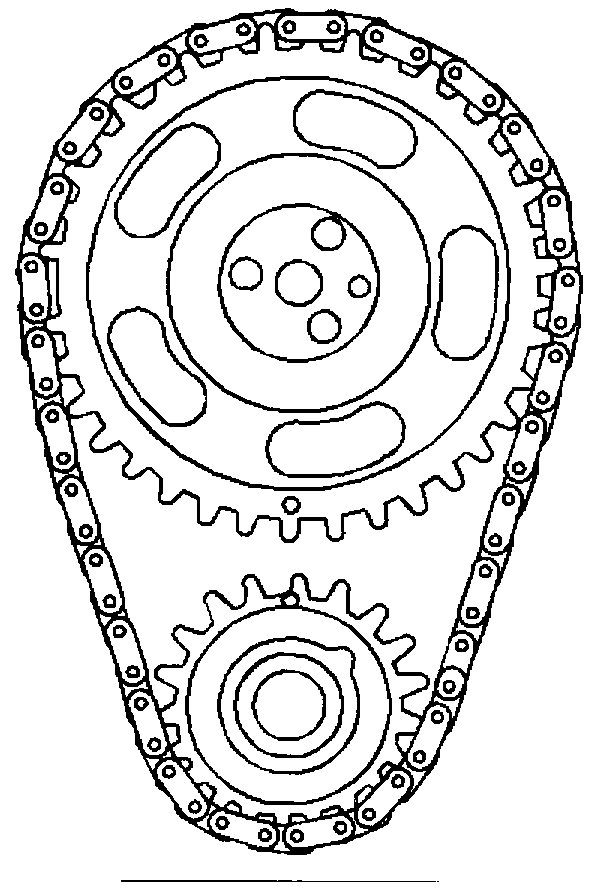
3. Check the timing chain free play.
4. Rotate the crankshaft until:
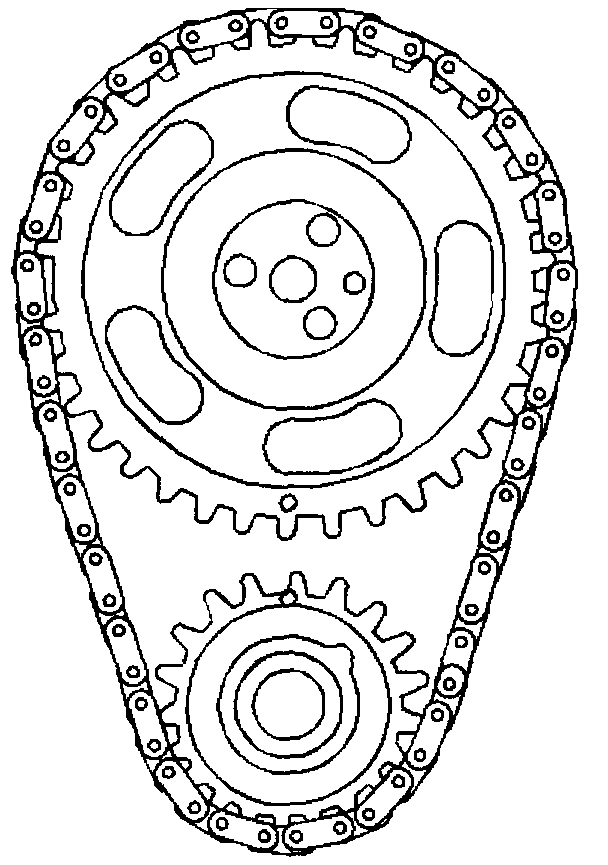
4.1.The timing marks on both sprockets line up.
4.2.The number four cylinder is at top dead center (TDC) of the compression stroke.
pic 3
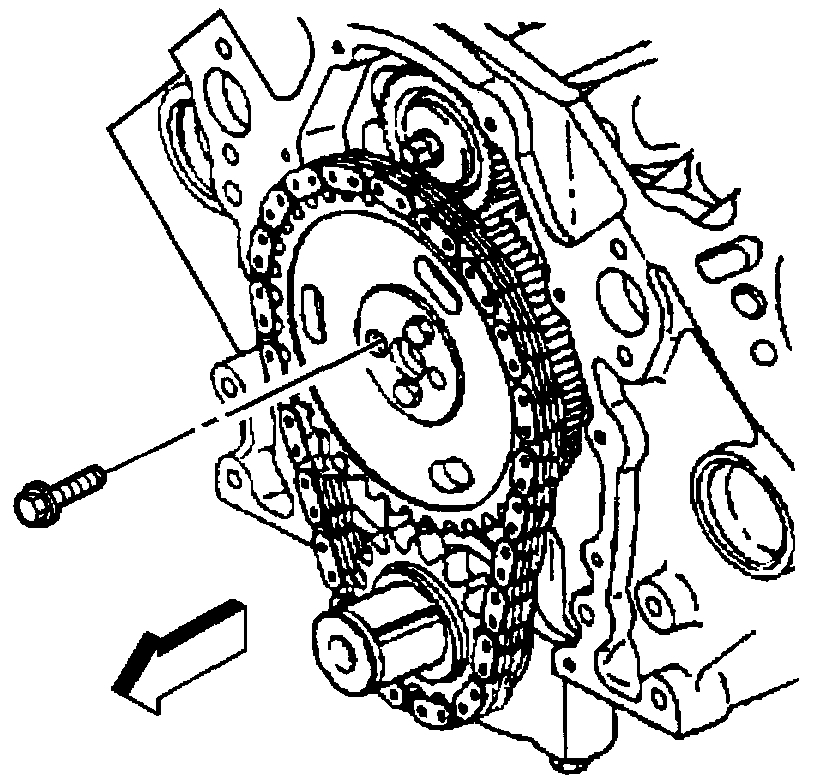
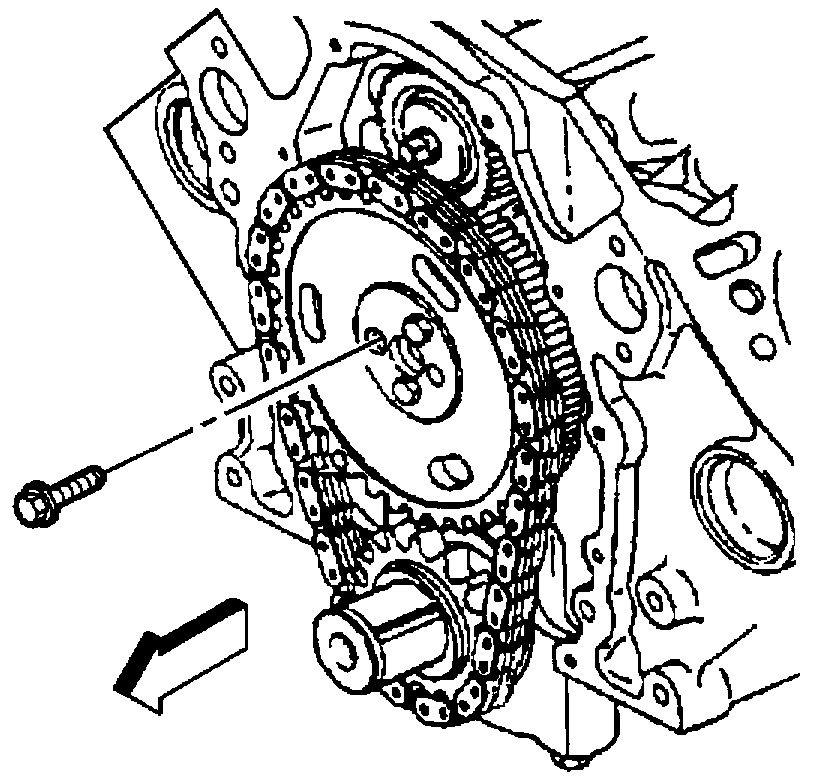
5. Remove the camshaft sprocket bolts.
pic 4
6. Remove the camshaft sprocket.
7. Remove the camshaft timing chain.
pic 5
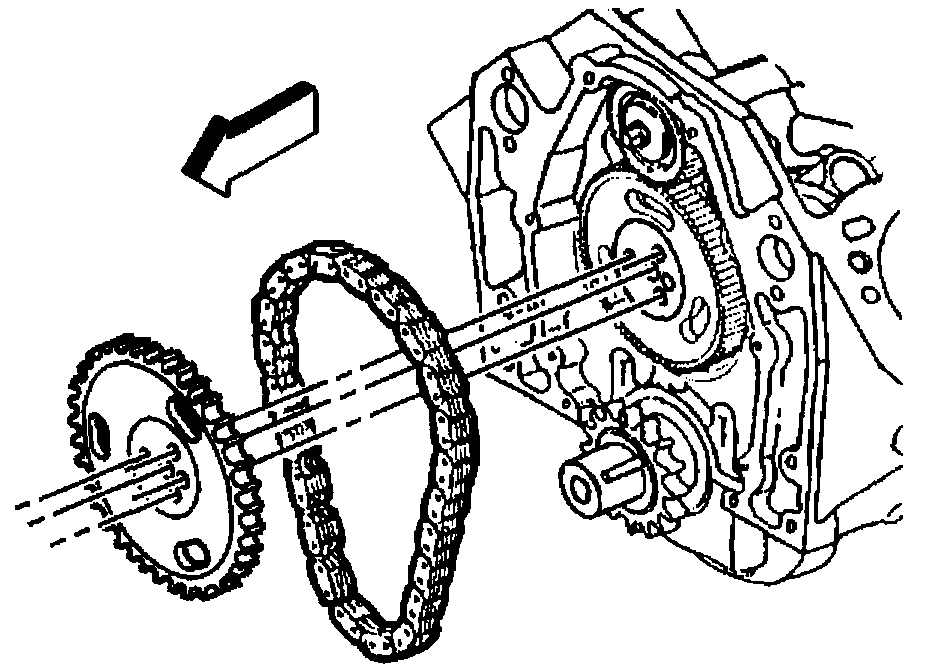
8. Use the J 5825-A in order to remove the crankshaft sprocket.
9. If necessary, remove the crankshaft balancer key.
INSTALLATION PROCEDURE
^ Tools Required
- J 23523-F Balancer Remover and Installer
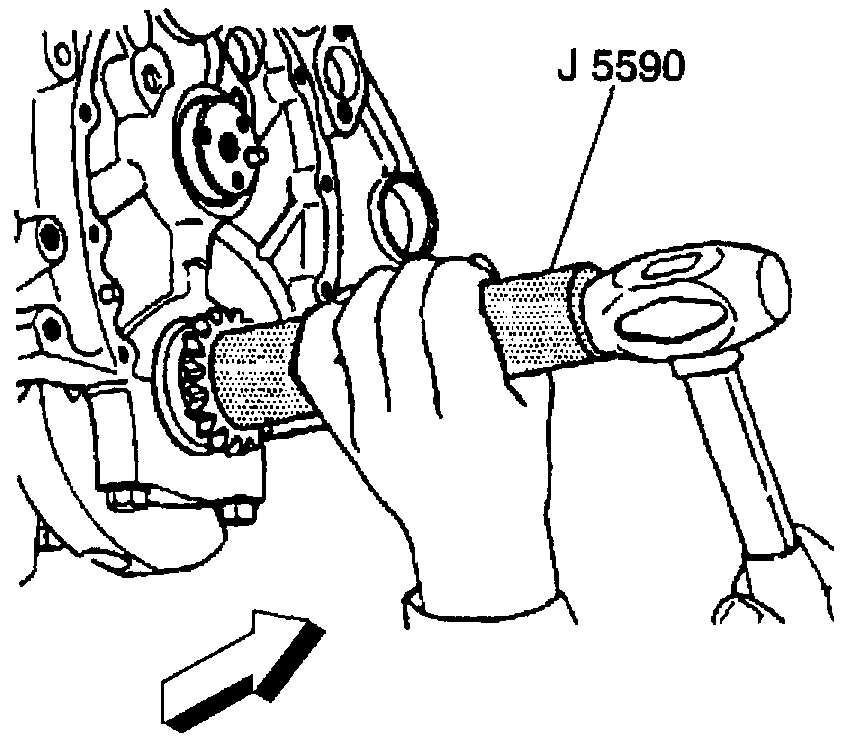
- J5590 Installer
pic 6
1. Install the crankshaft balancer key into the keyway in the crankshaft (if removed).
The crankshaft balancer key should be parallel to the crankshaft or with the front of the key slightly lower.
2. Align the keyway of the crankshaft sprocket with the crankshaft balancer key.
3. Use the J 5590 and a hammer in order to install the crankshaft sprocket.
pic 7
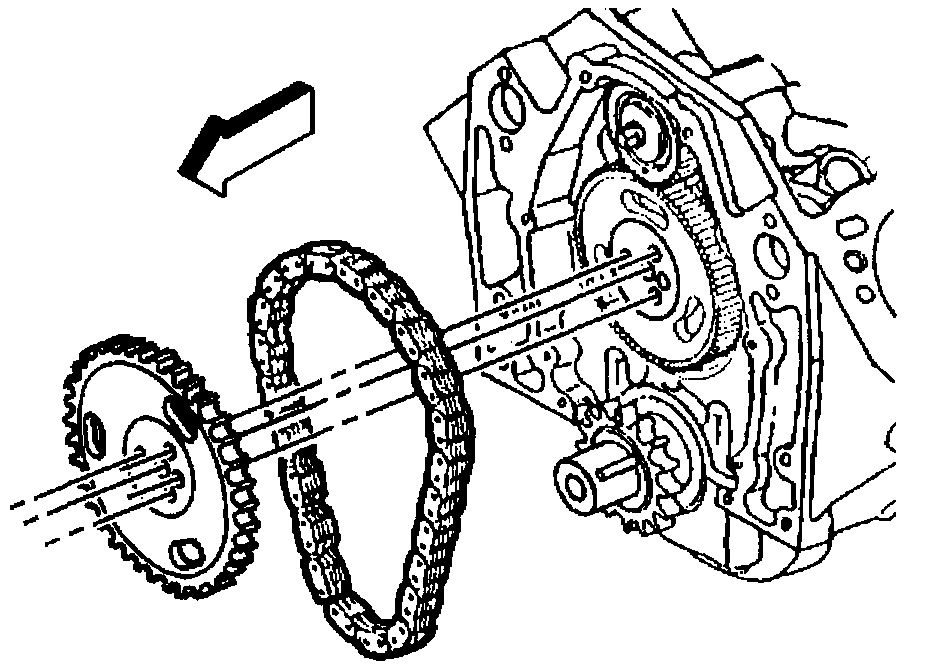
IMPORTANT: Be sure to align the camshaft and the crankshaft sprocket alignment marks.
4. Align the camshaft and crankshaft sprockets timing marks.
5. Look to ensure that the crankshaft sprocket is aligned at the 12 o'clock position and the camshaft sprocket is aligned at the 6 o'clock position.
pic 8
6. Install the camshaft sprocket and the camshaft timing chain.
NOTICE: Refer to Fastener Notice in Service Precautions.
pic 9
7. Install the camshaft sprocket bolts.
^ Tighten the camshaft sprocket bolts to 25 Nm (18 ft. lbs.).
8. Install the crankshaft position sensor reluctor ring.
9. Install the engine front cover.
_____________________________________________
Let me know if this helps,.
Take care,
Joe
Images (Click to enlarge)
Aug 19, 2019 at 8:35 PM