Good afternoon,
I attached the procedure below for you of the repair.
https://www.2carpros.com/articles/steering-wheel-removal
Let us know if you have any other questions.
Roy
REMOVAL
NOTE: Before proceeding, Refer to Service Precautions.
1. Make sure the front wheels of the vehicle are in the STRAIGHT AHEAD position before beginning the column removal procedure.
2. Disconnect negative (ground) cable from the battery and isolate cable from battery terminal.
3. Remove the lower shroud.
4. Remove the traction off switch.
5. Remove the upper shroud.
6. Remove the cluster trim bezel.
7. Remove the knee blocker.
8. Remove the parking brake handle link.
9. Remove the knee blocker reinforcement.
10. Remove the airbag.
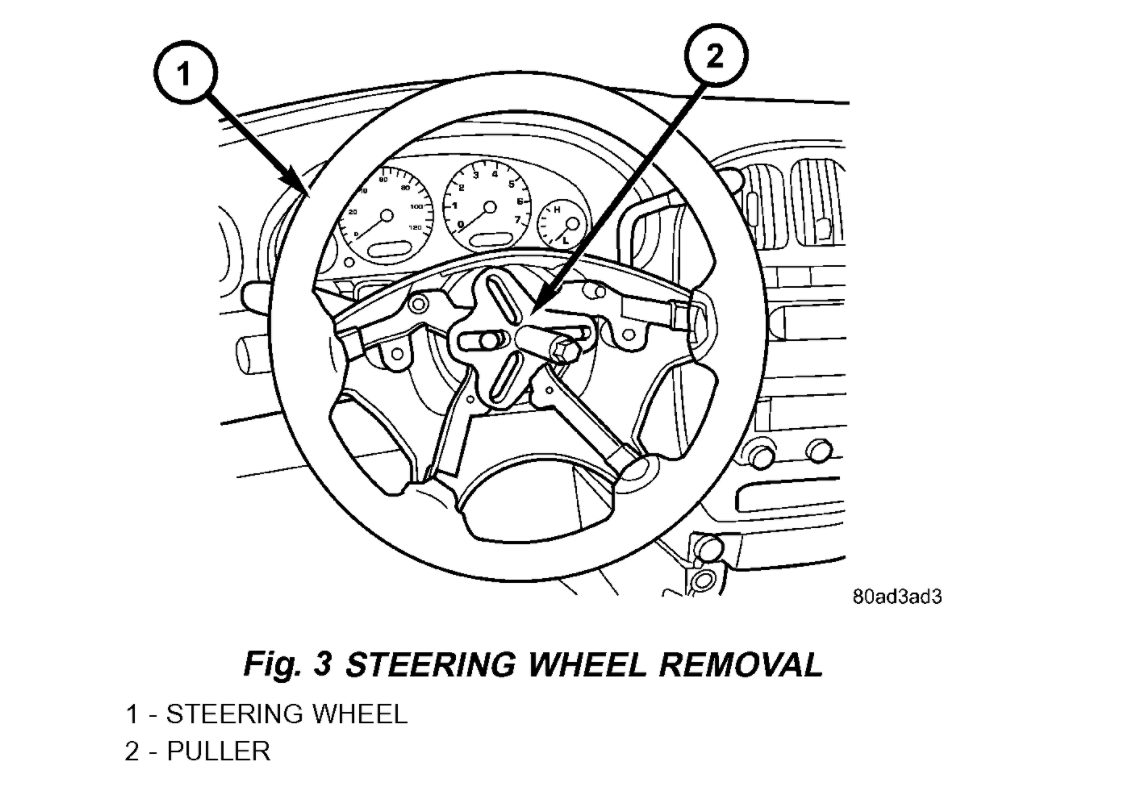
11. Remove the steering wheel retaining nut.
12. Remove the vibration damper weight.
imageOpen In New TabZoom/Print
13. Remove the steering wheel.
14. Disconnect the wiring harness connectors from the clock spring, multi-function switch, halo lamp, SKIM module, ignition switch and BTSI solenoid.
imageOpen In New TabZoom/Print
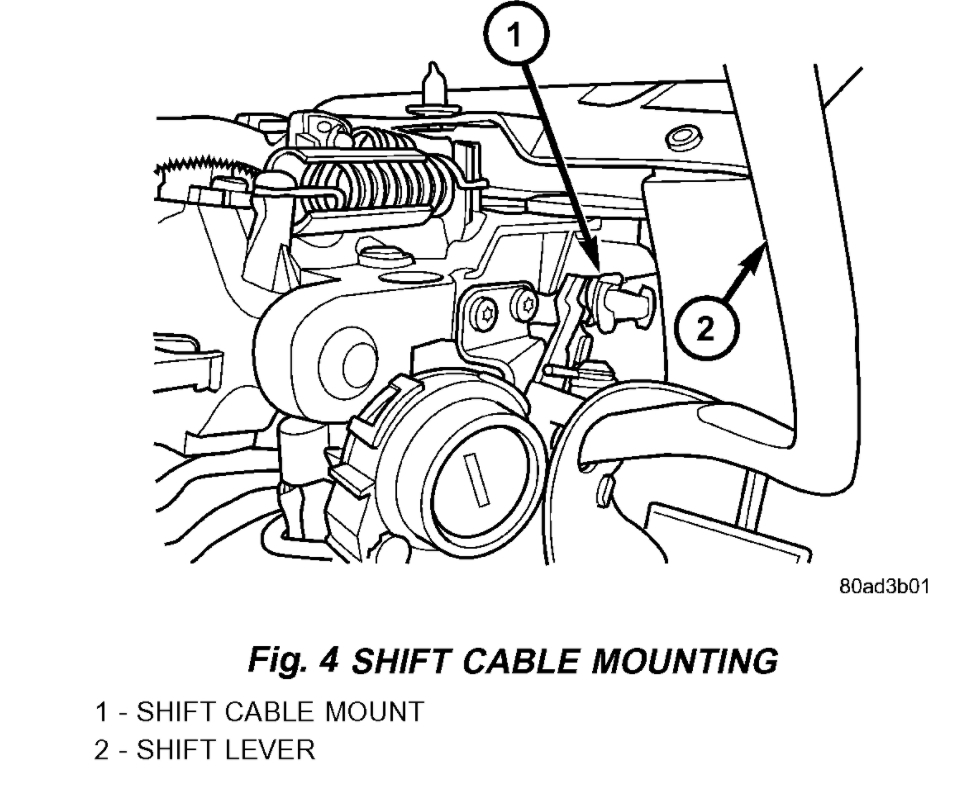
15. Disconnect the shift cable at the lever.
16. Remove the pinch side clip, then remove the cable from the bracket on the column.
imageOpen In New TabZoom/Print
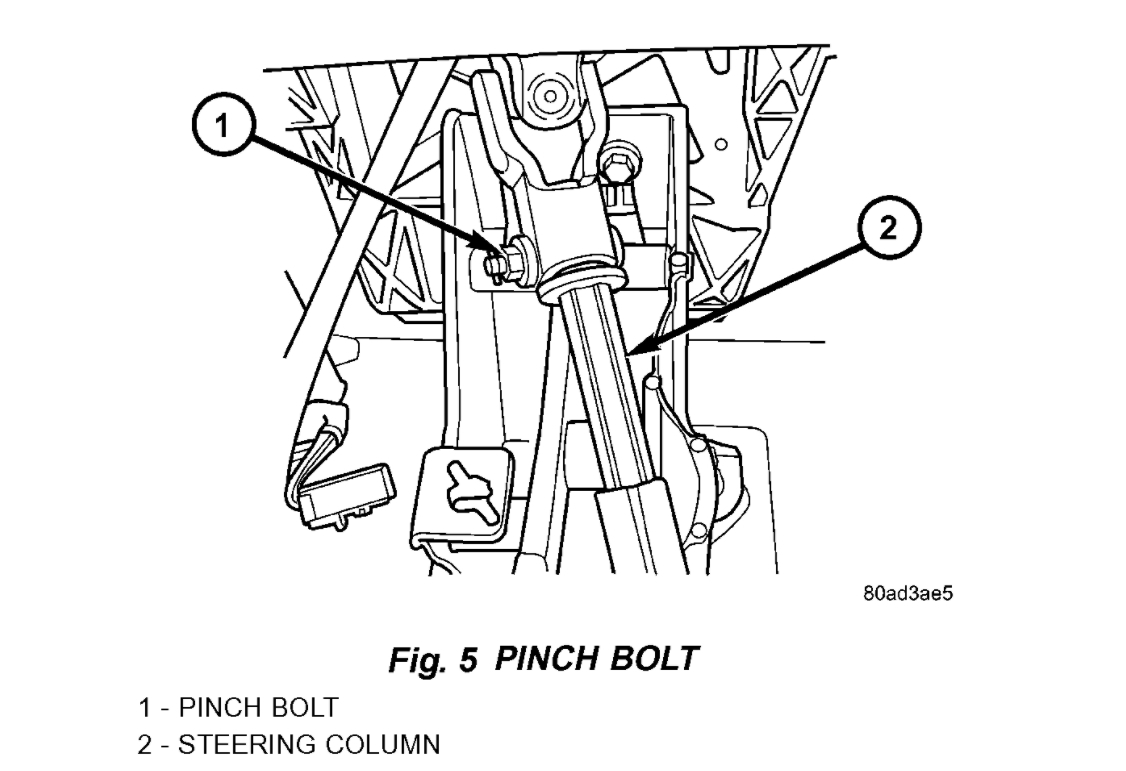
17. Remove the pinch bolt coupling.
18. Loosen the two lower mounting nuts.
19. Remove the two upper mounting nuts
20. Remove the steering column.
imageOpen In New TabZoom/Print
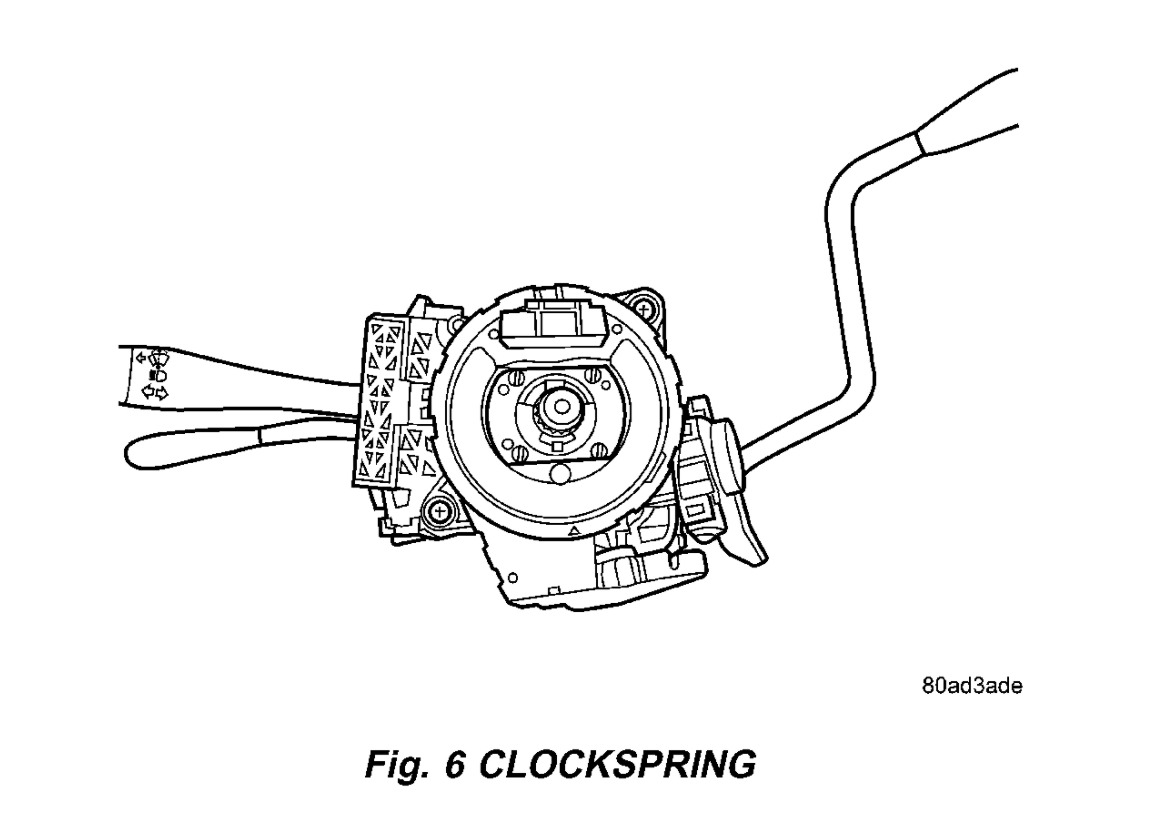
21. Remove the clock spring.
22. Remove the mounting plate with the multifunction switch.
23. Remove the halo-lamp.
24. Remove the ignition key cylinder.
25. Remove the BTSI.
INSTALLATION
To service the steering wheel components or the airbag. Refer to Restraint Systems. Follow all Service Precautions.
1. Make sure the front wheels of the vehicle are still in the STRAIGHT AHEAD position before beginning the column installation procedure.
2. Install the BTSI.
3. Install the ignition key cylinder.
4. Install the halo-lamp.
5. Install the mounting plate with the multi-function switch.
6. Install the clock spring.
7. Install the steering column to the vehicle.
8. Install the two upper mounting nuts
9. Tighten the two lower mounting nuts and the two upper mounting nuts. Tighten to 12 Nm (105 inch lbs.).
10. Install the coupling onto the intermediate shaft and install the pinch bolt. Tighten the pinch bolt to 28 Nm (250 inch lbs.).
11. Install the cable from the bracket on the column, then install the pinch side clips.
12. Reconnect the shift cable at the lever.
13. Reconnect the wiring harness connectors to the clock spring, multi-function switch, halo lamp, SKIM module, ignition switch and BTSI solenoid.
14. Install the steering wheel.
15. Install the vibration damper weight.
16. Install the steering wheel retaining nut. Tighten the nut to 61 Nm (45 ft. lbs.)
17. Install the airbag.
18. Install the knee blocker reinforcement.
19. Install the parking brake handle link.
20. Install the knee blocker.
21. Install the cluster trim bezel.
22. Install the upper shroud.
23. Install the traction off switch.
24. Install the lower shroud.
Images (Click to enlarge)
Mar 14, 2021 at 3:21 PM