Replacing the correct actuator

Tiny
DEKESTER16
  • MEMBER
  • 2004 CHEVROLET SILVERADO
  • 5.3L
  • V8
  • 4WD
  • AUTOMATIC
  • 250,000 MILES
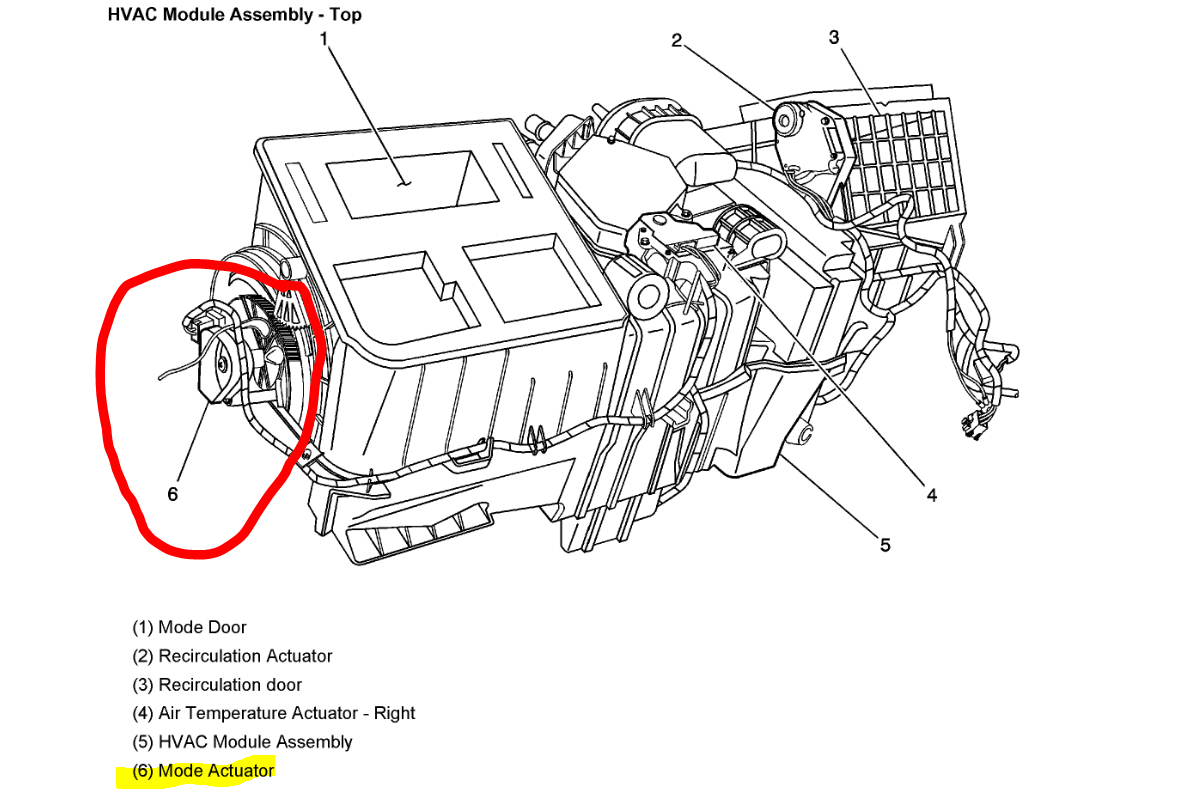
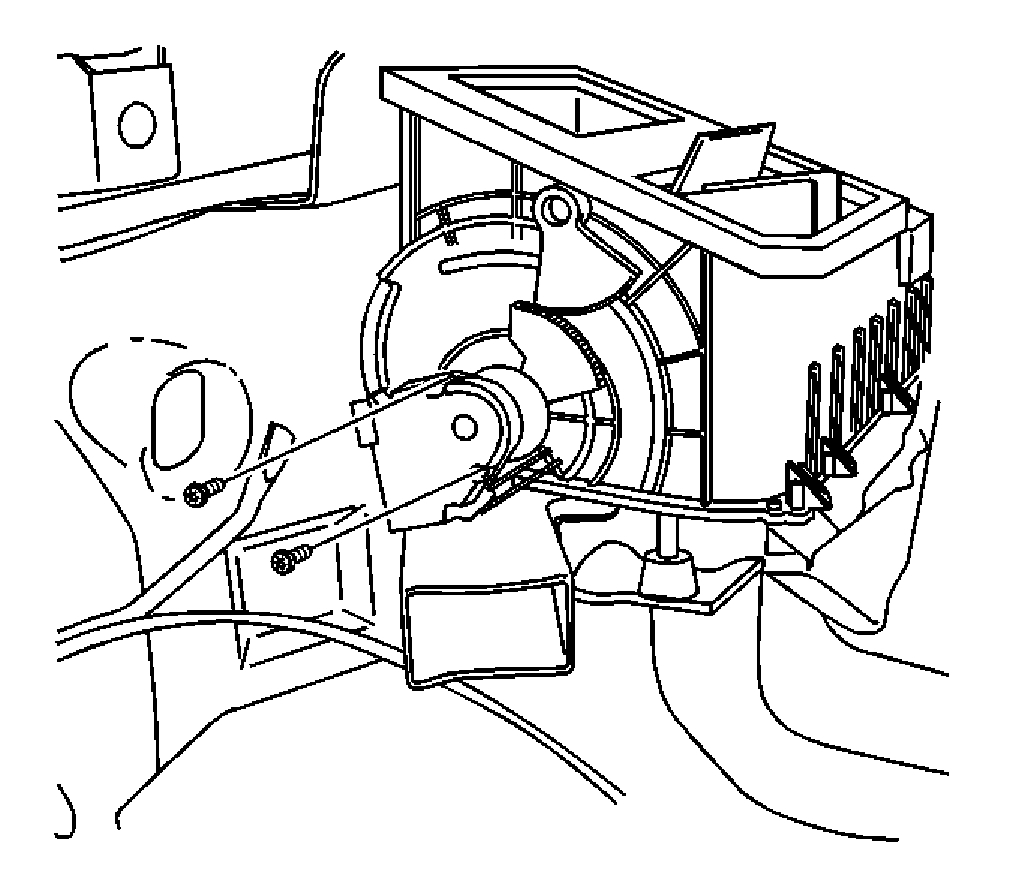
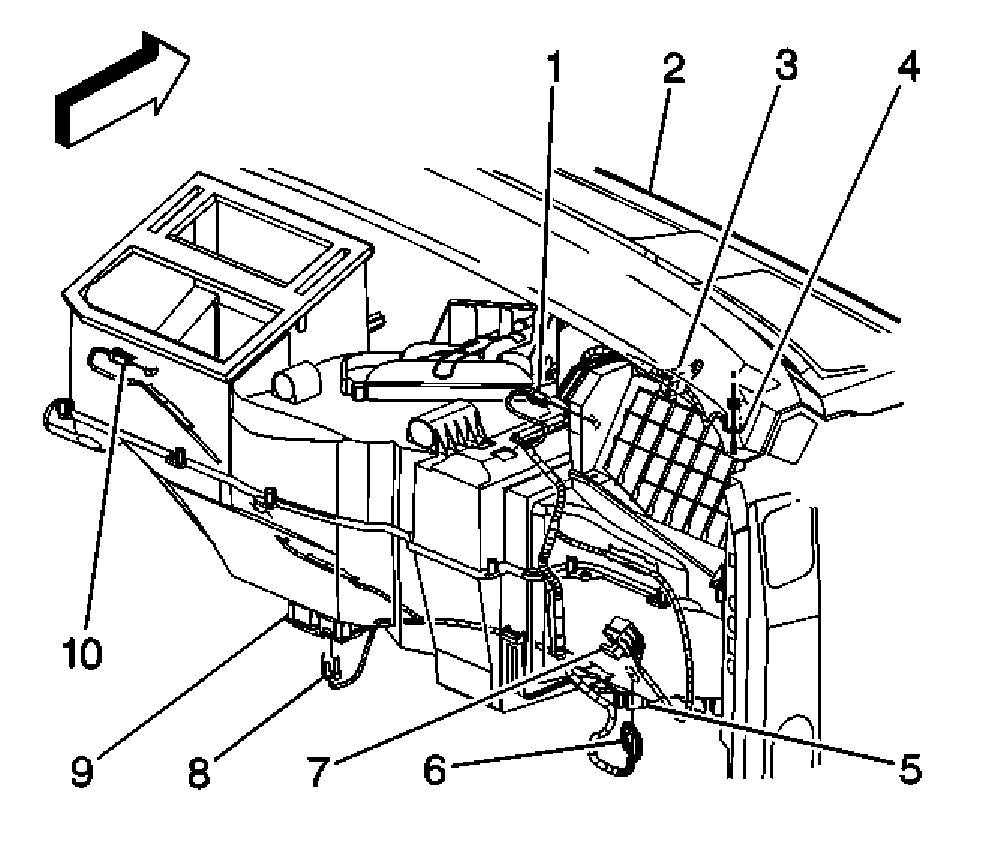
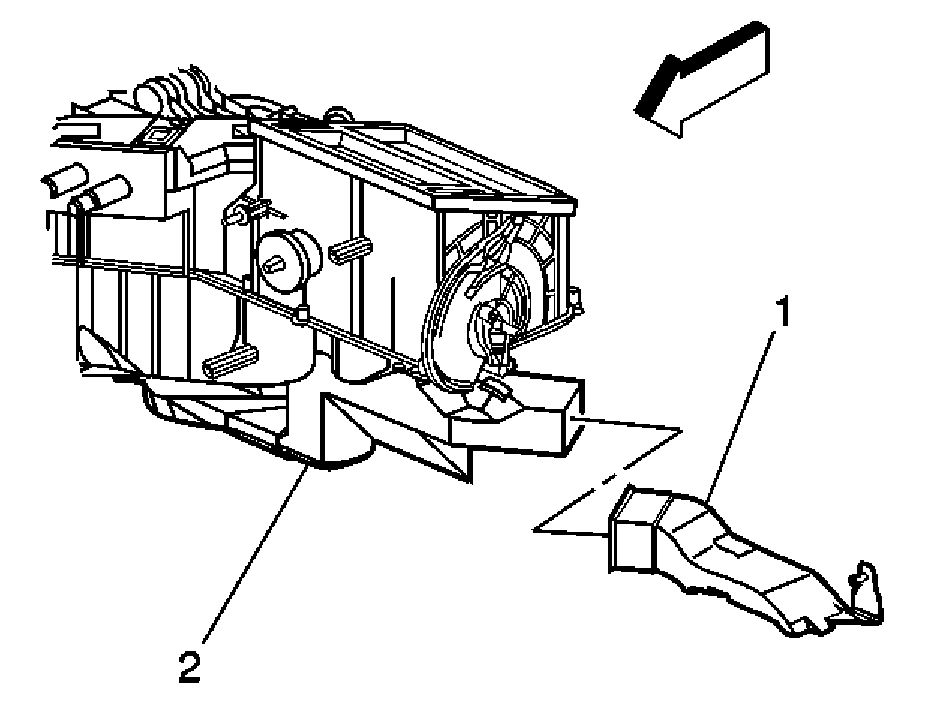
The truck has double auto controls. I turned the heater on and got cold air out of the driver A/C vents and warm air out of the passenger a/c vents. I thought it may be the actuator on the passenger side, so I located it and found that it was unplugged. I plugged the wires back together and now I have warm air out of both A/C vents, but I can't get any air to go to the feet (heater). Thinking I may need the actuator replaced that directs the air to different locations. Is that correct? Is that the one under the dash where you have to take the top part of the dash off? Thanking you so much as I don't want to replace the wrong one.
Monday, December 2nd, 2019 AT 8:48 PM

2 Replies

Tiny
JACOBANDNICKOLAS
  • MECHANIC
  • 108,192 POSTS
Hi,

The part that changes air flow directions is called the mode door actuator. If you look at pic 1, it shows location.

Here are the directions for replacement. The remaining pictures correlate with the directions.

____________________________________________________

MODE ACTUATOR REPLACEMENT (W/ D07)

REMOVAL PROCEDURE

pic 2

1. Remove the floor air outlet duct extension (1) from the floor duct (2).
2. Remove the center console.
3. Remove the screws from the center console duct.
4. Remove the center console duct.

Pic 3

5. Disconnect the electrical connection from the mode actuator (10).

Pic 4

6. Remove the mode actuator mounting screws from the HVAC module.
7. Remove the mode actuator as an assembly with the actuator cam.

INSTALLATION PROCEDURE

pic 5

1. Install the mode actuator as an assembly with the actuator cam.
- Line up the heater/defroster valve lever with the mode actuator cam slot.
- Line up the A/C valve lever with the mode actuator cam

NOTE: Refer to Fastener Notice in Service Precautions.

2. Install the mode actuator mounting screws to the HVAC module.

Tighten
Tighten the screws to 1.6 N.M (14 lb in).

Pic 6

3. Connect the electrical connection at the mode actuator (10).

Pic 7

4. Install the center console duct.
5. Install the screws to the center console duct.

Tighten
Tighten the screws to 1.6 N.M (14 lb in).

6. Install the center console.
7. Install the floor air outlet duct extension (1) to the floor air duct (2).

________________________________________

Let me know if this helps or if you have other questions.

Take care,
Joe
Was this
answer
helpful?
Yes
No
Monday, December 2nd, 2019 AT 9:17 PM
Tiny
DEKESTER16
  • MEMBER
  • 1 POST
Thank you so much. It'll be a day or 2 before I tackle this job. I do have an immediate question. The location of actuator in picture 1 (one) appears that it is located pretty much below or beside the steering column and to the left of the HVAC box. In picture 3 (three) it appears to be more in the middle of the dash.. Any comment?

Thank you,
Darrell
Was this
answer
helpful?
Yes
No
Wednesday, December 4th, 2019 AT 12:41 PM

Please login or register to post a reply.

Sponsored links