Removing/replacing ignition starter switch

Tiny
KETCHIKANMD
  • MEMBER
  • 2006 HUMMER H3
  • 5.7L
  • 5 CYL
  • 4WD
  • AUTOMATIC
  • 180,000 MILES
Hi, I see that you already have many questions about replacing the ignition starter switch from other users, but I did not see any specifically for a 2006 Hummer H3 automatic transmission. I know there is a airbag in the steering column, and something about sheared off screws. Hoping for detailed instructions for removal/replacement for starter switch. We need the vehicle to go across state in three days, so any help would really be appreciated. Thank you!
Friday, November 16th, 2018 AT 3:56 PM

3 Replies

Tiny
JACOBANDNICKOLAS
  • MECHANIC
  • 108,300 POSTS
Hi and thanks for using 2CarPros. Com.

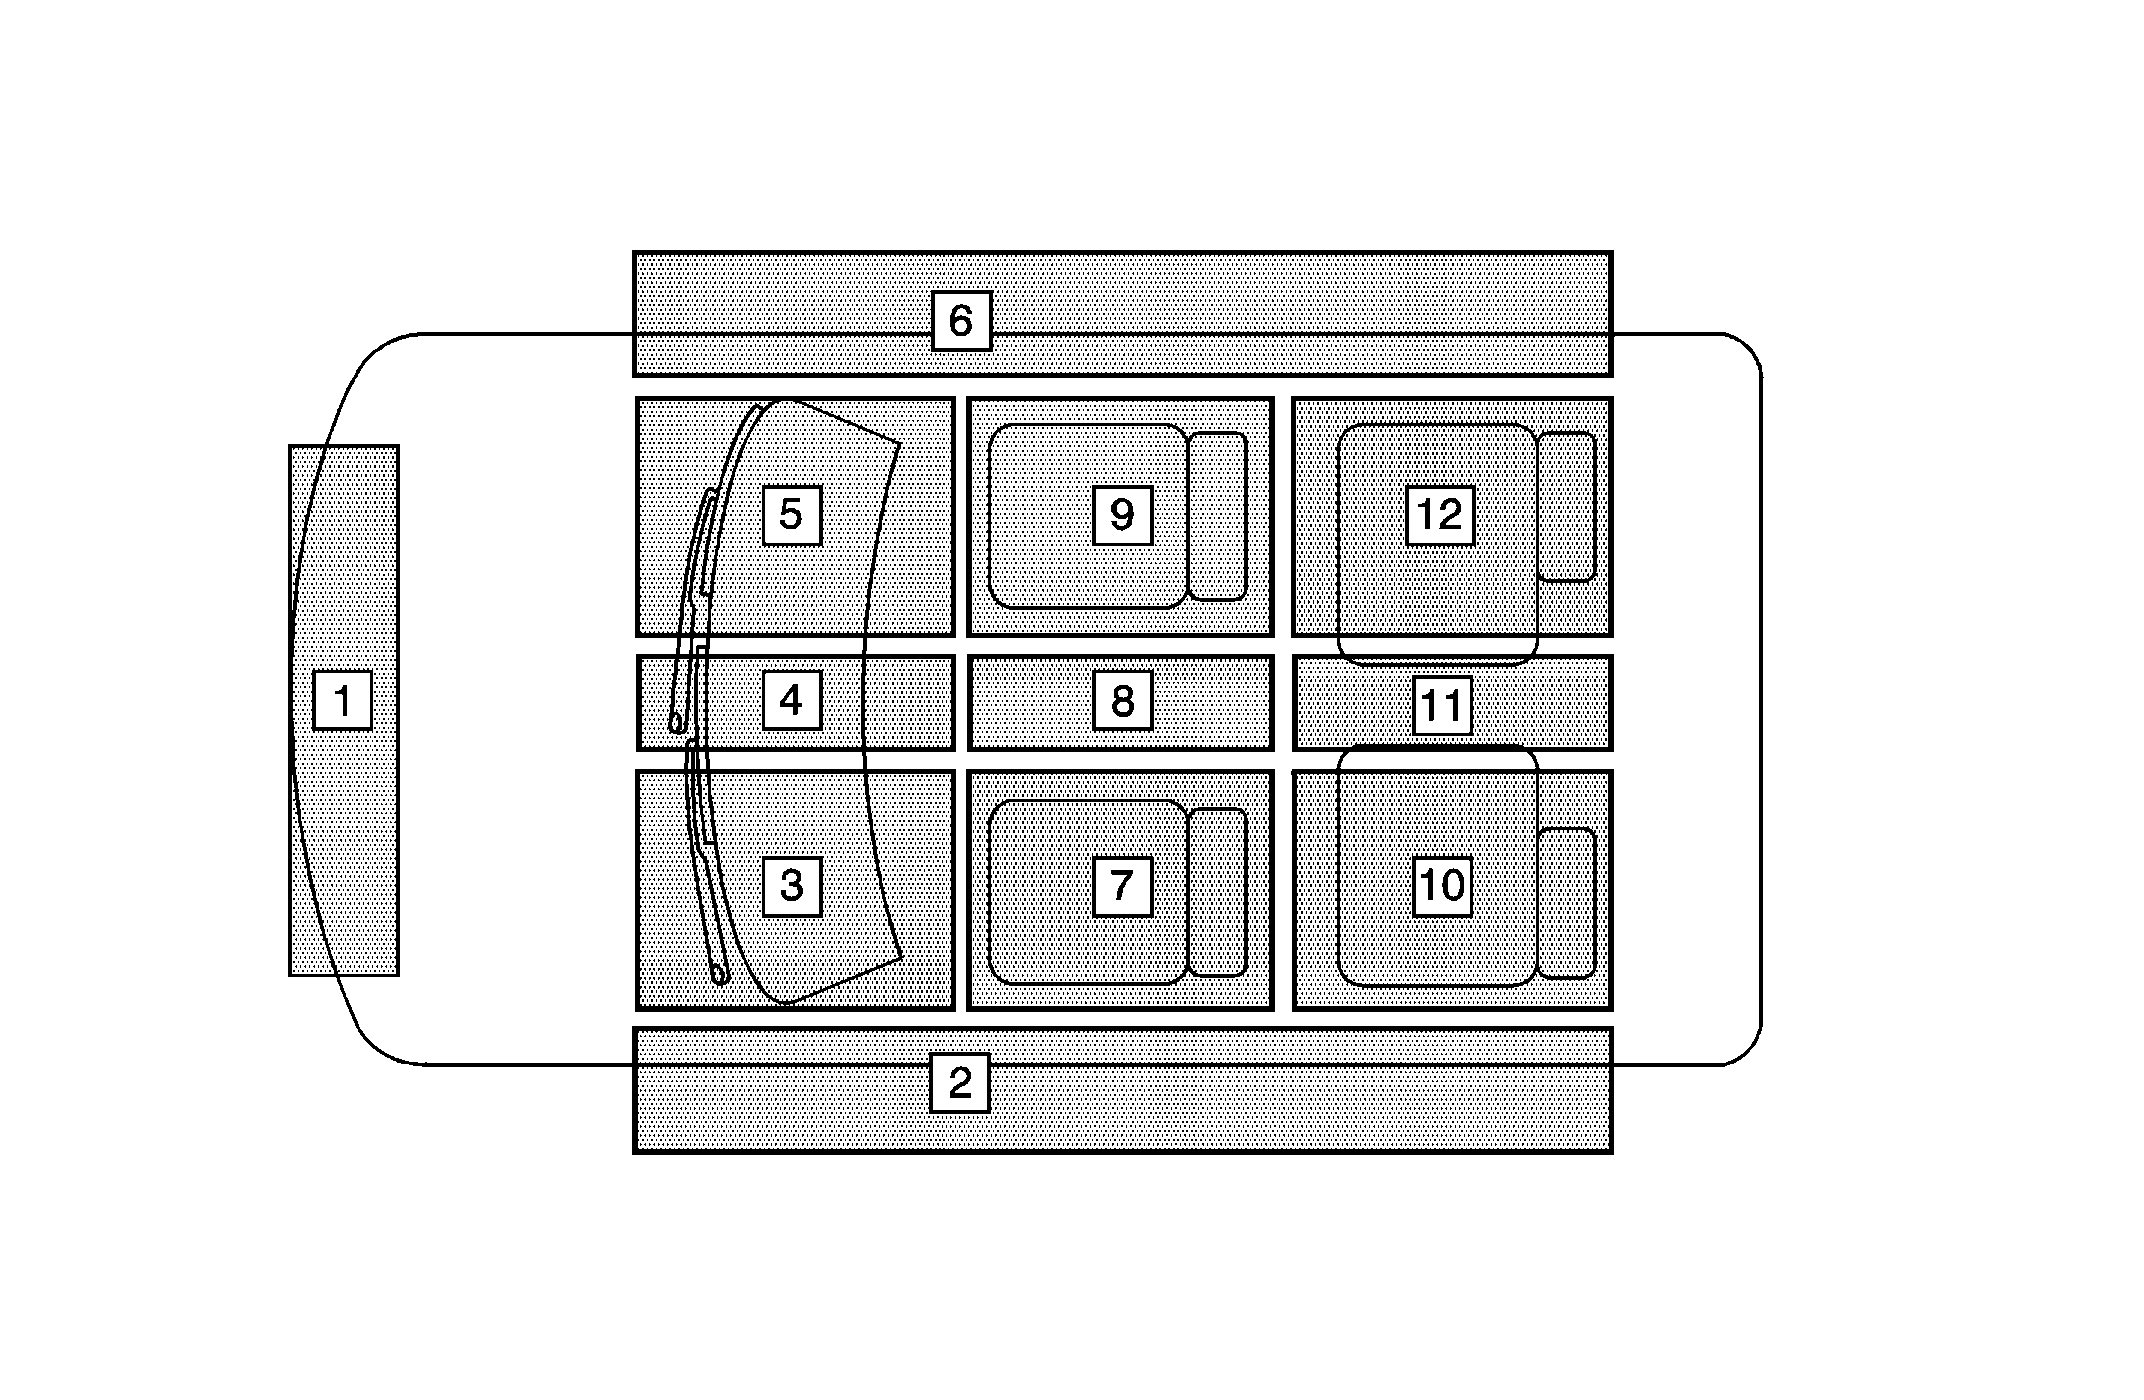
You are correct. Zone 3 needs turned off/disabled when doing the repair. Here are the directions for disabling zone 3 (steering wheel). Picture 1 shows zones, picture 2 zone locations,

SIR DISABLING AND ENABLING ZONE 3

DISABLING PROCEDURE
1. Turn the steering wheel until the vehicles wheels are pointing straight ahead.

IMPORTANT: Refer to SIR Disabling and Enabling Zones before disabling the SIR system.

2. Turn OFF the ignition.
3. Remove the key from the ignition.
4. Remove the trim panel.

(pic 3)

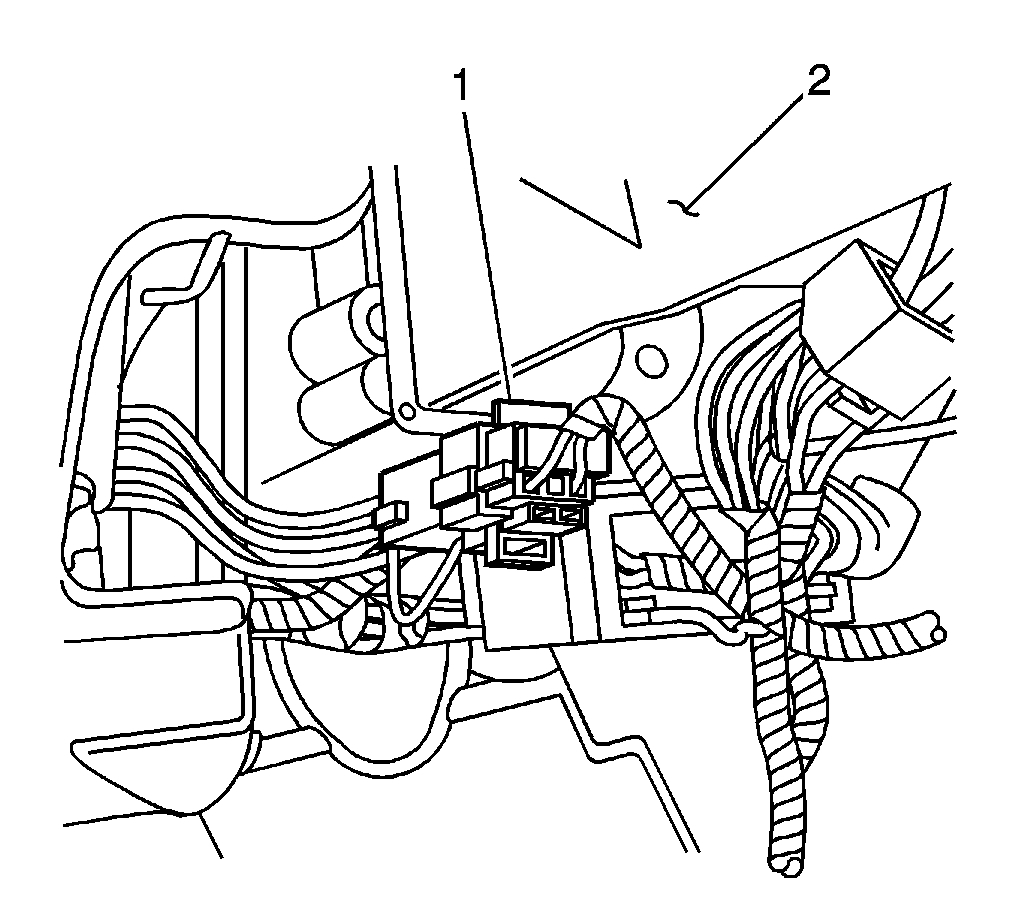
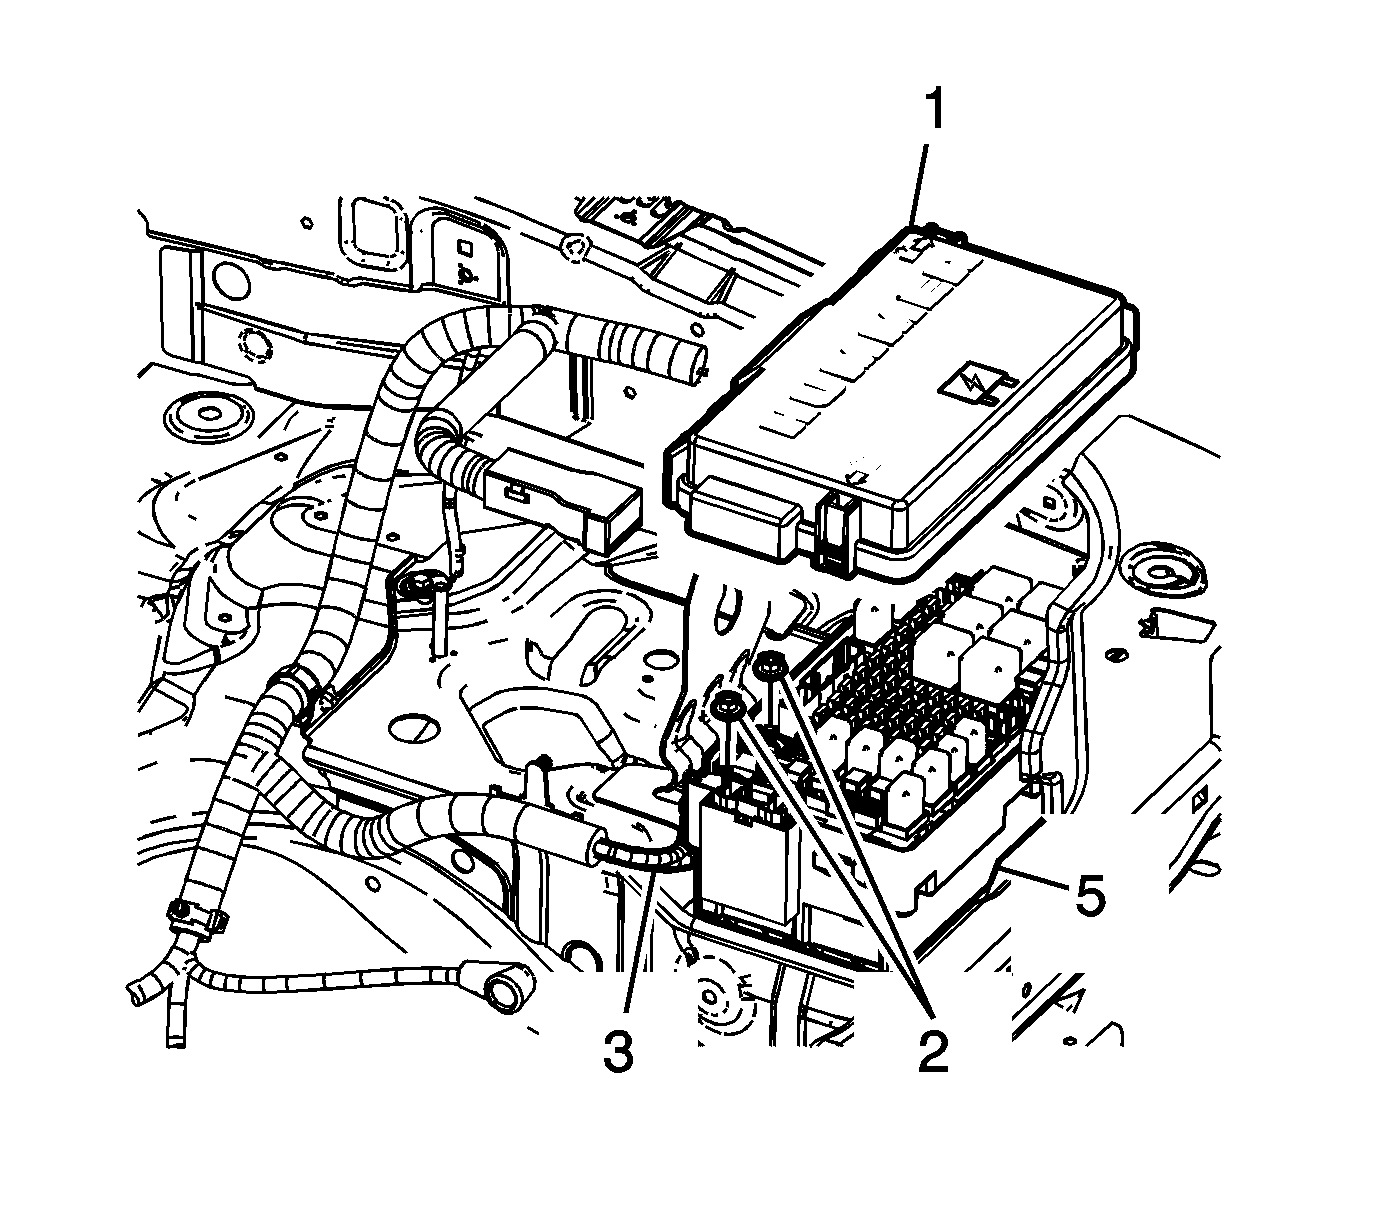
5. Remove the Air Bags fuse from the fuse block (5) located in the underhood fuse block.

IMPORTANT: With the Air Bags fuse removed and the ignition ON, the AIR BAG indicator illuminates. This is normal operation and does not indicate an SIR system malfunction.

(pic 4)

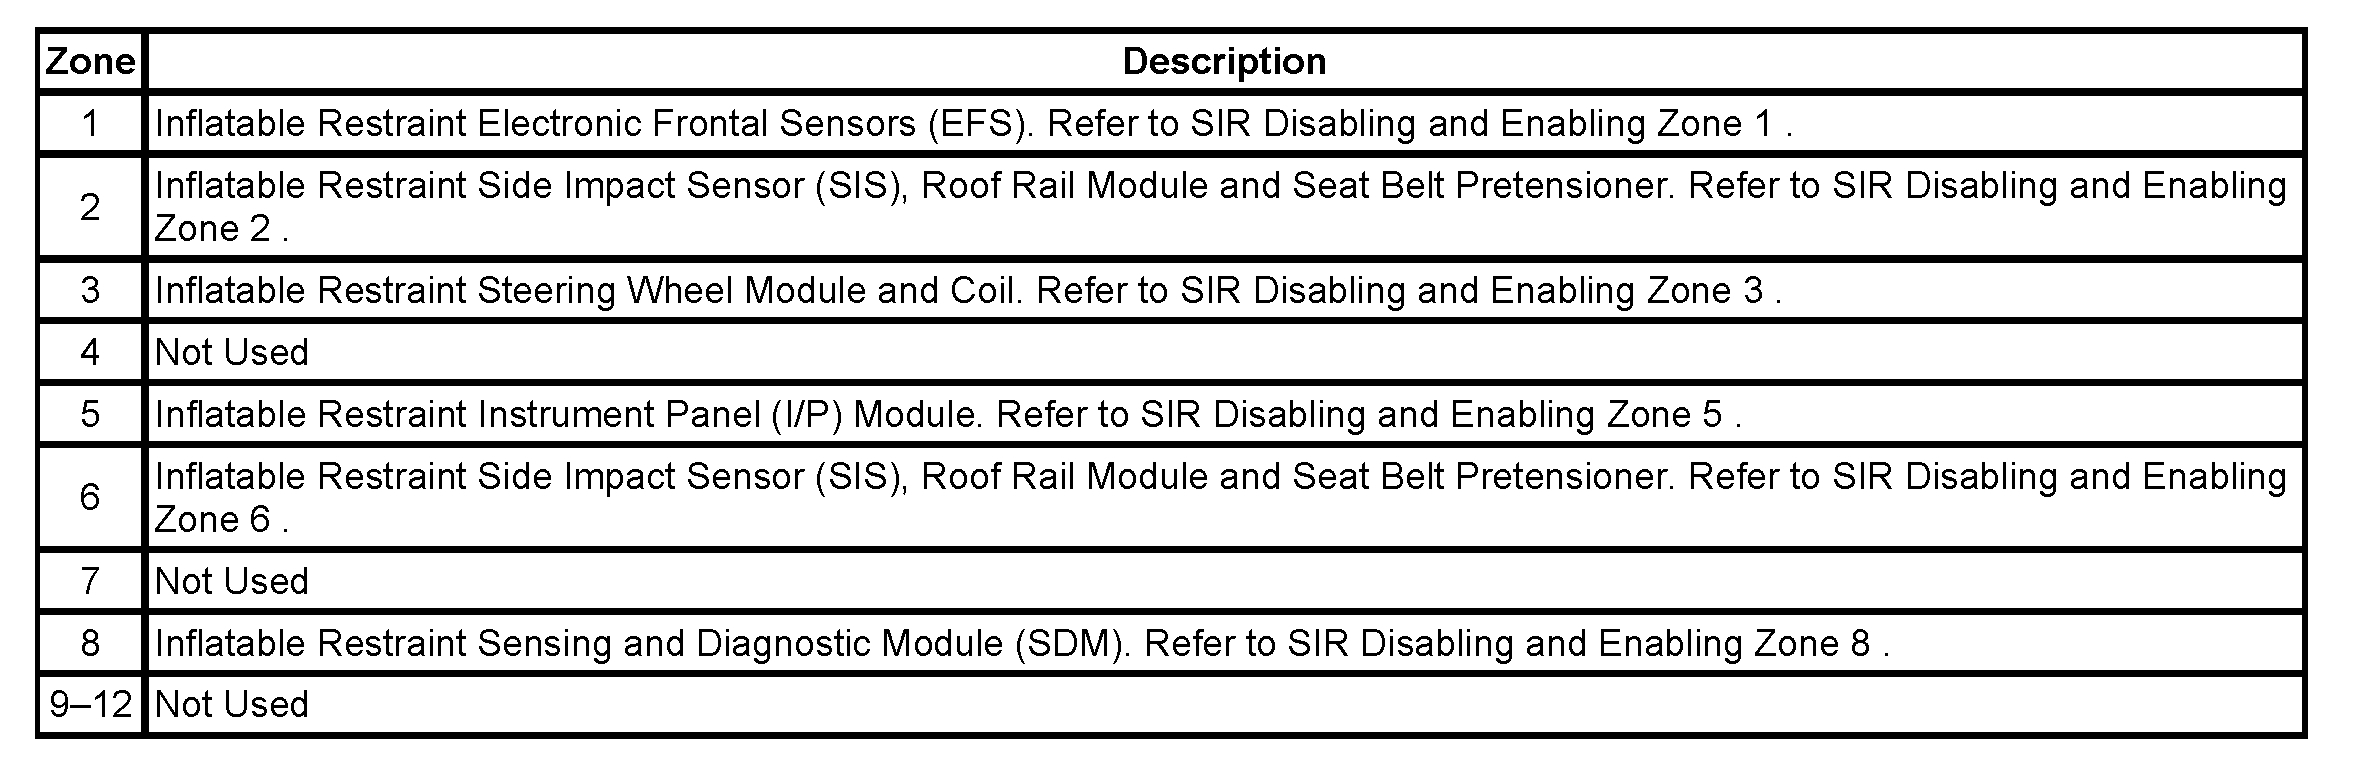
6. Remove the connector position assurance (CPA) (1) from the steering wheel module yellow 4-way connector (2) located left of the steering column above the left hinge pillar trim panel.
7. Disconnect the steering wheel module yellow 4-way connector (2) located left of the steering column above the left hinge pillar trim panel.

ENABLING PROCEDURE
1. Remove the key from the ignition.

(pic 5)

2. Connect the steering wheel module yellow 4-way connector (2) located left of the steering column above the left hinge pillar trim panel.
3. Install the CPA (1) to the steering wheel module yellow 4-way connector (2) located left of the steering column above the left hinge pillar trim panel.

(pic 6)

4. Install the Air Bags fuse to the fuse block (5) located in the underhood fuse block.
5. Staying well away from all air bags, turn ON the ignition, with the engine OFF.
1. The AIR BAG indicator will flash 7 times.
2. The AIR BAG indicator will then turn OFF.
6. Perform the Diagnostic System Check - Vehicle, if the AIR BAG indicator does not operate as described. See: Vehicle > Initial Inspection and Diagnostic Overview > Diagnostic System Check - Vehicle

____________________________________

Make sure you disconnect the negative battery terminal as described in the directions. Also, I recommend allowing the vehicle to sit 30 minutes with the battery disconnected prior to starting work.

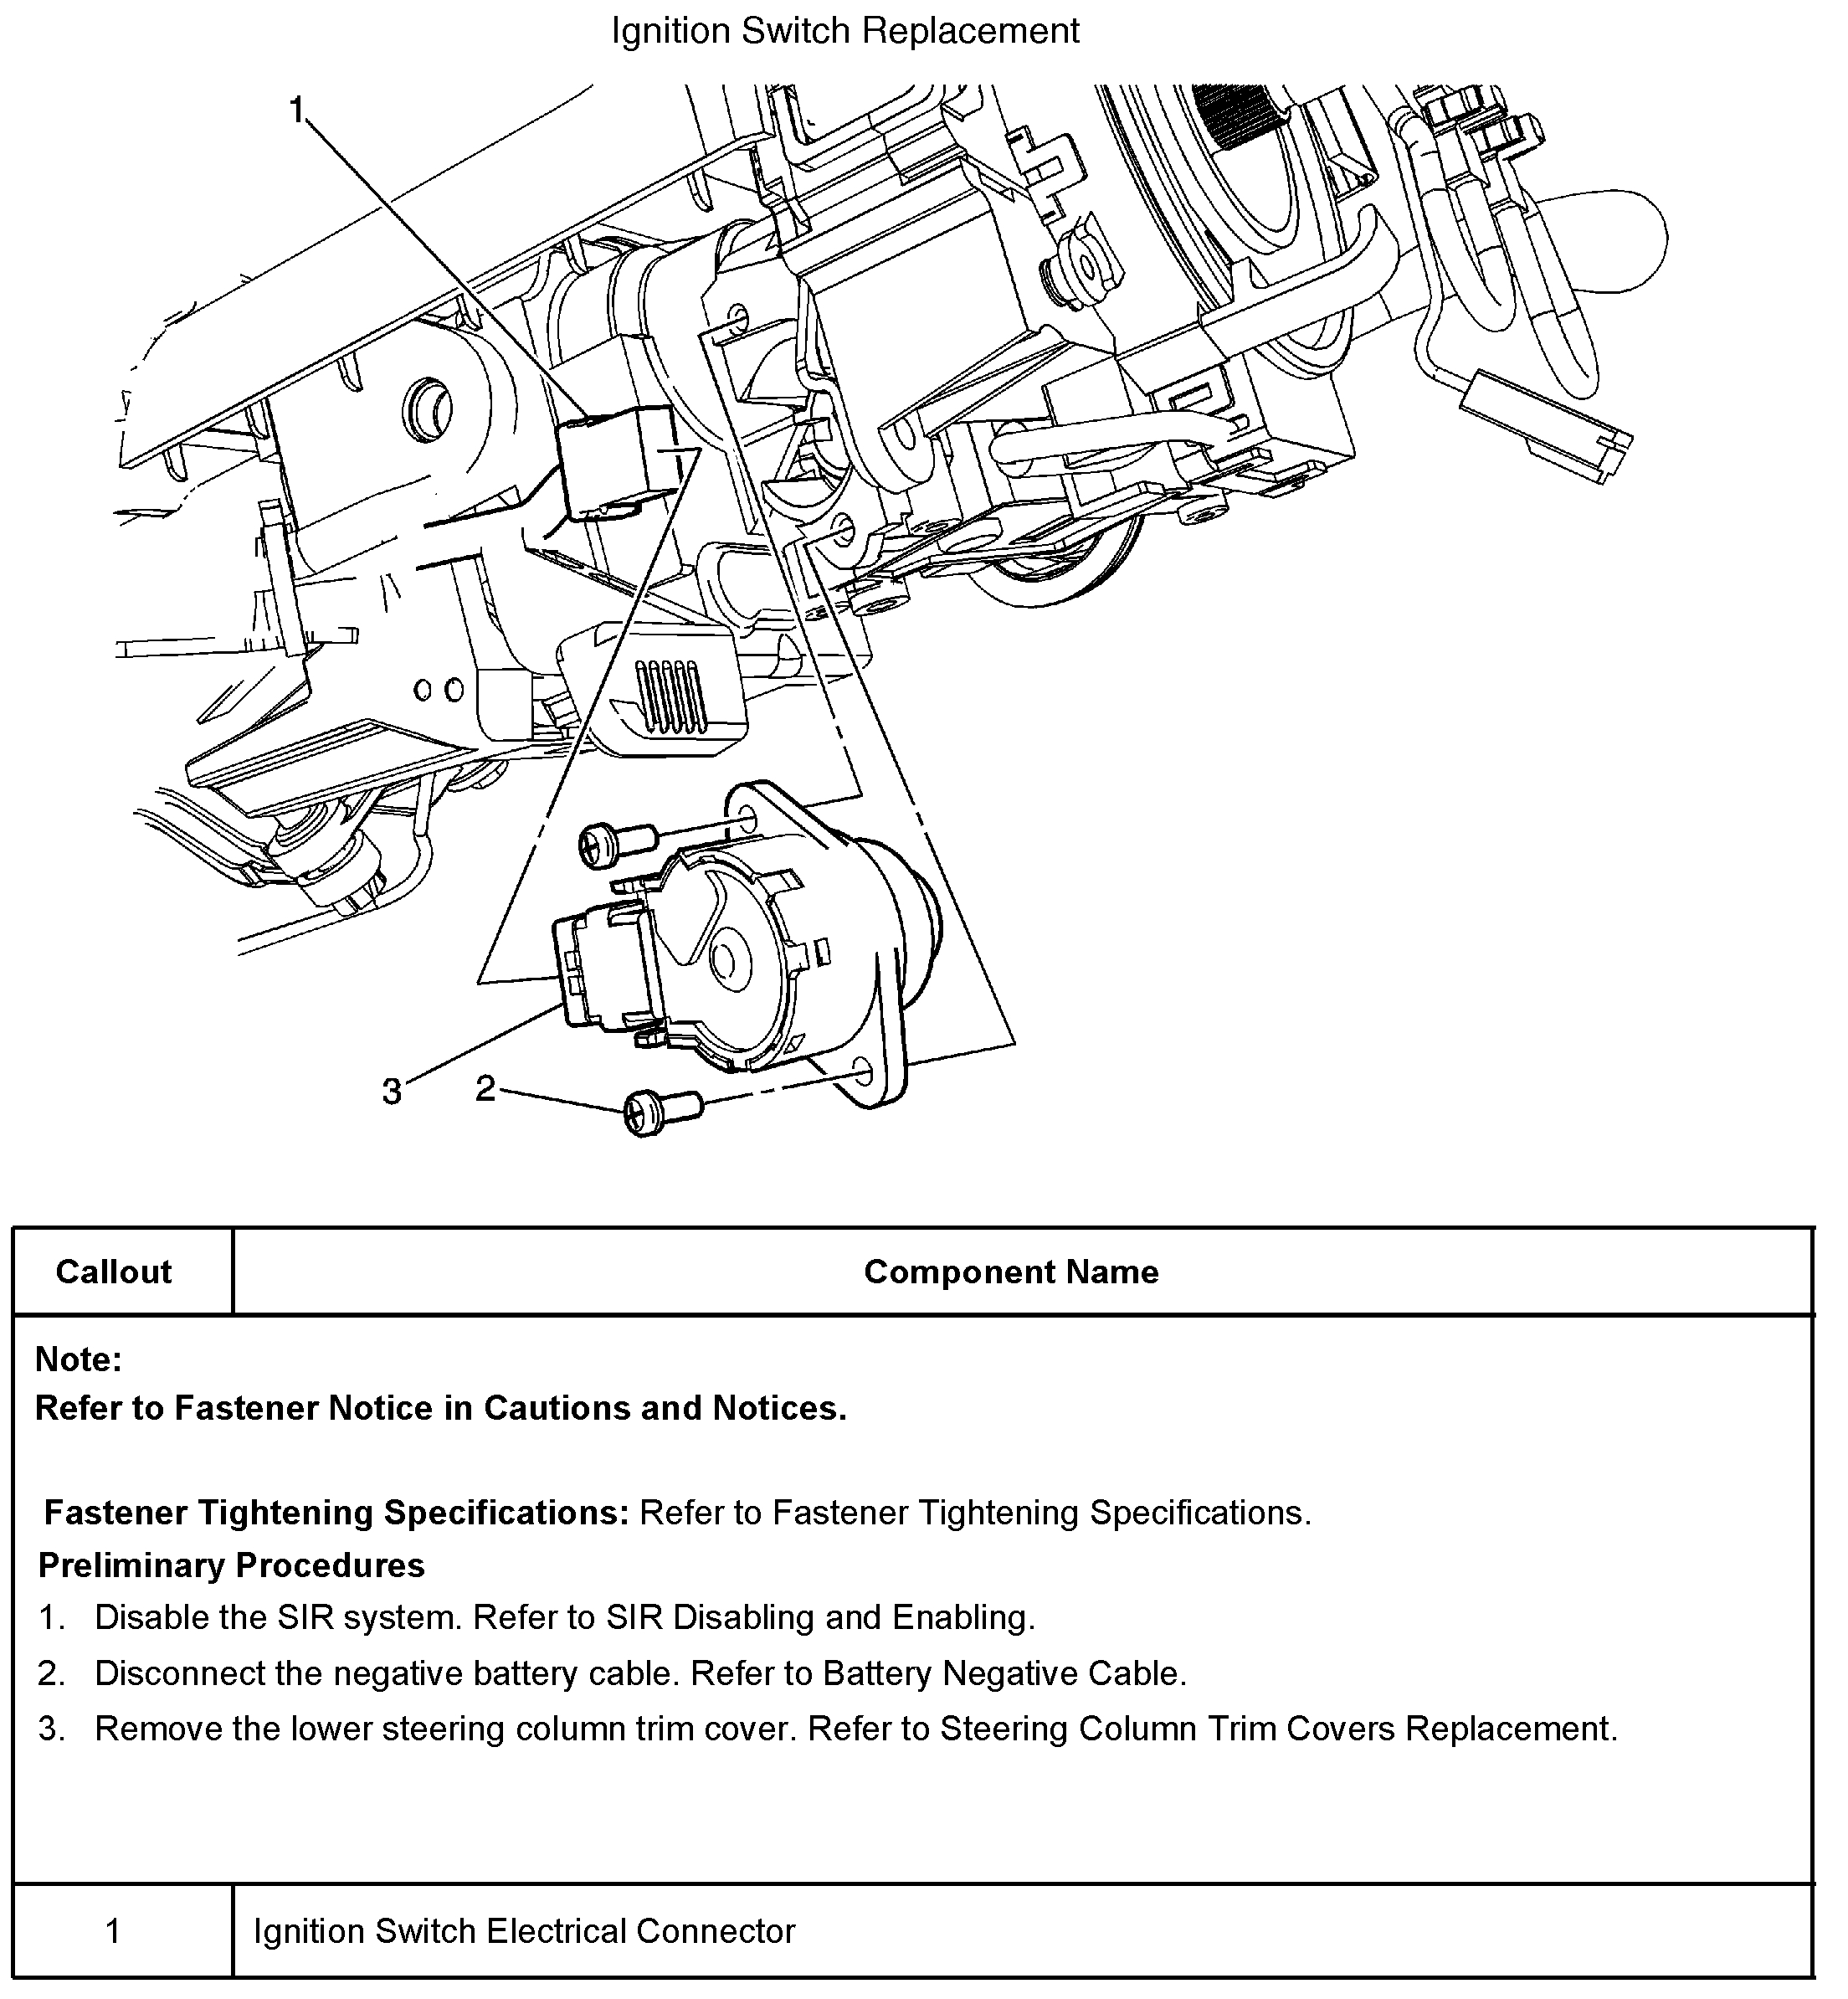
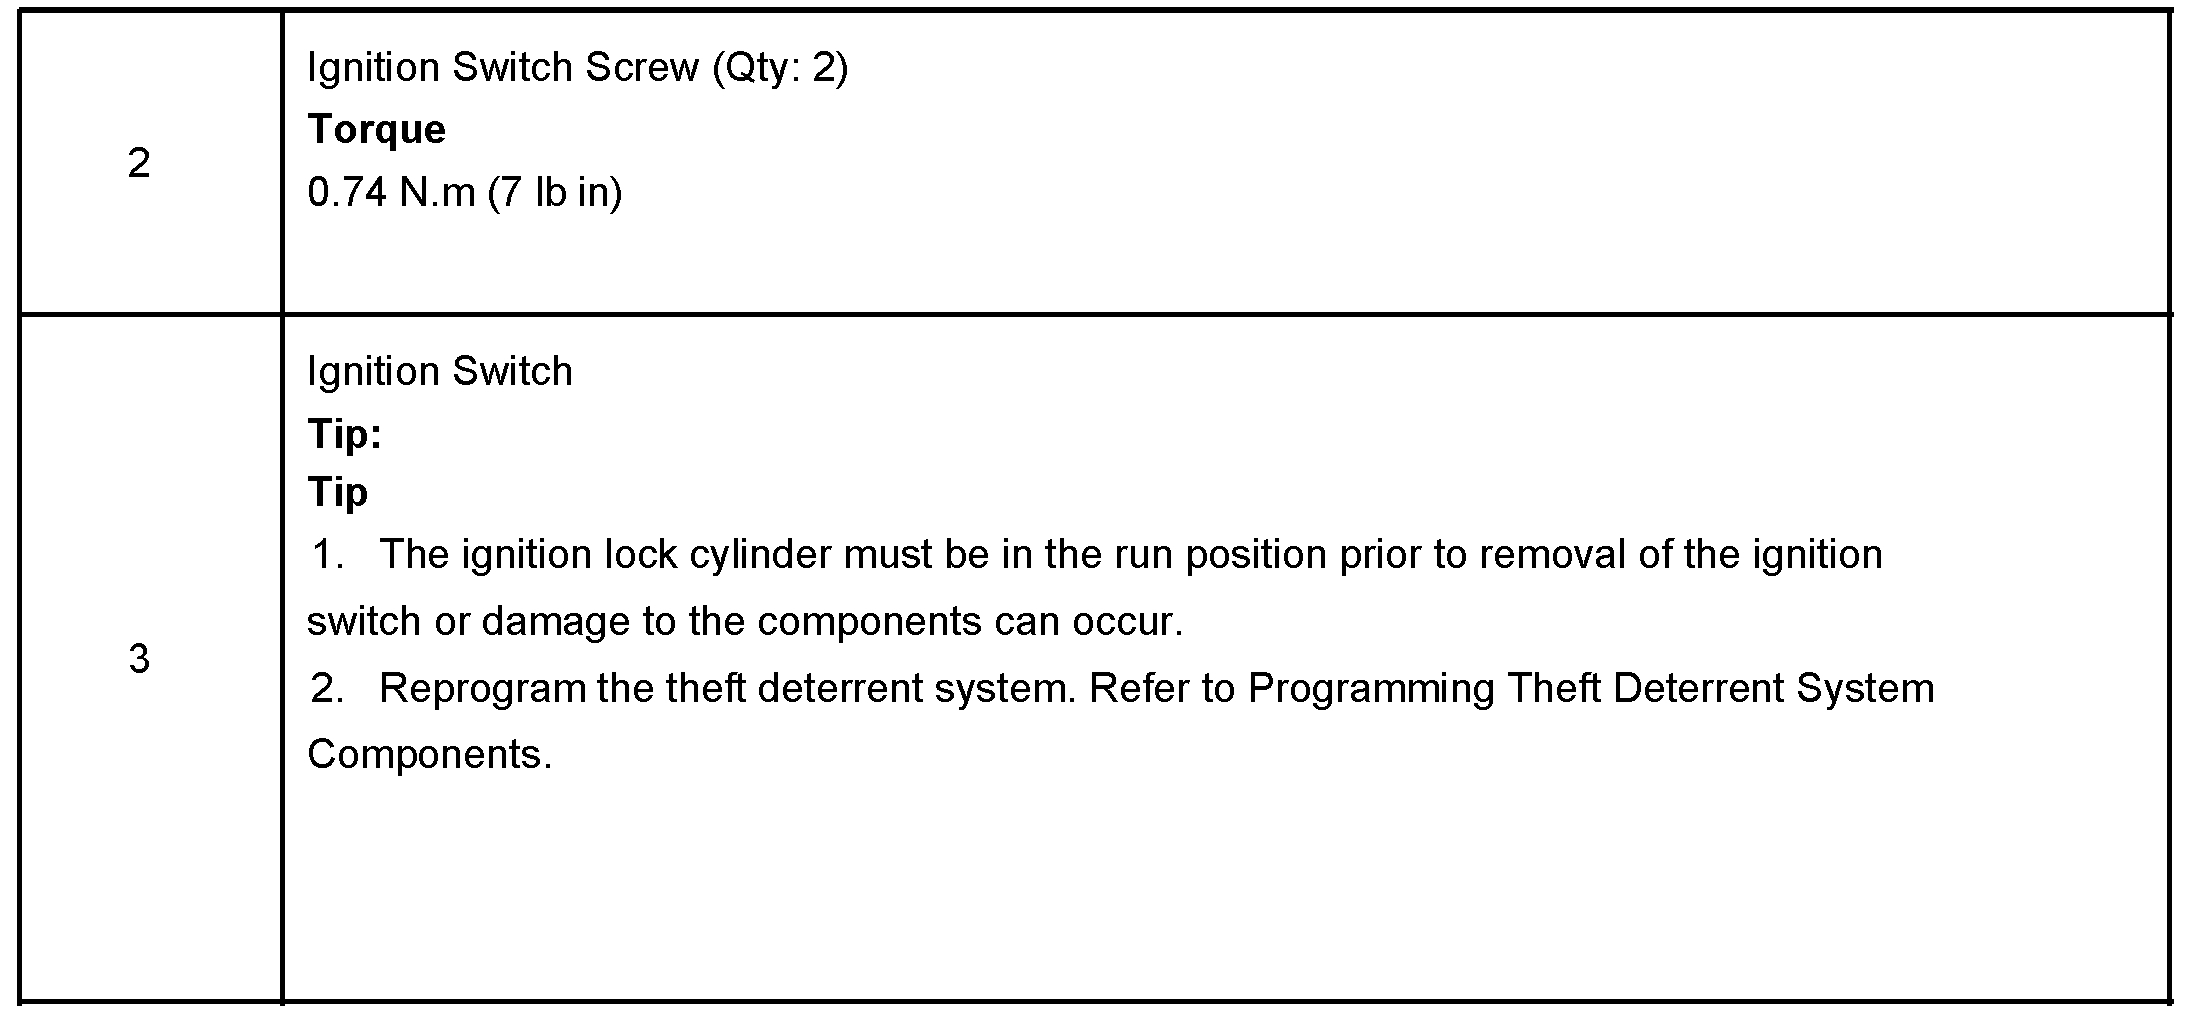
Now for the switch directions. In my manual, they are shown in picture form. Therefore, I have attached the directions in pictures 7 and 8. If you are unable to read them, let me know and I'll help you through them.

Note that step 2 says to disconnect the battery.

Last, the new switch will need relearned. There are two ways of doing it. One way is using a tech 2 scanner. The second doesn't require a scanner, but you must follow the directions.

Since most people don't have the tech 2 scanner, here are the alternate directions. It will take 30 minutes to complete, so make sure you have the time.

__________________

30-MINUTE LEARN PROCEDURE
1. Turn ON the ignition, with the engine OFF.
2. Attempt to start the engine, then release the key to ON, vehicle will not start.
3. Observe the SECURITY telltale. After approximately 10 minutes, the telltale will turn OFF.
4. Turn OFF the ignition, and wait 5 seconds.
5. Repeat steps 1 through 4 two more times for a total of 3 cycles/30 minutes. The vehicle is now ready to relearn the Passlock Sensor Data Code and/or passwords on the next ignition switch transition from OFF to CRANK.
6. Start the engine. The vehicle has now learned the Passlock Sensor Data Code and/or password.

IMPORTANT: The vehicle learns the Passlock(TM) Sensor Data Code and/or password on the next ignition switch transition from OFF to CRANK. You must turn the ignition OFF before attempting to start the vehicle.

_______________________________

I hope this is helpful. Let me know if I can help.

Take care,
Joe
Was this
answer
helpful?
Yes
No
+1
Friday, November 16th, 2018 AT 8:06 PM
Tiny
KETCHIKANMD
  • MEMBER
  • 2 POSTS
# 4. Remove the trim panel. Is that referring to the fuse box cover under the hood? (That is what the picture looks like) or the steering wheel cover?

I just read all your directions over and over and was thoroughly confused but I think I have got it now. Sorry literally have been up for two days trying to figure all this out. Your site is awesome great and so are you guys for helping people out like this. Especially first thing in the morning!

Thanks for telling us the thirty minute relearn option. Person/friend/mechanic with the scan tool we can't seem to get a hold of so that is great we can do it ourselves.

If I could quickly try to recap how we got here, would you mind throwing your two cents in on the direction we are going? 2006 Hummer h3 - was fine. While driving one day while stopped at a red light, it would not go forward. I quickly shifted it into third gear (it is an automatic), and it went forward a few feet (light was still red) then again, it would not go forward (like it was in neutral). I was able to put it into second gear and into a parking lot. So, then it would work in first, second and reverse only. Other gears if you used the shifter to put it into third or drive, it would not move forward, only rpm's raced. So person put it on the fancy scanner and came up with that it needed a solenoid (and they were able to, I am not sure, maybe bypass something, with that scanner, and it did engage when you manually put the shifter into third and then drive, after starting out in 2nd gear. Then after stopping you'd have to start all over again. Then he un-bypassed it and it was back to first, second and reverse. So we replaced the TCC solenoid (we also told to change transmission fluid filter and unhook the battery while doing the solenoid swap, but neither of those two got done). So now we can start out in second, and manually move shifter to third and then drive. Seems to be running very smoothly. But then have to start all over again when we stop. Got re-scanned. Told to replace solenoids A and B, the transmission filter, and replace the ignition starter switch. Apparently it is not showing any check engine codes on the dashboard (never has) and this is due to the ignition starter switch. That is the part I would really appreciate your opinion on. Would love not to have to do that if it is not necessary. But we do really need our car. Driving over the mountains Monday night to catch a flight to Alaska. Very sorry for the long message here, very much appreciate your time. One more thing, I did come across your great instructions for taking out the airbag (sorry I should have looked harder before I asked ) and see that there is also a video which we will watch.) Thanks. M. Davis
Was this
answer
helpful?
Yes
No
Saturday, November 17th, 2018 AT 4:51 AM
Tiny
JACOBANDNICKOLAS
  • MECHANIC
  • 108,300 POSTS
Hi again:

The ignition switch should not cause the issues you described. What I need are the trouble codes the person found when the computer was scanned. Can you get them for me?

Let me know.

Joe
Was this
answer
helpful?
Yes
No
Saturday, November 17th, 2018 AT 5:32 PM

Please login or register to post a reply.

Sponsored links