Welcome to 2CarPros.
It sounds like the cage nut is turning. It is actually spot welded from the factory. I have two options. First, if you only need to repair the seat itself, it can be removed without the track which is bolted to the floor. Here are the directions for that. The attached pictures correlate with the directions.
__________________________________
SEAT REMOVAL
picture 1
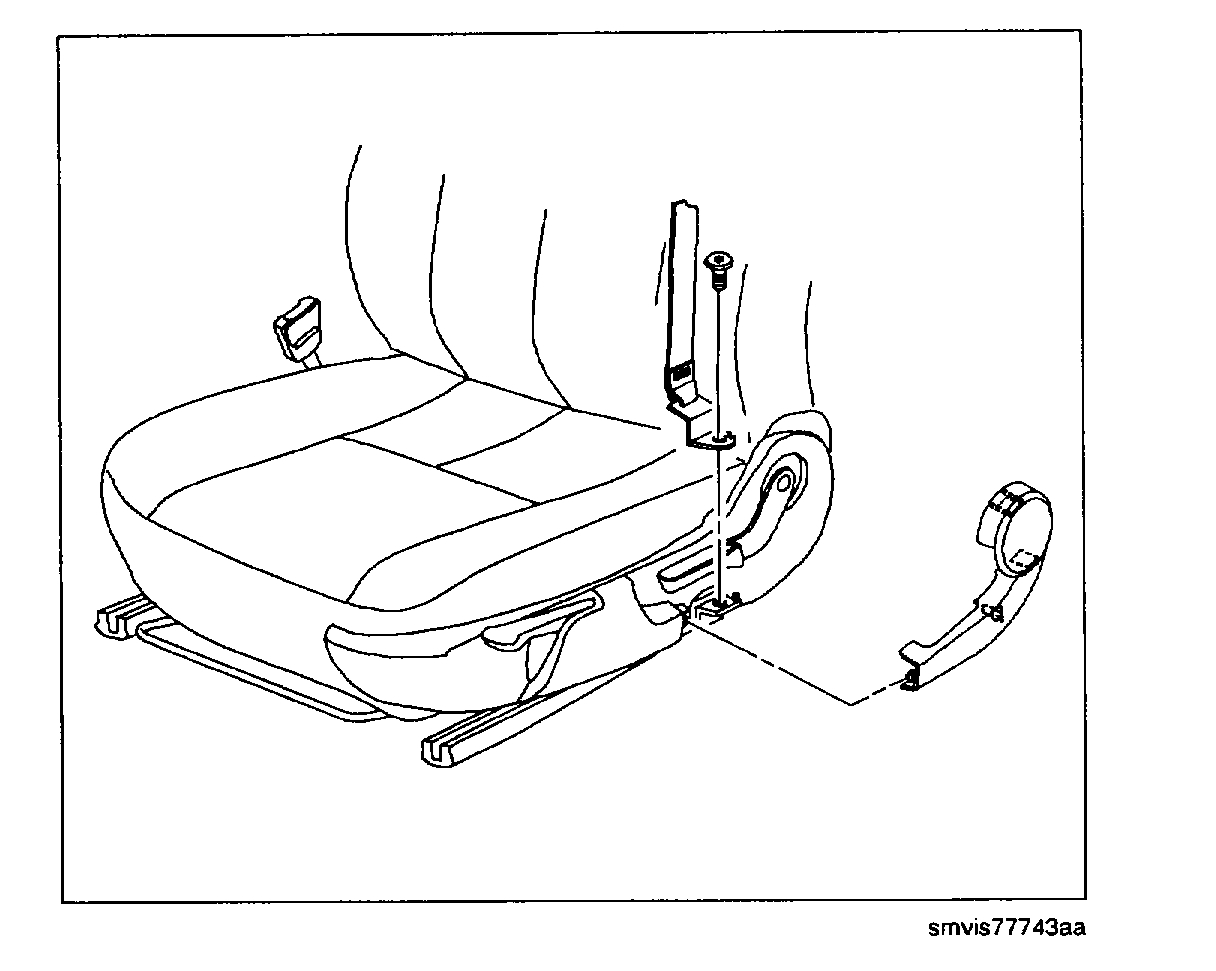
1. Remove front seat shoulder belt outer cover.
2. Remove shoulder belt from seat frame.
Picture 2
3. Move seat to full forward position and remove front seat fasteners.
4. Pull seat assembly slightly rearward to disengage seat from front set track books.
5. Tilt seat rearward and disconnect seat wiring harnesses.
6. Remove seat from vehicle and place on clean protected work surface.
INSTALLATION
picture 3
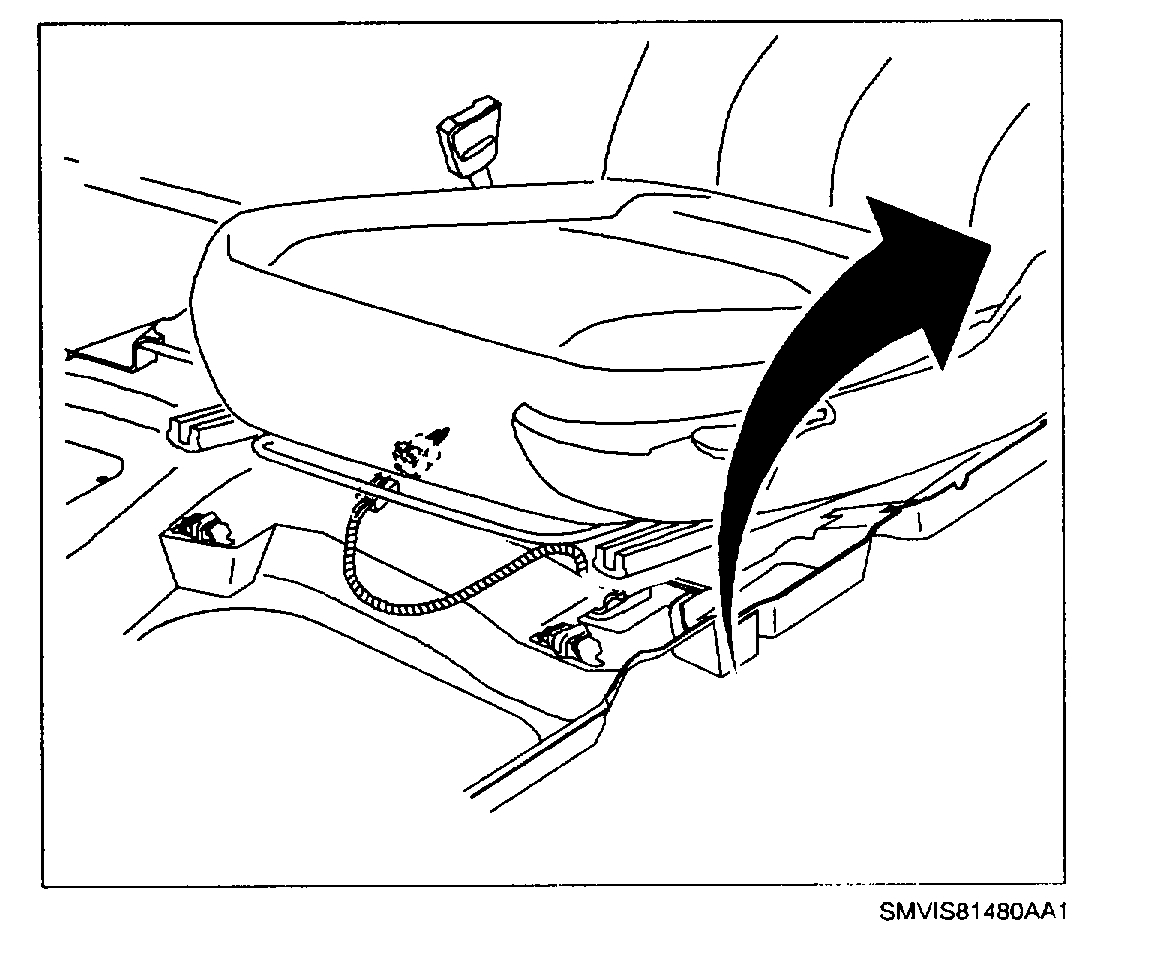
1. Position seat into vehicle.
2. Tilt seat rearward and connect seat wiring harnesses.
3. Slide seat into forward tracks.
4. Apply Loctite(R) 242 Threadlocker (or equivalent) to seat fasteners and install seat fasteners.
Torque:
Seat Fasteners: 25 N.M (19 ft-lbs)
picture 4
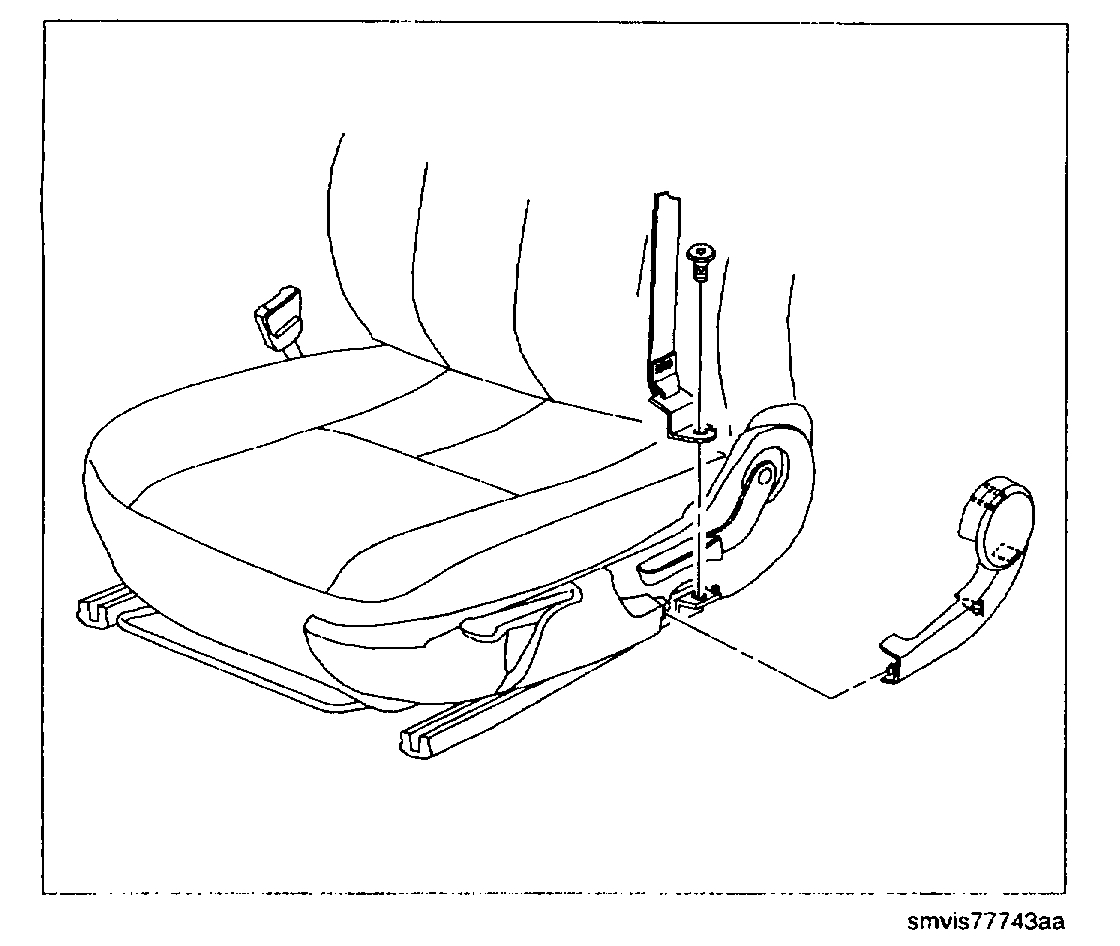
5. Install shoulder belt to seat frame.
Torque:
Shoulder Belt-to-Seat Frame Bolt: 20 N.M (15 ft-lbs)
6. Install shoulder belt outer cover.
7. If equipped, function electrical seat components to ensure proper operation.
_________________________________
If you have to replace the cage nut, at this point you will need to cut the old bolt off and allow it to drop down through the vehicle.
Here are the directions for that. Note that the seat is already removed in the directions. That is why you will need to cut the head off the bolt.
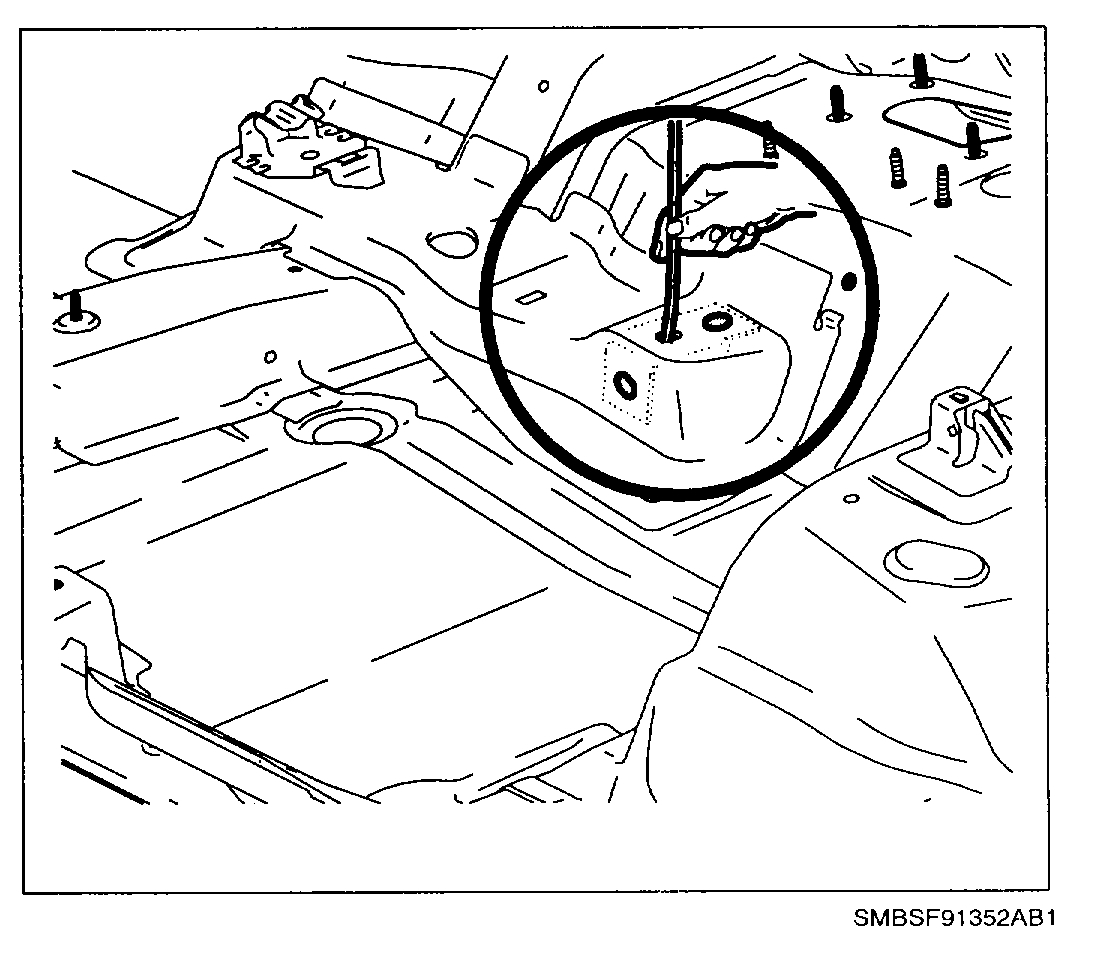
REMOVAL
imageOpen In New TabZoom/Print
1. Remove front seats and carpet from vehicle.
2. Route a flexible wire through the cage nut and out the front opening between the floor pan and seat bracket.
3. Tie a loop in the wire above the cage nut that is slightly larger than the inside diameter of the nut.
4. Using a 8 mm (5/16 in.) Drill bit, drill out the two spot-welds retaining the cage nut to the seat bracket.
IMPORTANT: Before performing any drilling or welding operations take necessary precautions to ensure that the vehicles interior will not be damaged by sparks or other debris.
5. Pull the cage nut through the front opening between the floor pan and seat bracket using the wire. Discard the old cage nut.
INSTALLATION
picture 5
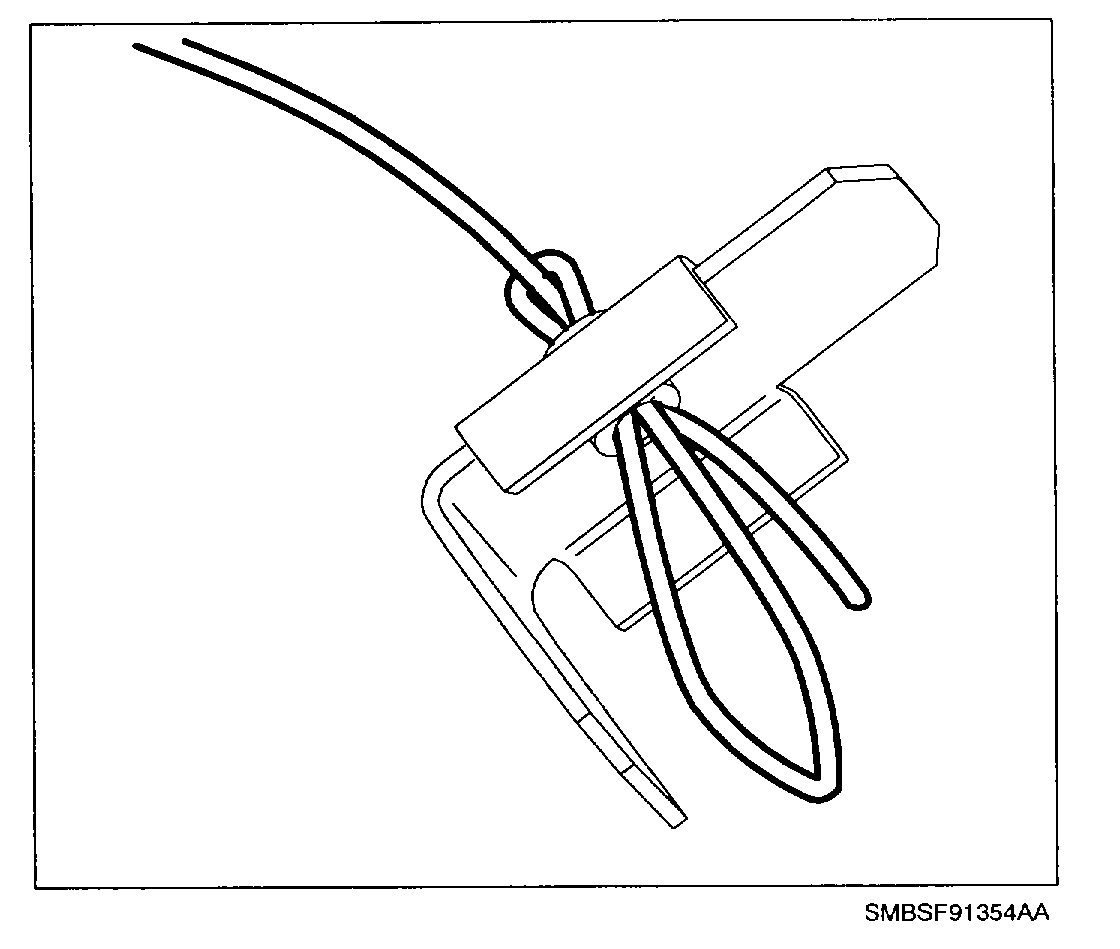
1. Route the wire through the new cage nut so that the looped end of the wire is below the bottom surface of the cage nut.
Picture 6
2. Route wire with cage nut attached through the front opening between the floor pan and seat bracket. Continue routing wire through the cage nut bolt hole in the top of the seat bracket.
3. Pull the cage nut tight against the bottom of the seat bracket ensuring that the cage nut is in its original position.
4. Perform MIG plug welds through the drill holes in the original weld locations.
5. Remove wire from cage nut and seat bracket.
6. Grind welds flush.
7. Prime and paint welded area. Refer to "Body Paint" in the Collision Repair.
8. Install front carpet and seats in vehicle.
___________________________
Let me know if this helps or if you have questions.
Take care,
Joe
Images (Click to make bigger)
Wednesday, May 8th, 2019 AT 6:52 PM