Yes, it is correct. The dash pad is the instrument panel.
I attached the instructions and pictures for you.
Roy
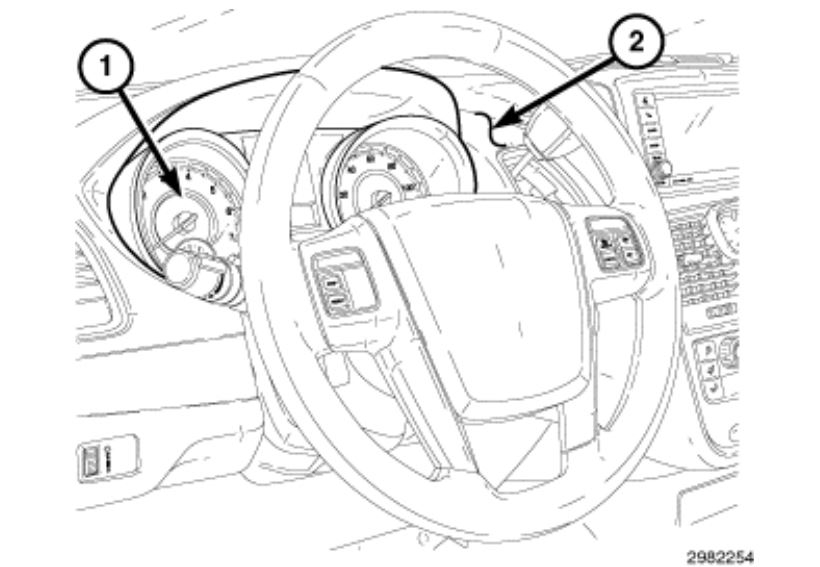
REMOVAL
WARNING:
Disable the airbag system before attempting any steering wheel, steering column or instrument panel component diagnosis or service. Disconnect and isolate the negative battery (ground) cable, then wait two minutes for the airbag system capacitor to discharge before performing further diagnosis or service. This is the only sure way to disable the airbag system. Failure to follow these instructions may result in accidental airbag deployment and possible serious or fatal injury.
imageOpen In New TabZoom/Print
NOTE:
Take the proper precautions to protect the front face of the instrument panel from cosmetic damage during this service procedure.
Remove both instrument panel end caps (Refer to 23 - Body/Instrument Panel/CAP, Instrument Panel End/Removal) .
Remove the steering column (Refer to 19 - Steering/Column - Removal) .
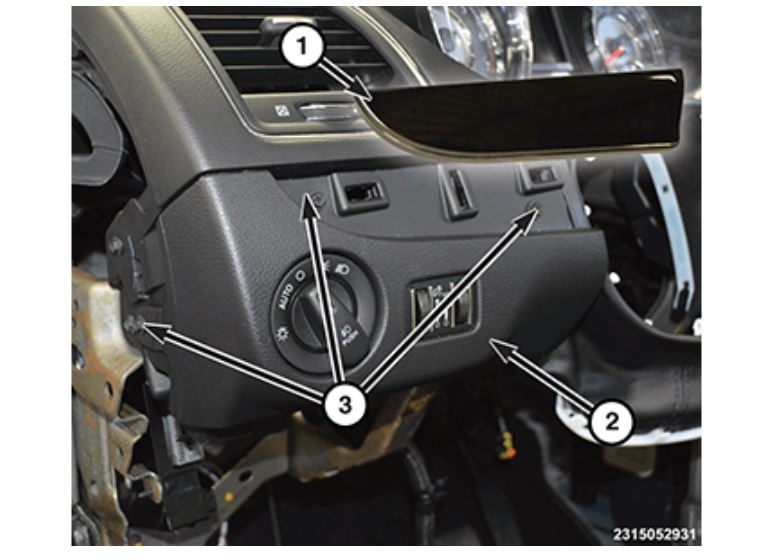
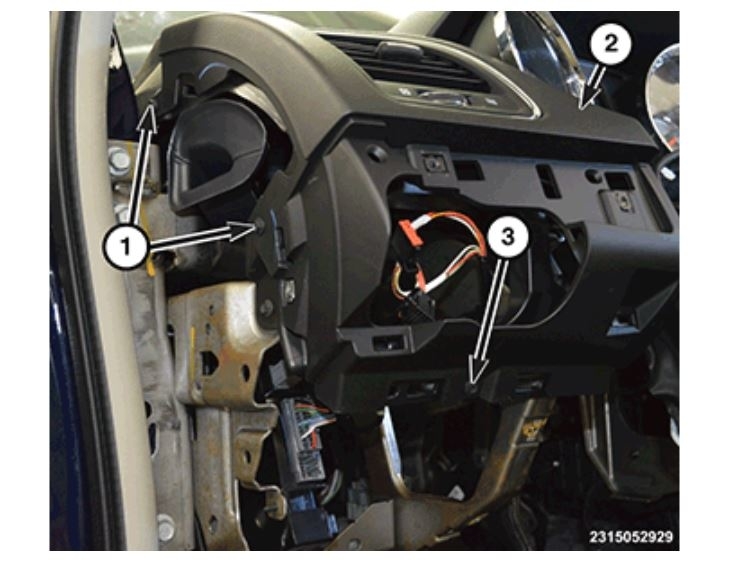
Using a trim stick or equivalent, remove the applique (1).
Remove the three screws (3) and the headlamp switch bezel (2). Disconnect the wire harness connectors.
Remove the start stop button (Refer to 08 - Electrical/Starting/BUTTON, Start/Stop/Removal) .
Remove the gearshift knob (Refer to 21 - Transmission and Transfer Case/Automatic - 62TE/KNOB, Gearshift/Removal) .
Remove the instrument panel top cover (Refer to 23 - Body/Instrument Panel/COVER, Instrument Panel/Removal) .
Remove the instrument panel center bezel (Refer to 23 - Body/Instrument Panel/BEZEL, Instrument Panel, Removal) .
Remove the upper glove box and upper glove box door (Refer to 23 - Body/Instrument Panel/GLOVE BOX, Instrument Panel - Removal) .
imageOpen In New TabZoom/Print
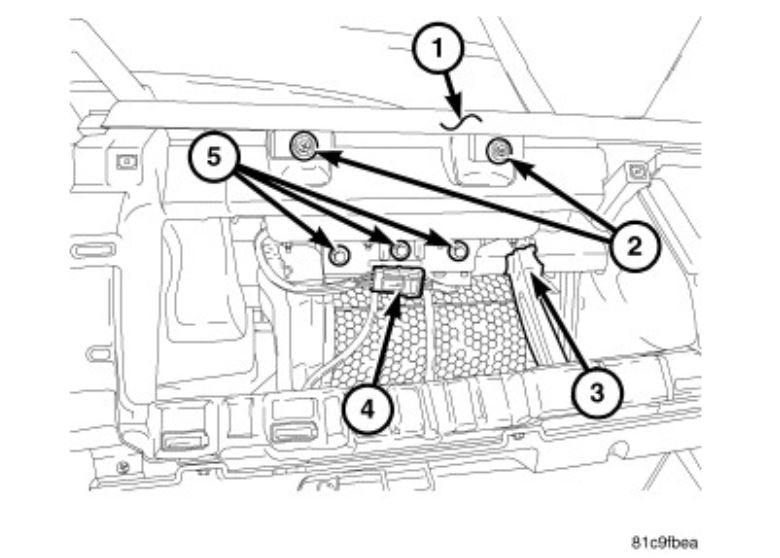
Remove the three passenger side airbag bolts (5).
Disconnect the passenger side airbag wire harness connector (4).
imageOpen In New TabZoom/Print
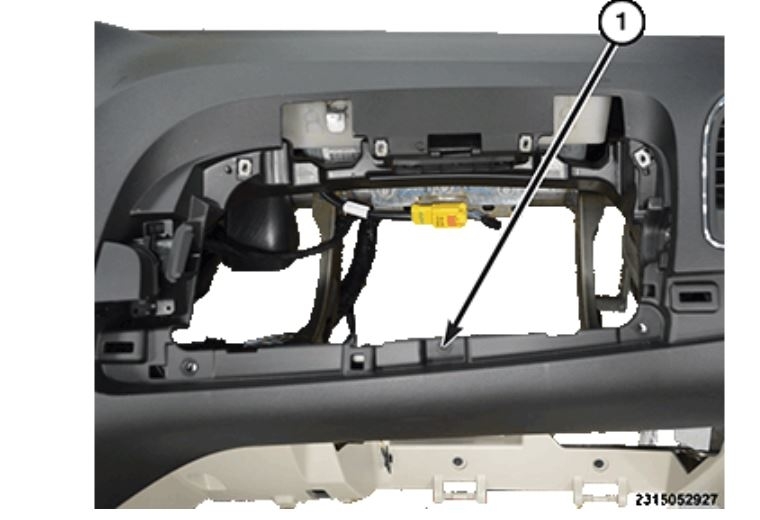
Remove three screws (2) on the right side of the instrument panel pad (1).
imageOpen In New TabZoom/Print
Remove one screw (1) located in the upper glove box opening.
imageOpen In New TabZoom/Print
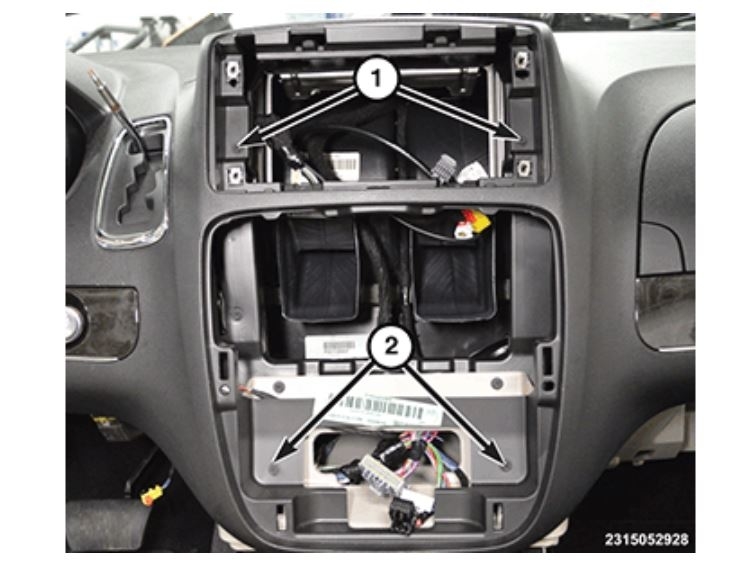
Remove two screws (1) located in the radio opening.
Remove two screws (2) located in the instrument panel center bezel opening.
imageOpen In New TabZoom/Print
Remove one screw (3) located below the headlamp switch bezel.
Remove two screws (1) on the left side of the instrument panel pad (2).
imageOpen In New TabZoom/Print
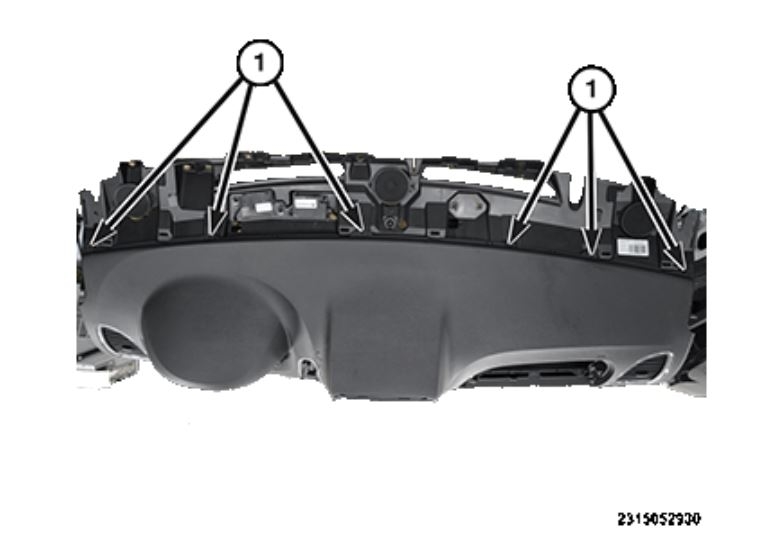
Remove six screws (1) along the top of the instrument panel pad.
imageOpen In New TabZoom/Print
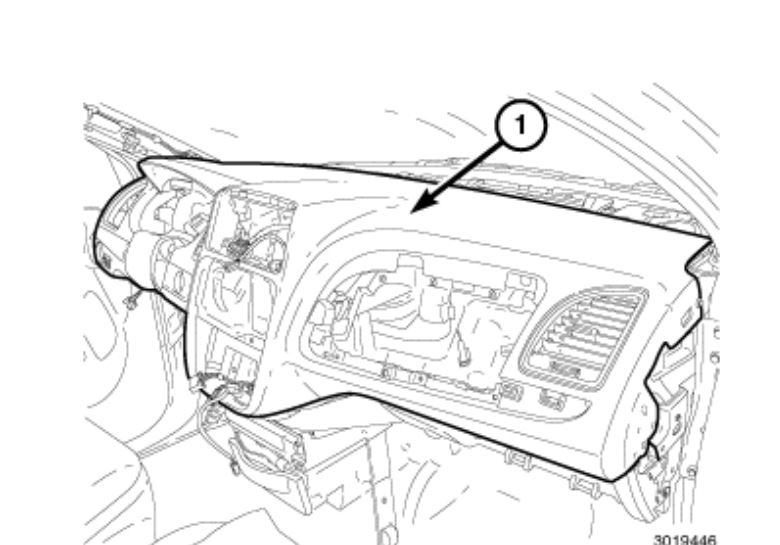
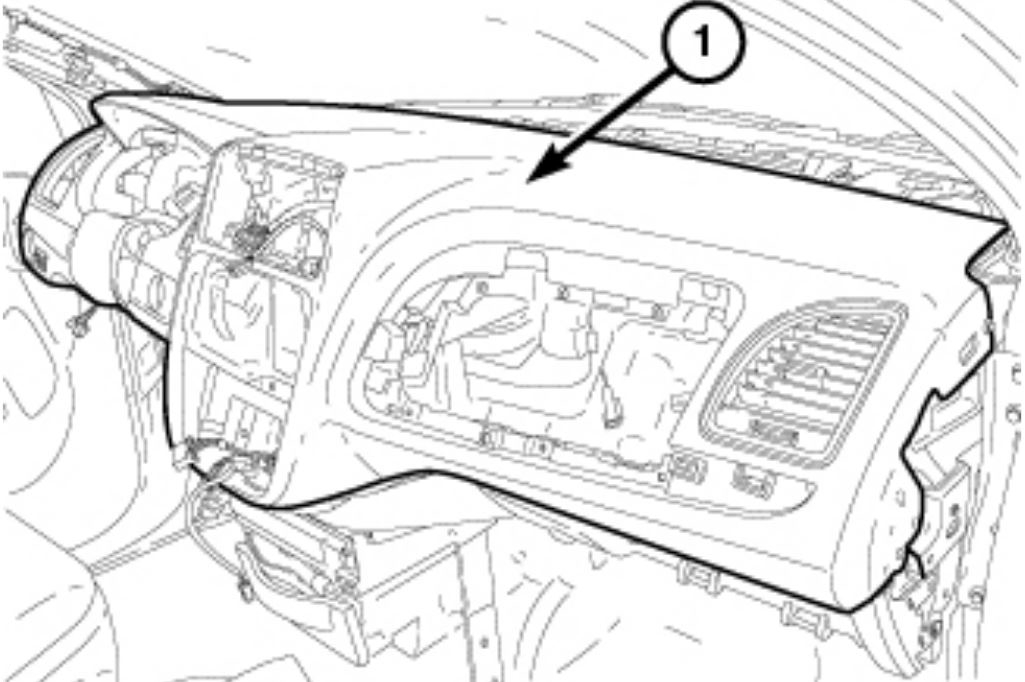
Pull the instrument panel top pad (1) rearward to disengage the retaining clips that secure the top pad to the structure.
Lift upward and rearward to remove the instrument panel top pad (1) from the vehicle.
Images (Click to enlarge)
Jun 16, 2020 at 1:22 PM