Welcome to 2CarPros.
The axle shaft which has the CV joints on it is separate from the hub bearing. I wonder if the terminology is getting mixed up. If the bearing is bad, it can be replaced. If the axle shaft is bad, it can be replaced, and I'm not sure why they said the drive shaft needs replaced other than they may be referring to the axle as the drive shaft. So, that will need confirmed.
Here are the directions for replacement. The attached pictures correlate with these directions.
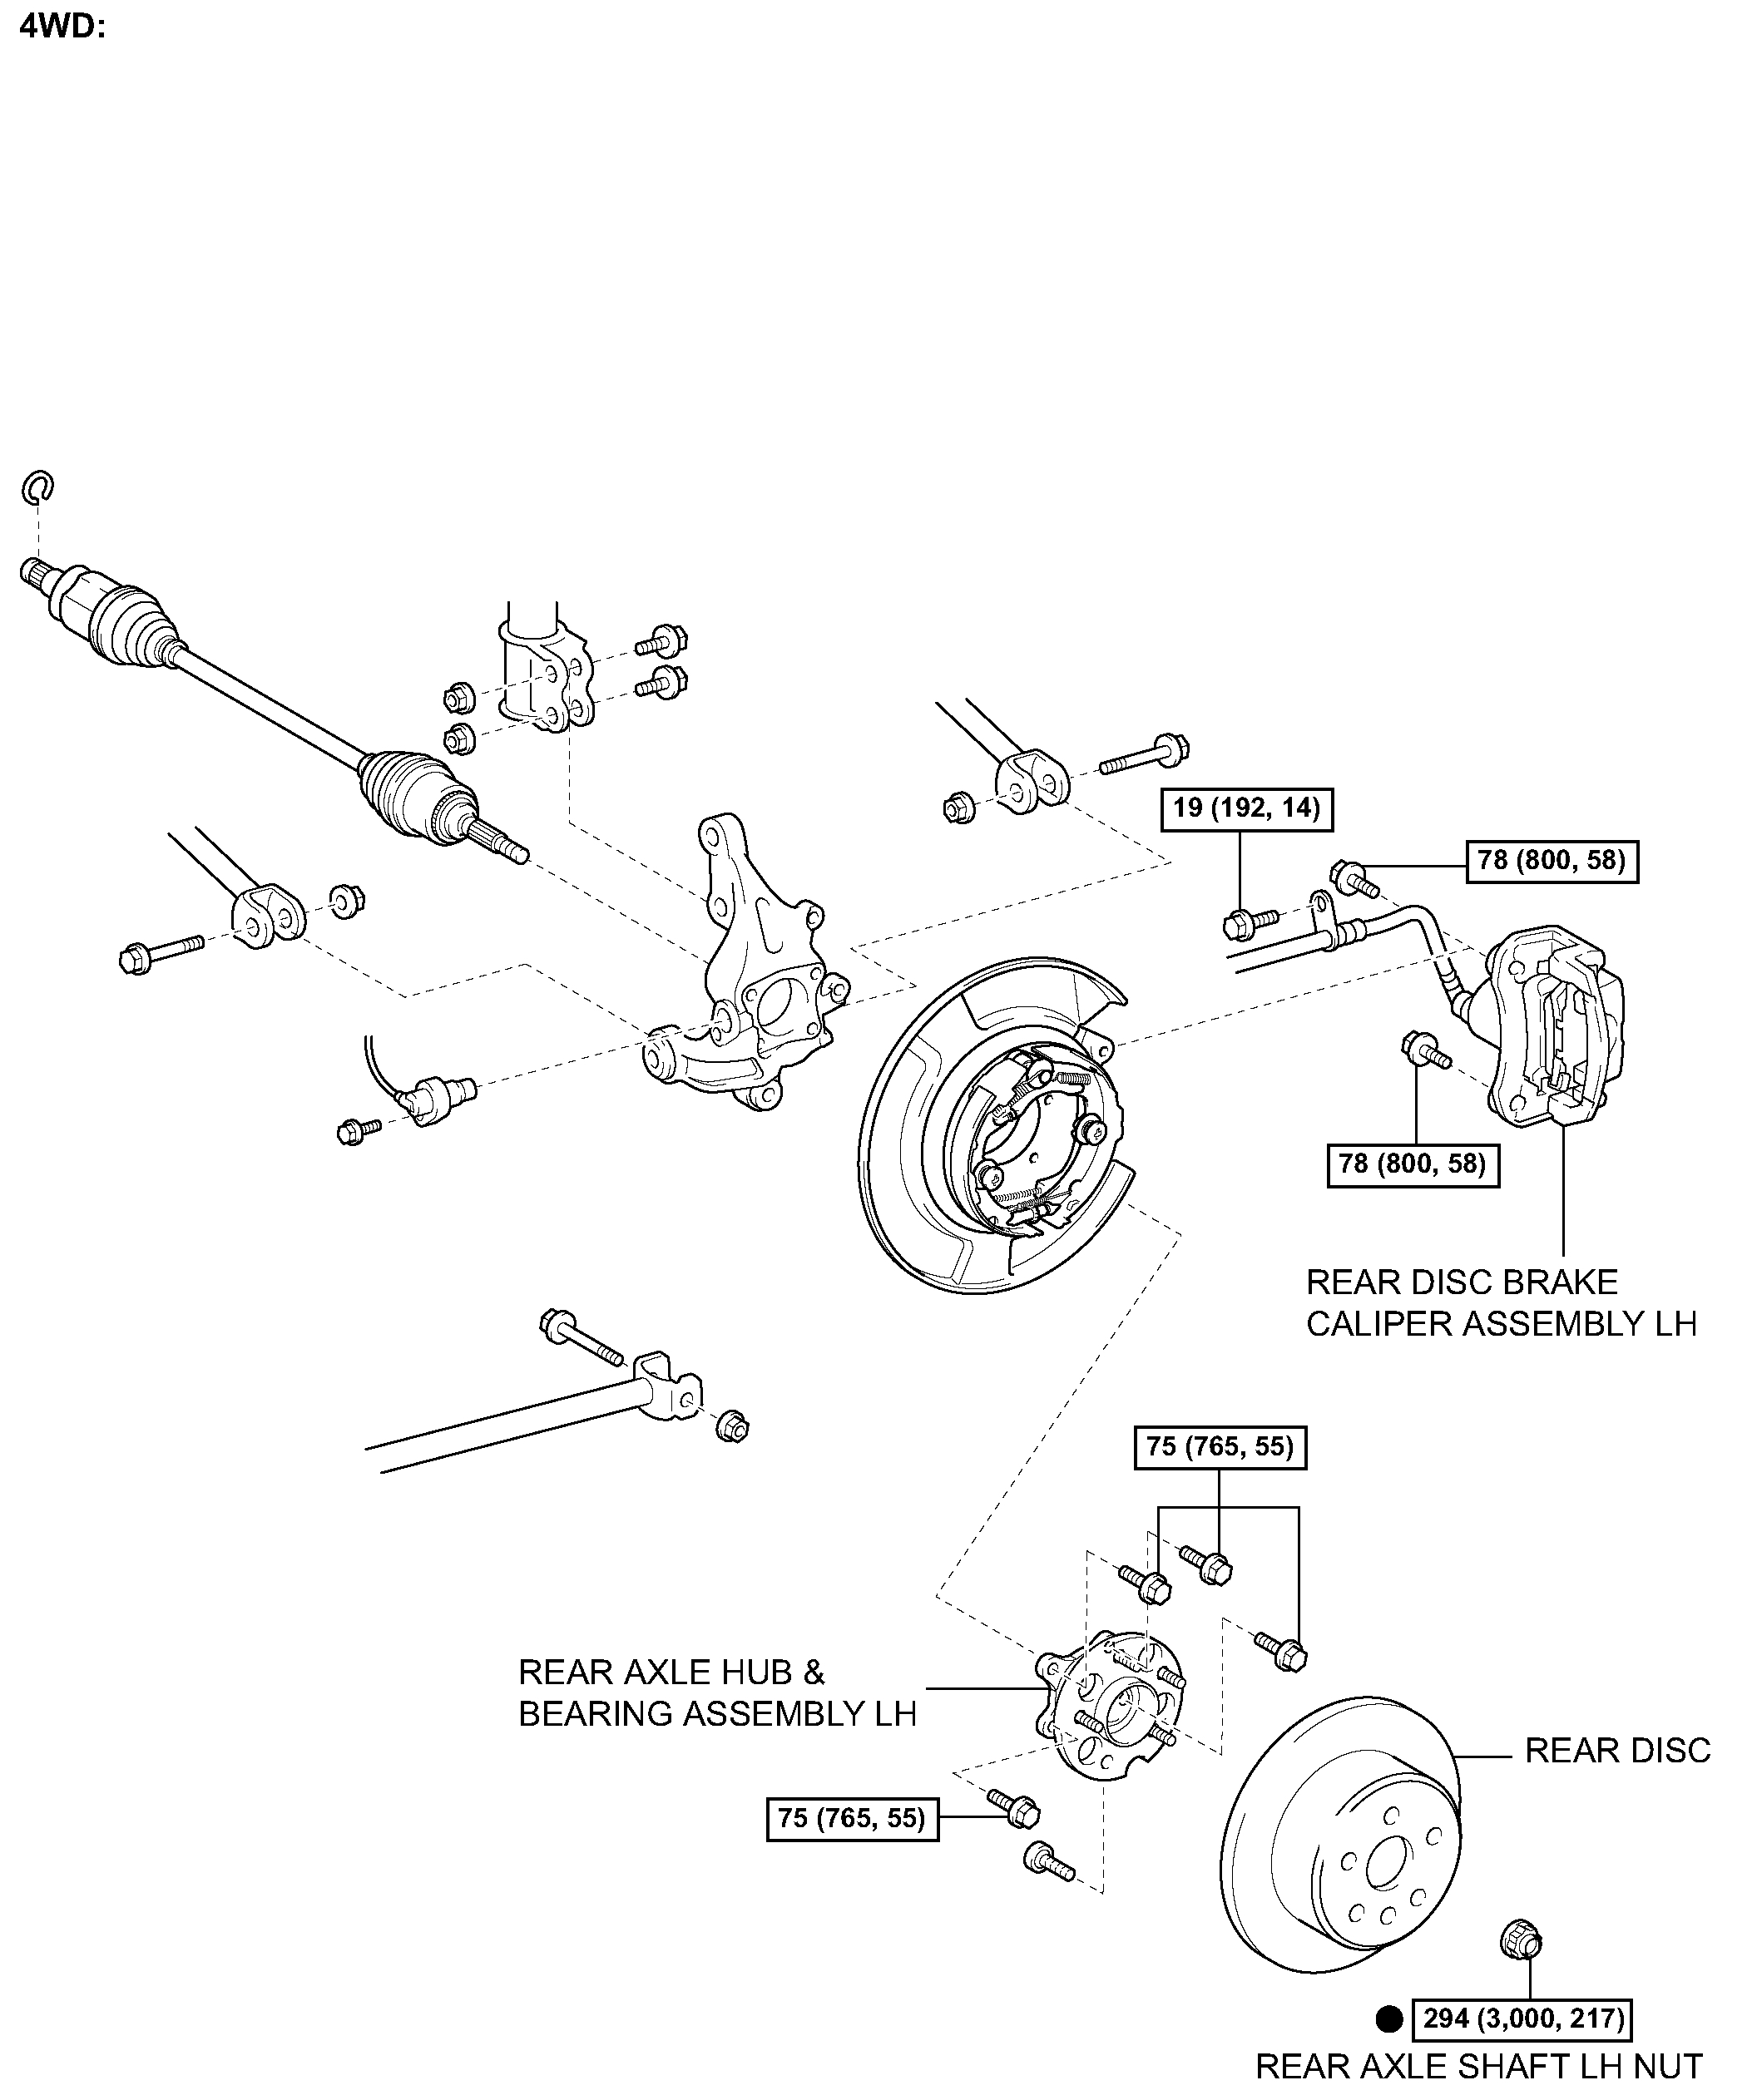
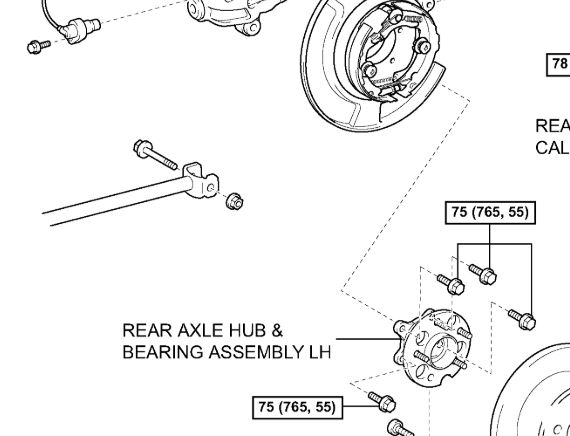
REAR AXLE HUB AND BEARING
Components
Pic 1
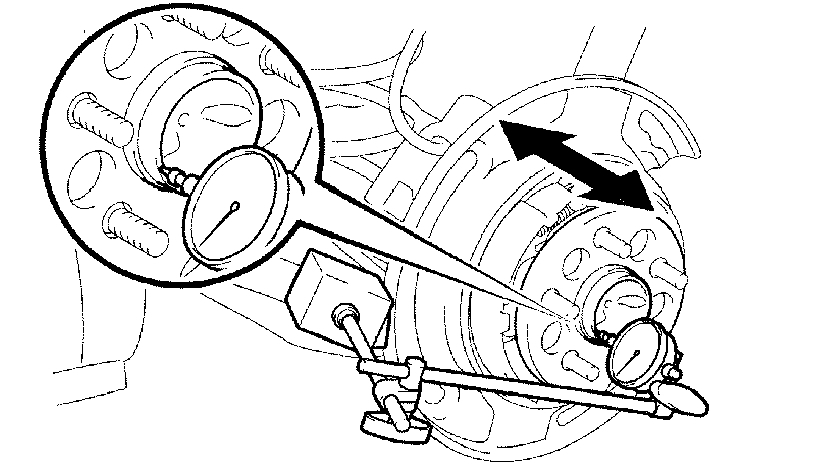
ON-VEHICLE INSPECTION
picture 2
1. INSPECT REAR AXLE HUB BEARING LOOSENESS
a. Using a dial indicator, check for looseness near the center of the axle hub.
Maximum: 0 mm (0 inch)
If looseness exceeds the maximum, replace the axle hub assembly.
NOTICE: Ensure that the dial indicator is set at right angles to the measurement surface.
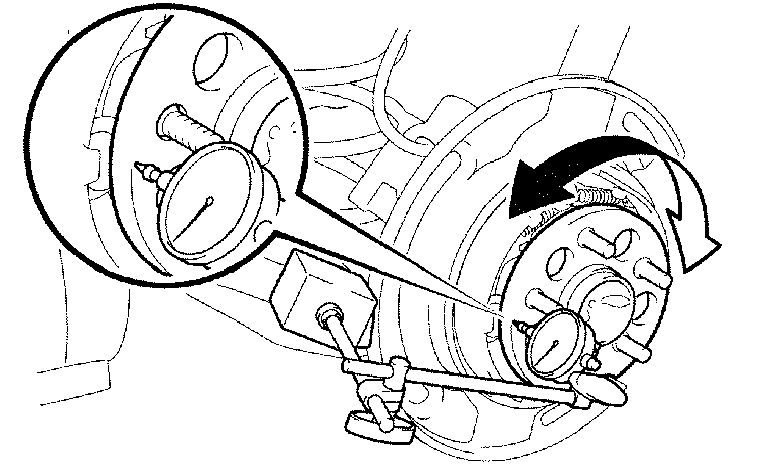
picture 3
2. INSPECT REAR AXLE HUB BEARING RUNOUT
a. Using a dial indicator, check for runout in the surface of the axle hub outside the hub bolt.
Maximum: 0.08 mm (0.0031 inch)
If runout exceeds the maximum, replace the axle hub assembly.
NOTICE: 30 Ensure that the dial indicator is set at right angles to the measurement surface.
REMOVAL
1. REMOVE REAR WHEEL
2. SEPARATE SPEED SENSOR REAR LH
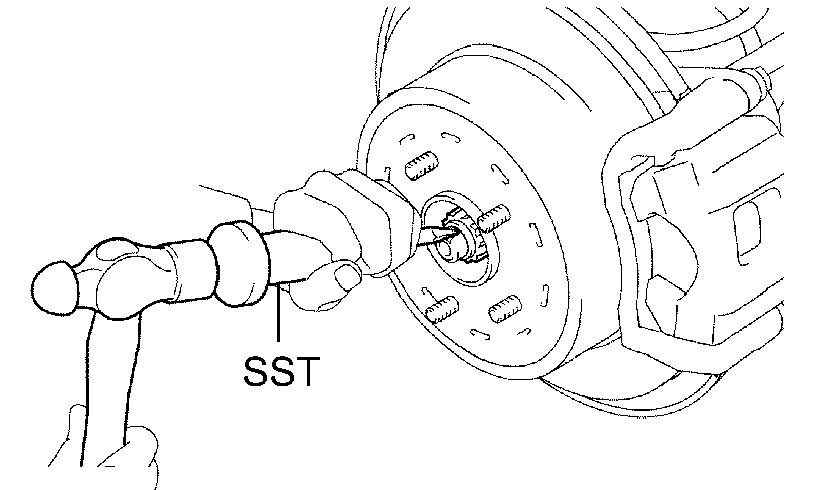
picture 4
3. REMOVE REAR AXLE SHAFT LH NUT
a. Using SST and a hammer, unstake the staked part of the axle hub LH nut.
SST 09930-00010
NOTICE: Loosen the staked part of the nut completely, otherwise the screw of the drive shaft may be damaged.
b. While applying the brakes, remove the lock axle hub LH nut.
4. SEPARATE REAR DISC BRAKE CALIPER ASSEMBLY LH
5. REMOVE REAR DISC
picture 5
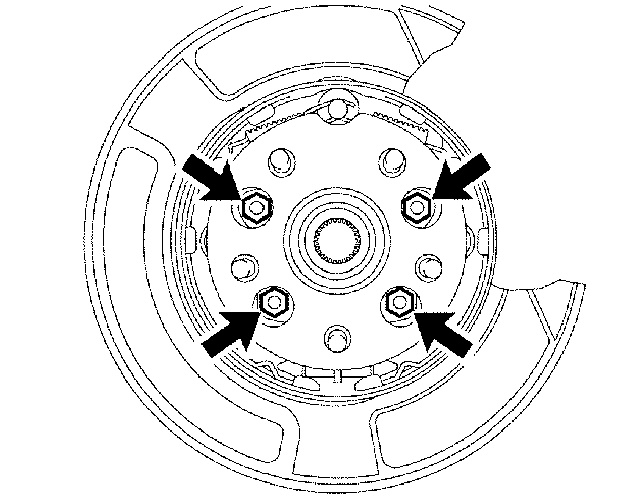
6. REMOVE REAR AXLE HUB & BEARING ASSEMBLY LH
a. Remove the 4 bolts and the rear axle hub & bearing assembly LH.
INSTALLATION
picture 6
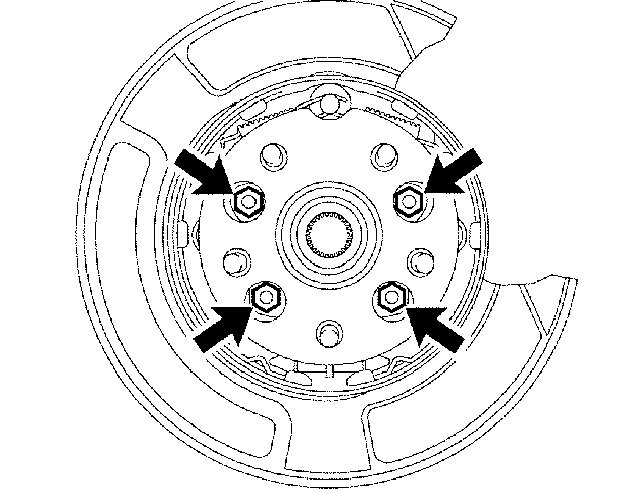
1. INSTALL REAR AXLE HUB& BEARING ASSEMBLY LH
a. Install the rear axle hub& bearing assembly LH with the 4 bolts.
Torque: 75 Nm (765 kgf-cm, 55 ft. lbs.)
2. INSTALL REAR DISC
picture 7
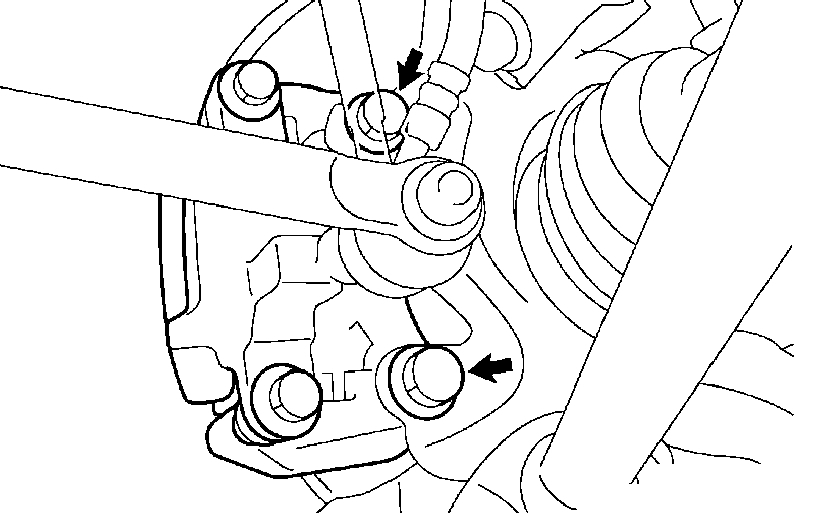
3. INSTALL REAR DISC BRAKE CALIPER ASSEMBLY LH
a. Install the rear disc brake caliper assembly LH with the 2 bolts.
Torque: 78 Nm (800 kgf-cm, 58 ft. lbs.)
b. Install the flexible hose with the bolt to the shock absorber.
Torque: 19 Nm (192 kgf-cm, 14 ft. lbs.)
4. INSTALL REAR AXLE SHAFT LH NUT
a. Install a new axle shaft LH nut.
Torque: 294 Nm (3,000 kgf-cm, 217 ft. lbs.)
5. SEPARATE REAR DISC BRAKE CALIPER ASSEMBLY LH
6. REMOVE REAR DISC
7. INSPECT BEARING BACKLASH
8. INSPECT AXLE HUB DEVIATION
9. INSTALL REAR DISC
picture 8
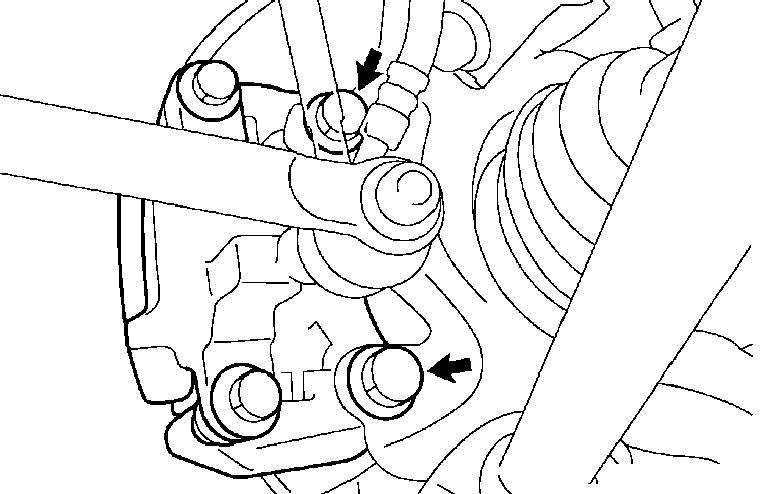
10. INSTALL REAR DISC BRAKE CALIPER ASSEMBLY LH
a. Install the rear disc brake caliper assembly LH with the 2 bolts.
Torque: 78 Nm (800 kgf-cm, 58 ft. lbs.)
b. Install the flexible hose with the bolt to the shock absorber.
Torque: 19 Nm (192 kgf-cm, 14 ft. lbs.)
picture 9
11. INSTALL REAR AXLE SHAFT LH NUT
a. Install a new axle shaft LH nut.
Torque: 294 Nm (3,000 kgf-cm, 217 ft. lbs.)
b. Using a chisel and a hammer, stake the axle shaft LH nut.
12. INSTALL SPEED SENSOR REAR LH
13. INSTALL REAR WHEEL
a. Install rear wheel.
Torque: 103 Nm (1,050 kgf-cm, 76 ft. lbs.)
14. INSPECT REAR WHEEL ALIGNMENT
a. Inspect rear wheel alignment.
15. CHECK ABS SPEED SENSOR SIGNAL
a. Check ABS speed sensor signal.
__________________________________
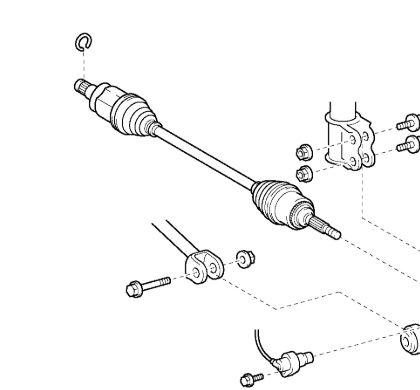
If you look at picture 1, it is an exploded view of the components. It shows the axle hub assembly and the axle. They are separate components. If you look at the last two pictures, I copied the specific parts. The first is the hub bearing and the second shows the axle with CV joints.
Let let me know if this helps or if you have other questions.
Take care,
Joe
Images (Click to enlarge)
Mar 21, 2019 at 8:14 PM